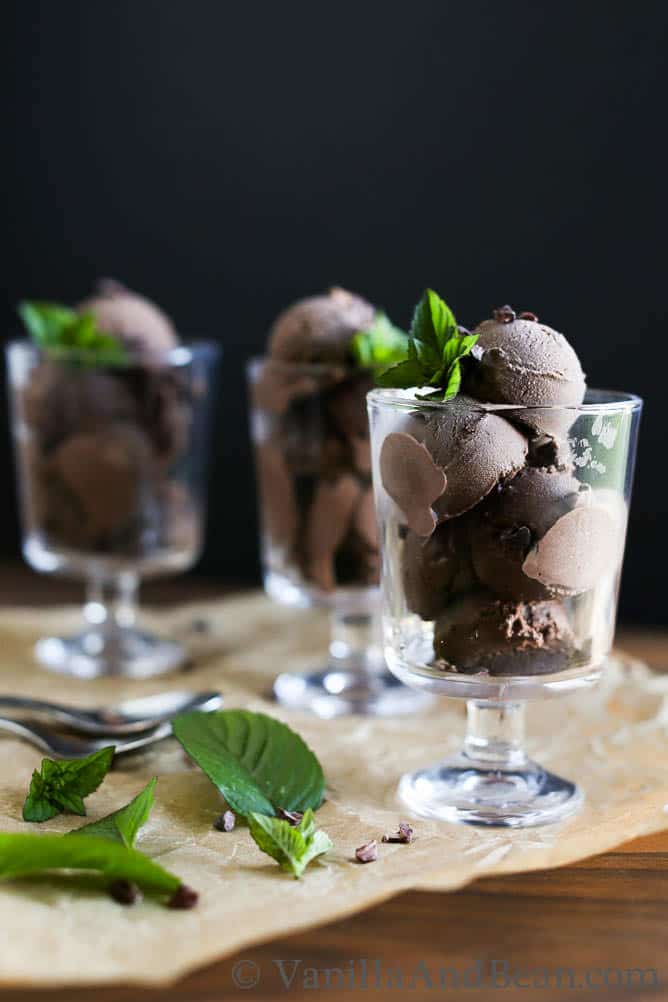
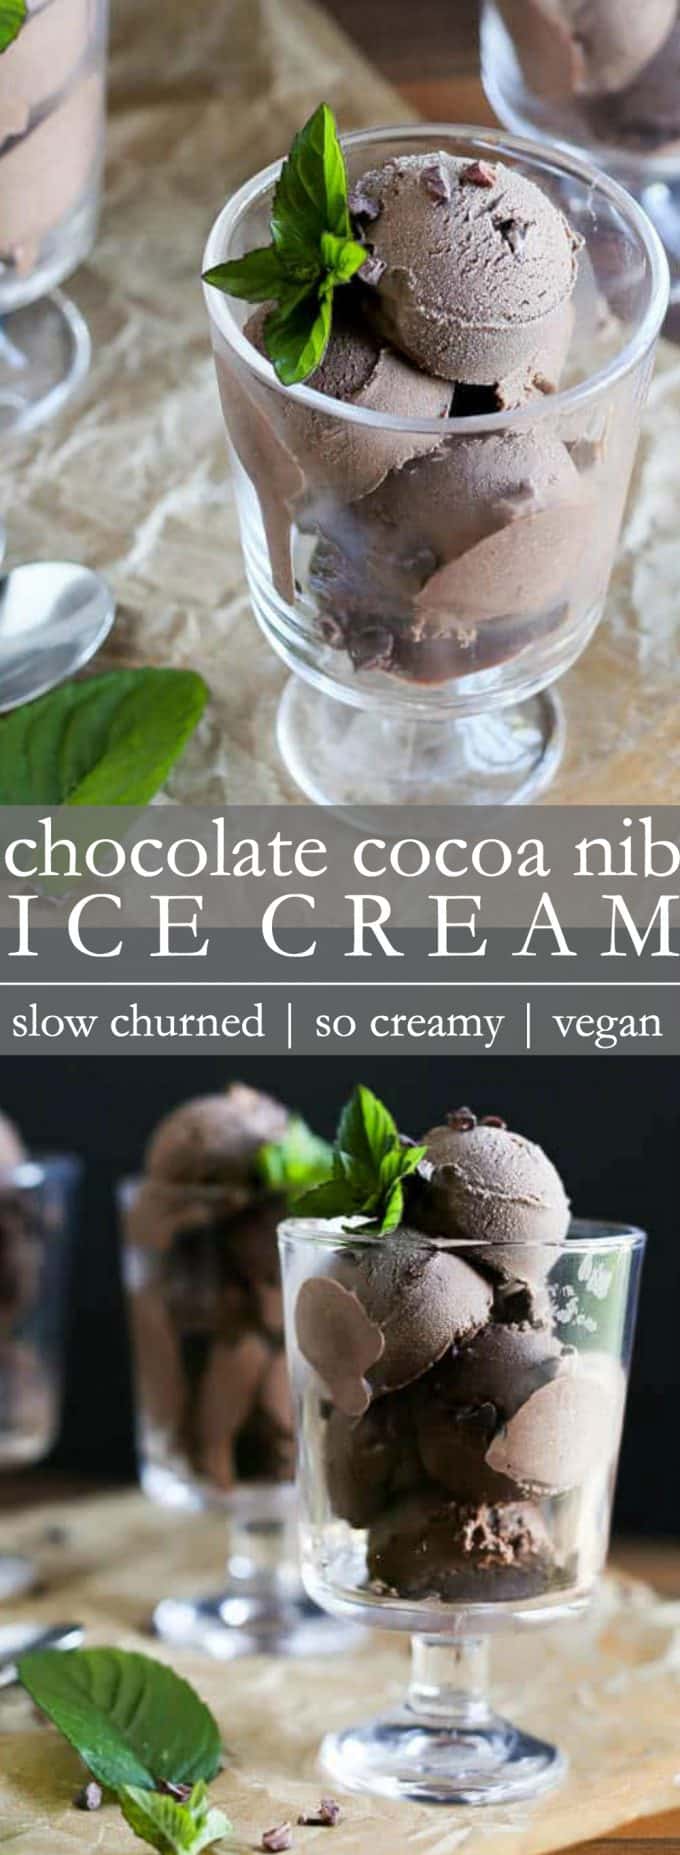
A creamy, rich, decadent cashew based ice cream awaits. You’d never know Dark Chocolate Ice Cream with Cocoa Nibs is egg free and dairy free! This recipe is vegan and gluten free.
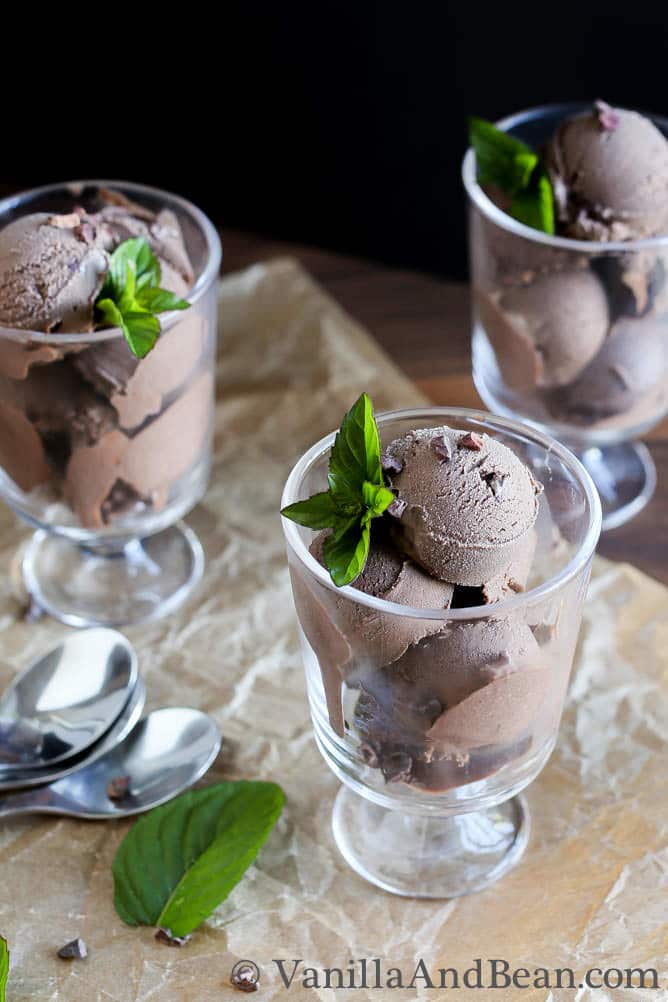
Table of Contents
Summer and Ice Cream!
It’s beginning to feel like summer around here. We’ve finally had a few hot days and by hot I mean, peaking at around 72.5 degrees! I decided it was time for some ice cream, since after all, ice cream is best on a hot day! This Dark Chocolate Ice Cream with Cocoa Nib is a delightful way to cool off.
Before I started making dark chocolate ice cream with cocoa nibs, I had never made dairy and egg free ice cream. It’s not that I didn’t want to try it, it’s just that when I had store bought, I just didn’t like how it tasted. So I assumed homemade would taste similar. I should have known better.
What’s so fantastic about this ice cream is that it is rich, creamy, crunchy, and wholesome, with the exception of sugar. The other bonus is that it makes a small batch, perfect for two to four, depending on scoop size. This egg and milk free ice cream calls for an ice cream maker, so if you have one, great! If not, read on and either borrow one or put one on your list. Mine was borrowed for years until I was gifted my own.
Dairy Free Ice Cream For Picky Eaters
Rob, a very skeptical eater, eats everything I make, even if he initially turns his nose up. He often likes regular stuff; his word. I’m not sure I know what regular is after all these years, but even he likes this vegan ice cream, and by all accounts, it’s not regular. He had no idea what he was eating is dairy and egg free.
The only thing he took the exception with was the cocoa nibs. He’s a texture guy, and wasn’t thrilled about all those little crunchy inclusions in his ice cream. I ended up decreasing the nibs to 1/8 C, but if you want more, you should have them. I’ve added up to 1/4 C and it works fine. I love the added crunch!
How to Make Dark Chocolate Ice Cream with Cocoa Nibs
I usually make ice cream over a two-day period, making the cashew cream and base on day one, chill overnight and churn the next morning. It only takes 30 minutes to churn the ice cream, but then requires at least an hour or two in the freezer post churn, so plan accordingly.
- First, start by soaking the cashews over night or use a quicker hot water soak.
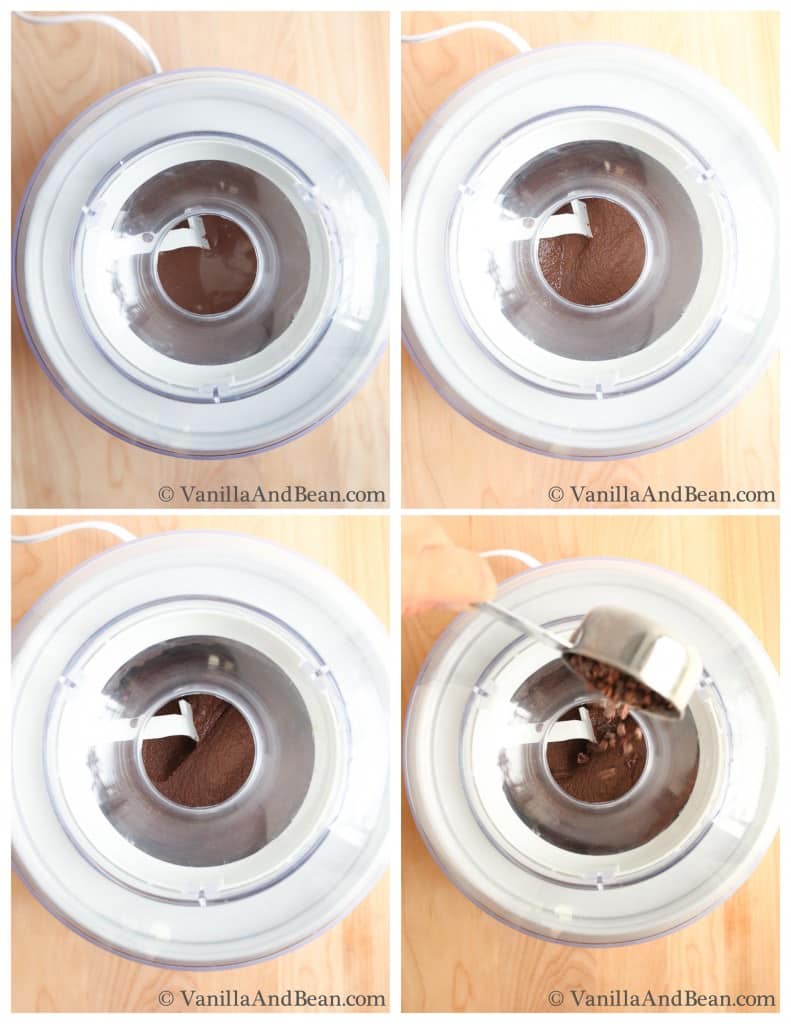
- Second, make the cashew cream base. Into a high speed blender, I use Vitamix, add the cashews, water, maple syrup, sugar, cocoa powder, and vanilla. Blend until the ingredients are smooth and creamy. Store overnight in the refrigerator to so cool and to age the base.
- Next, the following day, churn the ice cream in an ice cream maker. I’ve borrowed one for years, but now have my own. I like Kitchen Aid and Cuisnart.
- Last, freeze the ice cream for about an hour.
To this recipe, I’ve added espresso powder simply because coffee enhances the flavor of chocolate. If espresso powder is not on hand or available, you can use espresso or strong coffee. If you prefer to leave the coffee flavor out, your ice cream will still taste delicious.
Dark chocolate is my favorite ice cream. Well, really, anything dark chocolate is my favorite. Not that there aren’t plenty of other flavors out there that make me shake my grove thing.
I’m curious to know, what’s your favorite ice cream flavor?
More Egg and Dairy Free Ice Cream Recipes to Love!
- Bourbon Vanilla Bean Ice Cream
- Strawberry Chocolate Chip Nice Cream
- Bourbon Soaked Cherry Vanilla Bean Ice Cream
- Mexican Chocolate Almond Nice Cream Bowls

Dark Chocolate Ice Cream with Cocoa Nibs - vegan
Ingredients
- 1 C Raw Cashews soaked in water overnight or in very hot water for at least 10 minutes and rinsed
- 2/3 C Water
- 2 tsp Vanilla Extract
- 1/4 C + 2 Tbs Maple Syrup 3 oz
- 1/2 C Almond Milk unsweetened (4 oz)
- 1/4 C Granulated Sugar ground (1 3/4 oz)
- 2 1/2 Tbs Dutch Cocoa Powder
- 1/4 tsp Arrowroot optional, but helps thicken
- 1 1/2 tsp Espresso Powder or Strong Espresso optional
- Pinch of Sea Salt
- 1/8 C Cocoa Nibs 1/2 oz
- Leaves Mint for Garnish Optional
Instructions
Day One: Make the Ice Cream
- Place cashews, water, extract, maple syrup, almond milk, sugar, cocoa, arrowroot, espresso and sea salt into a high-speed blender like this one. Blend for 1 minute on med-high speed. Scrape down the inside of the pitcher and blend for 30 more seconds on med-high speed.
- Pour into a container, cover and chill in the fridge for at least four hours or overnight. This helps develop flavor.
- Now is a good time to put your ice cream maker freezer bowl into the freezer.
Day Two: Churn the Ice Cream
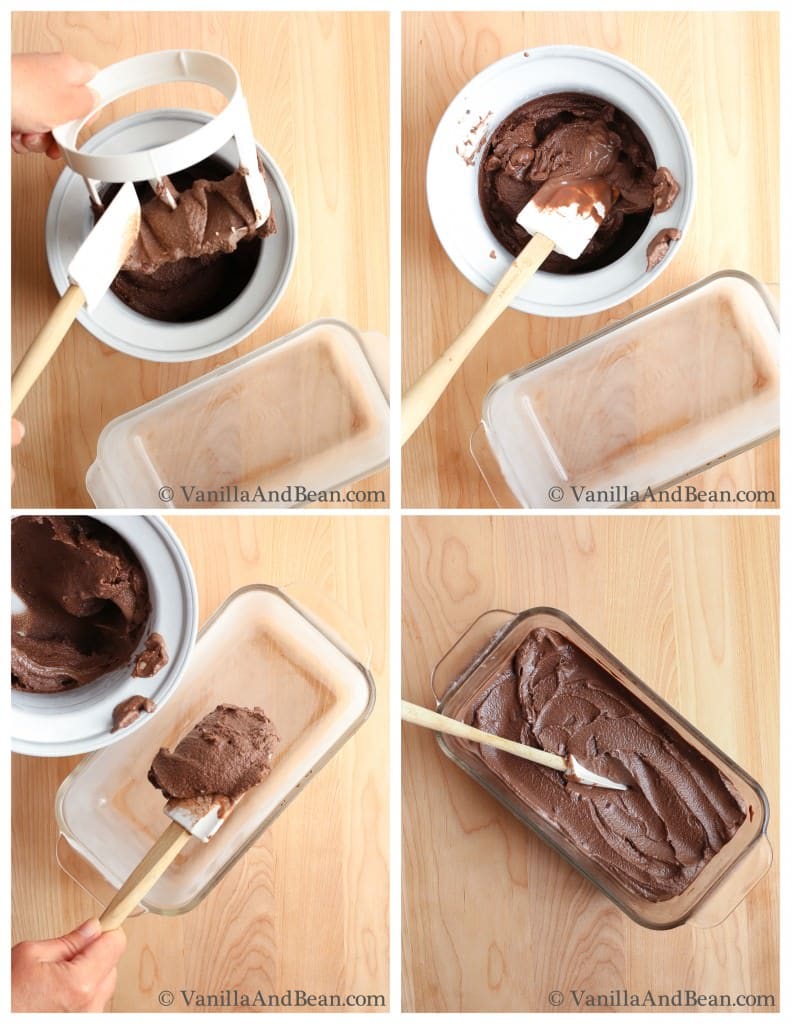
- When you are ready to churn the ice cream, place the container (I use a loaf pan) you'll be storing the ice cream in in the freezer so it's nice and chilled when you transfer the ice cream from the machine. Line the container with parchment paper and clip the sides as to hold them in place (optional).
- Churn the ice cream according to the manufacture's instructions (I churned mine for 30 min on low).
- Add the cocoa nibs to the ice cream during the last few minutes of the churn. The goal is to evenly distribute the nibs throughout the ice cream.
- Transfer the ice cream to the storage container, place parchment or plastic wrap right on the surface of the ice cream (this will prevent ice crystals from forming) and cover tightly. Freeze for at least an hour to an hour and a half in the covered container.
- When you're ready to serve, remove from the freezer and let set at room temperature for at least 5 minutes. This will allow it to become a bit softer and ready for scooping.
- Enjoy within a week.
Leave a Comment & Rate this Recipe