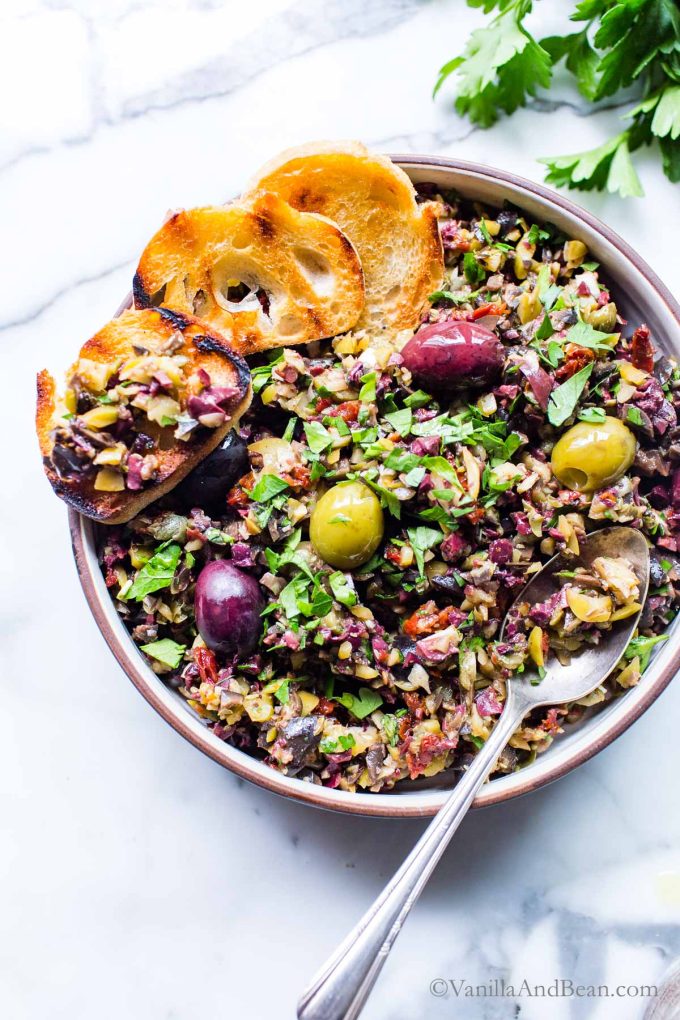
Olive Tapenade: A salty, garlicky, lemony snack, condiment, or appetizer. Like my Green Olive Tapenade, this olive tapenade recipe takes ten minutes to whip up and is make ahead easy! It’s delicious on its own or with Easy Artichoke Hummus or on an Italian Pressed Sandwich. This recipe is vegetarian, vegan + gluten-free. [ VIDEO in recipe card below ]
This post was first published in 2015 and was updated December 2021. The recipe remains unchanged.
Table of Contents
Everyone Loves Olive Tapenade!
You know those recipes that you make over and over again and can rely on every time? This easy Olive Tapenade Recipe is it! From the pickiest of eaters to the vast array of friends and family with varying diets, just about everyone can agree on this recipe. It uses 10 fresh ingredients and takes only 10 minutes to make.
My taste for briny/salty flavors is no secret. Olives tend to soothe salty cravings but add a couple of tablespoons of capers to the mix, and their briny flavor takes this olive tapenade recipe over the top! And did I mention it’s SO easy?
Stock Up on Olives
Olives are a pantry staple. They make a quick snack and add a good bit of briny/salty flavor to any recipe they’re a part of. Olives are especially tasty in Italian recipes like Pasta Puttanesca, and Sourdough Pizza as well as salads like this Spinach Pecan Brown Rice Salad and Farro Kale and Olive Salad.
I’ve also included olives in this completely delicious Olive Artichoke Crostini recipe.
Quick Guide: How to Make Olive Tapenade Recipe
I make this olive tapenade recipe without anchovy fillets opting for capers instead. They’re a perfect stand-in for that briny/salty flavor anchovies are known for. Whip this tapenade recipe up in the food processor as a relish, spread or dip. In summary, here’s how to do it (see recipe card for details):
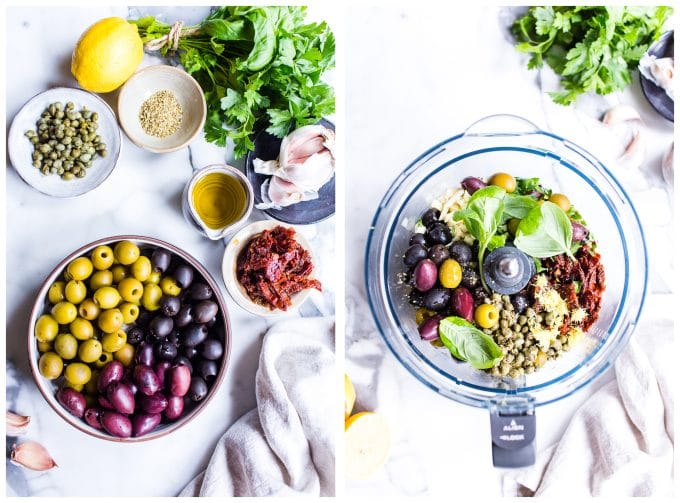
- First: add olives, capers, sun-dried tomatoes, fresh garlic cloves, oregano, parsley, basil, lemon juice, olive oil, and black pepper to a food processor.
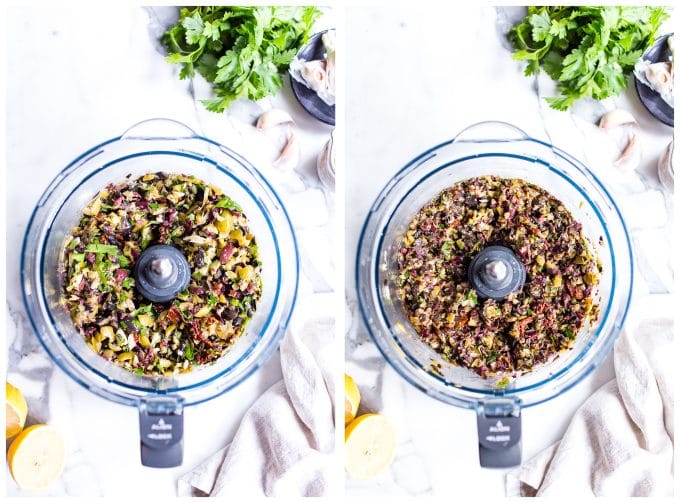
- Next: pulse until you get the desired consistency.
- Last: garnish with parsley leaves and drizzle with olive oil.
Store in an airtight container (I like Mason jars) in the refrigerator for up two weeks (!!).
This tapenade recipe is salty enough due to the capers and olives; however, feel free to add a pinch of salt to taste if needed. Jennifer commented below about lower salt: you can “rinse the olives and capers prior to processing” and then add salt to taste.
Make an Olive Spread or Relish
The main difference in consistency between a spread and relish is how long the ingredients are processed in the food processor. When making this flavorful olive tapenade recipe, pulse the ingredients to reach the desired consistency.
- Chunky: make tapenade more like a relish to share alone or with hummus; simply pulse the contents just a few times.
- Spread: make tapenade spreadable for sandwiches, pita bread or baguette slices.
You can’t go wrong either way; this tapenade is delicious and devoured by all!
What Do You Eat with Olive Tapenade?
There are many ways to enjoy olive tapenade. Here are some ideas to get you started!
- Dollop tapenade on Sourdough Pizza or Gluten Free Sourdough Pizza just before baking.
- Scoop up with Sourdough Discard Crackers.
- Share it alongside Spanakopita Triangles.
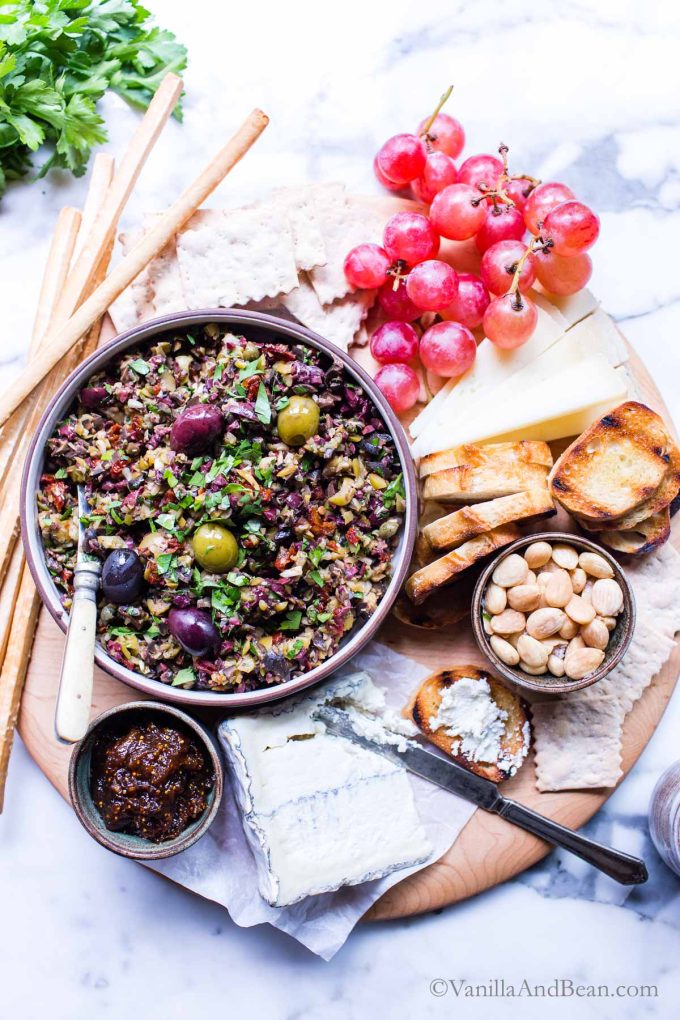
- Share with your favorite cheeses on a cheese board.
- Share it chunky on top of hummus like Easy Artichoke Hummus or Roasted Eggplant Hummus.
- Offer tapenade as a dip with crackers or crostini.
- Stuff it into Sourdough Pita with hummus, cucumbers, and tomatoes.
- Enjoy it as a sandwich spread with cream cheese or make an epic Italian Pressed Sandwich.
- Tapenade is super tasty with whipped feta.
Expert Tips
- Make Ahead? Yes Please! Make up to three days ahead of when needed.
- Relish or Spread? The main difference in consistency between a spread and relish is how long it is processed in the food processor. For a relish, pulse only a few times. For a spread, process until almost a paste forms.
- Lower Salt: If you prefer lower salt, rinse the olives and capers before processing, then adjust the salt to taste.
- Variation: Olive tapenade tastes best with a mix of olives. I like Kalamata olives, black olives, and buttery ripe green olives in this recipe. Castelvetrano olives may be subbed; just be sure to remove the pits or look for already-pitted olives.
More Appetizers and Snacks to Love
- Roasted Red Pepper Hummus
- Habanero Carrot Salsa
- Mushroom Crostini with Goat Cheese
- Chipotle Black Bean Dip
- Roasted Tomatillo Salsa Verde
- Smoky Roasted Eggplant Hummus
Did you make this recipe? If so, please leave a comment and rating below as it helps others considering making this recipe. If you’re on Instagram, take a picture and tag me @VanillaAndBean #VanillaAndBean so I can see and share in my stories!

10-Minute Olive Tapenade Recipe
Ingredients
- 2 1/2 cup (345 grams) Mixed Pitted Olives such as Black, Kalamata, ripe Green, drained
- 2 Tablespoons Capers drained
- 2 Tablespoons Marinated Sun Dried Tomatoes drained
- 1 Tablespoon Garlic chopped
- 1 Tablespoon Oregano dried
- 4 Tablespoons Fresh Parsley Leaves chopped, or 1 Tbs dried
- 1 Tablespoon Fresh Basil Leaves chopped, or 1 tsp dried
- 1 Tablespoon Lemon Juice about 1/2 a lemon
- 1/4 cup (50 grams) Extra Virgin Olive Oil
- A few grinds of black pepper
Instructions
- In the bowl of a food processor fitted with the S blade, add the olives, capers, tomatoes, garlic, oregano, parsley, basil, lemon juice, olive oil, and black pepper.
- For a relish, pulse a few times, then scrape down the bowl. Pulse a few more times, and the relish will be ready.
- For a chunky spread (pictured here), pulse up to 15-17 times, stopping to scrape down the bowl a few times.
- For a spreadable tapenade, process until a paste is formed, stopping to scrape down the bowl a few times.
- Garnish with parsley leaves and olive oil for drizzling. Store in a covered container in the refrigerator for up two weeks.


Leave a Comment & Rate this Recipe