
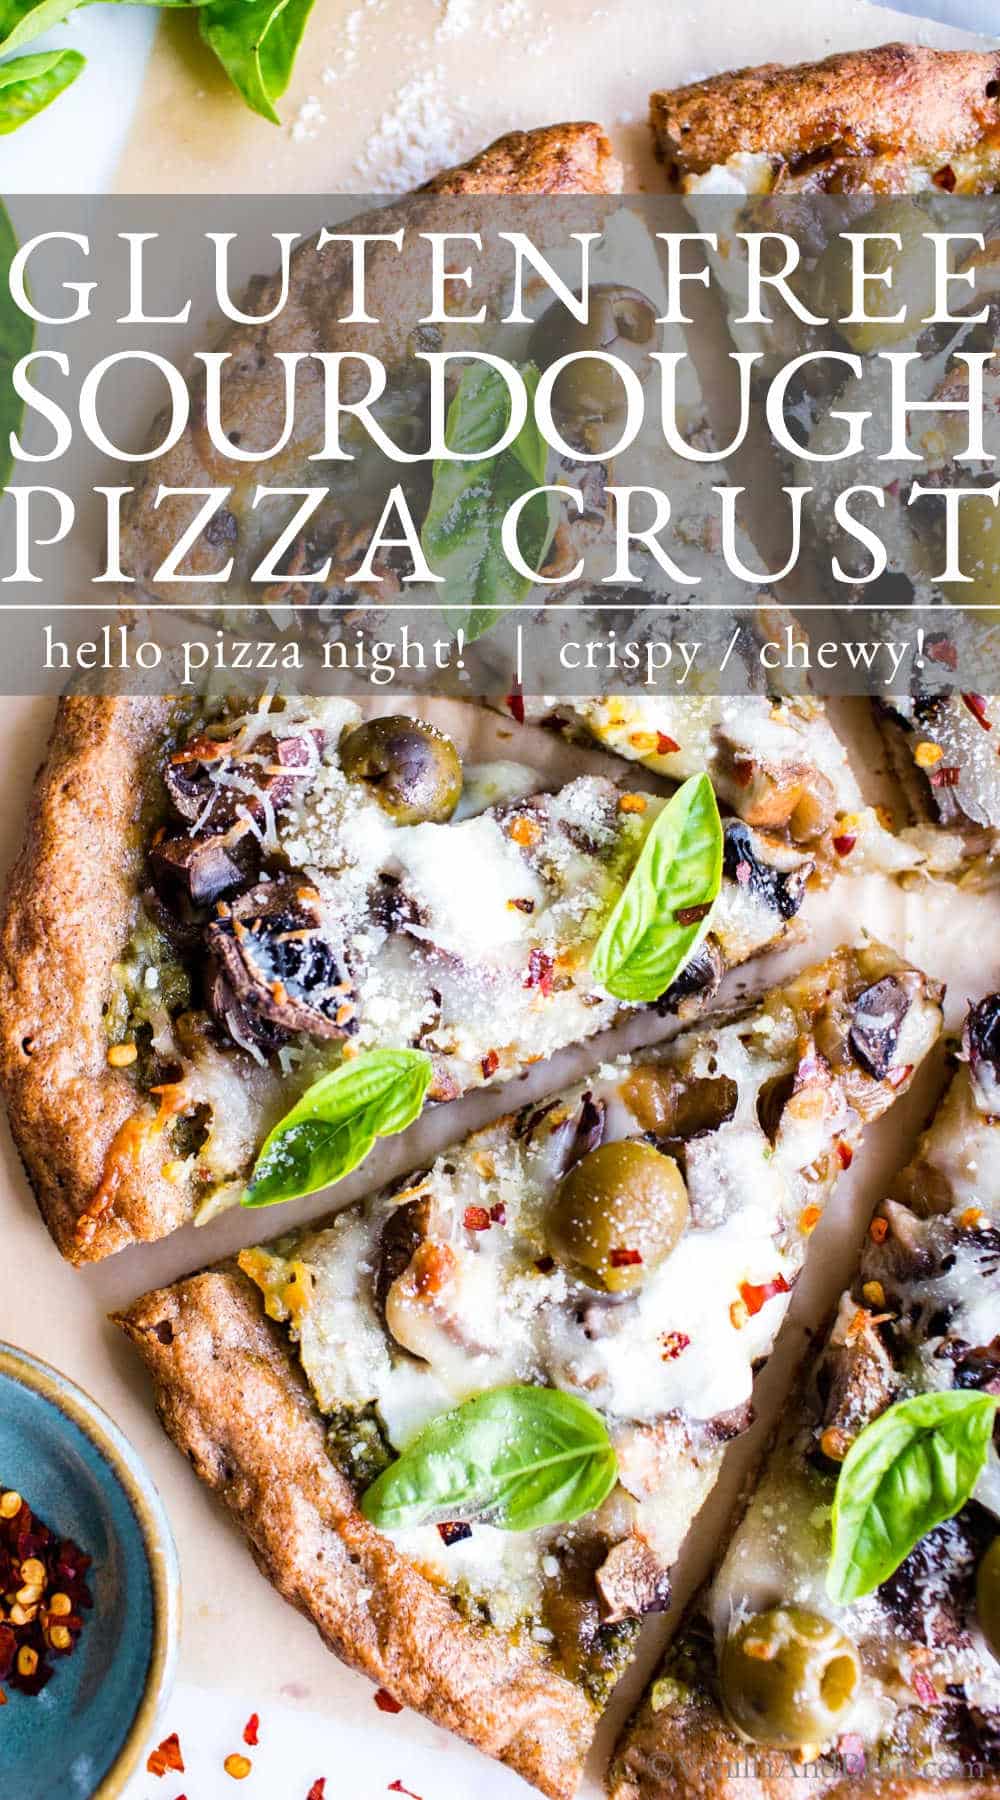
Flavor, texture and easy to pull together, this delicious Gluten Free Sourdough Pizza Crust is a pizza night game changer! Use your Gluten Free Sourdough Starter discard to whip up a crispy, chewy and flavorful pizza. This recipe is make ahead ready, freezer friendly, vegetarian and a gluten free vegan sourdough pizza crust! For a non-sourdough crust, try my similar Gluten Free Pizza Crust. | This post is brought to you by Bob’s Red Mill.
Reader Review: “OMG!!!! You have nailed it. By far the best crust I have ever made. Thank you so much. I am a big pizza lover and enjoyed this so much.” ~ Peggi
You will receive recipes and kitchen tips, along with information about our partners and offerings. For more details, review the Vanilla And Bean privacy policy.
A Gluten Free Sourdough Pizza Journey
It was in pastry school where I first discovered the process of sourdough baking. Home sourdough baking followed with many trials, triumphs and failures along the way. Since then I’ve shared sourdough bread recipes as well as lots of sourdough discard recipes. So, it was a natural part of my journey to delve into gluten free sourdough when I went on a gluten free trial back in 2018.
While on that trial, I developed a Gluten Free Sourdough Starter recipe to use in this now reader favorite, Seeded Gluten Free Sourdough Bread. Discard recipes followed. After receiving requests from Vanilla And Bean readers for a gluten free sourdough pizza recipe, I got to work. So, you can imagine there have been many iterations of this delicious gluten free sourdough pizza base recipe.
This Recipe Is
- make ahead ready
- crispy and chewy
- no pizza stone or steel needed
I’m back to my glutenous ways, but come to find out, Rob (my husband) prefers my gluten free pizza crust over my Classic Recipe for Sourdough Pizza Dough (I know, right?). After lots of testing and tweaking I’m excited to be sharing my best gluten free pizza dough, sourdough style, with y’all!


About the Key Ingredients
- Sourdough Discard: I’m using my Gluten Free Sourdough Starter recipe in this pizza recipe. The sourdough starter is 130% hydration. If you use a lower hydration discard, you may need to add a bit more water.
- Gluten Free Flour Blend: I use Bob’s Red Mill 1:1 Baking Flour in this recipe. It complements the sourdough and contributes to a crispy/chewy pizza crust texture.
- Almond Flour: Bob’s Red Mill Super Fine Almond Flour adds structure and contributes to the earthy flavors sourdough is known for.
- Tapioca Flour: Assists in a crisp texture in part and helps manage water in this high hydration dough.
- Psyllium Husk Powder: contributes to binding and a chewy texture in this egg free gluten free pizza recipe so I do not recommend subbing this ingredient. Be sure to use psyllium husk powder rather than whole husks.
- Quick Rise Yeast: also known as Rapid Rise or Instant Yeast aids in flavor development and leavening the dough.
_____________________
How to Make GF Sourdough Pizza Dough
step by step


Shaping the pizza dough takes a little practice and finesse. Because the dough is wet, and you wet your hands in order to shape it (sans flour), it’s almost like trying to shape mashed potatoes into a pizza shape. The excess water will cook off, don’t worry.


Bake!
Once the dough is shaped and docked, par bake the crust by sliding it into a preheated oven onto a pizza stone or back of a sheet pan using the parchment as a handle. Excess water you used in shaping will bake off. Don’t worry!
Once your pizza dough is par baked, it’s ready for toppings and baking again.
Ingredients Make All the Difference
Choosing high quality ingredients is important for flavor and texture. It’s a reflection of the love that goes into each recipe I create for my family, friends and the Vanilla And Bean community.
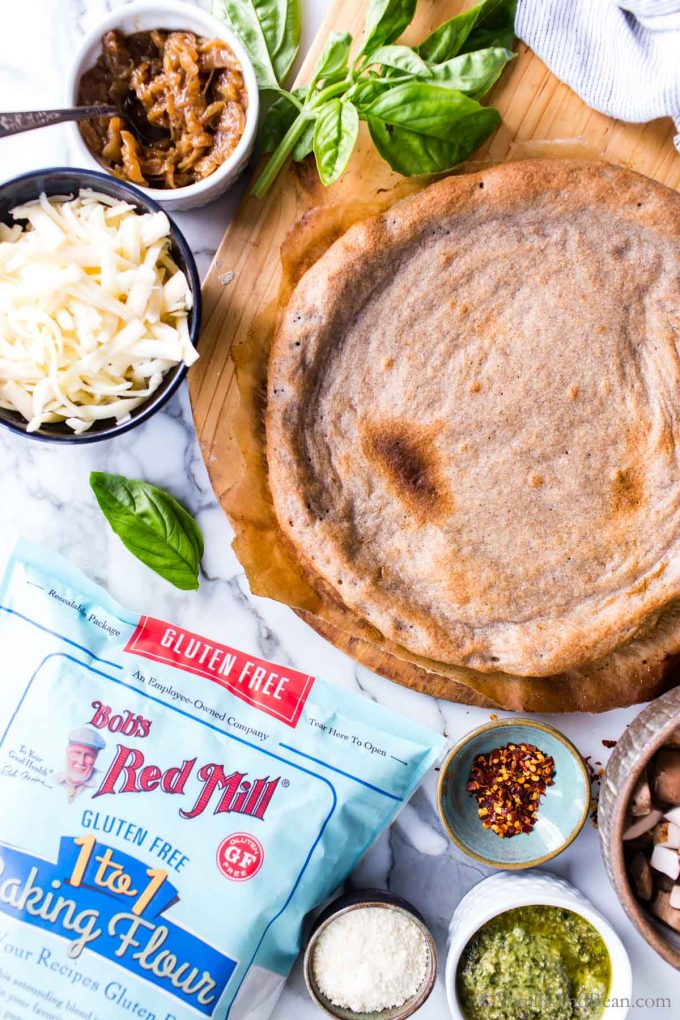
Bob’s Red Mill Gluten Free 1-to-1 Baking Flour is perfect for everyday. It’s a blend of white and brown rice flour and other gluten-free flours, starches, and xanthan gum. It’s helped me create light and fluffy cupcakes, pastry for apple pie, tasty Gluten Free Cornbread and this reader favorite, homemade Gluten Free Pizza Dough recipe!
Using Bob’s Red Mill Gluten Free 1-to-1 Baking Flour and Almond Flour in this gluten free sourdough pizza dough recipe is a delicious way to create crisp and sturdy homemade pizza sans gluten and to enjoy that sourdough flavor we love without wasting discard.


Good To Know
Thin Crust or Thick Crust Pizza
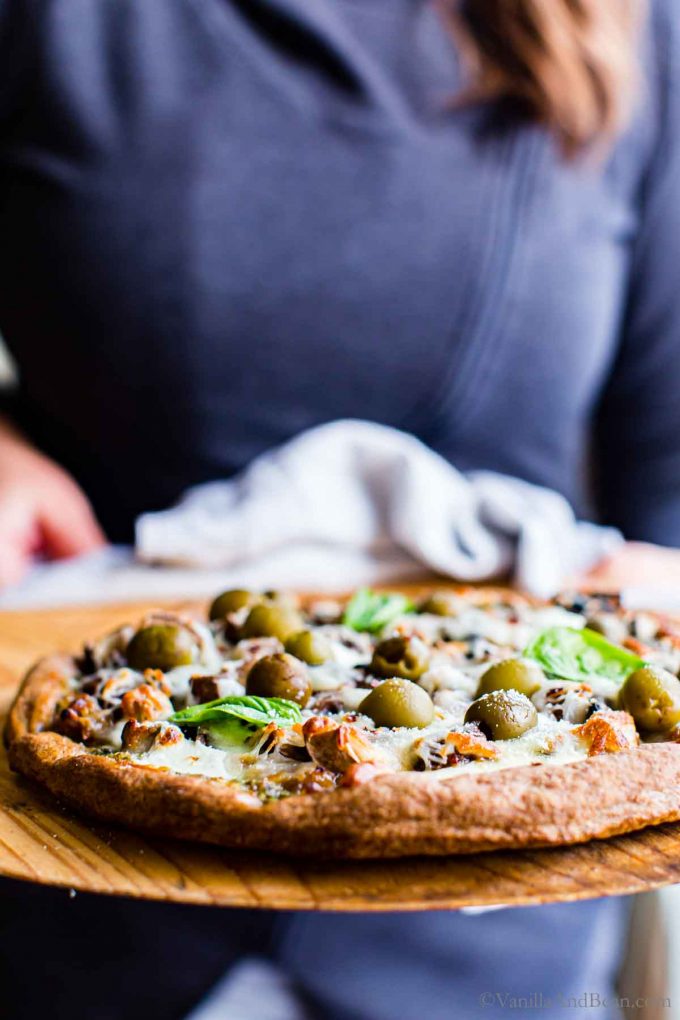
Depending on how you shape the dough will depend on whether you’ll create a thick or thin crust pizza. I typically go for a thinner crust by shaping the edges a little narrower (as shown in the pictures). However, for a thicker crust, shape the pizza a bit smaller and allow for a little bulk around the edges.
Pizza Stone or Baking Sheet
To bake the pizza, you can use either a pizza stone and/or the back of a sheet pan or one of each. When baking multiple pizzas, preheating the pan or stone will help create a crispy crust. You can use either because they both produce similar results with sourdough gluten free pizza dough.
Traci’s Tips
- This gluten free pizza dough is par-baked meaning the crust is baked prior to piling on the sauce and toppings. I’ve tested this recipe without par baking the gluten free pizza dough, but the crust didn’t finish baking by the time the toppings were done. So, after the crust is par-baked, red sauce or green sauce like Lemon Basil Pesto, or Spinach Basil Pesto and toppings.
- Shape and bake the dough on parchment paper. Note that parchment paper isn’t generally rated for use over 500 Fahrenheit. So at 550 Fahrenheit, with any overhang, the paper will char and become brittle.
- A pizza peel makes transferring the shaped gluten free pizza dough (with parchment supporting it) to the preheated stone/pan a snap. I recommend it. However, if not using a peel, the shaped pizza dough can be slid off the back of another pan and onto the preheated stone/pan. Just be careful as the oven is very hot!
For more recipes using Bob’s Red Mill Gluten Free 1-to-1 Baking Flour and other pantry ingredients head to their website.
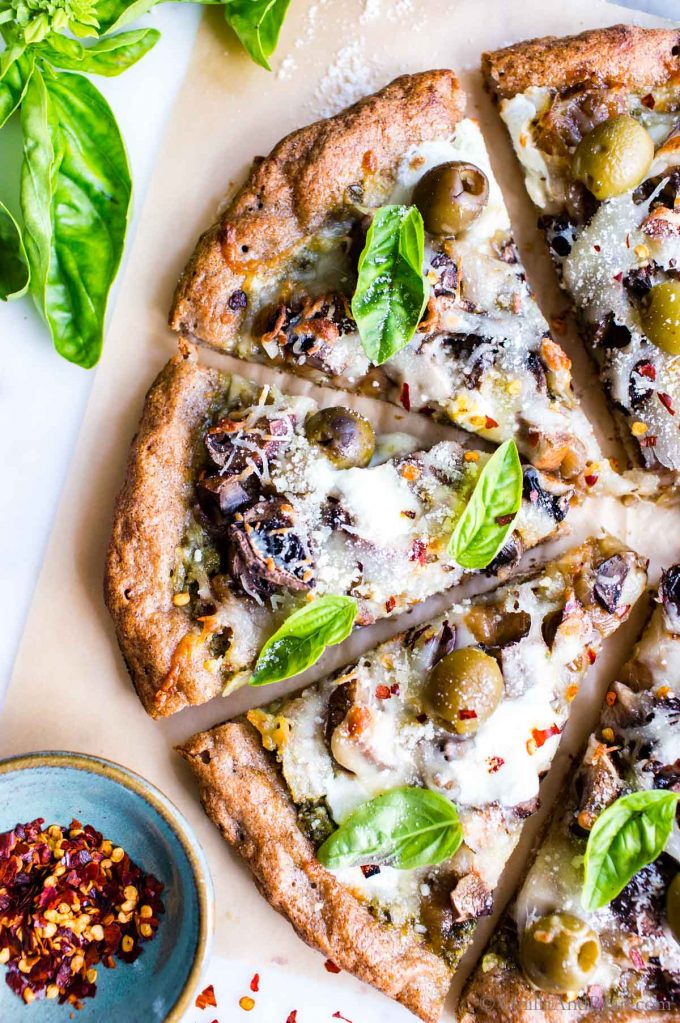
Gluten-Free Sourdough Pizza Crust with Discard
Ingredients
- 1 cup (150 grams) Bob’s Red Mill Gluten Free 1-to-1 Baking Flour
- 1/3 cup (40 grams) Super Fine Almond Flour, I use Bob's Red Mill
- 1/4 cup (30 grams) Tapioca Flour, I use Bob's Red Mill
- 1 3/4 teaspoons Psyllium Husk Powder, I use Terrasoul PHP *see note on brands
- 1 1/4 teaspoons Baking Powder
- 1 1/4 teaspoon Fine Sea Salt
- 1/2 teaspoon Quick Rise Yeast, or Rapid Rise Yeast
- 1/2 cup (140 grams) Gluten Free Sourdough Discard, stirred down
- 1 cup + 2 tablespoons (260 grams) Water , 115 Fahrenheit (46 Celsius)
- 1 tablespoons Olive Oil, + more for brushing the parchment paper
Instructions
Mix the Dough:
- In a medium mixing bowl whisk the gluten-free flour, almond flour, tapioca flour, psyllium husk powder, baking powder, salt, and yeast so that the ingredients are evenly distributed. Set aside.In a separate medium mixing bowl, whisk the sourdough discard, warm water and olive oil. Add the dry ingredients to the wet using a fork to incorporate the flour. The batter will begin to thicken. Use the fork to scrape the batter off your hands, then knead by hand, in the bowl, for two minutes.The dough will become thicker and remain sticky, almost like mashed potatoes. Scrape the excess dough off your fingers using a fork. Use a water moistened silicone spatula, scrape the bowl and smooth the dough on the surface into a dome. Cover the bowl with a damp tea towel and leave on the kitchen counter or warm area to rise for about 90-120 minutes. I recommend putting it in a turned off oven with the light on. The dough should rise to about 1 1/2 times its size and be fluffy/springy to the touch.
Prepare:
- While the Dough is Rising: a. Prepare a sheet of parchment paper by generously brushing olive oil on the parchment, one for each pizza. This is the base to shape and bake the crust on. Have a pizza peel or sheet pan standing by to slide the shaped dough on to for baking. b. Prepare the oven by placing an oven rack at the center and if making two pizzas, another rack two settings down (leaving enough room to slide the pizza on to the pan).Place an upside down sheet pan(s) and/or pizza stones on racks. Two crusts or pizzas can be baked at the same time. c. Prepare the ingredients for the pizza. Just before you're ready to divide and shape the dough, preheat the oven to 550 Fahrenheit (288 Celsius).
Divide the Dough:
- At this point, you'll only use water to shape the dough. Fill a shallow dish with water so you can wet your hands as you work with the dough. Do not use flour here (as traditionally done with glutenous dough). Moisten a work surface with water. Turn the dough out onto the moist work surface. Dip your fingertips and palms into the water and pat the dough into somewhat of a disk, then divide the dough into two equal pieces. Moisten your hands again and shape each piece into a rough ball by tucking the edges under. Set the dough balls on a water-moist work surface.
Shape the Dough:
- On the oiled parchment paper, set a pizza dough ball in the center. Dip your palm and fingertips into the water. Working with both fingertips and palms, start pressing in the center of the dough, working your way towards the edges in a circular pattern leaving an edge all around that is thicker than the base of the crust (you can play with this if you like a thicker crust). It will feel almost like trying to shape mashed potatoes! There may be a bit of occasional tearing, if so, wet your hands/fingertips and smooth those areas back together. Turn the parchment as you work the dough so that a pizza shape can be achieved. Continue, wetting your hands and smoothing over the dough with light pressure as needed so the dough does not stick to your hands and you shape it by smoothing the dough in circular motions and/or pinching to create the edges, then smoothing with moist fingers again. It's okay that the parchment gets a little wet. I make my crust thin on the bottom and go for an 11" crust – but you can play with this if you like a little thicker crust (10" pizza). Note: If you plan on freezing the par baked crust, you'll need to make the crust *thicker* on the bottom – more of a 10 inch crust, as it tends to become brittle/fragile in the freezer in areas where it's *too* thin. Wet a fork and dock the pizza with the tines of the fork about 10 times. Tear off any excess parchment paper so that it's flush with the pizza dough, leaving enough overhang to use as a handle if needed. *Note that parchment paper is generally rated for use under 500 Fahrenheit. So at 550 Fahrenheit, with any overhang, the paper will char and become brittle.
Par-Bake the Dough:
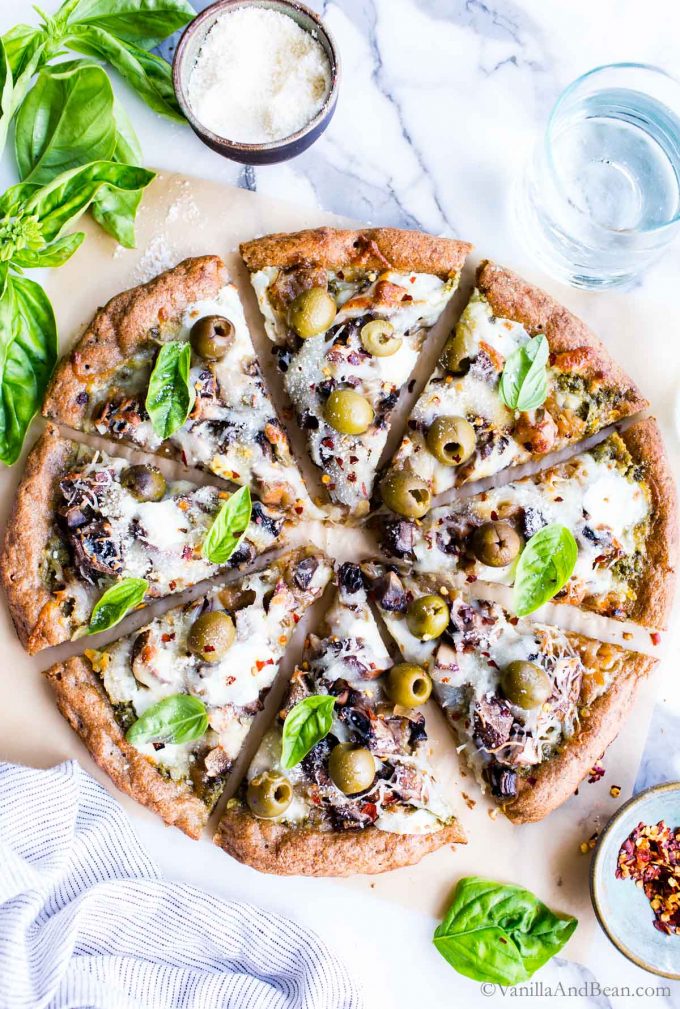
- Slide the shaped pizza dough onto a pizza peel or the back of a sheet pan using the parchment as a handle if needed. Open the oven and pull out the rack with the stone/pan. Slide the pizza dough onto the preheated pizza stone or back of the preheated pan. Sometimes the center puffs a bit during baking. Check the dough halfway through baking and if it has puffed in the center, use a knife to poke a small hole to let some of the steam out from under the pizza – use the knife to press it down to release the steam. Par-bake for 11-13 minutes or until the dough is golden brown around the edges and center. Remove from the oven. The parchment will be brittle at this point, and can be removed before baking the pizza. It may stick a little, so remove it carefully. Top the par baked crust with your favorite sauce or lemon basil pesto and toppings. Pictured is basil, mushrooms, artichokes, mozzarella, mixed Italian cheese and ripe green olives. To Freeze (optional): The par baked crust may be frozen at this point. Allow the crust to cool completely, then store it in a freezer or plastic bag. Thaw at room temperature and carry on!
Bake the Pizza:
- Bake the assembled pizza on preheated stone or pan at 550 Fahrenheit (288 Celsius) for about 6-8 minutes or until the cheese has melted and sauce is bubbly – a little cheese blistering is okay! The pizza bakes fast at high heat, so keep an eye on it. Remove from oven and allow to rest for five minutes. Cut into 8 equal pieces.
Store the Pizza:
- Store pizza leftovers in a lidded container in the refrigerator for up to three days. Reheat at 350F for about 12 minutes.
Video
Notes
Nutrition
Nutrition is provided as a courtesy and is an estimate. If this information is important to you, please have it verified independently.
Made it? Leave a comment below!
The most helpful comment may include recipe rating, feedback, any modifications or helping other commentors.



This is a 5 star recipe! I used a gf bread flour that I had on hand and followed your instructions. Made my hubby very happy! Thank you
I topped mine with marinara sauce, mozzarella, pesto, onion and chopped epplant cutlets!!
Hi LP! Best news ever! Thank you for your note and giving a new recipe a go! Your eggplant cutlets sound DELISH!!
Great GF discard recipe- the best i’ve made so far, for pizza crust. The instructions were very helpful, ensuring successful result! Thanks!
Love hearing this, Chris! Thank you for your feedback and star rating!
Can this recipe be cooked in the Ooni?
Unfortunately it cannot.
OMG!!!! You have nailed it. By far the best crust I have ever made. Thank you so much. I am a big pizza lover and enjoyed this so much.
Love hearing this, Peggi! Thank you for your note and giving the pizza crust a go!
What if my oven only goes to 500 degrees?
Hi Taylor! You can still make this, you’ll just need to parbake the crust a bit longer and also, the assembled pizza. Use the pictures as a guide for how long you need to parbake to achieve a golden brown color. Also, when baking the assembled pizza, it’s done when the cheese is melted and bubbly all the way through the center of the pizza (for a vegetarian pizza).
Have pretty bad arthritic hands is it possible to mix in my kitchen aid?
Hi Wendy! Of course. I would use speed 2 with the dough hook. Mix for about 2 minutes. Check the dough. It should feel thicker and somewhat like mashed potatoes. If not, give it just a little longer in the mixer. I hope you enjoy the pizza!
Wow! Best tasting and lovely texture. Beware, when you spread the dough, it really is a mash potato texture (I like thick mash potatoes). How can this recipe be altered to eliminate the sourdough starter? My friend won’t deal with starters.
Hi Carole! Thank you for your note. You had the right texture 😀. So glad you enjoyed the pizza! Here’s my GF Pizza Dough Recipe (not sourdough, but very similar to this one) your friend will love!
Oops forgot to rate the recipe. Idk how to comment edit to add this so I’m just posting another comment. Apologies for the spam
Thank youuu for sharing your notes, and five star review!
Hello this is my first pizza dough recipe and I’m quite new to sourdough and gluten free baking in general ( let’s be honest ALLLL BAKING )
SO I do have a genuine question; were we actually supposed to knead the sticky mashed potato dough with our bear hands ? Or did I just fall for a noobie hazing ritual lol. Halfway through the recipe now as I’m writing. But gosh what a horrible sensory experience haha
Hiii there! You’re doing it right! You can use a wooden spoon, but I find using our hands allows us to feel how the dough changes through the mixing process and we can better monitor when it’s time to stop kneading. It is a strange feeling, I agree! Keep us posted on your progress 😊
Thank you I can definitely have a flair for the dramatics aha. It all worked out amazingly tho. I actually came across your recipe while searching for a way to make gluten free vegan sourdough pizza rolls. As you can see thats quite a mouthfull, the results were pretty much non-existent in the good old Google engine. So I decided to modify a recipe instead. I never even believed it would turn out so amazing! I took your recipe and I ended up only having psyllium husks and not powder so I just used that instead. Along with not having the tapioca. But I did have a great PC brand gluten free blend where the first few ingredients on the list were all starches and flours including tapioca! So I subbed that in and hoped for the best ! And oh boy did it pay off!!!
As I needed the dough to be plyable enough to roll up I decided to half your parbake time and then take it out early to apply toppings (I removed the tray once the bread resembled a rather moist naan bread) , roll into a big log and slice up. I then places the rolls cinnabun style facing up into a brownie pan and coat with more vegan cheese and tomato sauce then put back into the oven for another 20 minutes. They ended up tasting exactly like my local gluten free bakery which I was trying to replicate ! Definitely will be writing this recipe down and making any time I get the craving again ! Very happy to have found this amazing recipe as all my other gluten free endeavors have been impossible to shape and always fell apart ( rip perogies and samosas)
I hope if anyone else sees this thread they feel inspired to try this one out as well.
Sorry for the ramble, thank you again for your amazing recipe even if I was initially caught off guard by the process