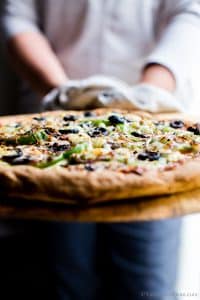
Gluten-free pizza crust does not need to be dry or crumbly — not on my watch! After multiple recipe tests, I’ve developed a simple recipe for gluten-free pizza crust that’s nice and crispy on the outside, and perfectly chewy on the inside. Sturdy enough to hold all your favorite pizza toppings, this pizza crust is game changer for those on a gluten-free diet. It blends gluten free all-purpose 1-to-1 baking flour and psyllium husk powder to create that classic pizza dough texture, only gluten free! The crust recipe is vegetarian and vegan. | Disclosure: this recipe is brought to you by Bob’s Red Mill
⭐️⭐️⭐️⭐️⭐️ “The best GF pizza crust I’ve ever tried! Truly. My girlfriend is celiac and this made both of us SO happy.” ~ R

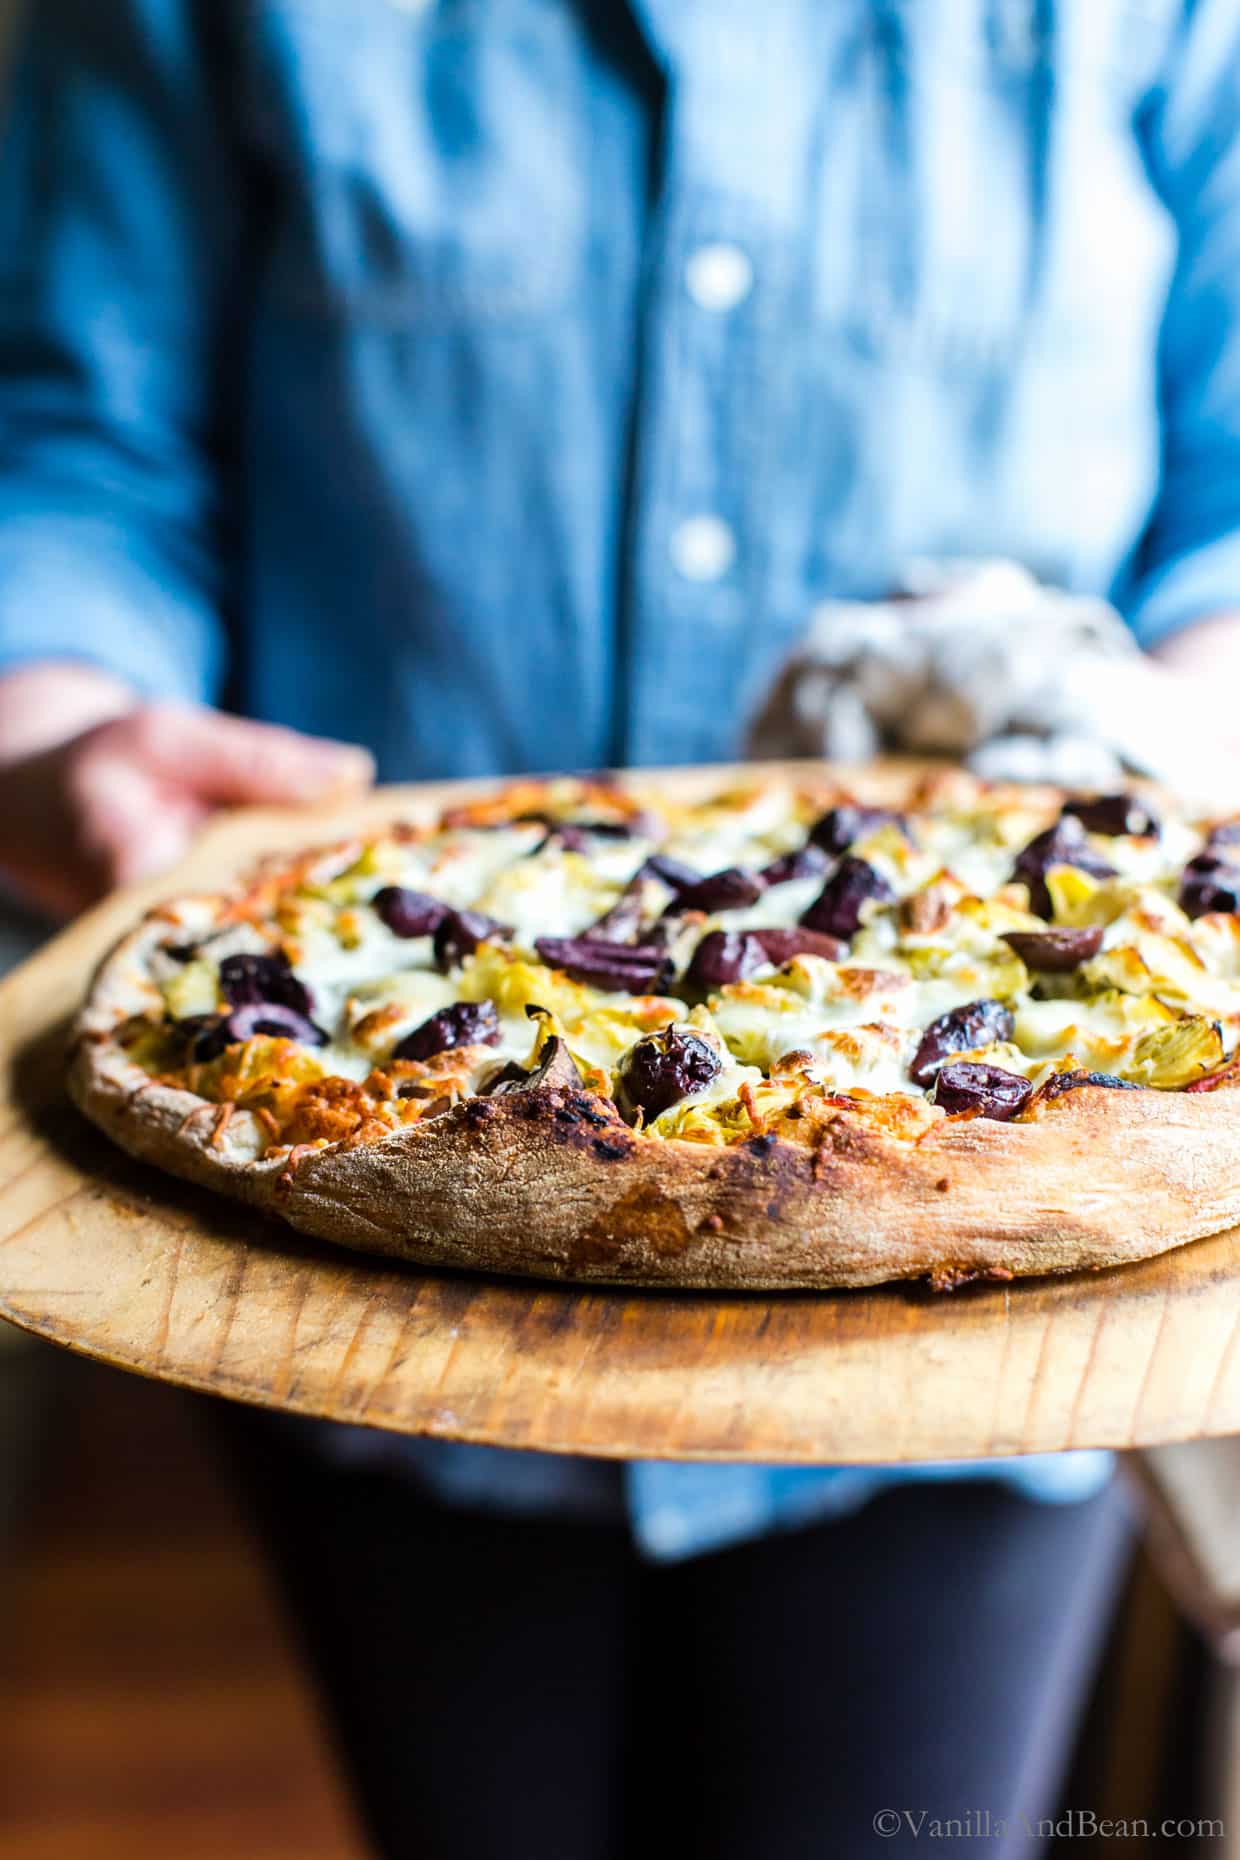
Love Pizza Again!
I’m a big fan of pizza recipes and topping ideas, so when I shifted my diet to gluten free years ago for a trial period, gluten free pizza was one of the first recipes on my agenda to learn how to make. I just couldn’t go without delicious homemade pizza (and neither could my family)!
Not only did this GF pizza dough recipe happen, but so did another reader favorite: my Gluten Free Sourdough Pizza Crust recipe.
I discovered the key to making a delicious chewy-crispy gluten free pizza dough is by incorporating psyllium husk powder into the dough. Gluten free pizza dough with psyllium husk powder creates a chewy texture similar to that of gluten filled pizza crust.
Thankfully, and eventually, I discovered I didn’t have to go gluten free, but this recipe resonated with readers and those in my life who are and are not gluten free.
But don’t take my word for it. This is from a Vanilla And Bean reader:
“I have to write a comment here, though I don’t usually leave comments. This really was a fantastic recipe, and I’m super grateful to you. I was also skeptical when I saw the consistency of the dough, but having carefully read your instructions and the comments, I stuck with it, and it came out beautifully. I’ll be making this again and again. Also, I should mention that we made non-gf pizza for those who are not gf. They tasted ours and preferred it! So from now on, it’s gf all around!!”
Dalia
This Recipe Is
- ready in about two hours
- freezer friendly
- crispy and chewy
If you make homemade pizza recipes and are gluten free or cook for those who are, you’ll enjoy the flavor and texture of this gluten free pizza crust.

About the Key Ingredients
- Gluten Free Flour Blend: I use Bob’s Red Mill 1-to-1 Baking Flour in this recipe. It contributes to a crispy/chewy pizza crust texture with a neutral flavor.
- Super Fine Almond Flour: Bob’s Red Mill Super Fine Almond Flour adds structure and contributes to the earthy, nutty flavor.
- Psyllium Husk Powder: an essential ingredient for binding and also, it creates a chewy texture -somewhat like gluten full pizza. Because of this, I do not recommend substituting this ingredient. I use Terrasoul Superfoods psyllium husk powder. It’s a very fine powder, so a little goes a long way. Be sure to use psyllium husk powder rather than whole psyllium husks.
_____________________
How to Make Gluten Free Pizza Crust
step by step


Shaping the dough takes a little practice and finesse. Because the dough is wet, and you wet your hands in order to shape it, it’s almost like trying to shape mashed potatoes into a pizza shape. The excess water will cook off. Don’t worry!


Choosing Quality Ingredients
Choosing high-quality ingredients is important for best flavor and consistent results. It reflects the love and attention that goes into each recipe I create for my family, friends, and the Vanilla And Bean community. I use Bob’s Red Mill 1-to-1 Gluten Free Baking Flour in this and other gluten free recipes you’ll see on Vanilla And Bean.
Bob’s Red Mill Gluten Free 1-to-1 Baking Flour is a blend of gluten free flours, starches, and xanthan gum. It’s helped me create light and fluffy cupcakes, pastry for Gluten-Free Apple Pie, make tender Gluten Free Cornbread, and delectable cookies based on family favorites. Using their Gluten Free 1-to-1 Baking Flour and Super Fine Almond Flour in this gluten free pizza dough recipe is an easy way to enjoy fabulous pizza sans gluten.


An Adapted Recipe
When I went gluten free for a trial, I searched high and low, making a variety of gluten free pizza crust recipes. Finally, it was America’s Test Kitchen’s recipe that caught my attention.
While the ingredients for this gluten free pizza recipe are almost identical to the Test Kitchen’s, I did tweak a few. Through testing this recipe, I found by reducing the the psyllium husk powder and baking powder just a bit created a crisper crust. Also, since I keep Bob’s Red Mill Gluten Free 1-to-1 Baking Flour in the pantry, that’s what I use rather than Test Kitchen’s homemade mix.
However, the method I applied for this gluten-free pizza dough recipe strays from the Test Kitchen’s machine mixing, shaping, and long, low-temperature bake method in favor of easier hand mixing, a different shaping method, and quicker bake time somewhat similar to a Homemade Sourdough Pizza Crust I’ve been making for years.

Traci’s Tips
- This pizza crust recipe is par-baked meaning the crust is baked prior to piling on the sauce and toppings. I tested this recipe without par baking, but the crust didn’t finish baking by the time the toppings were done. So, after the crust is par-baked, add the sauce and toppings.
- Par-baking the crust and finished pizza at 550F contributes to a crisp outer crust and chewy interior. At that temperature, the assembled pizza will bake fast. So be sure to keep an eye on it. Seven to nine minutes should do it!
For more recipes using Bob’s Red Mill Gluten Free 1-to-1 Baking Flour and more pantry staples, head to their website.
Homemade Gluten-Free Pizza Dough & Crust
Ingredients
- 2 3/4 cups (500 grams) Bob’s Red Mill Gluten Free 1-to-1 Baking Flour
- 1/2 cup + 1 tablespoon (75 grams) Super Fine Almond Flour I use Bob’s Red Mill
- 2 teaspoons Psyllium Husk Powder *see note on brands
- 2 teaspoon Baking Powder non aluminum
- 2 teaspoon Fine Sea Salt
- 1 teaspoon Quick Rise Yeast or Rapid Rise Yeast
- 2 1/2 cups (590 grams) Water 100F (38C)
- 1/4 cup (50 grams) Olive Oil + more for brushing parchment paper
Instructions
- Mix the Dough: In a medium mixing bowl add the gluten-free flour, almond flour, psyllium husk powder, baking powder, salt, and yeast. Whisk so that the ingredients are evenly distributed. Pour in the warmed water and olive oil. Mix with a fork until the ingredients come together. Knead by hand, in the bowl, for one minute making sure the dough is hydrated. It will be thick and sticky, almost like mashed potatoes. Scrape the excess dough off your fingers using a fork. Cover the bowl with a damp tea towel and leave on the kitchen counter or warm area to rise for about 90 minutes. The dough should rise to about 1 1/2 times its size and be fluffy.
- While the Dough is Rising: Prepare a sheet of parchment paper by generously brushing olive oil on the parchment using a pastry brush. This is the base to shape and bake the crust on. Have a pizza peel or sheet pan standing by to slide the shaped dough on to for baking. Prepare the oven by placing oven rack at the second to top setting and if making two pizzas, another rack two settings down (leaving enough room to slide the pizza on to the pan).Place sheet pan(s) and/or pizza stones on racks. Two crusts or pizzas can be baked at the same time. Prepare the ingredients for the pizza. Just before you're ready to divide and shape the dough, preheat the oven to 550F (288C). **See recipe note if your oven doesn't get that hot.
- Divide the Dough: At this point, you'll only use water to help shape the dough. Fill a shallow dish with water so you can wet your hands as you work with the dough. Do not use flour here (as traditionally done with glutenous dough). Moisten a work surface with water. Turn the dough out onto the moist work surface. Dip your fingertips and palms into the water and pat the dough into somewhat of a rectangle, then use a bench scraper to divide the dough into three equal pieces. Moisten your hands again and shape each piece into a rough ball by tucking the edges under. Set the dough balls on parchment or a water-moist work surface. At this point, the dough can be frozen (see notes below).
- Shape the Dough: On the oiled parchment paper, set a pizza dough ball in the center. Dip your palm and fingertips into the water. Working with both fingertips and palms, start pressing in the center of the dough, working your way towards the edges in a circular pattern leaving an edge all around that is thicker than the base of the crust (you can play with this if you like a thicker crust). It will feel almost like trying to shape mashed potatoes! There may be a bit of occasional tearing, if so, wet your hands/fingertips and smooth those areas back together. Turn the parchment as you work the dough so that a pizza shape can be achieved. Continue, wetting your hands and smoothing over the dough with light pressure as needed so the dough does not stick to your hands and you shape it by smoothing the dough in circular motions and/or pinching to create the edges, then smoothing with moist fingers again. It's okay that the parchment gets a little wet. I make my crust thin on the bottom and go for an 11" crust – but you can play with this if you like a little thicker crust (10" pizza). Wet a fork and dock the pizza with the tines of the fork 5-6 times. Tear off any excess parchment paper so that it's flush with the pizza dough, leaving enough overhang to use as a handle if needed. Note that parchment paper is generally rated for use under 500F. So at 550F, with any overhang, the paper will char and become brittle.
- Par-Bake the Dough: Slide the shaped pizza dough onto a pizza peel or the back of a sheet pan using the parchment as a handle if needed. Open the oven and pull out the rack with the stone/pan. Slide the pizza dough onto the preheated pizza stone or back of the preheated pan. Sometimes the center puffs a bit during baking. Check the dough halfway through baking and if it has puffed in the center, use a knife to poke a small hole to let some of the steam out from under the pizza – use the knife to press it down to release the steam. Par-bake for 13-15 minutes or until the dough is golden brown. Remove from oven and top with favorite sauce and toppings. (The parchment will be brittle at this point, and can be removed before baking the pizza).
- Bake the Pizza: Bake the assembled pizza on preheated stone or pan at 550F (288C) for 7-9 minutes or until the cheese has melted and sauce is bubbly – a little cheese blistering is okay! The pizza bakes fast at high heat, so keep an eye on it! Remove from oven and allow to rest for five minutes. Cut into 8 equal pieces.After the Bake: If you like condiments for your pizza, you’ll love, Pickled Jalapeno Peppers or Pickled Banana Peppers for added spice and Greek Yogurt Ranch Dressing or Dairy Free Ranch Dressing for dipping.
- Store pizza leftovers in a lidded container in the refrigerator for up to three days. Reheat at 350F for about 12 minutes.
I have to write a comment here, though I don’t usually leave comments. This really was a fantastic recipe, and I’m super grateful to you. I was also skeptical when I saw the consistency of the dough, but having carefully read your instructions and the comments, I stuck with it, and it came out beautifully. I’ll be making this again and again. Also, I should mention that we made non-gf pizza for those who are not gf. They tasted ours and preferred it! So from now on, it’s gf all around!! Thanks again.
Hii Dalia! Thank you SO much for coming back, writing a note and sharing your success! How amazing the nonGF eaters preferred the GF pizza ☺️ I know, the process seems strange, but in the end, it just works. Hooray for tasty GF pizza!
Has anyone tried this recipe in an OOni Pizza oven? Curious if you need to par bake before putting into the OOni?
I used my own GF flour blend and was nervous as I couldn’t find the Bobs version. I did add an extra 1/2 cup of GF flour & it worked. Also used a dehydrator for the 90 min rise time. I’ve tried so many recipes but this one is great. Thank you.
Hi Michelle! I’m SO happy to hear the pizza turned out delicious and you’re enjoying delicious pizza! Hooray! Thank you for sharing your tips :D
Hi, the 875 calories in the nutrition, is that for 1 crust or 1 recipe?
Hi Lisa! Thank you for your note. Woah… I knew something was off there. My new recipe card didn’t quite transfer the correct calculation over. I just recalculated. For one 11″ pizza crust, it’s an estimated 397kcal. I hope this helps!
Hello,
This looks amazing. What can be subbed for the almond flour? My daughter has severe nut & peanut allergies. Thank you!!!
Hi Deb! Thank you! I’m not sure what can be subbed as the protein provided by the almonds helps aid in structure. Maybe ground sunflower seeds could work, but I’m just not sure. I’m sorry I’m unable to help.
I am looking for a gluten free sourdough pizza crust recipe and I see you have a sourdough pizza crust recipe and a gluten free pizza crust recipe so wondering if you have any thoughts on incorporating a gluten free sourdough starter (mine is brown rice flour and water based) into a pizza crust? Thanks!
Hi Tessa! Thank you for your note. I’m working on a recipe for a GF SD pizza crust… it’s almost there. It’s taking a bit more tweaking than I anticipated! I hope to have one on the blog very soon.
Hi Tessa! An update on GF Pizza! You can now find my GF SOURDOUGH Pizza Recipe on the blog. LMK if you give it a go!
The best GF pizza crust I’ve ever tried! Truly. My girlfriend is celiac and this made both of us SO happy.
The first time I made, I subbed flax for the psyllium husk and it worked great. But the second time I did the recipe as-is (with a tiny bit of sugar) and it was BRILLIANT.
Extra dough freezes great, too. A new staple in our household. Thank you!
Wooo! So happy to hear R! Thank you for your note and giving the recipe a go! :D
My wife has been off of gluten for over a year now. What she wanted for dinner on Mothers Day this year was a great gluten free pizza. Not the usual fancy dinner but just a great gluten free pizza! So I tried 3 dough recipes – one was a fail, one was very good and this one was AWESOME!! I made some changes such as using Cup for Cup since that was all I had and cooked at 430F instead of 500. Based on the pictures in the recipe my dough seemed much looser and sticky than what is shown. Likely due to using a different brand of flour. This crust had the right texture and chew that matched up to any pizzeria style dough. Can’t wait to play around this recipe to see what else we can make – bread sticks, foccacia, etc. Thanks so much Vanilla and Bean!!
Hi Kevan! Thank you for coming back, leaving a note and sharing your experience! What a wonderful gift to give your wife, and going the extra mile to try THREE pizza recipes. SO happy to hear you two enjoyed it! I’d love to hear if you give focaccia a go… keep in touch!
Can you recommend how I might use g-f sourdough starter instead of yeast for this recipe?
Hi Julie… I’m working on that, but haven’t created a recipe for it. If you experiment, please let us know what you learn!
Hi Julie! An update on GF Pizza! You can now find my GF SOURDOUGH Pizza Recipe on the blog. LMK if you give it a go!
I don’t have yeast since we can’t unfortunately find it anywhere. How do we make without it?
Hi Shweta! At this time I don’t have a solution.
Psyllium bothers my innards. Do you have any recommendations for a replacement?
Hi Lisa! Psyllium binds this bread together. Unfortunately I don’t have a sub.
I have used this recipe using chia seeds in place of psyllium. Works fine. I have also used 1 cup of gluten free sour dough discard with various flours and reduced water. Tastes great.
Hi Glenda! So happy to hear chia seeds worked for you and you’re enjoying that discard. Thank you for sharing!
I tried this recipe tonight – it was yummy but the dough stayed stuck to the parchement paper and it took quite a while to peel it off. Do you have any tips on this? Thanks!! :)
Hi Sim! Oh noooo… This is the first I’ve heard of this problem. I’m curious if you prepared the parchment by oiling it throughly before shaping the pizza on it? The pizza shouldn’t stick to the parchment if prepared this way.
I did oil it , but next time I’ll try putting more oil or using a silicon baking tray. Thanks for the suggestion!
After completely failing a simple pavlova recipe, I learned that I was using wax paper instead of parchment paper and they’re NOT the same thing. Once I started using parchment paper (DUH), I never had a problem with this dough sticking and it quickly became our to-go pizza crust.
Thank you! <3
Oh my gosh, Sim…. they are two very different things. So happy to hear you’re enjoying the pizza now!
Hi Tracy,
Im trying this out tonight as I have yet to succeed with gluten free pizza crust. I just noticed (as we’re in the middle of this glorious pandemic), I used regular active yeast instead of quick rise. I know with active yeast you’re required to proof it in water before mixing into the dry ingredients however, in my haste and inexperience, I mixed everything together in one bowl. I’m now waiting to see if this dough will turn out in an hour and a half since there’s so much water in it. Thoughts? If it doesn’t look good after an hour and a half, should I let it rise longer?
Thank you!
Hi Carolyn! Okay… this from Cooks Illustrated:”if the recipe calls for 1 teaspoon of instant yeast, use 1 1/4 teaspoons of active dry.” But no note on what to do if the dough is already mixed. I’m thinking you could let it rise longer, but how much I’m not sure. To speed it up, consider setting the bowl in the oven with the light on (be sure to cover it with a moist tea towel. But since the yeast wasn’t activated from the start, I’m afraid this may be an experiment. Please keep us posted (fingers crossed).
This is amazing! The best we have had. My family loved it. It took me a couple crust fails to realize you really mean keep your hands wet. I was afraid to have too much moisture but it Cooks out, be and the crusts turn out fabulous! I used parchment paper and because I’m a messy baker, I had too much extra paper around the edges on some of the crusts…paper scorched. Got to work fast due when it comes to baking, my sisters jumped in and we had an assembly line. My husband is thrilled, he has gluten sensitivity and I’m learning how to bake with the different flours…big challenge for me. I love BRM products, they make it easier for me. FYI….I definitely recommend the psylium husk powder for breads, I notice a difference. That is one reason I picked your recipe.
Hiii Julie! Thank you so much for your note, rating and sharing in Bob’s FB group! SO happy to hear you’re enjoying the recipe and have made it a family affair. Indeed, keep your hands wet! It’s like trying to shape mashed potatoes. Isn’t psyllium amazing in gf doughs?
Yes, psyllium is perfect for bread. I used it in a naan bread recipe, turned out great. My husband misses bread. He said this crust is this best crust he’s had.
FYI I am now making this every other weekend because my husband loves it so much. I’ve frozen it and baked it later. It works out nicely!
Hi Julie! Hooray! Love hearing this. So, you’re freezing the par-baked crust? Or do you bake it fully then add the toppings? Thank you for sharing your tips!
My favorite gfree crust so far! Crispy on the outside and soft on the inside. I measured the flour by weight. The only changes I made: 4tsp psyllium husk (I had whole husk and had to grind into a powder consistency), a whole packet of yeast, and I activated the yeast with a tsp of sugar and warm water before adding it into the rest of the mix. We live at high altitude, but I didn’t make any specific changes for that. Thank you for sharing this delicious recipe!
Hi JW! Thank you for your note and rating. So happy to hear you’re enjoying the recipe!
Recently went gluten free for health reasons. I was really craving a Friday night pizza and this recipe did not disappoint! I don’t think I cooked it long enough for the bottom to crisp up and was thinking I could either have turned the pre-baked crust over and cooked a few more minutes before adding the toppings? Or maybe because I baked another pizza right under it? Anyway, today I took one of the few leftover slices and crisped the bottom in a fry pan…HEAVEN…I will make this recipe from now on! Thank You!!!
Hi Amy! So happy to hear you’re enjoying pizza again! Hooray! Thank you for your note and rating. Feel free to play with the par bake time to crisp the crust to taste. But you don’t want to take it too far because you’ll bake it a second time after you top the pizza.
Best pizza dough recipe by far! I no longer miss GOOD pizza! Question: can you shape and par-bake a pizza crust and then freeze the par-baked crust? I’m looking for a quick way to make pizzas ahead of time for a party.
Thank you for your note, rating and kind words Kate! I have par-baked this pizza a few hours before topping and baking again and it worked, but the crust didn’t taste as ‘fresh’ (texture wise) as if you’d bake them just before. I didn’t freeze them rather, simply wrapped them in tea towels. If you attempt to freeze the par-baked crust, wrap tightly in a plastic bag or kitchen wrap (I wish there was an alternative to plastic, but in this case, tea towels wont work). Thaw at room temperature before piling on the toppings. If you do freeze the par-baked crust, please let us know your thoughts on trying it!
Wow! My dream come true! This was the best GF and Vegan pizza crust ever (and I have tried Many different recipes). My hubby now prefers this one over regular pizza crust and he is not gluten free! I did add a teaspoon of sugar for the yeast to feed on because it has been instilled in me that yeast must have some form of sugar to work. It was just so tasty, crispy and yet chewy! Thank you so much for this recipe!
Oh my gosh, Patricia! I loved reading your note! SO happy to hear that you and hubby enjoyed the recipe. My husband loves it too and he isn’t gluten free either – I was shocked he didn’t complain – lol! Thank you for coming back and leaving a note! :D
This crust is simply amazing.
I have tired so so many and this is a great surprise.
Will become my go to recipe.
OUTSTANDING!
Cannot tell you how wonderful it is to finally have a “normal” tasting
pizza crust.
Thank you.
Hi Paula! I’m SO happy to read your note. I was so excited to work through this recipe when I was on a GF trial.. and to be able to share it with you in this space, even better. Thank you for coming back and leaving a note. I’m happy to hear you’re enjoying pizza again! Hooray!
This recipe made the best gluten and egg free pizza crust I have ever had. Even my friends who don’t have any restrictions said that they wouldn’t be able to tell that it was gluten free. Thank you so much for a fantastic recipe!
Hi Deborah! Thank you for coming back and leaving a note! So happy to hear your enjoying the crust and sharing it! Day made!
Love the flavor of this crust! Definitely the best gluten free crust I have tried over the years. Only problem is, I believe the crust turned out a bit too moist inside? Sort of like mochi cake texture.. I even baked it an additional 10 minutes. The only thing I did differently was I used Kirkland Signature blanched almond flour, and Trader Joe’s psyllium husk powder (which isn’t as fine of a powder as yours looks in the photos). Any ideas?
Hii Deeni! Thank you for your note and sharing about your experience. I’m sorry to hear the recipe was a bit too moist inside. I can’t imagine that the almond flour and psyllium powder would make much of a difference (unless they were both not as fine as Bob’s – as you mentioned). The only things I can think of is maybe the oven wasn’t hot enough? Do you use an external oven thermometer? And also, maybe shape the pizzas a little thinner next time. I hope this helps!
This was our first attempt at a gluten free pizza, and it turned out AMAZING! The chew in the crust is real, and the taste and feel exceeded our expectations by a long shot. This is definitely going to be out go-to for gluten free pizza crust from now on. Thanks again Traci for developing such an awesome recipe!
Thank you so much for coming back and leaving a note AND sharing your pictures on Instagram! I loved seeing your process and hearing from you. I’m so happy to hear you’ve found your pizza crust! Hooray!
Hi Traci! Your recipe sounds amazing and the pizza looks sooo delicious, I can’t wait to try it! I live outside the US and have a few different kinds of flour blends at hand, but none of them have xanthan gum like in the one you use, though one of them already has psyllium. If I used this particular flour, should I add in xantham gum and lessen the amount of psyllium? Or if I used a flour blend without either, would adding an X amount of xantham gum suffice (and how much?), along with the 3 1/2 tsp of psyllium? Thank you so much, I’m looking forward to trying many of your recipes! :D
Hi Hanna! Thank you for your note and kind words… I appreciate your stopping by! I SO wish I could be confident in telling you to use any of the subs you described, but without testing the recipe myself, I just don’t know. If you feel like experimenting, I say go for it! This is such a good recipe and I think by tweaking the xanthum gum, it’ll be just fine. So, what I’d do is use the a flour blend that doesn’t have either and add both xanthum gum and psyllium. For the xanthum, go with about 1/4 tsp per cup of flour blend so you’ll add about 3/4 tsp of xanthum gum to this recipe. I hope this helps! Please let us know how it turns out for you Hanna!
Delicious and SO easy! I’ve tried quite a few GF pizza recipes and this one is by far the best, and the least time-consuming! My husband wasn’t too excited when I said I was making another GF pizza recipe for dinner last night, but he loved it! In fact, he almost ate all of it before I gently reminded him that he can eat regular pizza. The only modification I made was to bake it at 500F on convection bake.
Hi Sarah! Thank you for coming back and leaving a note – SO happy to hear you and your hubs are enjoying the pizza! My hubs was so pleasantly surprised too! Only having to make one pizza recipe is such a relief!
This looks delicious- cannot wait to try! Could you substitute psyllium with flaxseed meal or an egg?
Hi Taylor! Thank you for your note! I’ve not tried either of these two alternatives. The purpose of the psyllium husk is to mimic the elasticity and binding power of gluten, of which it does a fabulous job. It truly makes this gluten free crust special. An egg helps in binding, but does not produce the ‘chewy’ or elasticity that psyllium does. Same with flaxseed meal. I’ve not tried either in this recipe, but you could certainly give it a go! Please let us know if you give it a try! I hope this helps.
I’m fairly new to eating gluten-free, and after trying a couple of disappointing gf offerings from local pizzerias, I decided to make my own. Yours was the recipe that stood out to me as being the most familiar in terms of method – I’m a former bread baker – and after trying it, all I can say is thank you! It was amazing! My husband, who isn’t gluten free, couldn’t tell the difference. This new way of eating is going to be easier than I thought!
Hi Patricia! Thank you so much for coming back and leaving a note and rating… I’m so happy to hear you’re enjoying the pizza! You know, my mom has been visiting and she’s not gluten free either.. but said she looooves this crust! My hubs too. Isn’t it great that the method just works like a good ole’ regular crust (yeasted and sourdough) – this is the same baking method I use there too! Thank you again Patricia! I wish you well on your gf journey!
Is there anything to replace almond flour? My grandson is allergic to nuts.
Hi Nai nai! For this recipe to work, the high protein of almond flour is essential. If your grandson can have seeds, you could give sunflower seed meal a go, although I’ve not tried it. I hope this helps!
Hi, if I make this into smaller pizzas for kids how long should the par bake be?
Hi Tracy! I’ve not tried it, but I’ve seen a few snaps from the community on IG who did! Par baking smaller pizzas should be close to the same as a full size pizza. Just keep an eye on the minis. I’d take a peek around 10 minutes to see. They need to be just golden. Please let us know how it turns out for you! I hope this helps and y’all enjoy the pizzas!
This recipe looks amazing! I was just wondering if I could make and par bake the day before I’m actually making the pizzas?
Hi Kimberley! Thank you for your note and kind words! I have done this a few hours before baking pizzas and it worked, but they didn’t taste as ‘fresh’ (texture wise) as if you’d bake them just before. If you give it a go, wrap the par baked pizzas tightly in a plastic bag or kitchen wrap (I wish there was an alternative to plastic, but in this case, tea towels wont work). This will keep them freshest until ready to use. I hope you enjoy the recipe!
Thank you for the suggestion! I’m going to go ahead and do it right before so they are the freshest. Can’t wait!
can you substitute psyllium with extra flour?
Hi Tom! The psyllium pretty much helps binds everything together. It adds structure and texture too. It’s essential in this recipe. I hope this helps!
I was sure I’d done something wrong, because when I added the warm water to the dry ingredients, the consistency was more like ‘batter’ than the dough I anticipated. Thank goodness for your mashed potato mention, which pushed me forward. It took considerably longer for the ‘dough’ to rise at my house (6 hours). After rising, I’d describe the dough as a sticky and heavy whipped cream.
This recipe and crust is AMAZING! If you are GF try it, it’s not difficult at all.
Oh my goodness! So happy to hear you pushed through the recipe and it turned out to be the delicious, amazing crust that it is! Hooray! Sticky and heavy whipped cream sounds like a good description. That’s the thing with gluten free baking I’m finding… it still tastes so good, and things are different, we just gotta learn how they’re different and push through. It is such a learning curve! Thank you for coming back, leaving a note, and a smile Suzy! Hooray for delicious gluten free pizza! :D
I wanted to follow up too, on the six hour rise… I’ve made this so many times and have never experienced it taking that long before. It’s been reliable right at 90 minutes every time. Did you warm the water to 100F?
I’ve tried this recipe three times. First time exactly as written, using active dry yeast directly with dry ingredients, without proofing the yeast. The dough rested inside oven, covered by wet tea towel for 90 minutes. It didn’t rise at all. I baked the dough and it came out ok. 2nd time, I did all the same but proofed the yeast. Same result. The dough came out ok. What does the 90 minutes accomplish, other than resting the dough? Mine never rose but ended up ok.
Hi Thomas! Thank you for your note. I’m sorry to hear you’re having difficulty with the recipe. The dough should rise to 1 1/2 times its size (after mixing). So, it could take longer than 90 minutes to achieve the proper size. The time to rise is a guide rather than the rule.
Thaaank you Sheenam!