• Skip to primary navigation
  • Skip to main content
  • Skip to primary sidebar
  • Skip to footer
  • Home
  • Start Here
  • Recipes
    • Appetizers
    • Bread
      • Sourdough
      • Sourdough Discard Recipes
      • Gluten Free Sourdough
      • Gluten Free Sourdough Discard Recipes
    • Breakfast & Brunch
    • Condiments
    • Desserts
    • Drinks
    • Grab & Go Snacks
    • Main Dishes
    • Side Dishes
    • Recipe Search
    • Recipe Index
Vanilla And Bean

Vanilla And Bean

Sweet and Savory Vegetarian

  • Facebook
  • Instagram
  • Pinterest
  • Subscribe
  • Shop
  • About
    • Subscribe
    • A little bit about me…
    • Contact
You are here: Home / Recipes / Vegetarian Basics / Fluffy Stovetop Brown Rice (for Basmati, Jasmine & More!)

Fluffy Stovetop Brown Rice (for Basmati, Jasmine & More!)

No ratings yet
By Traci York — Updated March 30, 2026 — 2 Comments / Jump to Recipe
This post may contain affiliate links. Please read my affiliate policy.

Cook tender, fluffy and delicious brown rice without the worry of scorching, undercooking or overcooking. We’re cooking brown rice on the stove pasta style, and it’s ready in about 30 minutes. Whether you’re cooking jasmine, short grain, long grain or Basmati brown rice, this easy method creates perfectly cooked brown rice every time. 

Cooked and fluffed short grain brown rice in a Dutch oven with a wood spoon.

Brown Rice Cooked Pasta Style

If you’re looking for an easier method to cook perfect brown rice every time on the stove, coking brown rice like pasta is the way to do it. This method is quicker than the absorption method and scorched, mushy, under or over-cooked brown rice is thing of the past – it’s a win-win!

My brown rice cooking instructions offer an easy hands off approach that cooks up tender, fluffy, no fuss brown rice. You’ll have it memorized the first time you make it! 

Enjoy brown rice as a side dish or as a component in other recipes like in this reader favorite Spanish Brown Rice, my popular Roasted Fennel, Mushroom and Brown Rice Gratin and as a side in curry dishes like this cozy 35 Minute Chickpea Spinach Curry. 

This Recipe Is

  • tender with a perfect tooth
  • two ingredients
  • easy

Brown rice is a versatile pantry staple that, when cooked properly, is delicious with many dishes and in a variety of recipes. 

Four types of brown rice setting in piles on a marble table each labled: brown jasmine rice, short grain brown rice, long grain brown rice, basmati brown rice.

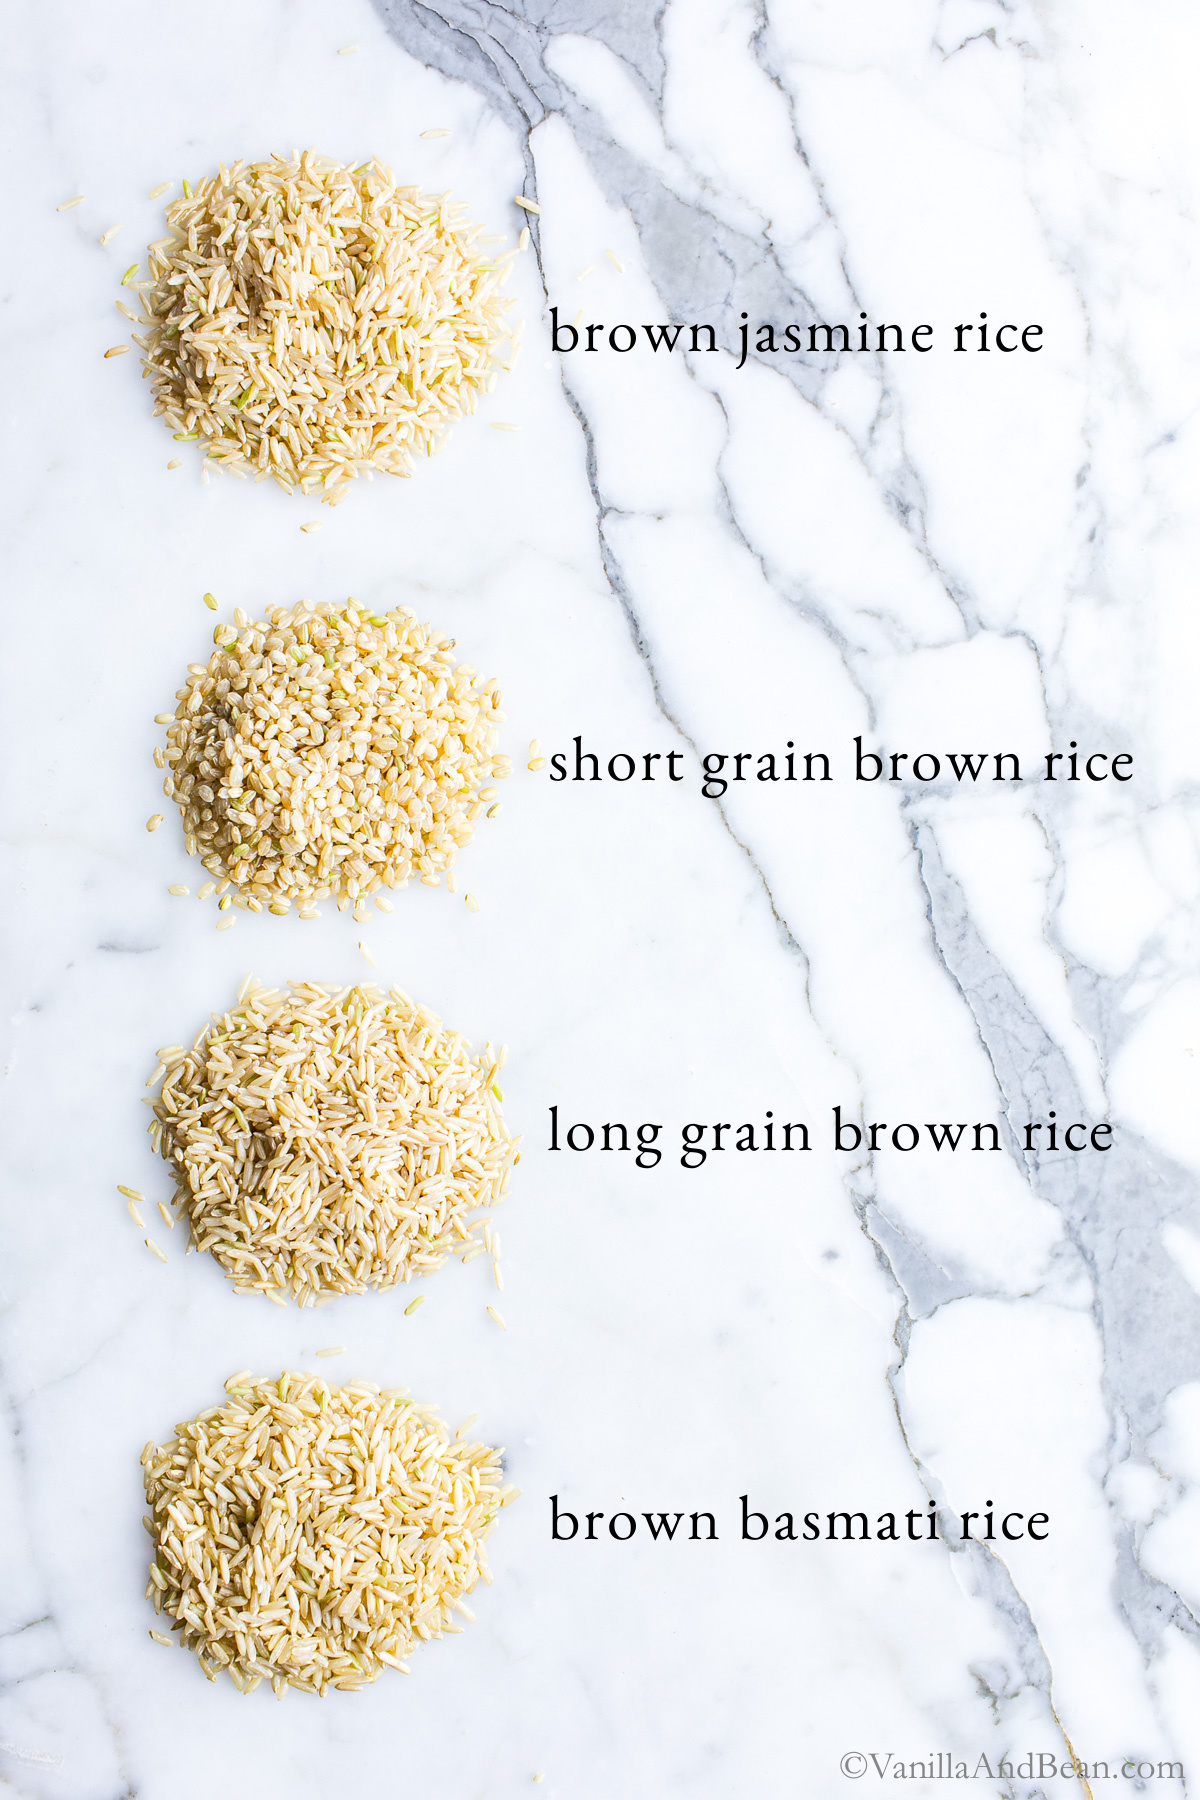
For this recipe, I tested cooking short grain, long grain, basmati and jasmine brown rice using the pasta method. I found how long to simmer brown rice is the same for all four varieties, 25-30 minutes.
 

_________________________

How to Cook Brown Rice On The Stovetop
step by step

Dry brown rice rinsed under running water in a sieve.
1. rinse the rice under running water.
Dutch oven with rice and boiling water on the stove top.
2. transfer the rice to boiling water & cook like pasta, for 25-30 minutes.

Brown Rice to Water Ratio

For cooking rice on the stovetop, I use a rice to water ratio of 1 to 8 or one cup rice to eight cups water.

I experimented with varying amounts of cooking water, less and more, with and without a lid and found eight cups to be the sweet spot without a lid for one cup of rice. Using too little water prevents the rice from cooking properly due to the loss of water in the form of steam. Using more than eight cups of water just isn’t necessary.

Draining brown rice through a fine strainer in the sink.
4. strain the rice. add it back to the cook pot & lid for 5 minutes off heat.
Brown rice in a Dutch oven just cooked fluffed with a fork.
5. fluff with a fork.
Long grain brown rice in a bowl with a spoon

Traci’s Tips

  • Taste for Rediness: at the 25 minute mark, taste your rice. If the texture is to your liking, it’s time to drain it. If not quite there, give the rice a few more minutes of simmer time, then test again. 
  • For Faster Cooking: I also tested cooking brown rice using the same method, but soaking it in water in the refrigerator for six to eight hours prior to cooking. Soaking reduced the cook time, using the pasta method, by 5-10 minutes. If soaking, drain, rinse then cook the brown rice, pasta style for 15-20 minutes. 
Brown rice in a Dutch oven just cooked fluffed with a fork.
Save Recipe Saved! Print Recipe

Fluffy Stovetop Brown Rice (for Basmati, Jasmine & More!)

Prep Time:5 minutes minutes
Cook Time:25 minutes minutes
Inactive Time:5 minutes minutes
Total Time:35 minutes minutes
Servings:6 1/2 cup servings
Calories:115kcal
Author:Traci York
Cook tender, fluffy and delicious brown rice without the worry of scorching or undercooking. We're cooking brown rice on the stovetop pasta style, and it's ready in about 30 minutes. Whether you're cooking jasmine, short grain, long grain or Basmati brown rice, this easy cooking method creates perfectly cooked brown rice every time. 
*Note* one cup of dry brown rice yields approximately 3 cups (385 grams) cooked brown rice.
(keep screen awake)

Ingredients

  • 8 cups (1.69Kg) Water
  • 1/4 teaspoon Fine Sea Salt optional
  • 1 cup Long Grain (175 grams), Short Grain (175 grams), Jasmine (165 grams) or Basmati (165 grams) Brown Rice (not the quick cooking variety)

Instructions

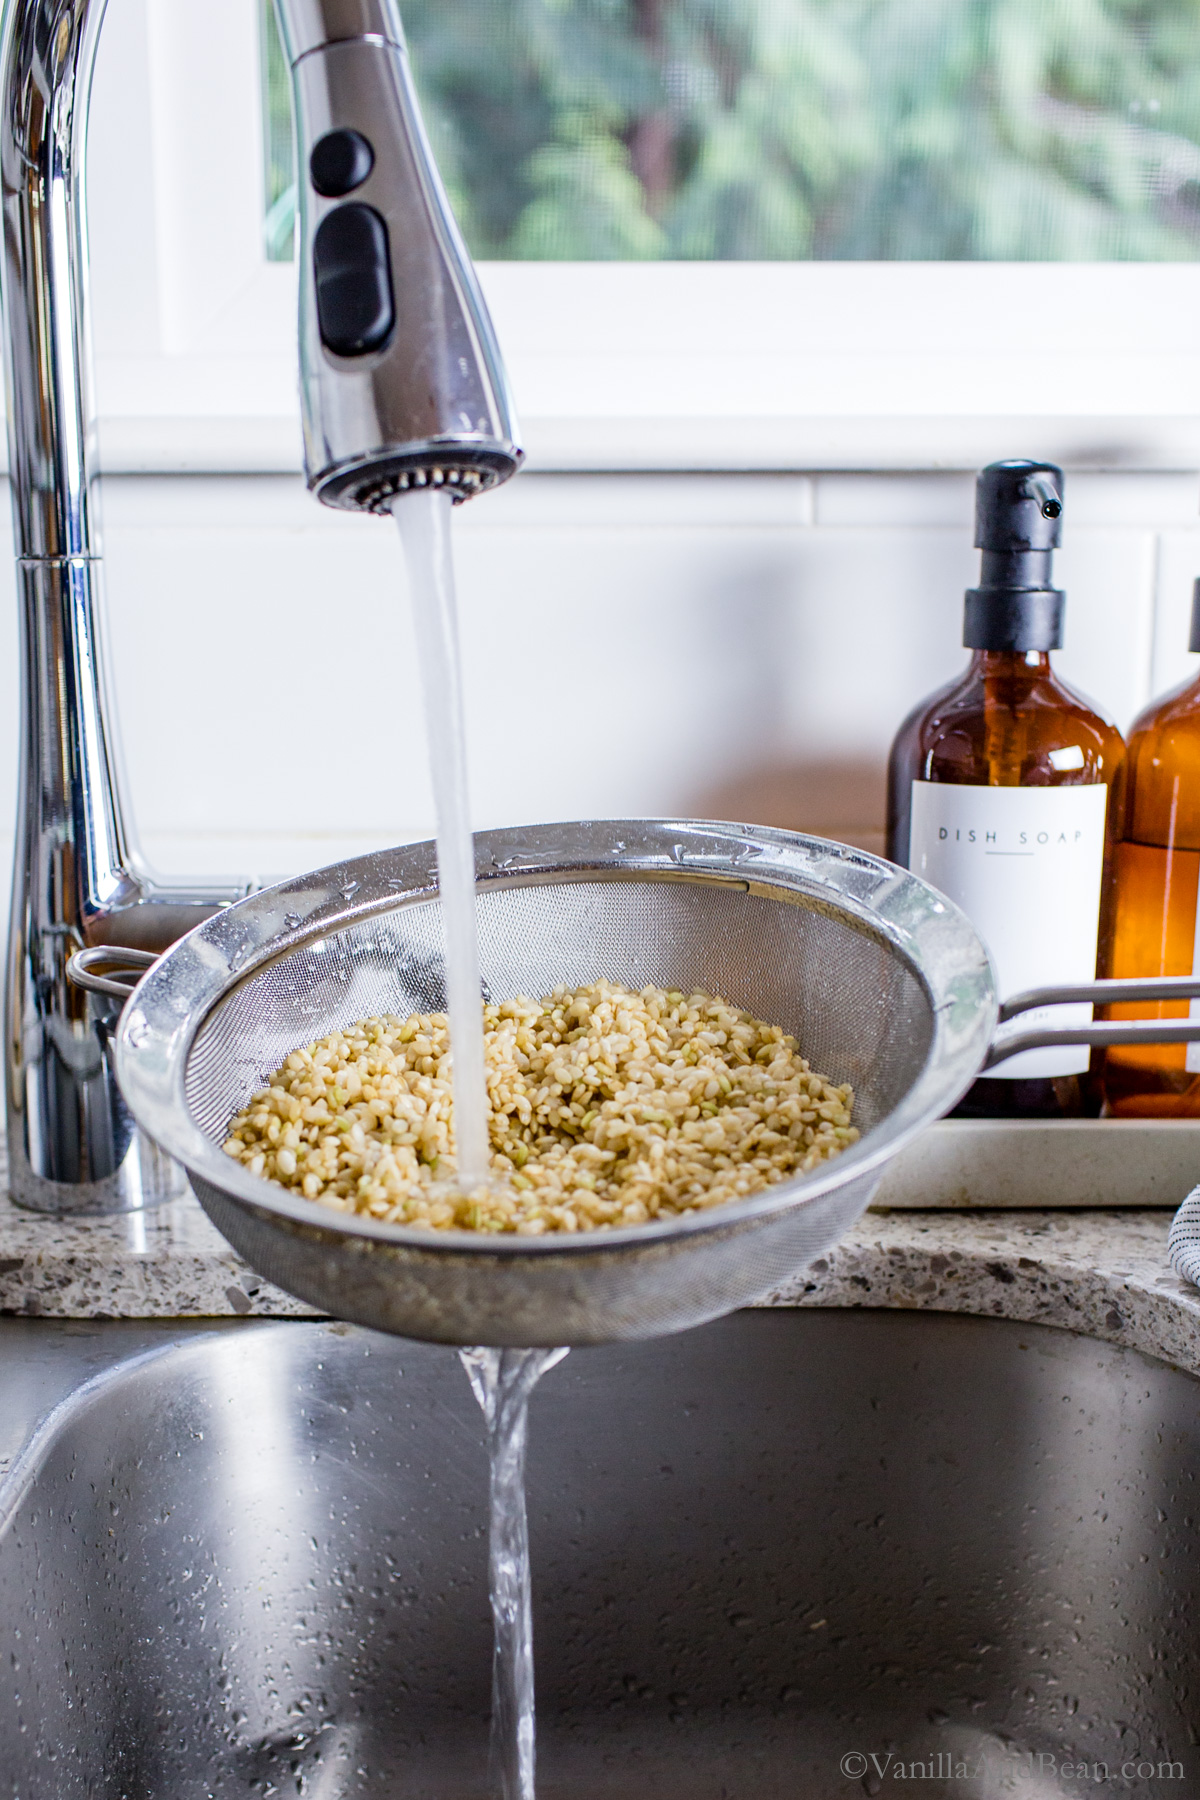
  • In a 2.75 quart Dutch oven or sauce pan, add the water and salt if using. Bring the water to a boil. Meanwhile, rinse the rice in a fine mesh strainer under cold running water for about 20-30 seconds. Drain and set aside.
  • Once the water is boiling, drop the rice in, turn the heat down just a touch and and cook on a heavy simmer – to boiling for 25-30 minutes, adjusting the heat so it doesn't boil over. Set a timer for 25 minutes, then, start checking to see if your rice is done starting at 25ish minutes.
    Too much texture? Cook for another minute or two, then check again. It can go from almost done to done quick, so check often. I find about 27 minutes to be the sweet spot.
    The rice is done when it's tender, has a slight chew to it, not mushy.
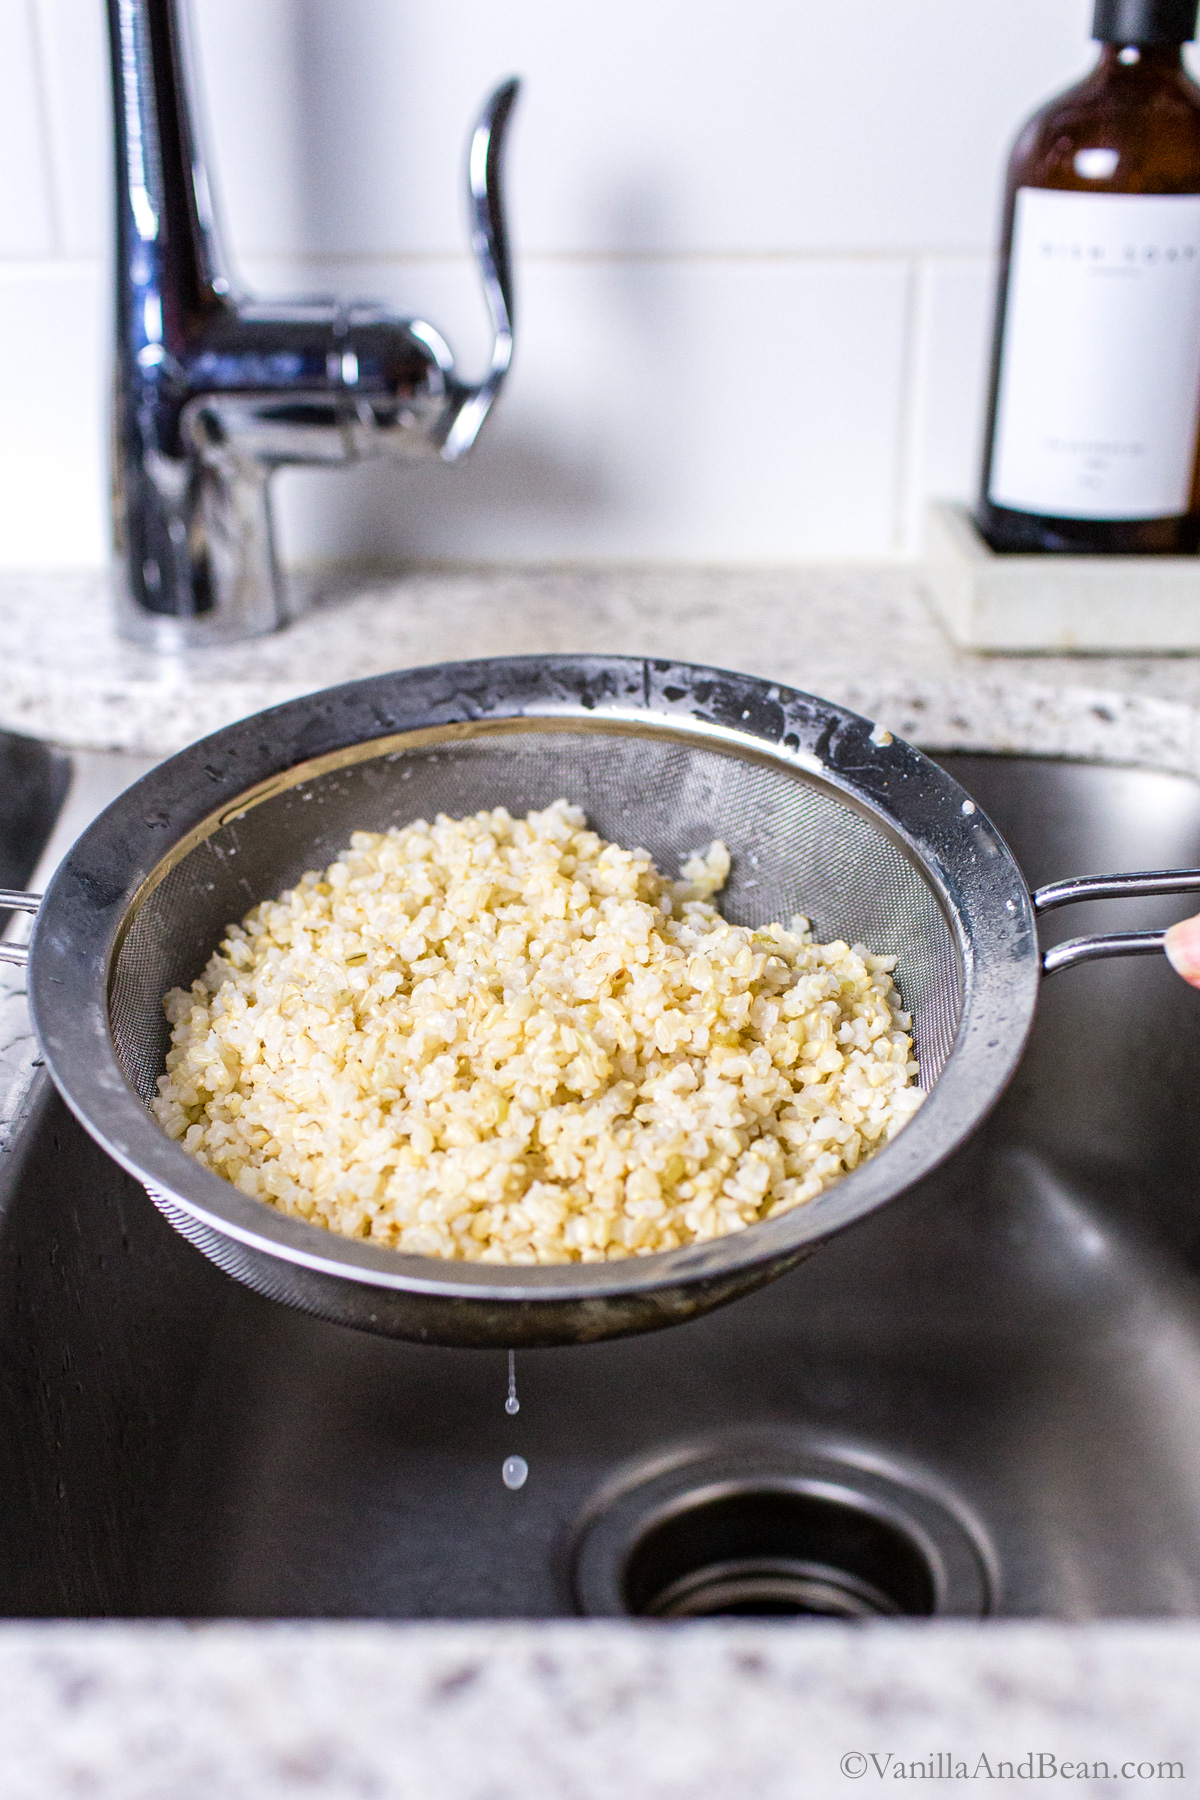
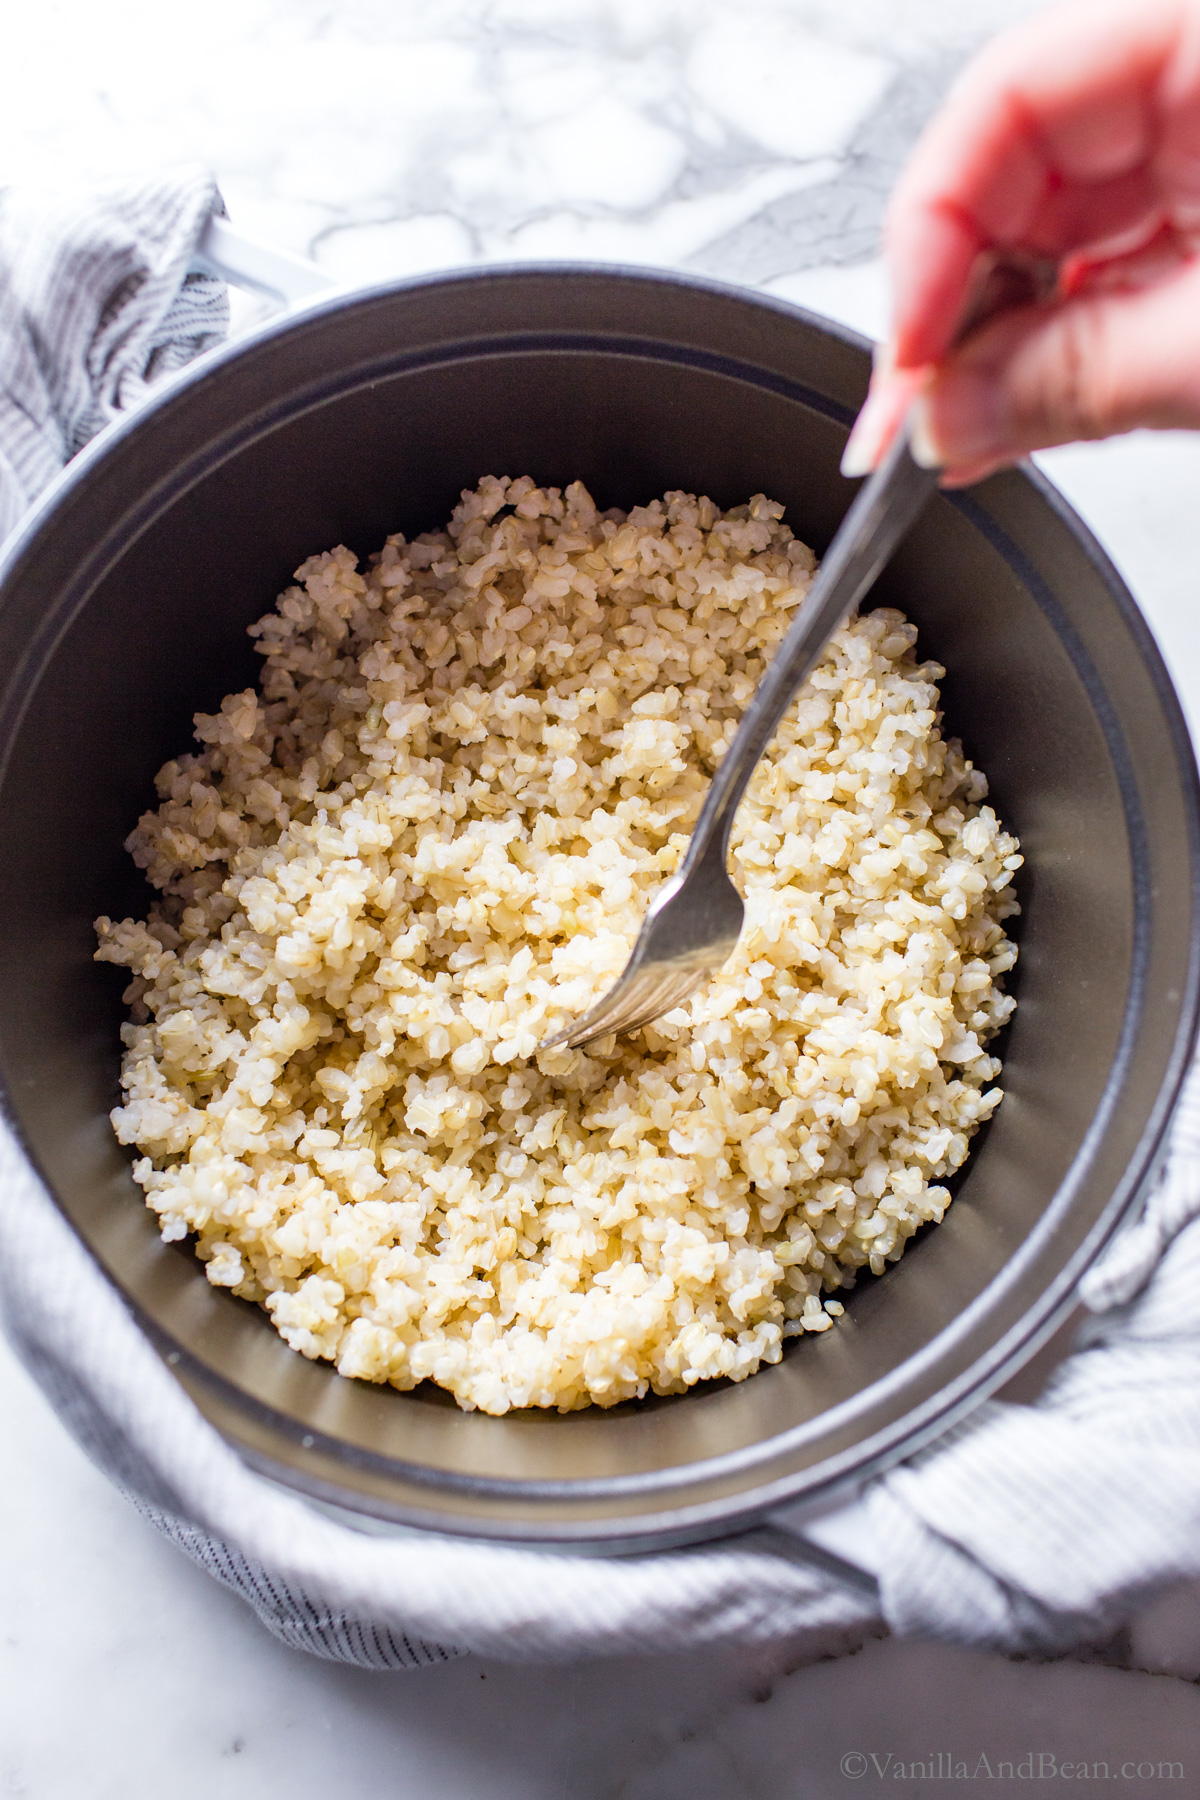
  • Drain throughly, through the mesh strainer until there's no water dripping from it. Make sure your pot doesn't have any water left in it, then transfer the rice back to the pot. Lid and set aside off the heat to steam for five minutes. Remove the lid and fluff with a fork. Your rice is ready to enjoy.
  • To Store: allow to cool, transfer to a storage container, lid and store in the refrigerator for up to three days.

Notes

I tested this recipe with Lundburg Farms brand brown rice and also my local Co-Op’s bulk bins brown rice.  
This recipe is inspired by Samin Nosrat’s (Salt Fat Acid Heat) and Mollie Katzen’s (The Heart of the Plate) cook rice like pasta method. 
Nutrition is provided as a courtesy and is an estimate. If this information is important to you, please have it verified independently.
Serving: 66grams (1/2 cup) | Calories: 115kcal | Carbohydrates: 24g | Protein: 2g | Fat: 1g | Saturated Fat: 0.2g | Polyunsaturated Fat: 0.3g | Monounsaturated Fat: 0.3g | Sodium: 114mg | Potassium: 85mg | Fiber: 1g | Calcium: 20mg | Iron: 1mg
Made It? Leave a comment below! The most helpful comment may include recipe rating, feedback, any modifications and/or helping other commenters. On Instagram? Take a snap of your make and share, tagging @VanillaAndBean #VanillaAndBean!

You might also like:

Refried Black Beans in a bowl garnished with lime, cilantro and fresh cheese.

Vegetarian Refried Black Beans

Closeup of crockpot pinto beans.

Crock Pot Pinto Beans

Cooked chickpeas in a Mason jar.

3 Ways to Cook Dried Chickpeas Perfectly

Two bottles of homemade cashew milk.

5 Minute Homemade Cashew Milk Recipe

  • Dutch Oven
Shares88PinShareEmail

Sign up for the Vanilla And Bean newsletter and get my Five Secrets to Vegetarian Cooking email series delivered to your inbox!

You will receive recipes and kitchen tips, along with information about our partners and offerings. For more details, review the Vanilla And Bean privacy policy.
Previous Post: « Buttery Sourdough Discard Cornbread
Next Post: Perfectly Steamed Hard-Boiled Eggs (Easy to Peel!) »

Reader Interactions

2 comments

    Leave a Comment & Rate this Recipe Cancel reply

    If you love this recipe, please consider leaving a star rating when commenting below. Star ratings play an important role in helping others in the online community discover and enjoy my recipes. I appreciate your support!

    Your email address will not be published. Required fields are marked *

    Recipe Rating


    This site uses Akismet to reduce spam. Learn how your comment data is processed.

  1. Avatar for SueSue

    March 28, 2026 at 4:21 pm

    I usually make more than 1 cup- would you do double or triple the water if I doubled or tripled the rice? 2C rice/16c water, 3C rice/24C water?

    Reply
    • Avatar for Traci YorkTraci York

      March 28, 2026 at 10:14 pm

      Hi Sue! That’s a good question. The most I’ve cooked in 8 cups of water is 1 1/2 cups of rice, and, while it worked, the water reduced so much I’d probably add another cup of water if I do it again. I assume doubling the recipe would work just fine, but I’m not sure if you’d actually need that much water. Without testing, I can’t say for sure.

      Reply

Primary Sidebar

well hello!

Traci in front of a barn.

I’m Traci and this is my blog. So Glad You Stopped By!

Here you’ll find full of flavor vegetarian comfort food with vegan and gluten free recipes too. I also share sourdough, sweets and naturally sweetened baked goods and desserts recipes because we all gotta have a little balance!

Learn More About Traci  or  The Blog.

Search

Start Here!

Why vegetarian, what you’ll find on Vanilla And Bean and fan favorites all right here!

Right this Way to Start

Footer

Affiliate Info

Vanilla And Bean is monetized in part through the use of affiliate links. As an Amazon Associate I earn from qualifying purchases. This means that if you click on a link and/or purchase an item after clicking on a link, Vanilla And Bean may receive a percentage of the sales price. I only recommend products that I love and use through my affiliate links. To learn more please see my Affiliate Policy. Thank you for your support!

© Vanilla And Bean, LLC  – 2026. Unauthorized use and/or duplication of any content or images without express and written permission from this blog’s owner is prohibited. Licensing inquiries for publication, general distribution, and/or commercial use, please contact me on my contact page.

Copyright © 2026 · Vanilla and Bean · Website by Meyne

Menu

Home · Recipes · Web Stories · Contact · Editorial Policy · Privacy Policy · Terms of Use · Accessibility · California Privacy Notice

Copyright © 2026 · Vanilla and Bean On Genesis Framework · Log in

  • Home
  • Start Here
  • Recipes
    ▼
    • Recipe Search
    • Recipe Index
    • Appetizers
    • Bread
      ▼
      • Sourdough
    • Breakfast & Brunch
    • Condiments
    • Desserts
    • Drinks
    • Grab & Go Snacks
    • Main Dish
    • Side Dishes
  • Shop
  • About
    ▼
    • Contact
    • A little bit about me…
    • Let’s Work Together
    • Blogger Resources
  • Subscribe to Newsletter!
  • Search

Rate This Recipe

Your vote:


A rating is required
A name is required
An email is required