• Skip to primary navigation
  • Skip to main content
  • Skip to primary sidebar
  • Skip to footer
  • Home
  • Start Here
  • Recipes
    • Appetizers
    • Bread
      • Sourdough
      • Sourdough Discard Recipes
      • Gluten Free Sourdough
      • Gluten Free Sourdough Discard Recipes
    • Breakfast & Brunch
    • Condiments
    • Desserts
    • Drinks
    • Grab & Go Snacks
    • Main Dishes
    • Side Dishes
    • Recipe Search
    • Recipe Index
Vanilla And Bean

Vanilla And Bean

Sweet and Savory Vegetarian

  • Facebook
  • Instagram
  • Pinterest
  • Subscribe
  • Shop
  • About
    • Subscribe
    • A little bit about me…
    • Contact
You are here: Home / Recipes / Bread / Sourdough / Soft Overnight Sourdough Dinner Rolls

Soft Overnight Sourdough Dinner Rolls

4.9 stars (from 12 ratings)
By Traci York — Updated December 9, 2025 — 25 Comments / Jump to Recipe
This post may contain affiliate links. Please read my affiliate policy.

Learn how to bake soft, pull-apart sourdough dinner rolls with starter at home by following this tried and tested homemade recipe! The dough for the rolls is spiked with whole wheat flour and a bit of oil to make them extra soft. You’ll use an active, doubled-in-size Sourdough Bread Starter for the fluffiest rolls!

Easy-to-follow photo and video guidance provided below, plus instructions for baking the rolls in either a 10 inch skillet or small sheet pan. This recipe is vegetarian and vegan friendly.
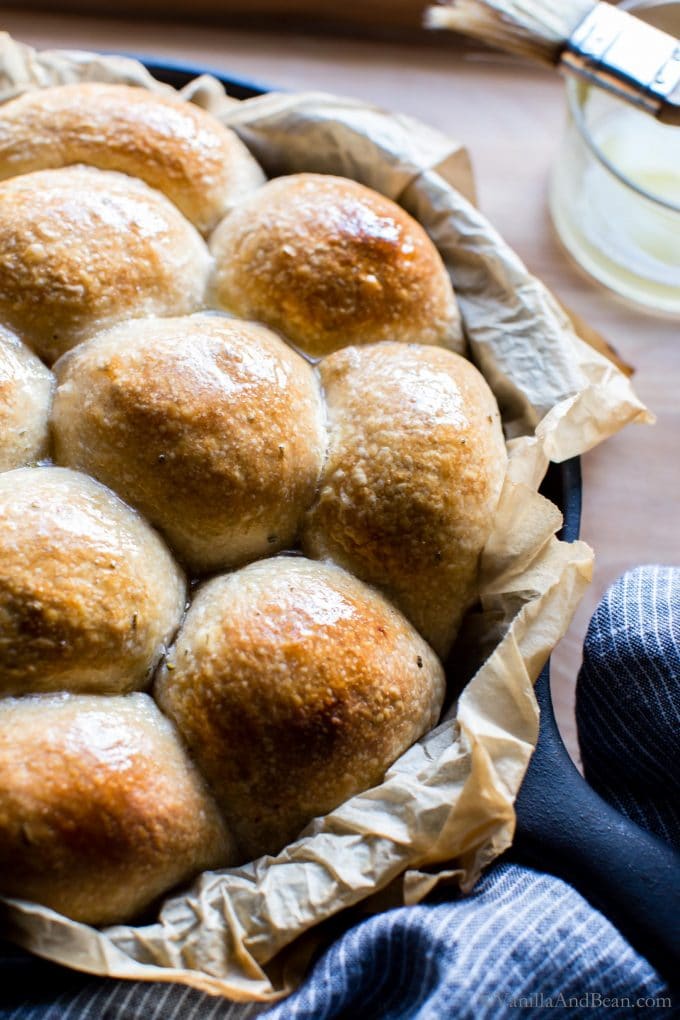
⭐️⭐️⭐️⭐️⭐️ Review: “These were a huge hit with my family. Your detailed instructions really helped a lot …” ~ Marina

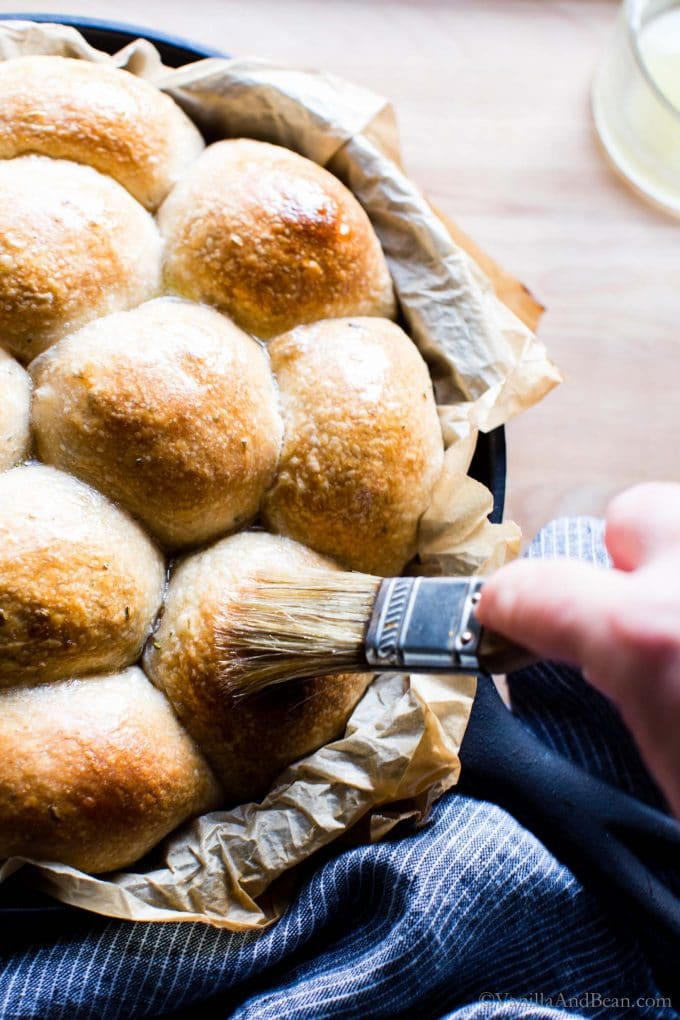
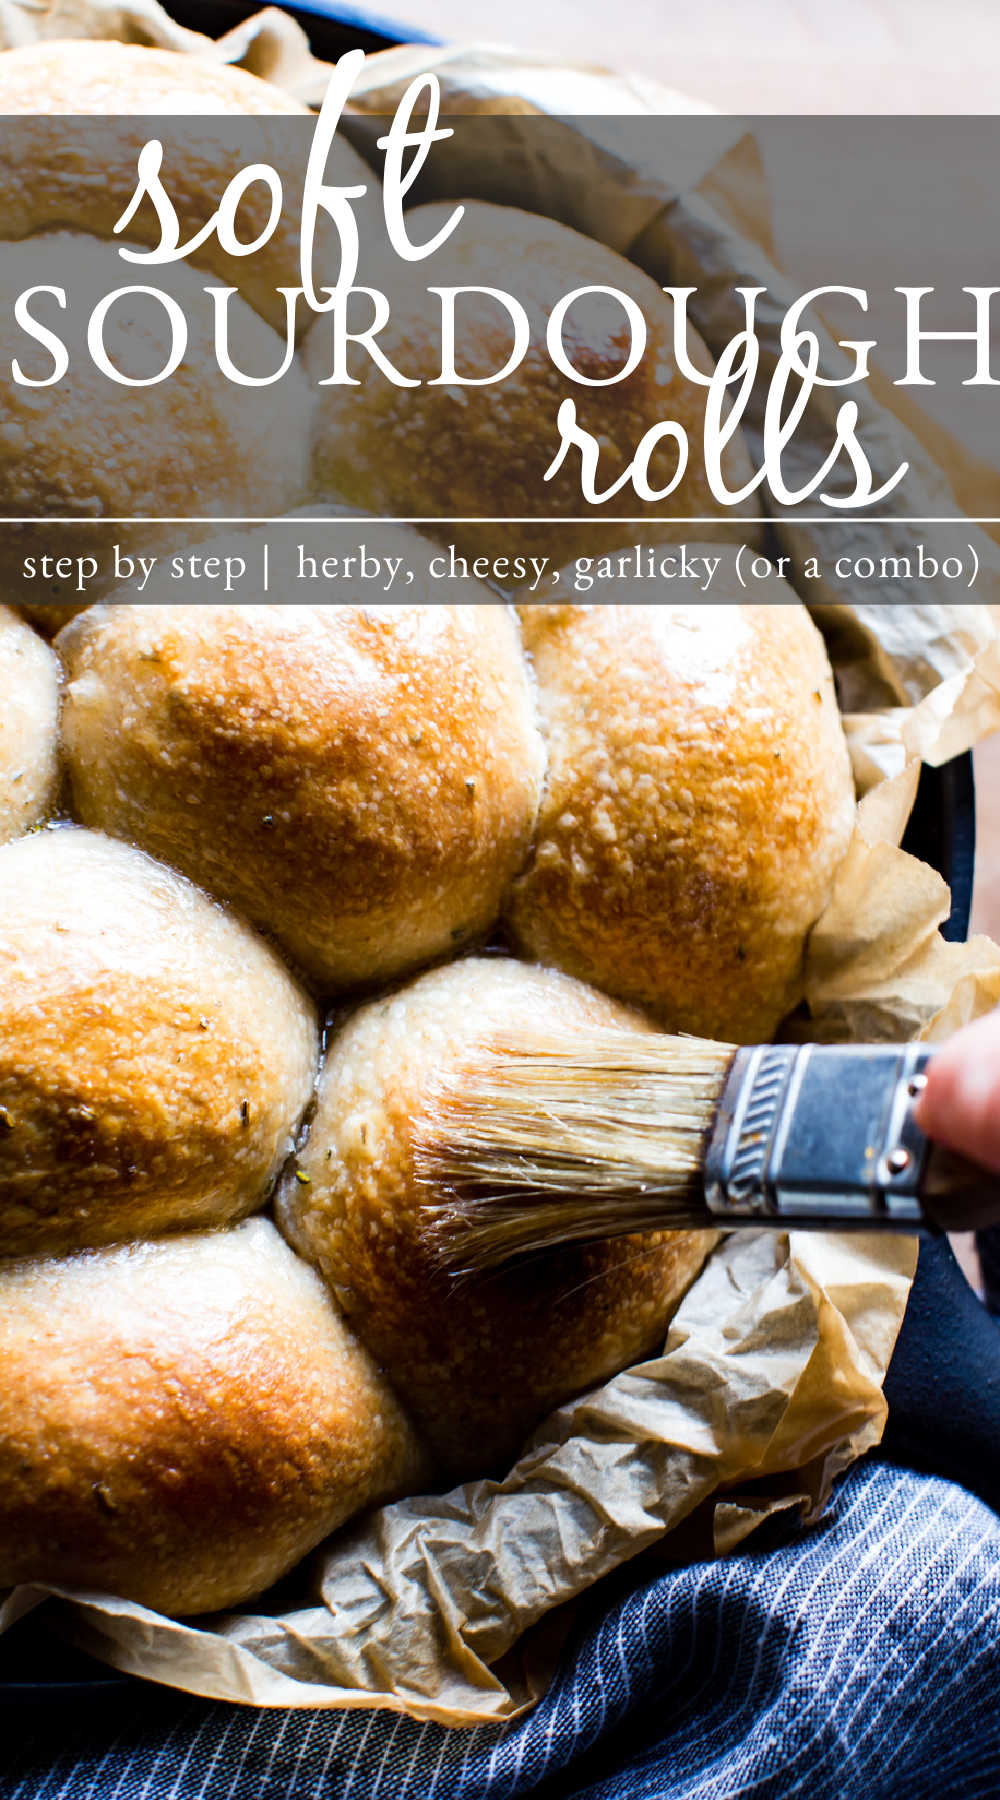
Sourdough dinner rolls brushed with butter.

Sourdough Rolls Recipe: Soft and So Fragrant

If you make Homemade Sourdough Recipes, you will enjoy these simple-to-make sourdough dinner rolls. These rolls are made with a touch of whole wheat flour for a bump of whole grains and nutty flavor, and olive oil to help create the softest, pull-apart rolls.

When I went to Pastry School, Chef always had us add a little something extra to dinner rolls. And so, for this recipe, I’m including optional add-ins to take these fluffy dinner rolls over the top, including your choice of roasted garlic (a must!), herbs like rosemary, thyme, sage, and chives, and last but not least, Parmesan! 

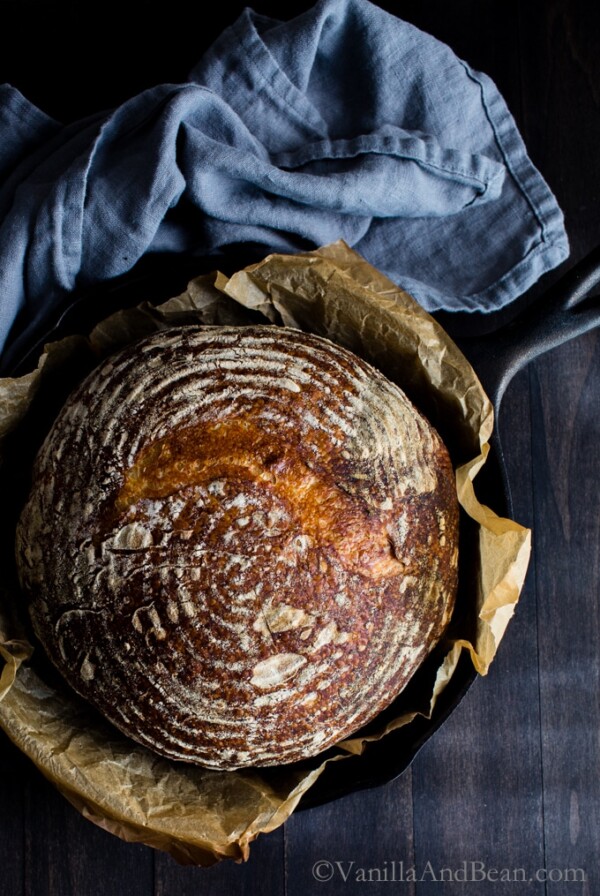
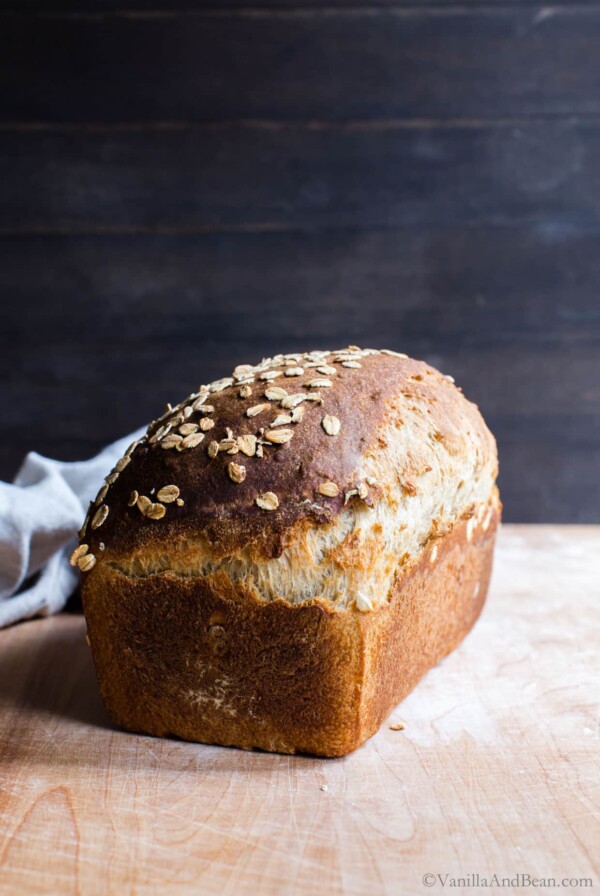
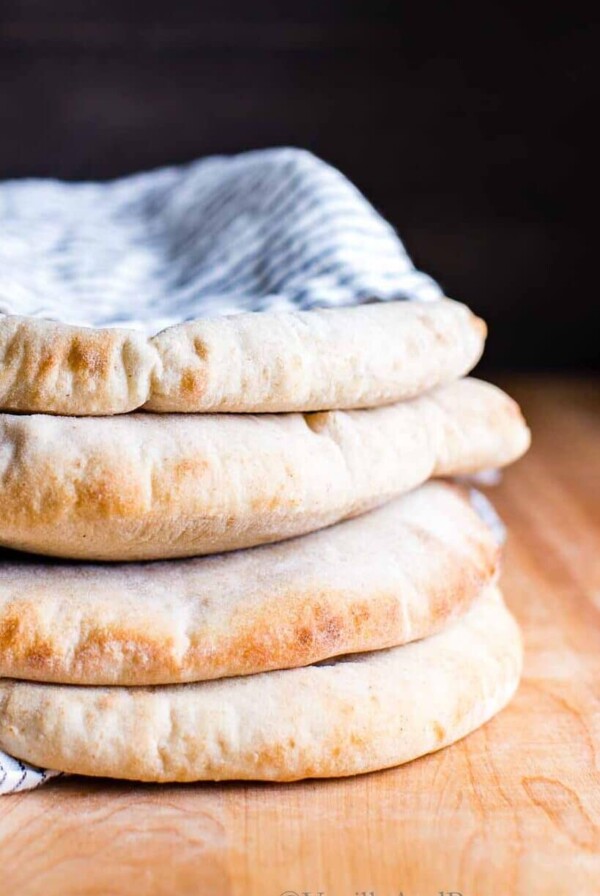
Just like my Multigrain Sourdough Bread and Sourdough Pita Bread with a little planning, these hearty yet soft sourdough rolls are simple to make. Best of all, they can be pulled out of the oven just before sharing the main course. But just in case, baked rolls can be frozen, thawed, and rewarmed as needed. 

About the Key Ingredients

  • Ripe Sourdough Starter – use a 100% hydration, previously fed, bubbly and doubled in size sourdough bread starter. This is the natural, wild yeast, levener that will flavor and raise your bread.
  • Unbleached Bread Flour – bread flour creates a lofty rise and sturdy structure. I use Organic King Authur Bread Flour. 
  • Whole Wheat Flour – offers earthy flavor and softens the texture of the bread. Use stone ground whole wheat for best flavor. If you can find whole wheat bread flour, use it. Otherwise, I use Organic Stone Ground Whole Wheat Flour.  

Optional Inclusions

Add one or more inclusions to customize these delicious whole wheat sourdough rolls:

  • Roasted Garlic: if there’s only one thing you add to these fluffy sourdough dinner rolls, let it be roasted garlic. It adds an earthy, mellow flavor and takes these buns to extraordinary!
  • Fresh Herbs: add flavor and interest. You can customize with your favorite, or use multiple herbs for a personalized approach. Enjoy with chives, rosemary, thyme and/or sage.
  • Grated Parmesan Cheese: alone, it’s fabulous. But pair it with herbs and/or roasted garlic and these homemade dinner rolls become gourmet!

____________________

How to Make Homemade Sourdough Dinner Rolls
step by step

You’ll start with a fluffy, doubled-in-size sourdough starter. I have an Easy Sourdough Starter tutorial if needed. Feed your starter the day before you plan to make the rolls. You can store it at room temperature or in the refrigerator. In the refrigerator, the starter rises slowly. Refrigerator storage offers a longer window of peak time to mix the sourdough rolls.
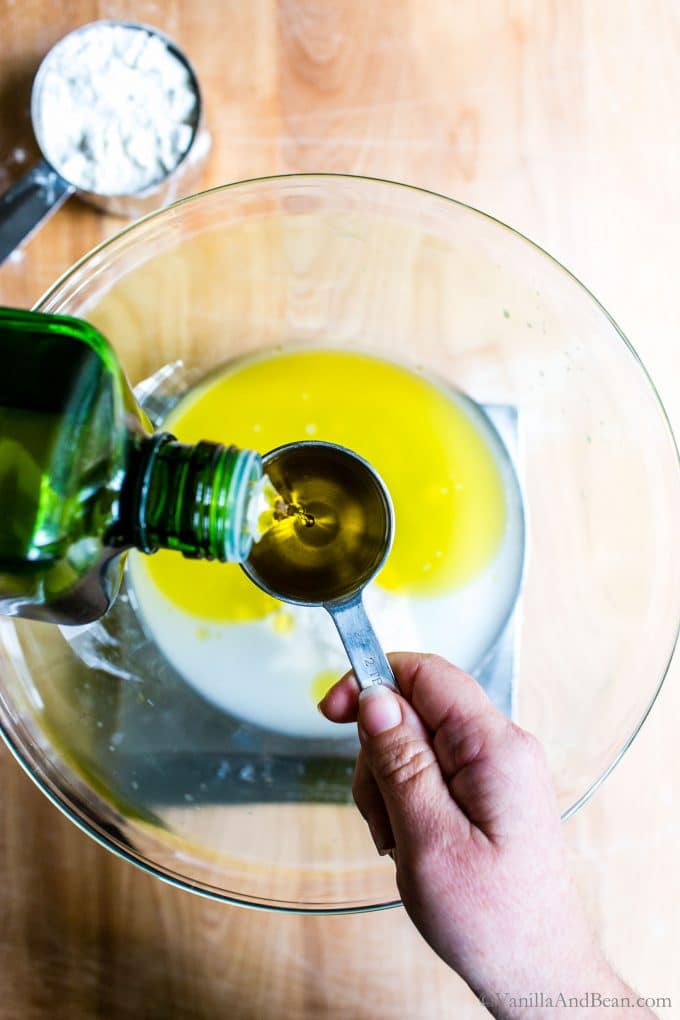
Pouring olive oil into a measuring spoon.
1. in a large mixing bowl, add the sourdough starter, water and olive oil.
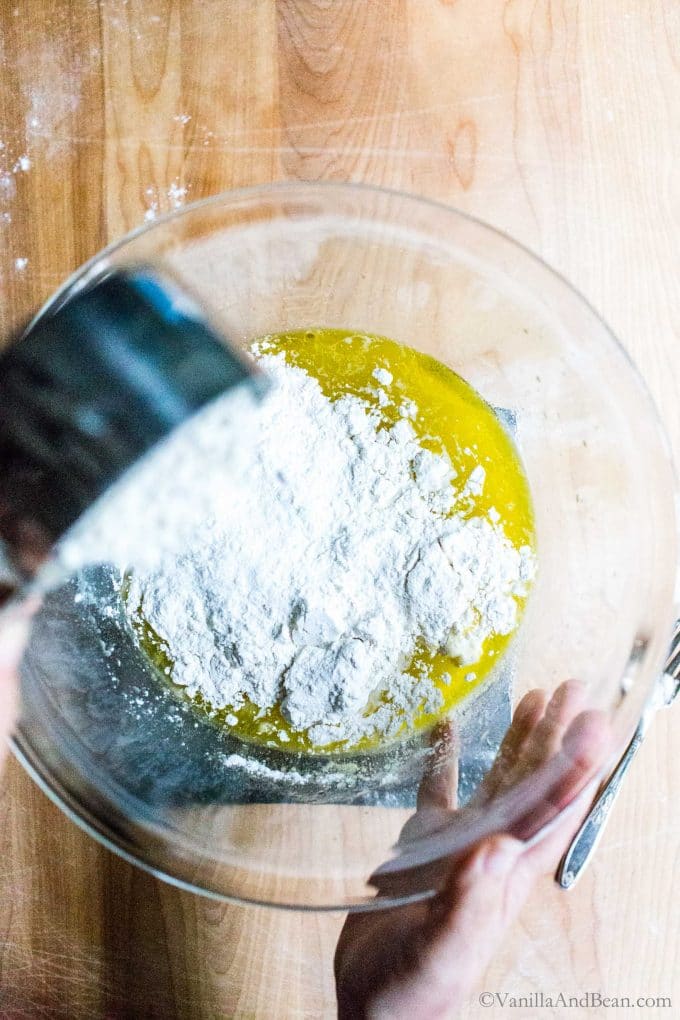
Transferring flour to a bowl while making Sourdough Rolls.
2. add the bread flour, whole wheat flour and salt.
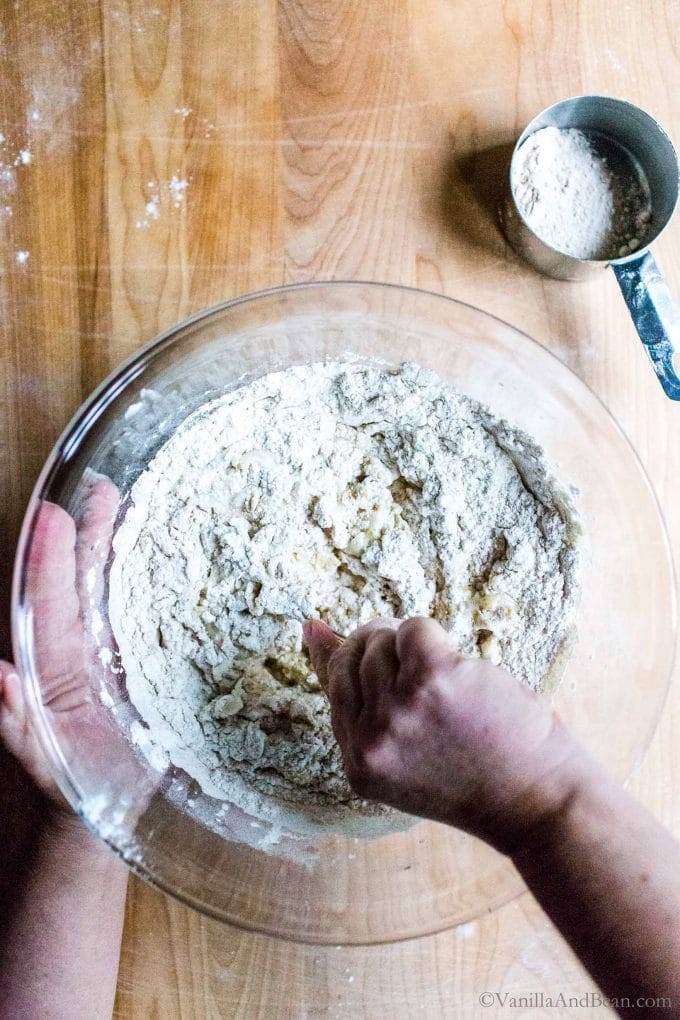
Mixing the sourdough for Sourdough Bread Rolls.
3. mix until a dough forms.
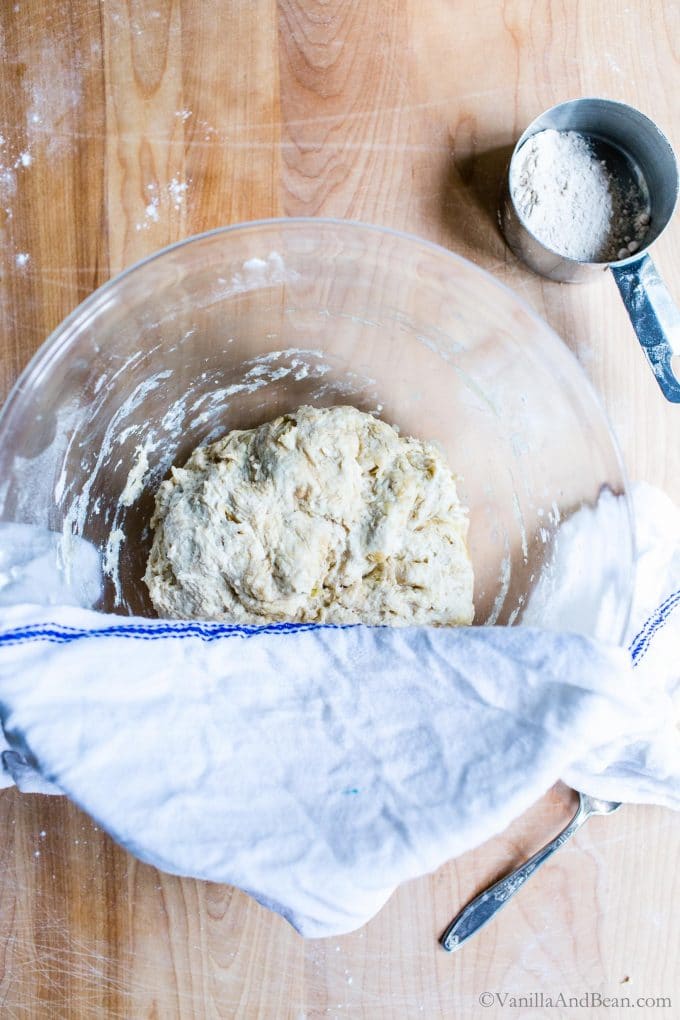
Homemade Sourdough Dinner Rolls Dough.
4. cover and rest for at least 45 minutes.

While roasted garlic is optional in these sourdough rolls, I highly recommend it. Roasting garlic is simple to do, but takes about 40 minutes to roast, then, about 20 minutes to cool.
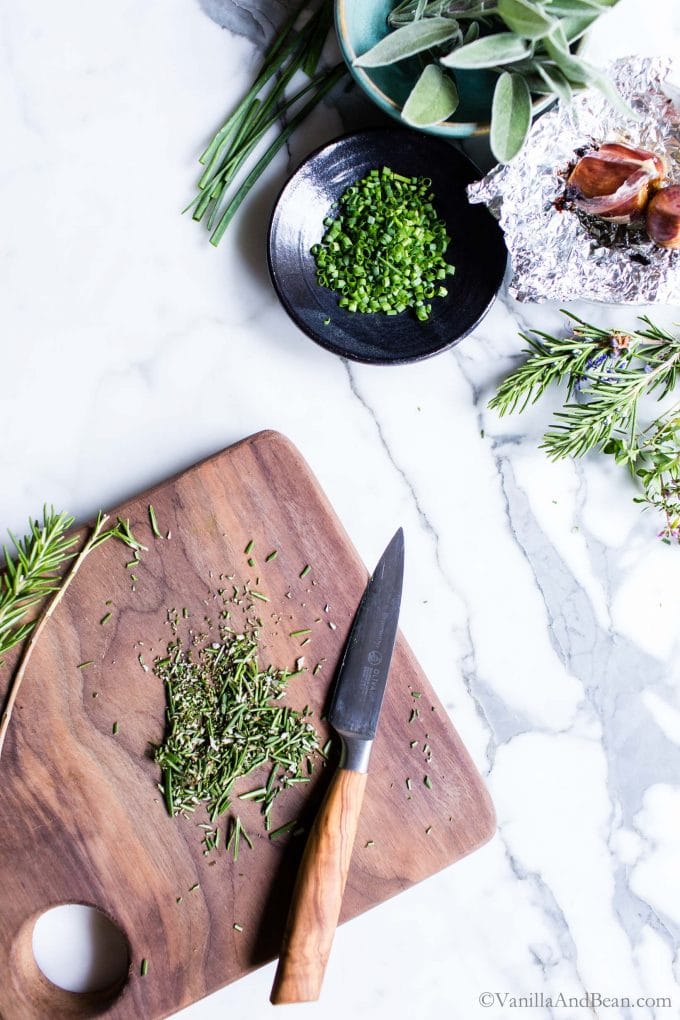
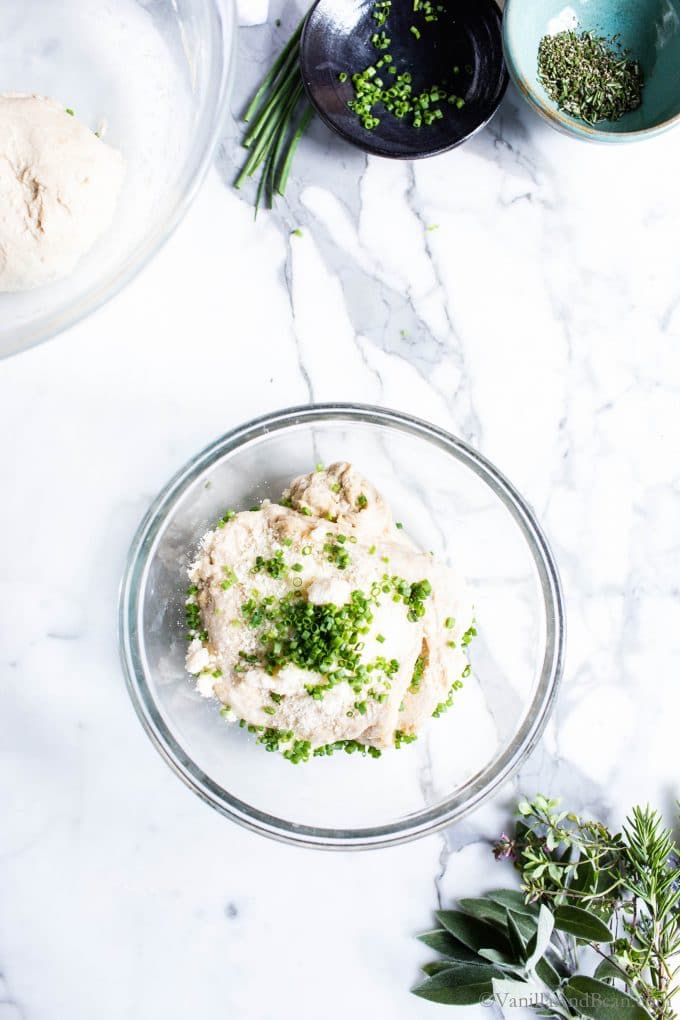
Chopping herbs for sourdough bread rolls.
5. chop herbs of choice.
Adding herbs to the sourdough rolls dough.
6. fold the herbs into the dough.
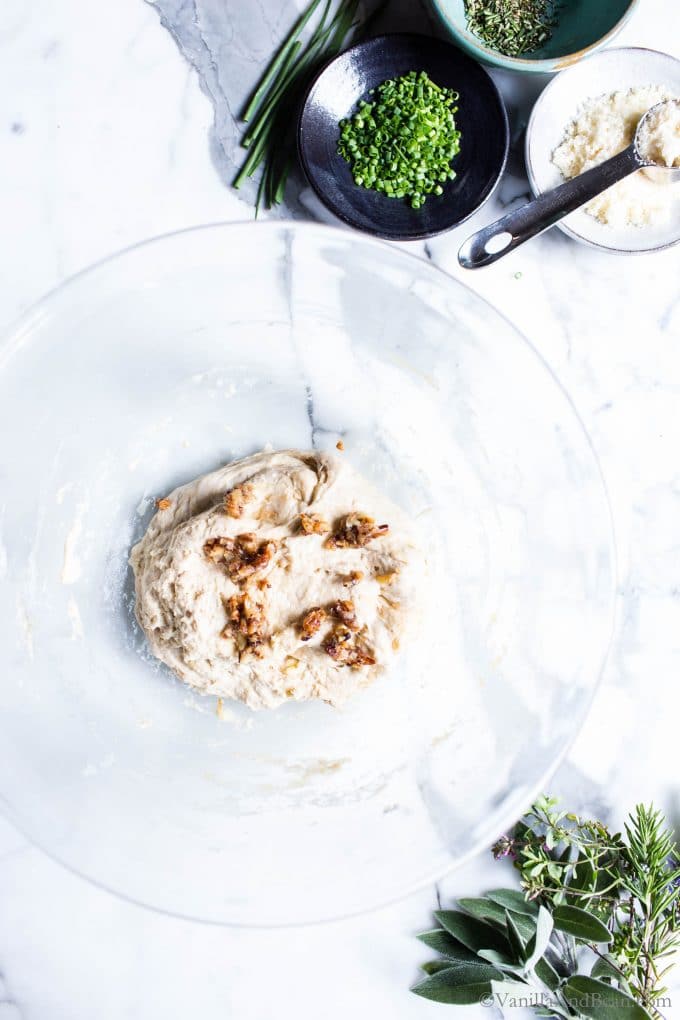
Adding roasted garlic to sourdough.
7. and/or, add roasted garlic.
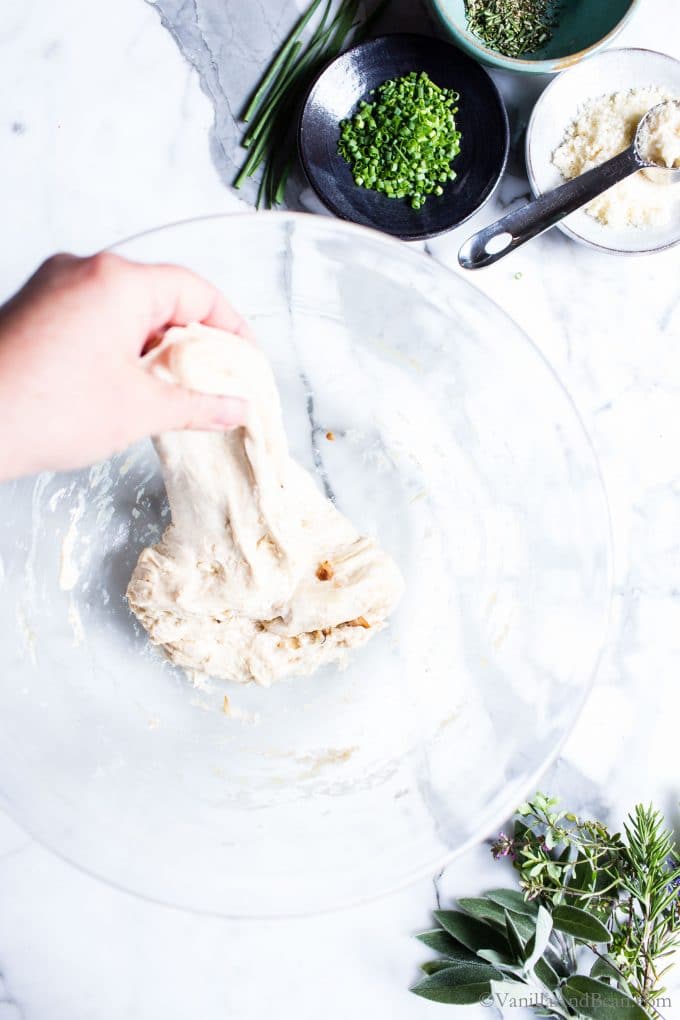
Stretching and folding the sourdough with roasted garlic.
8. fold it into the dough.

Sourdough Rolls on Your Schedule

Timing sourdough rolls just right so they’re coming out of the oven just before sharing dinner is easy; it just takes a bit of planning. Note that this timeline is in a 68F kitchen, so depending on ambient temperature, timing will vary. Here are two example schedules:

Refrigerator Proof

I prefer this method because it’s more flexible about when you can bake. Bulk ferment overnight at room temperature, shape the next morning, then proof in the refrigerator. The rolls can hang in the refrigerator 8-12 hours, until you’re ready to bake.

Room Temperature Proof

Because this dough tends to be slow, especially in winter, room temperature proof has proven more risky for me, especially when coordinating with dinner. But it is an option.

You’ll bulk ferment at room temperature, then move the dough to the refrigerator overnight. Pull from the fridge, then finish bulk at room temperature (about 8-10 hours), or until the dough doubles in size. Divide and shape the dough, then proof at room temperature for about an hour.

Whenever you want to create an warmer environment to proof your rolls, the covered dough can be put inside a turned-off oven with the light turned on. This will get the yeast moving!

Dividing the sourdough on aboard.
9. bulk ferment overnight until dough as doubled in size. divide the dough…
Weighing the sourdough rolls.
…into 12 pieces.
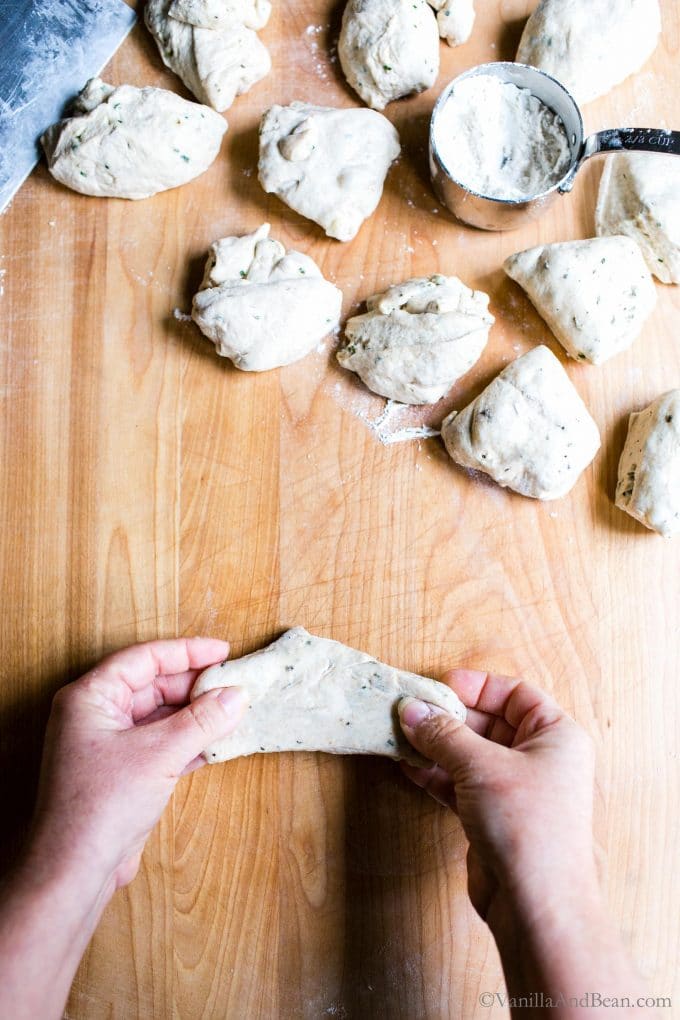
Shaping sourdough dinner rolls.
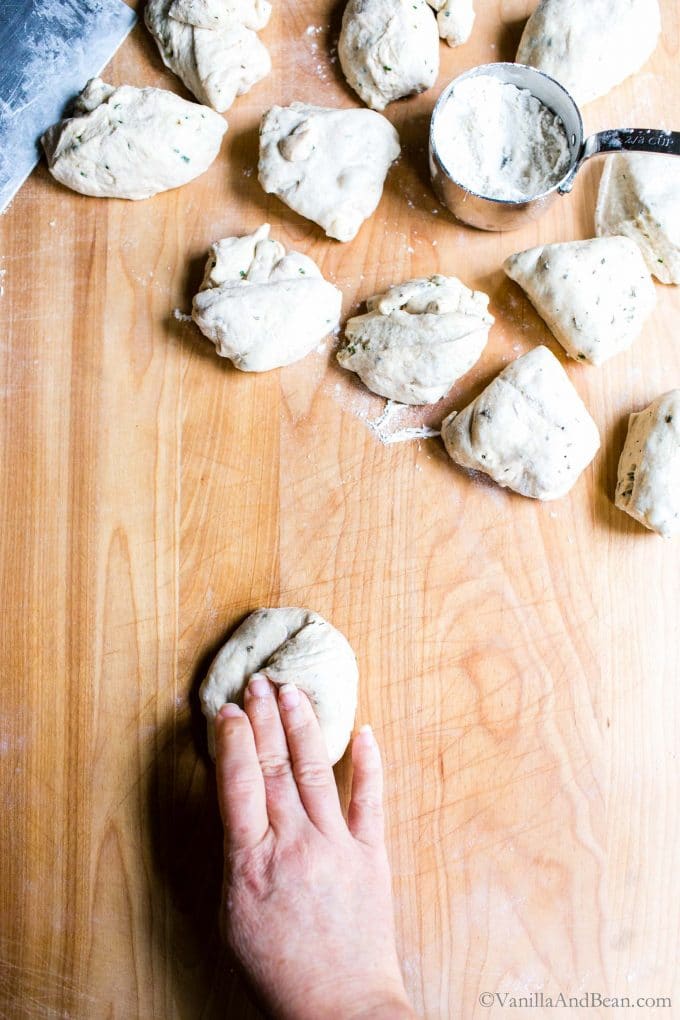
10. shape by forming the dough into dough balls…
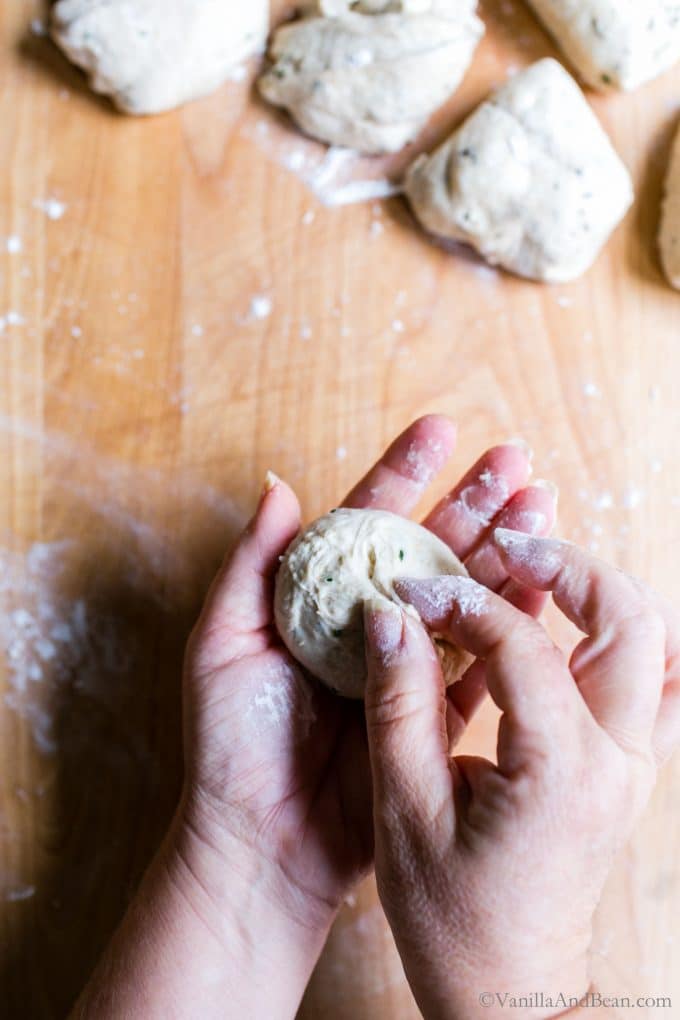
Shaping sourdough dinner rolls from starter.
Shaping sourdough dinner rolls by pinching the bottom.
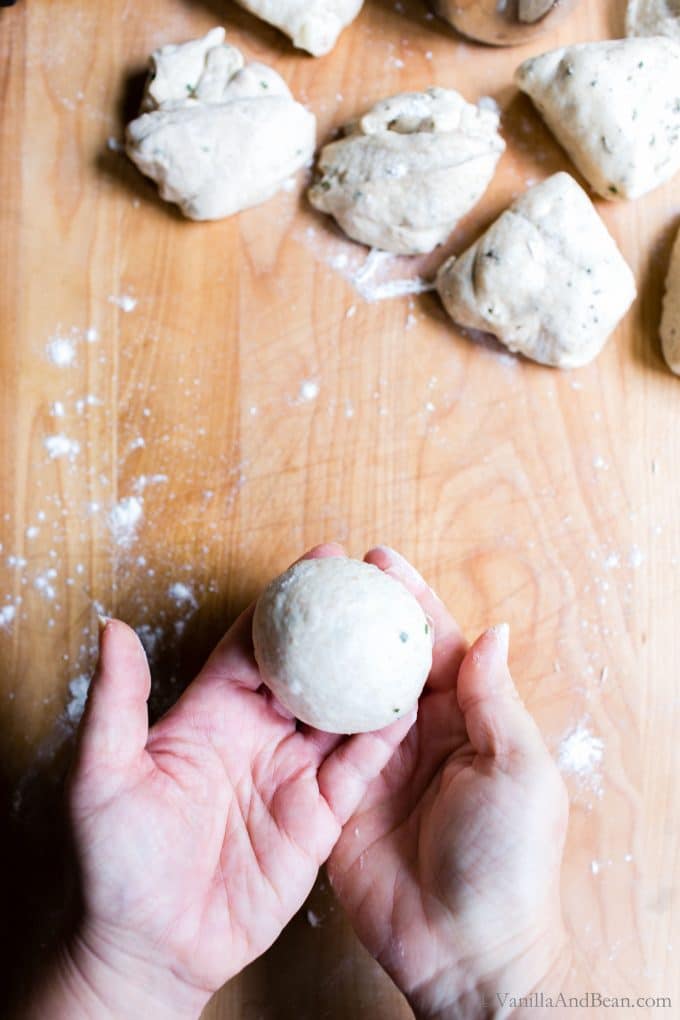
Shaped homemade sourdough dinner roll.

What Pan to Use for Baking

This sourdough rolls recipe is flexible in that you can use a sheet pan or cast iron skillet for baking. I use a small sheet pan (9″x12.5″) or a 10″ skillet lined with parchment paper. The sheet pan offers a more uniform baked roll, while the skillet offers a rustic look and keeps the rolls warm for serving. Additionally, the skillet browns the bottoms of the rolls more effectively than a sheet pan. 

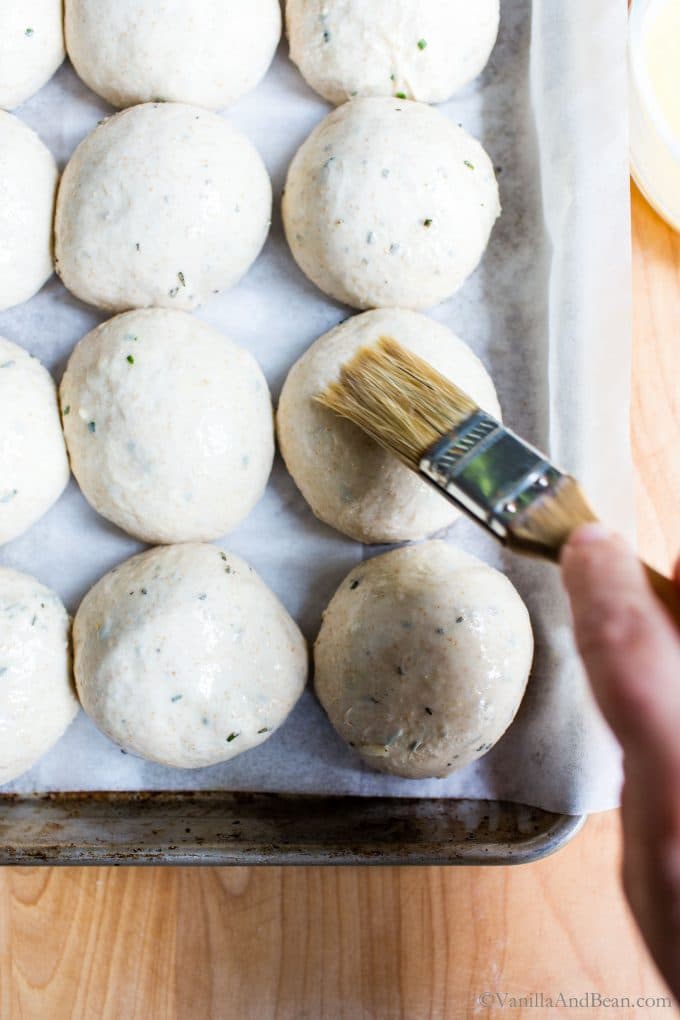
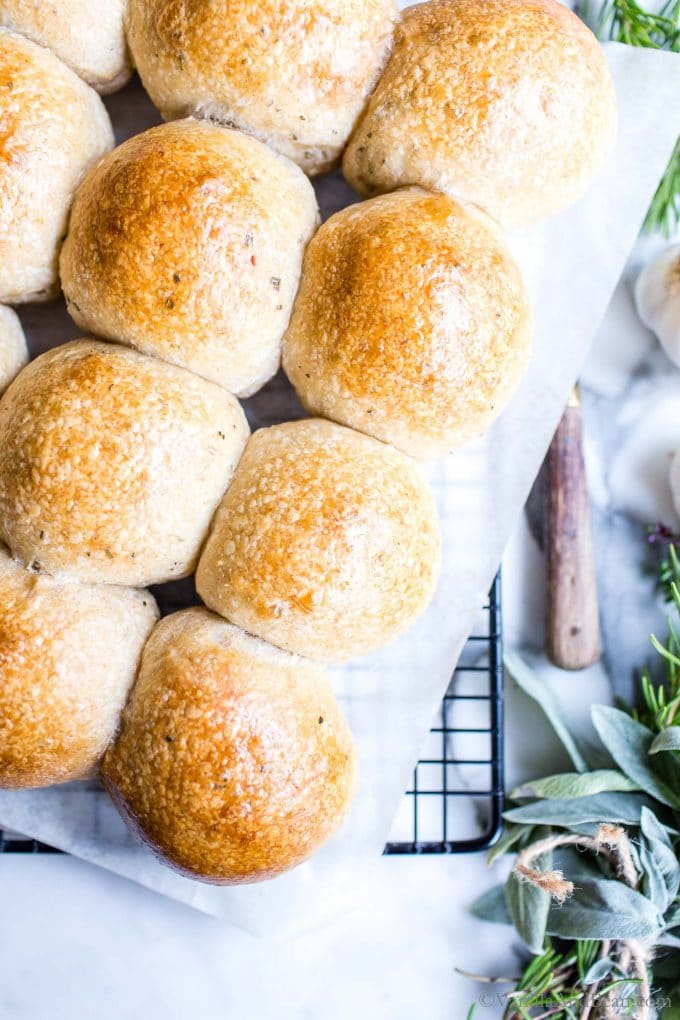
Finishing Options: Notice in the pictures below the skillet rolls are brushed with butter right out of the oven while the sheet pan rolls are brushed with egg wash just before going into the oven. The egg wash offers a shiny and a bit more golden finish. 
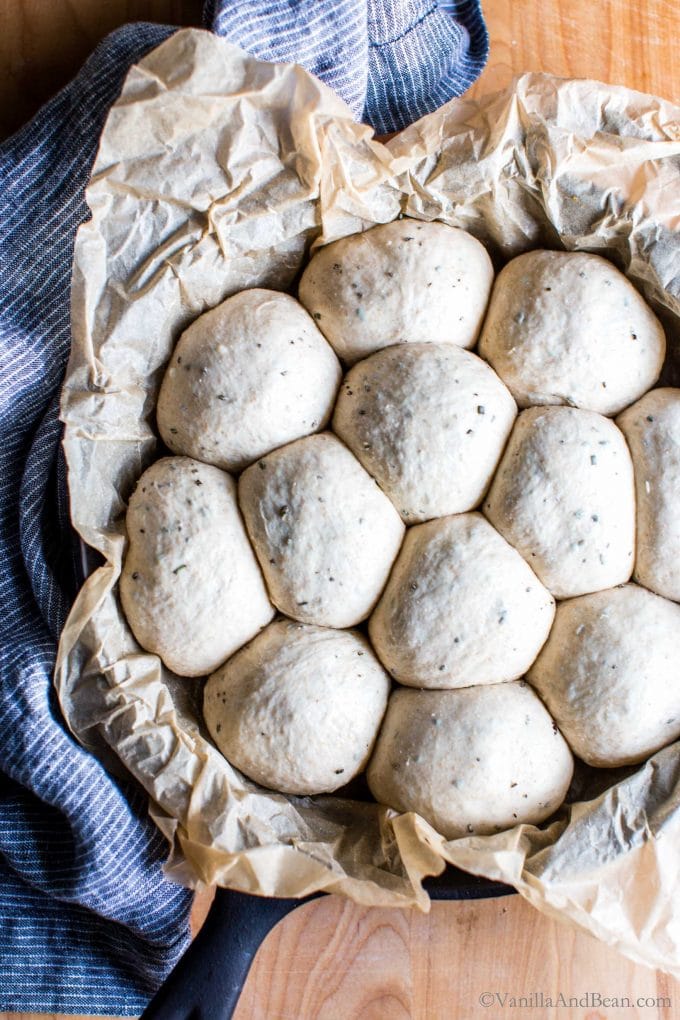
Proofed sourdough bread rolls in a cast iron skillet.
11. place dough into skillet to proof, then bake.
Sourdough dinner rolls brushed with butter.
…brush with butter after baking.
Brushing egg wash on rolls ready to bake.
12. or proof then bake on a sheet pan. these rolls are getting an egg wash treatment just before baking…
Finished sourdough rolls recipe with golden tops on a cooling rack.
…for a shiny golden finish.

How to Know When the Proofed Dough is Ready to Bake
…do the poke test

Simply wet your fingertip and gently press the dough in. Watch the dough closely. If the dough is proofed and ready for the oven, the dough will spring back slowly and leave a small indent. If the dough springs back right away and returns to its pre-poke state, it needs more proofing. Give the dough another 10 minutes or so, and test again. 
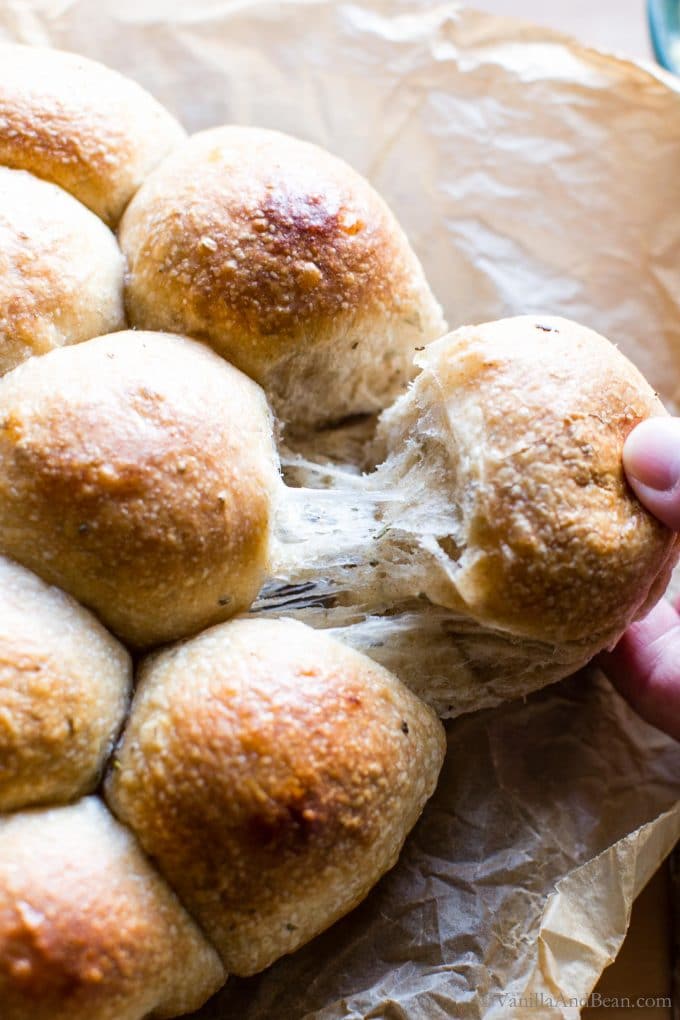
Pulling apart homemade sourdough dinner rolls.

Traci’s Tips

  • Be sure to start with a 100% hydration sourdough starter. To make a starter, see my Sourdough Bread Starter Recipe for a DIY guide. 
  • The herbs are optional, too, but the sky is the limit on combinations. During the holidays, I love a mix of sage, rosemary and thyme with roasted garlic. Play with the combinations to find what makes your toes curl! 
  • Kitchen Tools: I recommend a digital external oven thermometer and weighing your ingredients using a digital kitchen scale for the best outcome (affiliate link).
Sourdough dinner rolls brushed with butter.
Save Recipe Saved! Print Recipe

Soft Overnight Sourdough Dinner Rolls

Prep Time:30 minutes minutes
Cook Time:25 minutes minutes
Total Time:55 minutes minutes
Servings:12 Dinner Rolls
Calories:213kcal
Author:Traci York
**Advanced Prep Required – you'll need a sourdough starter**
[ Watch recipe VIDEO below ] Learn how to bake soft, pull-apart sourdough dinner rolls at home by following this tried and tested homemade recipe! The dough for the rolls is spiked with whole wheat flour and a bit of oil to make them extra soft. For best results, use an active, doubled-in-size Sourdough Bread Starter for the fluffiest rolls!
Easy-to-follow photo and video guidance provided below, plus instructions for baking the rolls in either a 10 inch skillet or small sheet pan ( 9" x 12 1/2"). This recipe is vegetarian and vegan friendly.
After a long overnight fermentation, you can proof the rolls in the refrigerator or for a quicker proof, at room temperature.
___________________
Example Bakers Schedule:
Friday Evening: Mix the dough and bulk ferment at room temperature overnight.
Saturday Morning: Divide, shape and pan the dough. Proof in the refrigerator.
Saturday Evening: Pull the rolls from the fridge, heat the oven and bake.
___________________
Time above does not include the amount of time for fermentation, shaping and proofing which takes between 13-20 hours, depending on ambient temperature and fermentation/proof method used. Use the fermentation and proof times as a guide, not as a determining factor.
In baking, I recommend weighing ingredients. Volume measurements are offered as a convenience.
(keep screen awake)

Ingredients

For the Dough:

  • 1/4 C (50g) Sourdough Starter previously fed, doubled in size (100% hydration)
  • 1 1/4 C (300g) Water 80F
  • 6 Tbs (60g) Olive Oil
  • 3 C (425g) Bread Flour
  • 1/2 C + 1 1/2 Tbs (100g) Whole Wheat Flour or Whole Wheat Bread Flour
  • 1 3/4 tsp (12g) Fine Sea Salt
  • 1 Egg or Butter (optional – for finishing)

Optional Inclusions:

  • 1 Large Head of Garlic + olive oil for sprinkling *see note for how to roast
  • 1 1/2 – 2 Tbs Fresh Herbs such as chives, rosemary, thyme and/or sage, chopped fine
  • 6 Tbs Grated Parmesan Cheese **see note for vegetarian friendly parm

Instructions

For the Dough:

  • Mix the Dough: In the evening, whisk the starter, water, and olive oil together in a large bowl with a fork. Add the flours and salt. First, mix with a fork, the dough will be shaggy. Then mix by hand, mixing, folding and pushing the dough until the flour is fully incorporated and no dry bits are present. It will seem dry at first, but the more you work the dough, the more hydrated it will become. The dough will feel stiff and it will stick to your fingers as you go. Do this for about 3-4 minutes. Use the fork to scrape the dough off your fingers.
    Cover bowl with a damp tea towel. Set a timer for for 45 minutes and allow the dough to rest. Now is a good time to feed/refresh your starter. 
  • Incorporate the Inclusions (optional): After the dough has rested, work in the inclusions. This can be garlic only, a combination of garlic and herbs or garlic and Parmesian. To do this, add 1/3 of the inclusion(s) on top of the dough (or smear the garlic paste), take a portion of the dough and fold it over and on top of itself. Add another 1/3 of the inclusion(s) and make another fold. Add the last of the inclusion(s), fold again. It will seem like a lot of added bits, but as you work the dough and as the dough develops through fermentation, the inclusions will incorporate. The dough will be stiff.
    Cover bowl with a damp tea towel, set a timer for 30 minutes and allow the dough to rest for 30 minutes.
  • Fold the Dough: After the dough has rested, fold the dough. To do this, grab a portion of the dough while it remains in the bowl, stretch it up and fold it over, pressing your fingertips into the center of the dough. You'll notice the dough is a little less stiff and more workable at this point. Repeat, until you've worked your way around the dough.
    This is the first fold (after incorporating the inclusions), and you can stop here and begin bulk fermentation, but If time permits, and optimally, you'll want to repeat this fold one more time as it improves the final dough's structure and crumb. Allow for about 30 minutes between folds. 
  • Bulk Fermentation (first rise): After the last fold, cover the bowl with two damp tea towels and allow to rise overnight at room temperature. This will take about 8-10 hours at 70F (21C), but in a cooler kitchen the dough can take up to 12-14 hours to rise – this is the norm in my chilly kitchen 66F (18C). Use the time as a guide and not a determining factor. (***see note about retarding the dough in the refrigerator overnight, and proofing at room temperature if desired).
    The dough is ready when it no longer looks dense, is jiggly when the bowl is shaken, and has about doubled in size.
  • Line a small sheet pan (9" x 12.5" / 22cm x 32cm) OR 10" (25cm) cast iron skillet with parchment paper. Set aside.
    Shape the Dough: In the morning, and with damp fingertips, coax the dough into a floured work-surface.  Divide the dough into 12 pieces. If you like, weigh the pieces to ensure uniformity (about 80g or 2.75oz each).
    Working quickly, with a piece of dough on the work surface, pull the edges of each piece to the center to shape the dough, and pinch making a rough dough ball. Place the dough on the work surface, pinched side down, sprits a touch of water on the work surface to increase friction if needed, and gently cup your hand behind the dough ball and pull it towards you to increase surface tension.
    Place the dough around the edges of the skillet first, then the remaining dough balls in the center. It's okay if the dough balls are touching each other. OR if using a sheet pan, place the dough balls 3 X 4 about 1/4" (6mm) apart.
  • Proof the Rolls (second rise): There's two ways to approach proofing:
    A. Refrigerator (long proof): Cover the pan with two damp tea towels and place in the refrigerator (the tea towels should stay moist so the dough doesn't dry out). Allow the dough to rise in the fridge for 8-12 hours. They'll become puffy but not doubled in size.
    When ready to bake, pull the dough from the fridge and set at room temperature while you preheat the oven.
    B. Room Temperature (short proof): Cover the rolls with a moist tea towel and proof at room temperature, about 50-75 minutes or until the rolls pass the poke test and look puffy but not doubled in size. 
  • Set an oven rack in the center of the oven. Preheat your oven to 425F (218C).
    Bake the Sourdough Rolls:
    After the oven has preheated, do the poke test to see if the rolls are proofed (see blog post above for how to).
    Egg Wash or Butter (optional): Crack an egg into a bowl and add one Tbs of water. Mix thoroughly and brush each dough ball with the egg wash. OR leave the egg wash off and after the rolls are baked, brush the rolls with melted butter.
    Place the rolls into the oven and bake at 425F (218C) for 10 minutes. Reduce the oven temperature to 375F (190C) and bake for an additional 15-17 minutes.
    The rolls are ready when the internal temperature on a digital food thermometer reads of the rolls are between 205F – 210F (96C – 98C). When done, transfer to a wire rack and brush with melted butter if using. A sprinkle of flaky sea salt is quite nice too. Cool for 10 minutes before sharing. Keeping the rolls in the skillet, means they'll keep warm longer.
  • Storage Notes: Sourdough is best consumed on the same day it's baked, but the rolls will last for 2-3 days stored at room temperature in a sealed plastic bag.
    The baked rolls freeze and rewarm beautifully. Pull the rolls apart and allow to cool completely. Wrap in foil, then in a freezer bag. Freeze for up to two weeks. Thaw at room temperature, and rewarm in a 350F oven, wrapped in foil (to keep their softness) for about 10 minutes. 

Video

Notes

*How to Roast Garlic: Preheat oven to 400F (204C). Slice about 1/4 inch off the top of the garlic head exposing the garlic. Remove any loose papery skin while keeping the head in tact. Set the head in a large piece of foil and drizzle with about a tsp. of olive oil and a pinch of salt. Wrap in the foil tightly, set on a small sheet pan and roast for about 40-45 minutes. When done the garlic will be soft, fragrant and some will be lightly browned. Cool slightly, then squeeze the garlic out of its papery covering. Mash the garlic together to make a paste. Now it’s ready to be used in your dough. 
**Regarding Parmesan: Look for vegetarian friendly Parmesan cheese (one that does not use rennet in production). BelGioioso, Organic Valley and Stella offers vegetarian friendly Parm. For more information, check directly with your preferred cheese maker.
***Retarding the Dough During Bulk Fermentation:
  • After mixing the dough, incorporating the inclusions and performing the folds, place the dough in the refrigerator, in the same bowl, covered with a damp tea towel and another damp tea towel on top (this helps keep the dough moist).  Bulk ferment overnight (about 8 -10 hours) in the refrigerator. Pull the dough from the refrigerator and continue bulk ferment at room temperature until the dough has doubled in size. 
  • Carry on with the recipe.
Nutrition is provided as a courtesy and is an estimate. If this information is important to you, please have it verified independently.
Serving: 1Plain Roll | | Calories: 213kcal | Carbohydrates: 31g | Protein: 5g | Fat: 8g | Saturated Fat: 1g | Sodium: 341mg | Potassium: 67mg | Fiber: 2g | Sugar: 1g | Vitamin A: 2IU | Calcium: 9mg | Iron: 1mg
Made It? Leave a comment below! The most helpful comment may include recipe rating, feedback, any modifications and/or helping other commenters. On Instagram? Take a snap of your make and share, tagging @VanillaAndBean #VanillaAndBean!

You might also like:

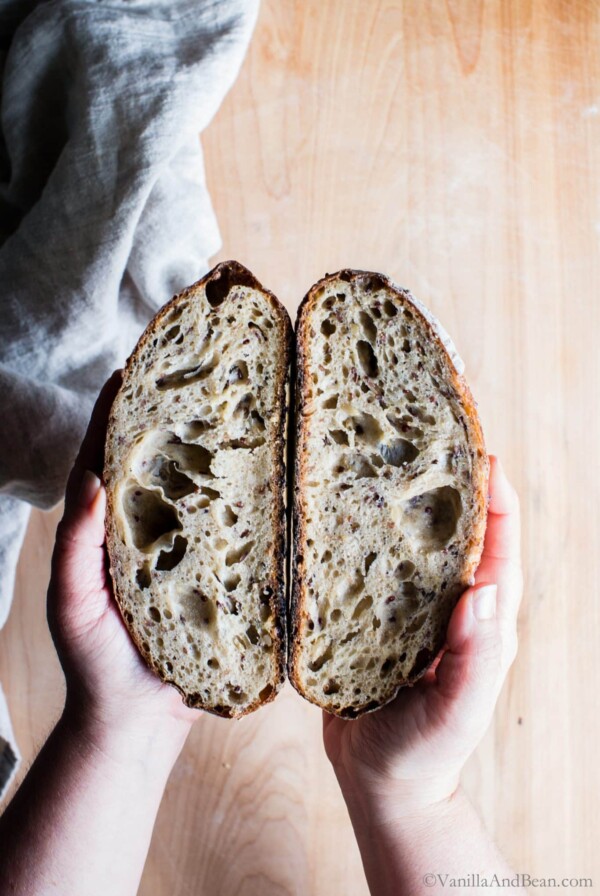
A person holding sliced sourdough bread.

Seeded Multigrain Sourdough Bread

Four Sourdough Pitas stacked and wrapped in a tea towel.

Sourdough Pita Bread

Orange and Cranberry Sourdough Bread sliced and buttered on a plate.

Cranberry Orange Sourdough Bread

Overhead shot of rustic sourdough bread in a skillet with parchment paper.

Emilie’s Everyday Sourdough

  • Christmas
  • Thanksgiving
Share1.6kPinShareEmail

Sign up for the Vanilla And Bean newsletter and get my Five Secrets to Vegetarian Cooking email series delivered to your inbox!

You will receive recipes and kitchen tips, along with information about our partners and offerings. For more details, review the Vanilla And Bean privacy policy.
Previous Post: « Vegetarian Spaghetti Alla Puttanesca
Next Post: Shaved Brussels Sprouts Citrus Quinoa Salad »

Reader Interactions

25 comments

    4.92 from 12 votes (5 ratings without comment)

    Leave a Comment & Rate this Recipe Cancel reply

    If you love this recipe, please consider leaving a star rating when commenting below. Star ratings play an important role in helping others in the online community discover and enjoy my recipes. I appreciate your support!

    Your email address will not be published. Required fields are marked *

    Recipe Rating


    This site uses Akismet to reduce spam. Learn how your comment data is processed.

  1. Avatar for CarrieCarrie

    July 10, 2024 at 6:14 pm

    Hi, Traci!
    Is soft sourdough rolls recipe able to be made as gluten free? I have newly diagnosed allergies and haven’t found a GOOD roll or bread recipe that is GF, EG, and DF. I miss bread! Thank you for your time.

    Reply
    • Avatar for Traci YorkTraci York

      July 10, 2024 at 8:37 pm

      Hi Carrie… it would be a completely different recipe. You would first need a GF sourdough starter, which I have one on my site here. But then you’d need a GF sourdough roll recipe, of which I do not have. But I do have a GF SD bread recipe here, if you like to check it out. Otherwise, Bakerita.com has lots of GF SD bread recipes… maybe a roll recipe? I hope this helps!

      Reply
  2. Avatar for LauraLaura

    December 26, 2023 at 9:59 am

    5 stars
    I’ve been making your seeded multigrain sourdough recipe regularly (thanks!) and thought I’d try these rolls. The dough went well, but I had problems baking. They took an extra 10 min to reach temperature and didn’t brown on top. I did bake on Christmas Day, so the oven was full of other dishes, which may have affected baking temps. Do the rolls need the egg wash to brown on top? I instead added melted butter after removing from the oven. I wanted to make sure the rolls shouldn’t be covered for part of baking, like the boule is?

    Reply
    • Avatar for Traci YorkTraci York

      December 26, 2023 at 1:11 pm

      Hi Laura! Thank you for your note and giving the recipe a go. It sounds like oven temperature may have been an issue. You do not need the egg wash to brown on top. In the video, the rolls are without egg wash – simply brushed with butter after they come out of the oven. Egg wash is an option, however if you want a shinyish/golden (less brown) finish. The rolls are not covered during baking. I hope this helps!

      Reply
  3. Avatar for MadinaMadina

    December 17, 2023 at 2:18 pm

    5 stars
    These came out great! Thank you so much for the recipe! love that is vegan friendly :)

    Reply
  4. Avatar for LaurieLaurie

    November 26, 2023 at 8:56 am

    Hi Traci…I make your multigrain seeded sourdough all the time and wanted to try these. I don’t know what happened to mine. I found it to be wetter than yours in the video and they didn’t rise as much and were doughy. Tasted good though. I will try again 🥰

    Reply
    • Avatar for Traci YorkTraci York

      November 27, 2023 at 4:54 pm

      Hi Laurie! It sounds like you may need to hold out some water and add to the dough as needed. Flours vary in their moisture content from brand to brand. Additionally, local humidity conditions will impact how your dough feels from one batch to another (or seasonally). Are you able to weigh your ingredients? Keep us posted!

      Reply
  5. Avatar for Lo LLo L

    November 25, 2023 at 7:56 am

    4 stars
    Tasty combination of ingredients, but more water is needed for proper autolyse and full rise. I doubled the amount of starter and added an extra 150 gr of water. Used spelt instead of whole wheat. Came out great!

    Reply
  6. Avatar for BrittaBritta

    November 19, 2023 at 6:23 pm

    These look great. I’m mixing up the dough tonight for a test before Thanksgiving. I’m going to try but do you think you could shape them into knots instead of rolls? I’m wondering how they would hold up and rise without being packed together. I’ll report back tomorrow I guess!

    Reply
    • Avatar for Traci YorkTraci York

      November 20, 2023 at 9:50 am

      Hi Britta! Thank you for your note. What a terrific idea! I think they’d be delightful. keep us posted!

      Reply
  7. Avatar for KAROL READKAROL READ

    November 14, 2023 at 3:11 pm

    5 stars
    Oh your recipe sounds divine. I am a newbie at sourdough breads/rolls so I am depending on the Premium Instant Starter as I perfect a very active starter. What adjustments do I need to make to use this recipe with Instant Starter?

    Reply
    • Avatar for Traci YorkTraci York

      November 14, 2023 at 8:22 pm

      Hi Karol.. thank you for your note. The starter I use is 100% hydration. To replace that, you’d use 25g water and 25g flour. But, I don’t know how much Instant Starter you’d need. I’ve never worked with it, so, I’m unable to make a recommendation.

      Reply
    • Avatar for KarolKarol

      November 15, 2023 at 5:21 am

      5 stars
      Thank you…. Now is the time to learn to make sourdough starter

      Reply
      • Avatar for Traci YorkTraci York

        November 15, 2023 at 10:09 am

        I have a recipe for that: Sourdough Starter. Keep in touch, Karol and lmk if you have any Qs.

        Reply
  8. Avatar for MarinaMarina

    October 1, 2023 at 6:01 am

    5 stars
    These were a huge hit with my family. Your detailed instructions really helped a lot and thanks to you baking with sourdough doesn’t feel so intimidating now. I’ve also been making your maple oat sourdough loaf weekly and it’s another great recipe. Thank you!

    Reply
    • Avatar for Traci YorkTraci York

      October 4, 2023 at 1:09 pm

      Hiii Marina! Thank you for your note and giving the rolls (and maple oat sourdough) a go! SO excited y’all enjoyed them and the instructions were helpful. Your feedback means a lot to me.

      Reply
  9. Avatar for EmmaEmma

    March 23, 2023 at 9:02 pm

    Is there harm in doubling the amount of starter in this recipe, or should it stay at 50g to ensure fluffy rolls? I have GI disorders and can only eat breads in sourdough form, but the recipes for bread I have made typically have 100g of active starter. Thank you :D

    Reply
    • Avatar for Traci YorkTraci York

      March 24, 2023 at 9:15 am

      Hi Emma! While I’ve not tried it, and if you’re working with 100% hydration starter, I don’t see that it would be a problem. Keep us posted!

      Reply
      • Avatar for EmmaEmma

        March 25, 2023 at 2:09 pm

        5 stars
        I tried the recipe using 75g of 100% hydration starter, and split it for half plain (egg washed), and half confit garlic and herb (buttered with Maldon flaked sea salt), baked on a sheet pan. They turned out amazing, thank you for the perfect recipe! Next time I will try it with 100g starter, as this has thus far been the magic amount for me to enjoy pain-free bread and pizza :-)

        Reply
        • Avatar for Traci YorkTraci York

          May 11, 2023 at 8:59 am

          Hi Emma! Thank you for your note, sharing tips and success! SO happy to hear about pain-free bread and pizza !!

          Reply
  10. Avatar for CamilleCamille

    November 4, 2021 at 5:34 am

    These rolls sound amazing, Tracy. Would you say that this recipe could be used as a burger/patty bun if baked on a sheet pan or is the texture too soft?

    Reply
    • Avatar for CamilleCamille

      November 4, 2021 at 5:39 am

      Sorry that I misspelled your name. It’s 5:30 in the morning!

      Reply
    • Avatar for TraciTraci

      November 4, 2021 at 12:48 pm

      Hi Camille! Thank you for your note. I’m thinking they’d be fine. Buns need to weigh about 130 grams each and gently flattened to 3 1/2 inches just before proofing, giving them plenty of room for expansion on the sheet pan. Let us know if you give it a go! No worries on my name, 5:30 is early!

      Reply
  11. Avatar for TraciTraci

    January 26, 2021 at 5:36 pm

    Hi Katherine! Neeed all the cozy food right now… and these are so good with a big schmear of butter (!!).

    Reply
  12. Avatar for TraciTraci

    January 26, 2021 at 5:35 pm

    Slathered with butter FTW Mare! The garlic is SOOOO nice!

    Reply

Primary Sidebar

well hello!

Traci in front of a barn.

I’m Traci and this is my blog. So Glad You Stopped By!

Here you’ll find full of flavor vegetarian comfort food with vegan and gluten free recipes too. I also share sourdough, sweets and naturally sweetened baked goods and desserts recipes because we all gotta have a little balance!

Learn More About Traci  or  The Blog.

Search

Start Here!

Why vegetarian, what you’ll find on Vanilla And Bean and fan favorites all right here!

Right this Way to Start

Footer

Affiliate Info

Vanilla And Bean is monetized in part through the use of affiliate links. As an Amazon Associate I earn from qualifying purchases. This means that if you click on a link and/or purchase an item after clicking on a link, Vanilla And Bean may receive a percentage of the sales price. I only recommend products that I love and use through my affiliate links. To learn more please see my Affiliate Policy. Thank you for your support!

© Vanilla And Bean, LLC  – 2026. Unauthorized use and/or duplication of any content or images without express and written permission from this blog’s owner is prohibited. Licensing inquiries for publication, general distribution, and/or commercial use, please contact me on my contact page.

Copyright © 2026 · Vanilla and Bean · Website by Meyne

Menu

Home · Recipes · Web Stories · Contact · Editorial Policy · Privacy Policy · Terms of Service · Accessibility · California Privacy Notice

Copyright © 2026 · Vanilla and Bean On Genesis Framework · Log in

  • Home
  • Start Here
  • Recipes
    ▼
    • Recipe Search
    • Recipe Index
    • Appetizers
    • Bread
      ▼
      • Sourdough
    • Breakfast & Brunch
    • Condiments
    • Desserts
    • Drinks
    • Grab & Go Snacks
    • Main Dish
    • Side Dishes
  • Shop
  • About
    ▼
    • Contact
    • A little bit about me…
    • Let’s Work Together
    • Blogger Resources
  • Subscribe to Newsletter!
  • Search

Rate This Recipe

Your vote:


A rating is required
A name is required
An email is required

Recipe Ratings without Comment

Something went wrong. Please try again.