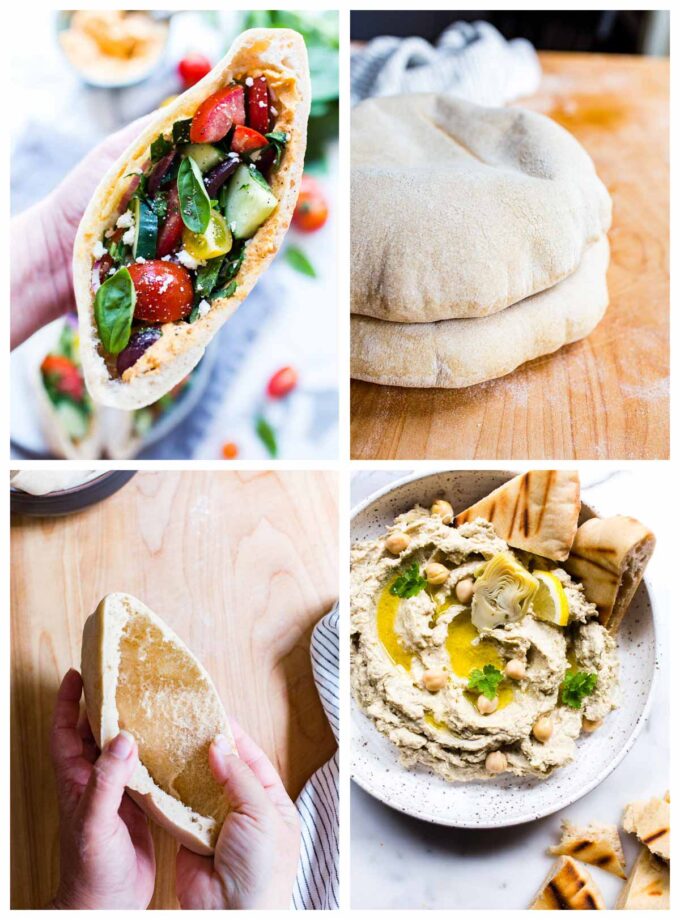
Soft, tender and fluffy Sourdough Pita Bread for all the sandwich stuffings like these Greek Pita Sandwiches, and a vehicle for scooping up flavorful dips and spreads like Artichoke Hummus. Use your doubled in size Sourdough Starter to whip up this sourdough pita recipe. This recipe is vegetarian and vegan friendly.
⭐️⭐️⭐️⭐️⭐️ Review: “I’ve tried making sourdough pita bread about 3 times using a variety of recipes. None of them could compare to the texture and flavor of your recipe.” ~ Marisa
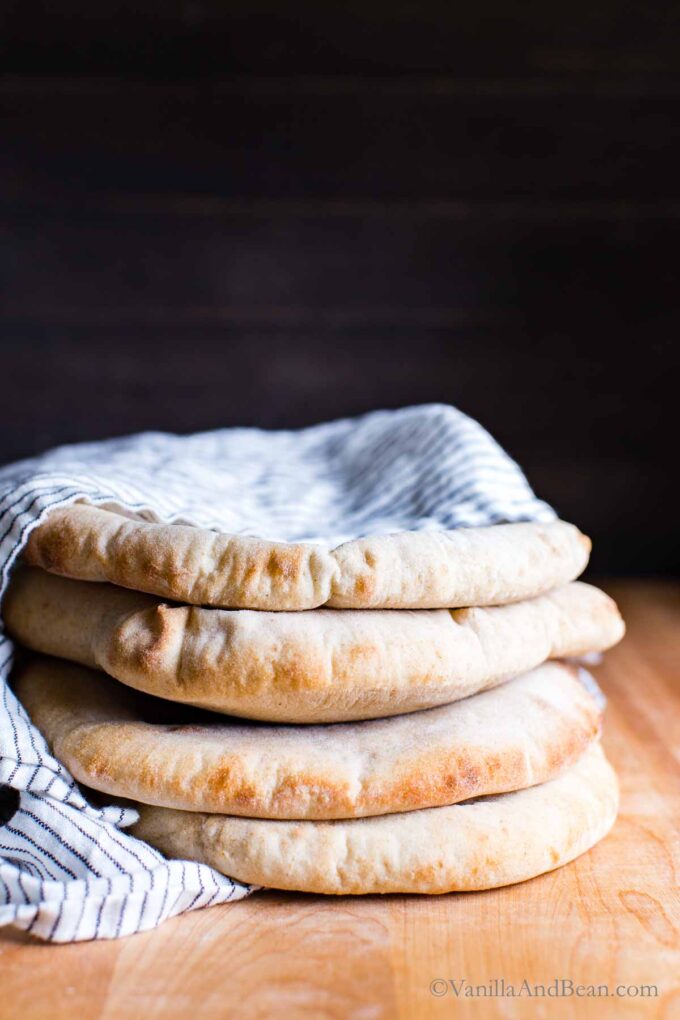
Homemade Sourdough Pita Bread
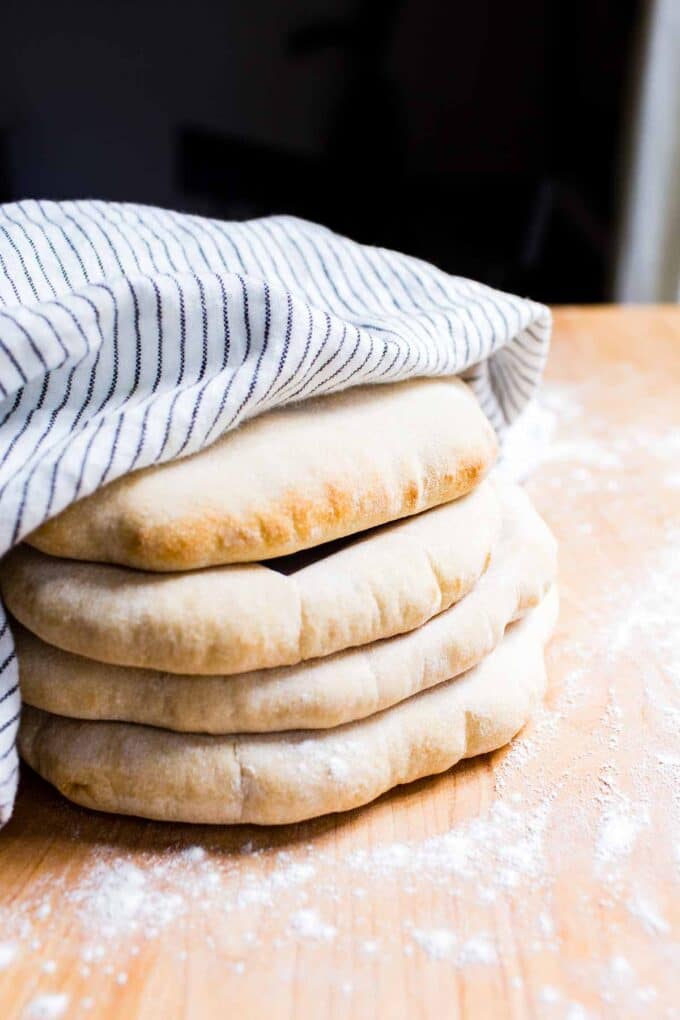
If you make homemade Sourdough Recipes, you’re going to love this Sourdough Pita Bread recipe. Homemade pita bread is flavorful, tender, soft and fun to make; It’s my best sourdough pita recipe! Watching it puff up in the oven means homemade pita isn’t too far away (and it’s so satisfying!).
This Recipe Is
- easy to make
- freezer friendly
- versatile enough for sandwiches, rich soups, pita pizza or slicing into wedges for dipping
There are many ways to enjoy homemade pita bread, and it tastes amazing! Read on to learn more.
About the Key Ingredients
- Sourdough Bread Starter – previously feed, doubled in size and bubbly. This is the natural leaving agent for sourdough pita!
- Bread Flour – for a chewy, sturdy yet tender crumb, I use unbleached, organic if possible, bread flour. It creates a stretchy tender dough that’s a dream to work with!
- Whole Wheat Flour – you can use whole wheat bread flour or regular whole wheat. Look for stone ground, I like Bob’s Red Mill. It adds an earthy flavor and contributes to pita’s chewy texture.
If you have leftover sourdough starter, use it in my Olive Oil Sourdough Discard Crackers.
At a Glance: How to Make Sourdough Pita Bread
You’ll start with a 100% hydration, doubled in size Sourdough Starter. Just like making sourdough bread, plan ahead so the dough has plenty of time to rise.
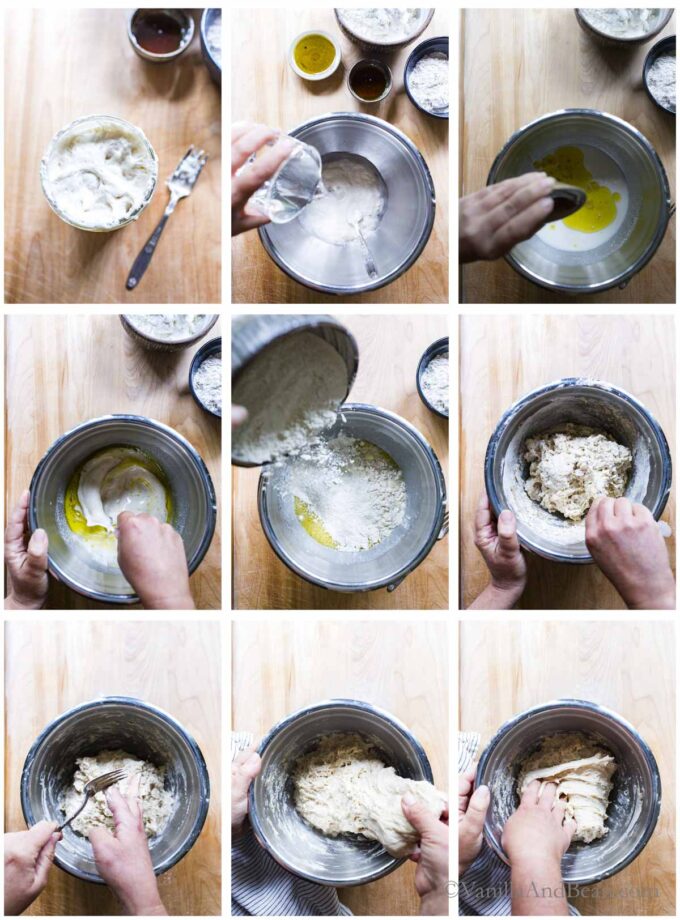
- First, in a medium mixing bowl, add your fluffy and active sourdough starter.
- Second, stir in warm water, maple syrup and oil.
- Third, add the bread flour, whole wheat and salt.
- Fourth, mix the dough by hand until no dry patches remain.
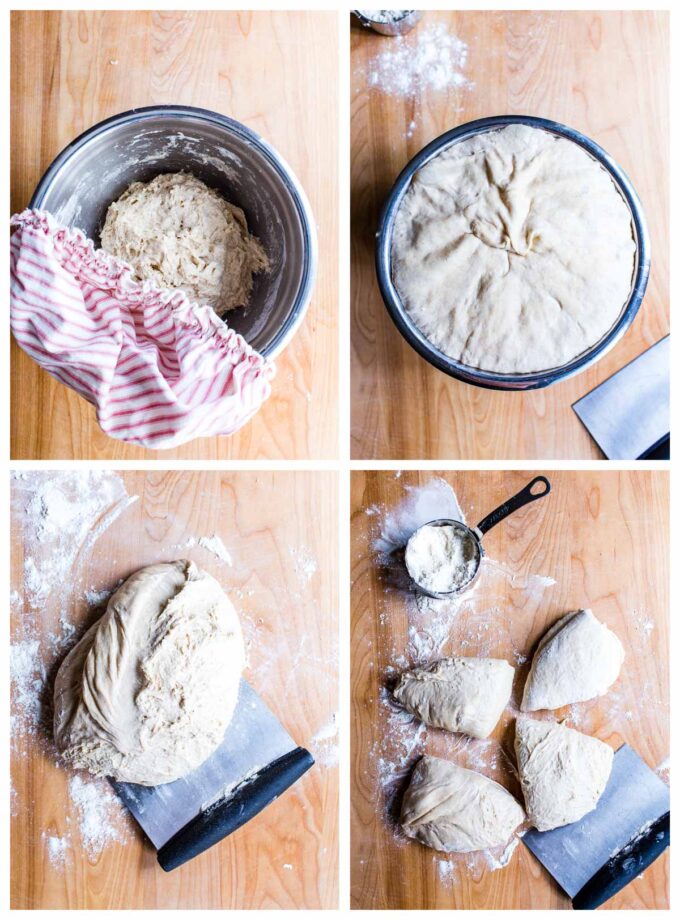
- Next, bulk ferment at room temperature overnight for about 12-16 hours.
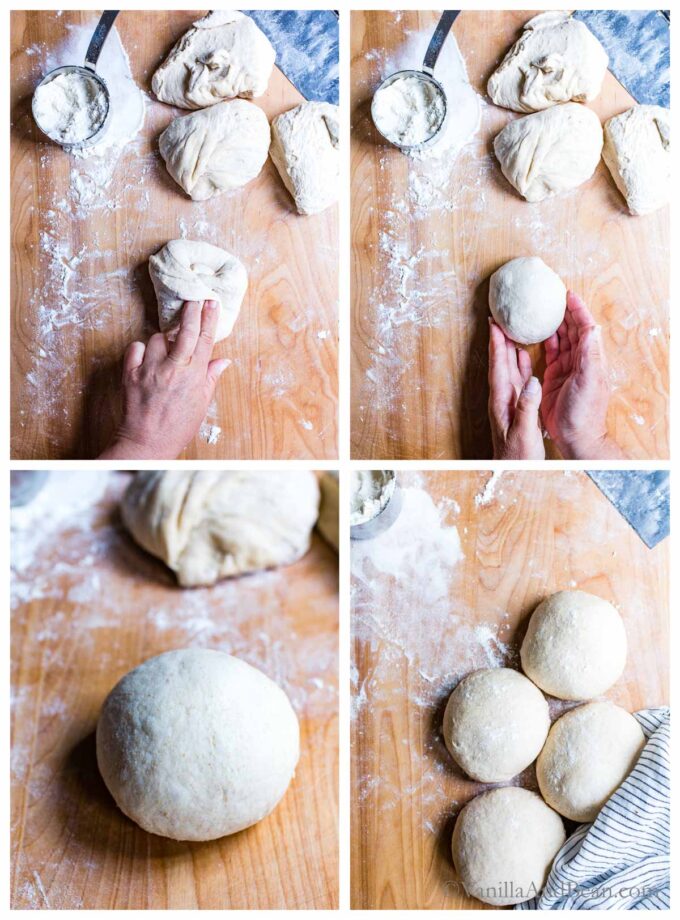
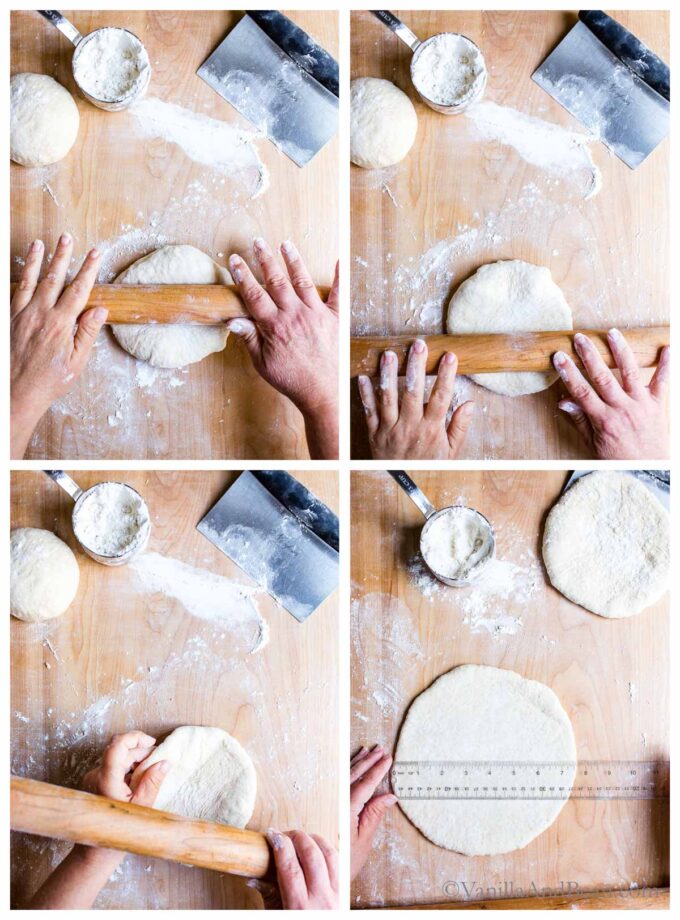
- Last, shape the dough, proof for just 15 minutes, then use a rolling pin to roll out each individual pita and bake!
To bake the sourdough pita, you’ll use the back of a baking sheet or pizza stone / baking stone. Use parchment paper cut to fit individual pita dough to make transferring the pita rounds to the baking surface easier. You’ll bake for just 5-6 minutes, then wrap the hot pita in a kitchen towel.
Things to Stuff, Slather, Dip or Serve with Sourdough Pita Bread
Sourdough Pita Bread Good to Know
How it Puffs
Pita is baked at a high temperature, in this case, in the oven at 500 degrees Fahrenheit. When the dough hits the hot baking surface, the water quickly becomes steam, causing the pita to puff up. When removed from the oven, the void or “pocket” remains.
Country of Origination
Pita has its roots in the Middle East, dating back 14,500 years! According to Wikipedia, Pita originates from the Natufian people in Jordan.
Pita Bread as a Pizza Base
Preheat your oven and a pizza stone or upside-down baking pan to 500 – 550 degrees Fahrenheit. Top your pita with your favorite pizza toppings. Slide it onto a piece of parchment paper, then use the parchment as a handle to slide it onto the preheated baking pan/stone. Bake for about five to six minutes, then it’s ready!
Sourdough Pita Making Schedule
- In the Morning: Feed your starter and allow it to double in size.
- In the Evening: Mix the dough and bulk ferment at room temp.
- The Next Morning: shape, rest and bake.
Pita Making Tools
You’ll need a few basic bread baking tools. Here are some of my favorite tools (these are affiliate links):
- Digital Scale – accurately weighs your ingredients for optimal outcome.
- Baking Stone – evenly transfers heat to your pita dough in the oven and also, it’s an ideal base for making sourdough pizza crust too!
- Rolling Pin – used to roll the pita dough evenly and thin.
- Aluminum Sheet Pan – an ideal baking medium if you don’t have a baking stone on hand. I find it works just as effectively as a baking stone! Turn it upside down for easy pita dough transfer.
- Parchment Paper – a perfect vehicle for transferring the rolled out pita dough into the oven and onto your baking surface.
- Bench Scraper – scrapes all the bits of flour and dough off your work surface to keep it clean and tidy.
- I recommend a digital oven thermometer. Knowing the accurate temperature of your oven allows you to make temperature adjustments when needed.
Traci’s Tips
- I include whole wheat flour in this recipe because it offers an earthy, rustic flavor and added nutrition. It can be replaced with bread flour if desired. I use stone ground whole wheat flour for best flavor.
- Weigh your ingredients for best outcome.
- Make sure your oven is fully preheated so that the pita will puff up as it should. An external oven thermometer is helpful in knowing the proper oven temperature and so, you can adjust when needed. I recommend a digital or dial oven thermometer to know the true temperature of your oven.
Soft and Puffy Sourdough Pita Bread
Ingredients
- 1 cup (200 grams) Sourdough Starter 100% hydration, active and doubled in size
- 3/4 cup + 2 tablespoons (200 grams) Warm Water 80 degrees Fahrenheit (27 Celsius)
- 2 tablespoons Maple Syrup or honey
- 2 tablespoons Extra Virgin Olive Oil
- 2 cups (300 grams) Bread Flour unbleached
- 1/2 cup (85 grams) Whole Wheat Flour stone ground
- 1 teaspoon (6 grams) Fine Sea Salt
Instructions
- Mix the Dough: In a large mixing bowl, add the sourdough starter, water, maple syrup, and olive oil. Whisk until there are no chunks of starter floating around. To the wet ingredients, add the bread flour, whole wheat flour and salt.
- First, mix with a fork, the dough will become shaggy. Then mix by hand, mixing, folding and pushing the dough until the flour is fully incorporated and no dry bits are present. It will seem dry at first, but the more you work the dough, the more hydrated it will become. Do this for about 3-4 minutes. The dough will stick to your fingers as you go.
- Use the fork to scrape off the dough on your fingers as much as you can. Cover bowl with a damp tea towel. Set a timer for for 30 minutes and allow the dough to rest for 30 minutes. Now is a good time to feed/refresh your starter.
- Fold the Dough: After the dough has rested, fold the dough. To do this, grab a portion of the dough while it remains in the bowl, stretch it up and fold it over, pressing your fingertips into the center of the dough. You'll notice the dough is less stiff and more workable at this point. Repeat, until you've worked your way around the dough. This is the first fold, and you can stop here and begin bulk fermentation, but If time permits, and optimally, you'll want to repeat this fold at least one more time, two if you can, as it improves the final dough's structure. Allow for about 30-45 minutes each between folds.
- Bulk (fermentation) Rise: After the last fold, cover the bowl with two damp towels and allow to rise overnight at room temperature. This will take about 10-12 hours at 70 degrees Fahrenheit (21 Celsius), but in a cooler kitchen the dough can take up to 12-16 hours to rise – this is the norm in my chilly kitchen. The dough is ready when it no longer looks dense, is jiggly when the bowl is shaken, and has about doubled in size.
- Shape the Dough: In the morning, and with damp fingertips, coax the dough into a floured work-surface. Divide the dough into 4 pieces (210 grams each). Working quickly, with a piece of dough on the work surface, pull the edges of each piece to the center to shape the dough, and pinch making a rough dough ball. Place the dough ball on the floured work surface pinched side down. Rest the dough for five minutes. Scrape the flour away from your work surface and sprits a touch of water. This will increase friction between the dough and surface if needed (otherwise the dough will slide around rather than grip the surface to form a tight ball). Gently cup your hand behind the dough ball and pull it towards you to increase surface tension. Once a ball is formed, proof the dough.
- Proof the Dough (second rise): Transfer the balls to a lightly floured surface, and cover with a damp tea towel. Allow the dough to rise at room temperature for 15 minutes (a quick proof). They'll become just slightly puffy.Meanwhile, preheat the oven to 500 degrees Fahrenheit (260 Celsius). Arrange the oven racks in the upper and bottom third of the oven. Place an upside down sheet pan(s) and/or pizza stone on each rack for preheating.
- Roll Out the Dough Balls: On a lightly floured work surface, use a rolling pin to roll the dough balls into a uniform disk to between 1/8 – 1/4 inch (.3 – .6 centimeters) thick and 7 – 7 1/2 inches (17 – 19 centimeters) wide, turning the dough like pie dough to keep a circular shape, sprinkling with more flour as needed to prevent sticking. If the dough becomes difficult to roll, set it aside to rest for about five minutes, and roll another ball. Transfer the pita dough to a small piece of parchment paper. Cover with a damp tea towel unless transferring directly to the oven. Finish rolling out the remaining dough balls.
- Bake the Pita Bread: *Note*: You can bake two pita at a time (two is easier to manage without cooling the oven down too much). I bake two at a time on one sheet pan (preferably), one at a time on a stone. Once the oven is preheated, transfer the pita to a peel or upside down sheet pan. Open the oven door, and using the parchment as a handle, slide the pita onto the preheated pan or stone.Bake for 5 minutes and 20 seconds or until the pita is puffed up and only lightly golden on the bottom around the edges. It won't brown on top. No need to flip the pitas while they're baking.
- Remove from the oven and loosely wrap the pitas in a tea towel(s). Do not deflate the pitas while still hot as the steam coming out of the pita will burn skin. Rest 10 minutes, then gently deflate once cooled.Slice the pitas in half and enjoy stuffed, or slice into wedges for dipping in all the things (see blog post for ideas!).
- To Store: Sourdough is best consumed on the same day it's baked, but pita will last for 2-3 days stored at room temperature in a sealed plastic bag.Baked pita freezes beautifully. First, allow the pita to cool completely, then place in a freezer bag. Freeze for up to two weeks. Thaw at room temperature, and rewarm in a 350F oven, wrapped in foil (to keep their softness) for about 10 minutes.

These came out great! I make pitas with yeast about once a month (or more) but I wanted to try it with starter and they came out wonderful! Great texture, puffed up nicely in the oven, and held up to stuffing. I’ll definitely be making them again.
Best news, Lauren! Thank you for your note, five star review and giving the pita a go!
Some info seems to be missing? Do you cut the dough in individual sections and roll into balls? Do you weigh them so they’re uniform?
Hi Lyn! Step 6 “ Divide the dough into 4 pieces (210 grams each).” Keep us posted, okay? 🙋🏻♀️
This recipe has become a weekly staple in our home. Easy to follow, very forgiving recipe, DELICIOUS results every time!!! Thank you so much! We will never buy storebought pita again!
Delicious! So fluffy!
Love hearing this, ASt! Thank youuu for your note!
Absolutely love this recipe. We use it often for dinners, but also an alternative to sandwich bread to switch it up for lunches.
Love that switch-up, Tiffnee! Thank you for your note and giving the pita a go!
These were so easy and turned out perfectly! Already passing it onto family and adding it to my recipe collection. Thank you.
Amazing! Thank you Sarah!
This turned out wonderful! The dough was great to work. Will definitely use this recipe again. Thank you!
Can the dough go into cold retard. If it can, at what point should it go on the fridge? Should I bring it back to room temperature before proceeding?
Hi Elaine! After mixing and doing your folds, you can put the bulk fermenting dough in the fridge up to 12 hours (covered), then take it out and leave at room temp to double in size (this will take a while). Once doubled, shape, proof and bake. Another commenter (also Elaine!) took a cold proof approach: “I formed the balls, covered and rested about 30 minutes then put them in the fridge. I took them out today a couple hours ahead then proceeded per your instructions. They came out just as lovely as they have without the cold retard.” I hope you enjoy the pita!
Delicious! I made these in one day by adding 1/4 t yeast. Also made 6 pitas, each 140 g. Served with the sheet pan shawarma from NYT.
Hi,
The instructions look out of order to me, between 7 and 8.
It says to bake them as a ball, two at a time? Then in number 8, it says to roll them out and bake again?
Would you please clarify?
Thank you for your note, Jeanette! The pita should be rolled out before baking. I made an annotation, clarifying that particular sentence as a *note* in step 9. I hope you enjoy the pita!