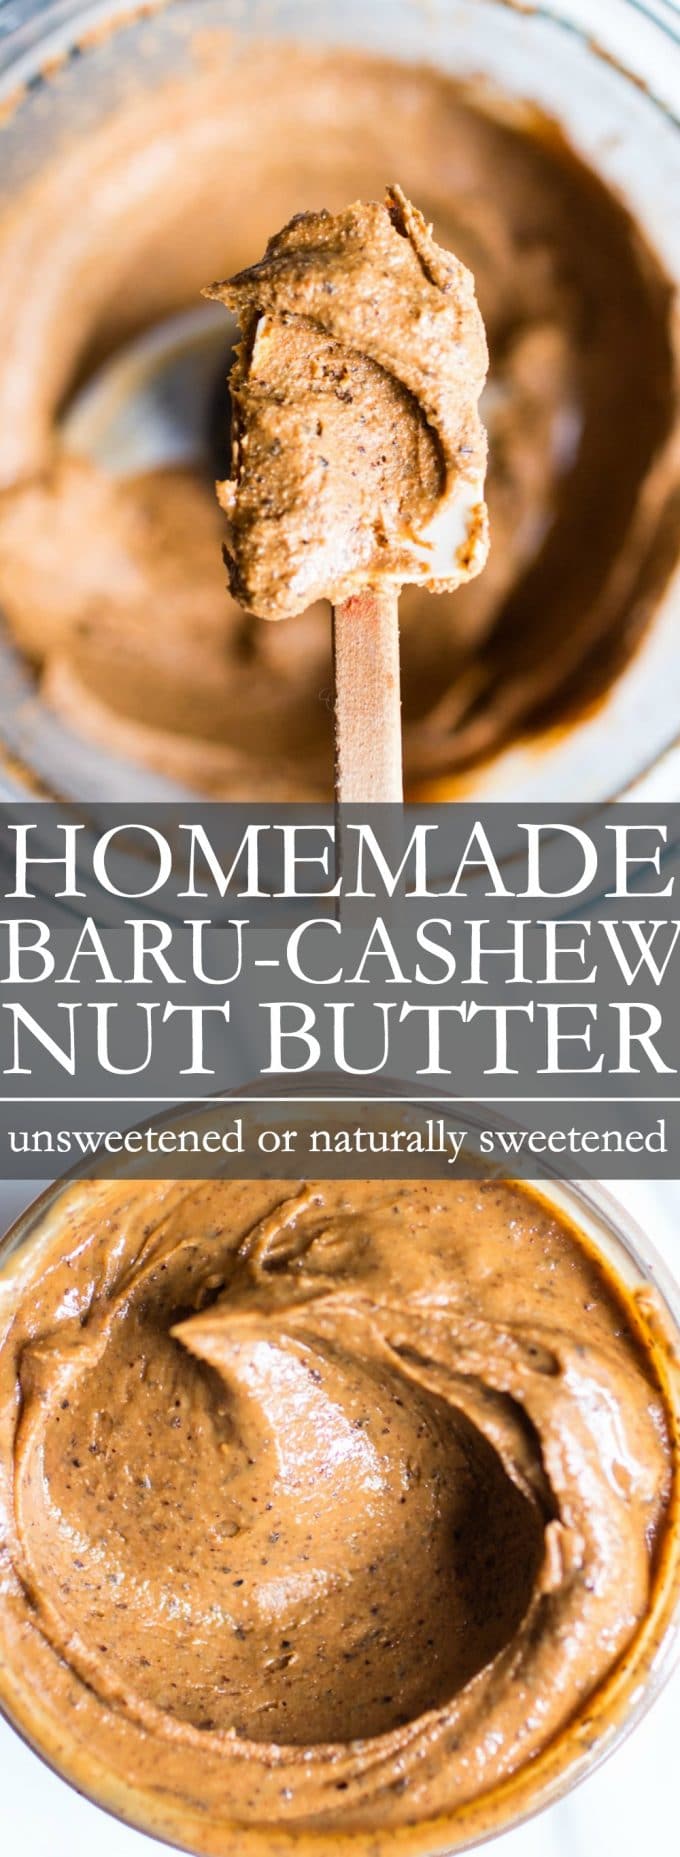
Introducing Baru nuts with homemade Baru Cashew Nut Butter! Ultra creamy, rich and flavorful. Learn how easy it is to make this delicious cashew based nut butter at home and where to find Baru nuts! Use my coupon code below for 15% off your first time Barùkas®️ purchase!
This post contains affiliate links and is made in partnership with Barùkas®️. All opinions are my own.
Homemade nut butter is such a treat and often less expensive than what you can find in the store. Better yet, you have control of the ingredients and can tweak them to your liking.
When I first learned about new to me Baru nuts, and besides snacking on them, I knew I wanted to create a nut butter recipe with them, and also, share their remarkable story in this space.
Where are Baru Nuts From?
Baru nuts are wild harvested nuts from Baruzeiro trees in the Cerrado of Brazil, which neighbors the Amazon in South America. This vast savannah covers an area three times the size of Texas.
The Cerrado ecosystem, like its rain forest neighbor, is rich in biodiversity yet is under threat with much of the land being exploited in favor of cattle ranching and monoculture crop production like soy bean, for example. Millions of Baruziero trees have been cut or burned down to make way for unsustainable agriculture.
Rich in biodiversity, the Cerrado is home to over 10,000 species of plants like the Baruziero tree, 935 species of birds like the Spix’s macaw and nearly 300 mammals, including endangered species such as Cerrado fox, and jaguar. Sadly, only 3% of this region is protected by law and therefore the remaining land is under pressure for development.

A Way for Sustainable Agriculture
However, Baru nuts are providing a way in part to safeguard the Cerrado ecosystem while producing economic support for those involved in their collection. Because Baru nuts are wild harvested by a local coop of families, this work is vital in supporting socio-environmental aid to the region.
Since the Baruzeiro trees and their fruits grow wild, there is no irrigation needed, and no pesticides or fertilizers used to produce this crop. Also, a percentage of the fruits are left in the wild to sustain local wildlife and for the Baruzeiro tree to continue its natural reproduction cycle creating a much needed sustainable agriculture model for the region.
How Do They Taste?
Rob and I think they taste somewhere between a peanut and cashew. They’re harder than most nuts, but have an excellent crunch. The skin can be enjoyed as well and offers a textural contrast to the nut itself.
Ingredients for Baru Cashew Nut Butter
Making homemade nut butter couldn’t be easier, but it takes a little patience and time. For this recipe, you can process with or without added natural sweeteners and oil. My preference is with a little honey or maple syrup added. I’ve shared both ways below. Here’s what you’ll need to make this recipe:
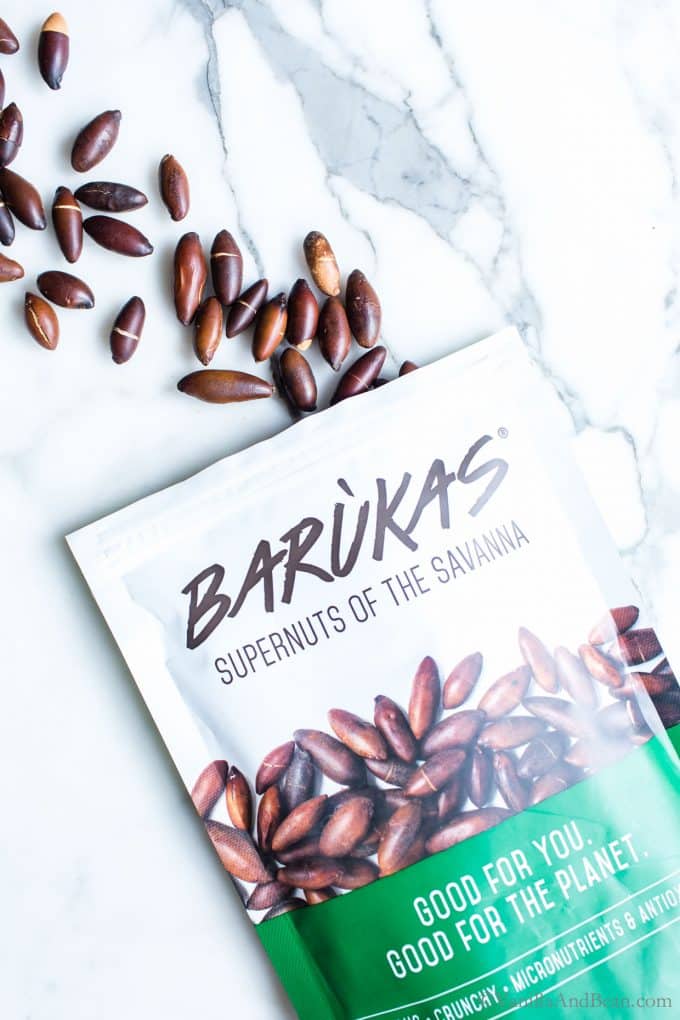
- Baru Nuts
- Cashew Nuts
- Maple Syrup or Honey
- Coconut Oil
- Fine Sea Salt
How to Make Nut Butter with Baru Nuts
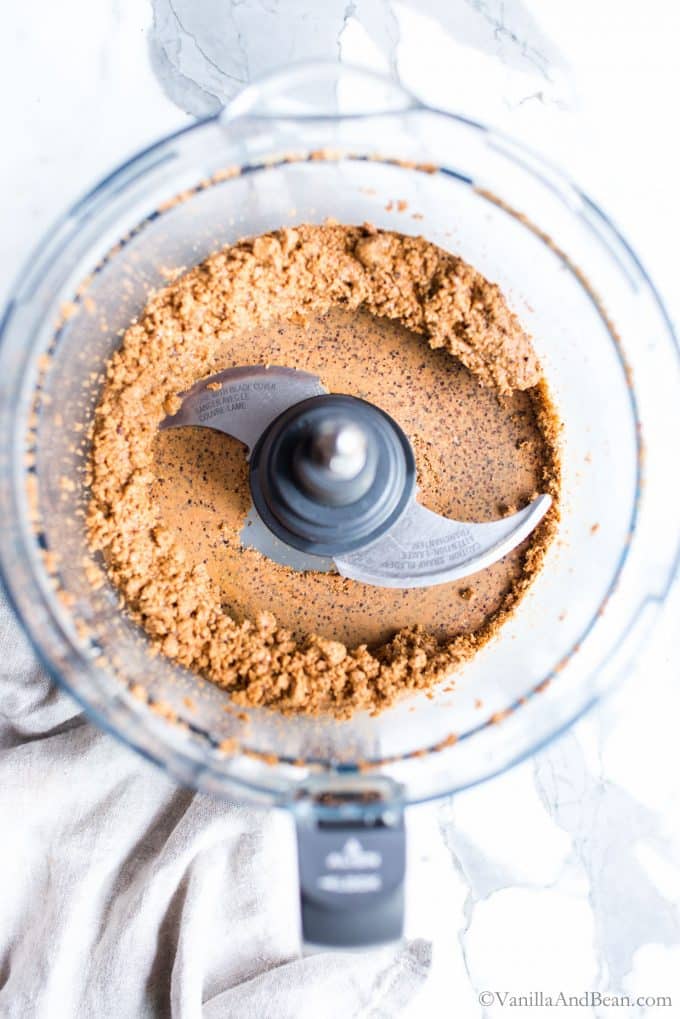
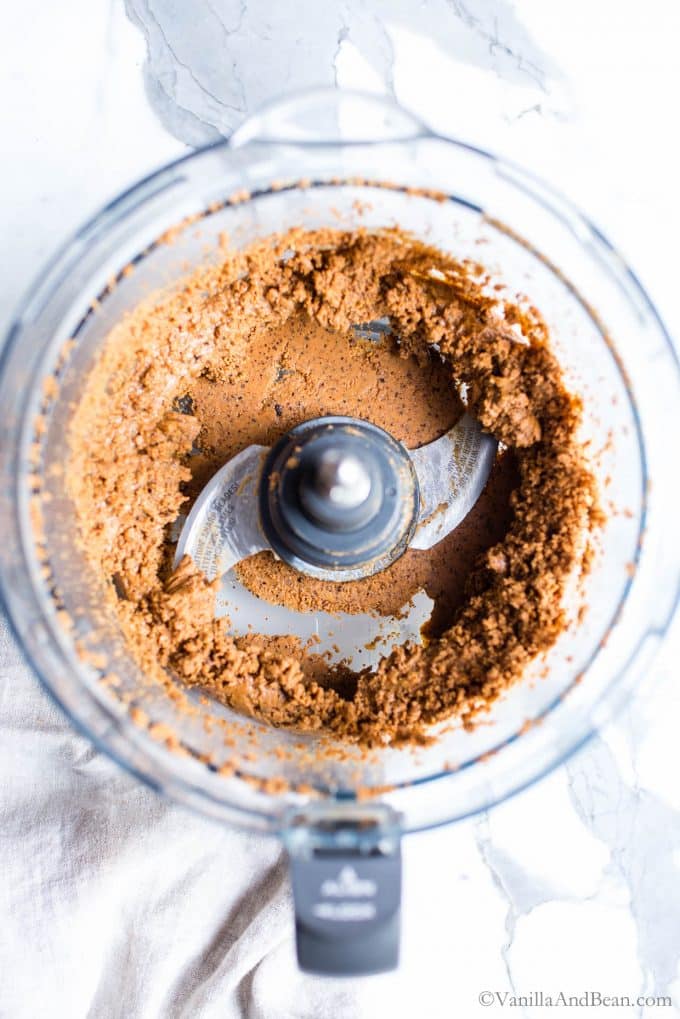
I blend cashew and Baru nuts because together, they produce a creamer nut butter and a more interesting flavor profile. Since Baru nuts are toasted prior to packaging, you don’t need to toast them, but you will need to toast the cashew nuts for about 9 minutes. After cooling slightly, processing can begin. Use a food processor with the S blade attachment. I use a 12 cup food processor.
Unsweetened Nut Butter
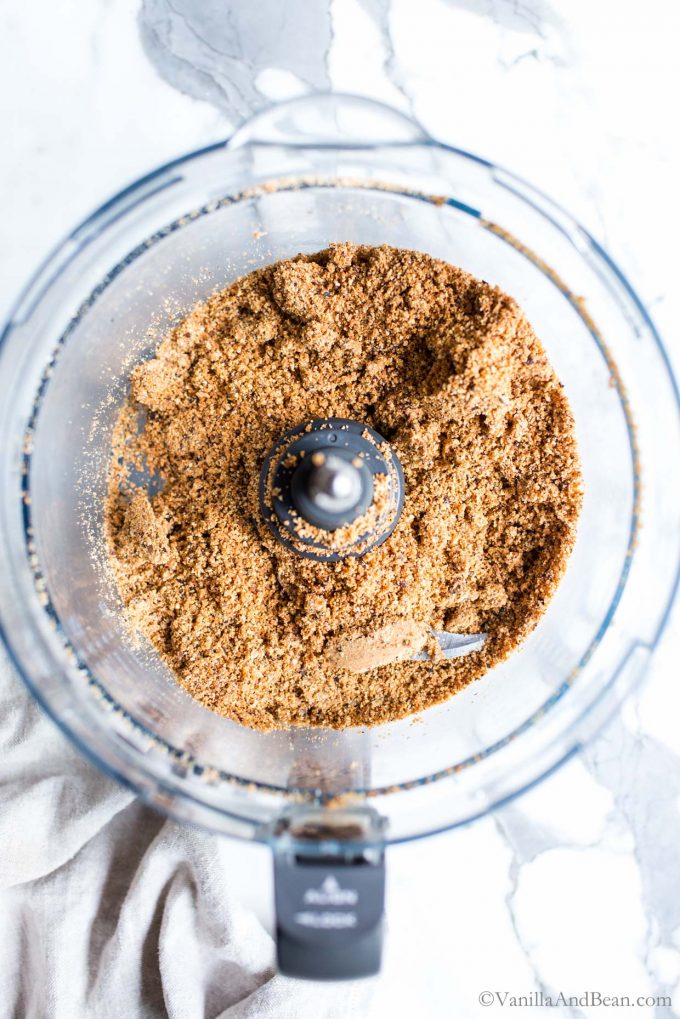
- The four images above reflect minutes 1-9 of the nut butter making process.
- Scrape down the bowl periodically as the nuts are processing.
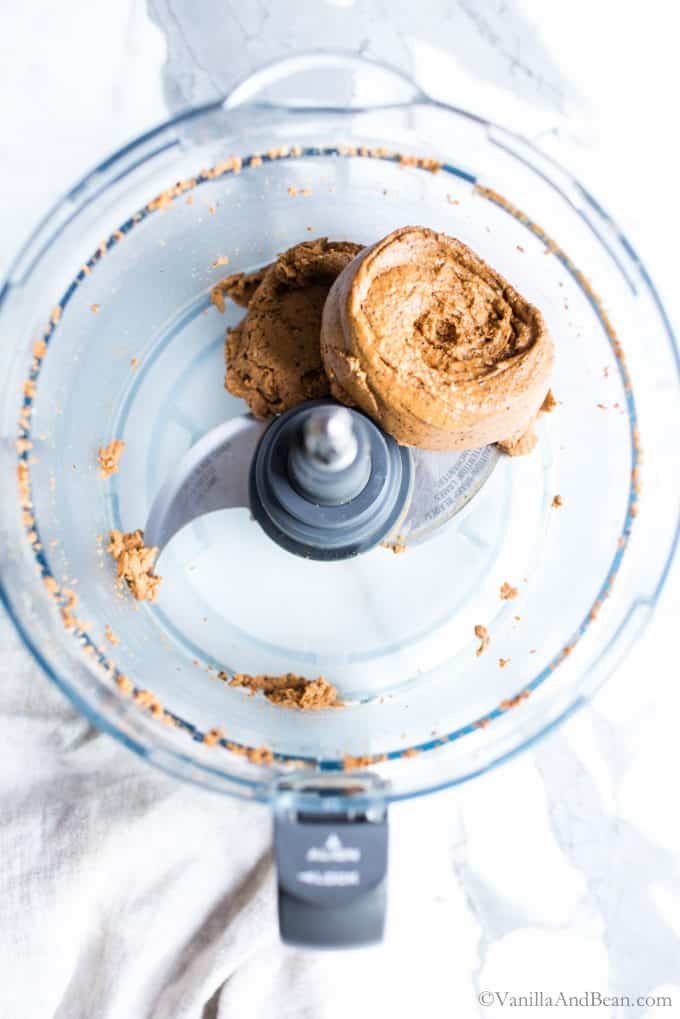
- At the 8-9 minute mark, creamy nut butter emerges.
- At this point you can store the nut butter without adding any sweetener, or press on to make the nut butter a little sweet (and so special) and whipped to a light butter!
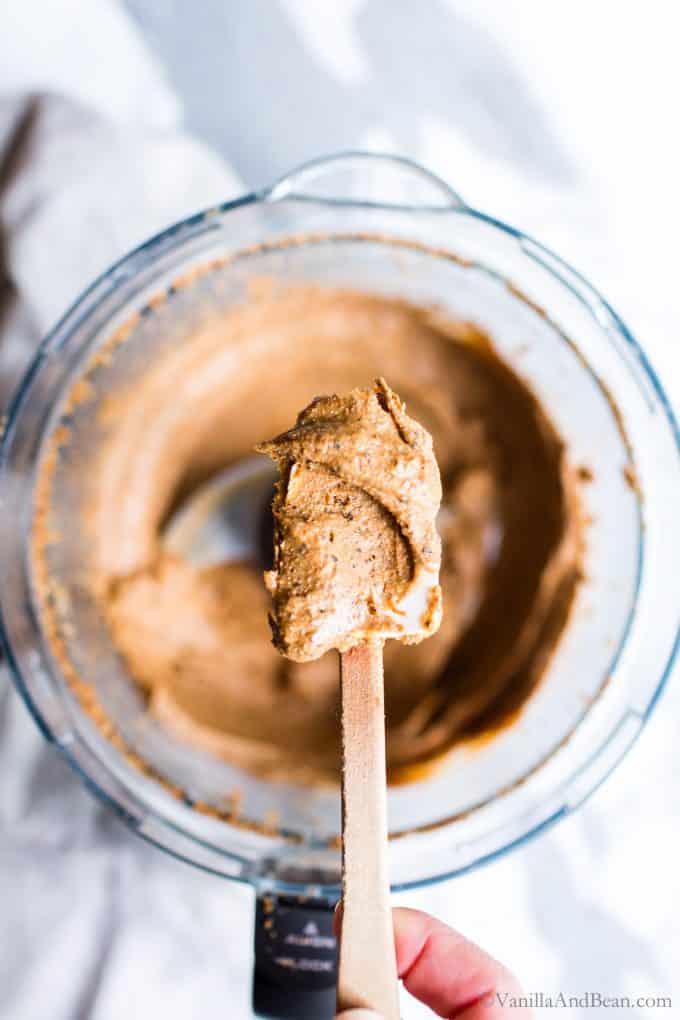
Naturally Sweetened Nut Butter
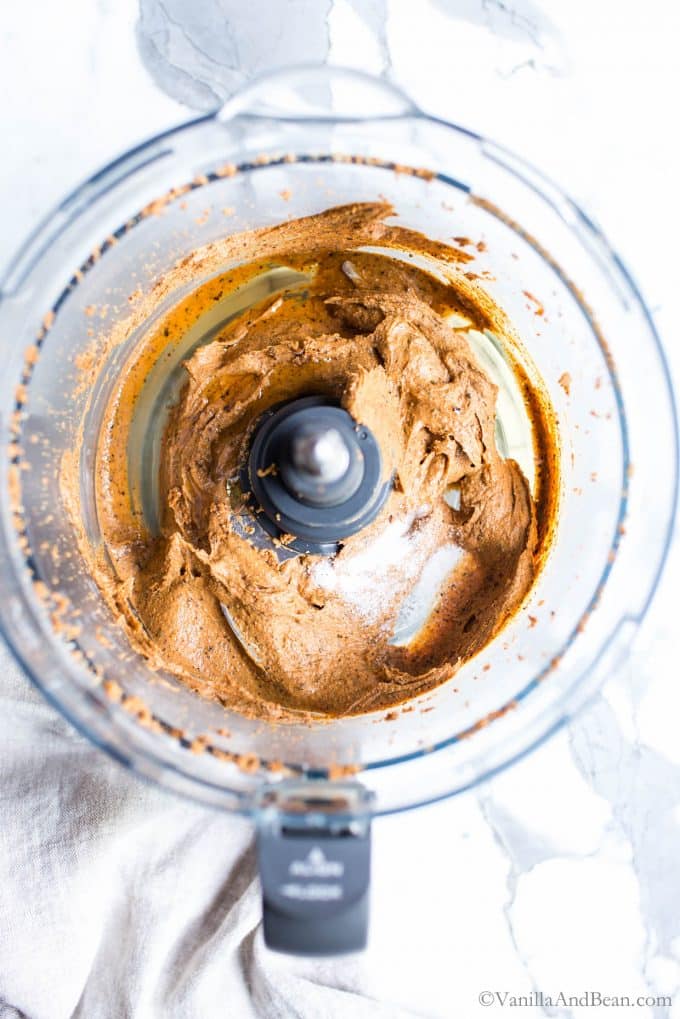
Adding a bit of natural sweeter seizes the nut butter, so to help get the mixture get moving again, I add a bit of oil. It takes a little time to bring it to a fluffy, light and ultra creamy texture, but it’s so worth it!
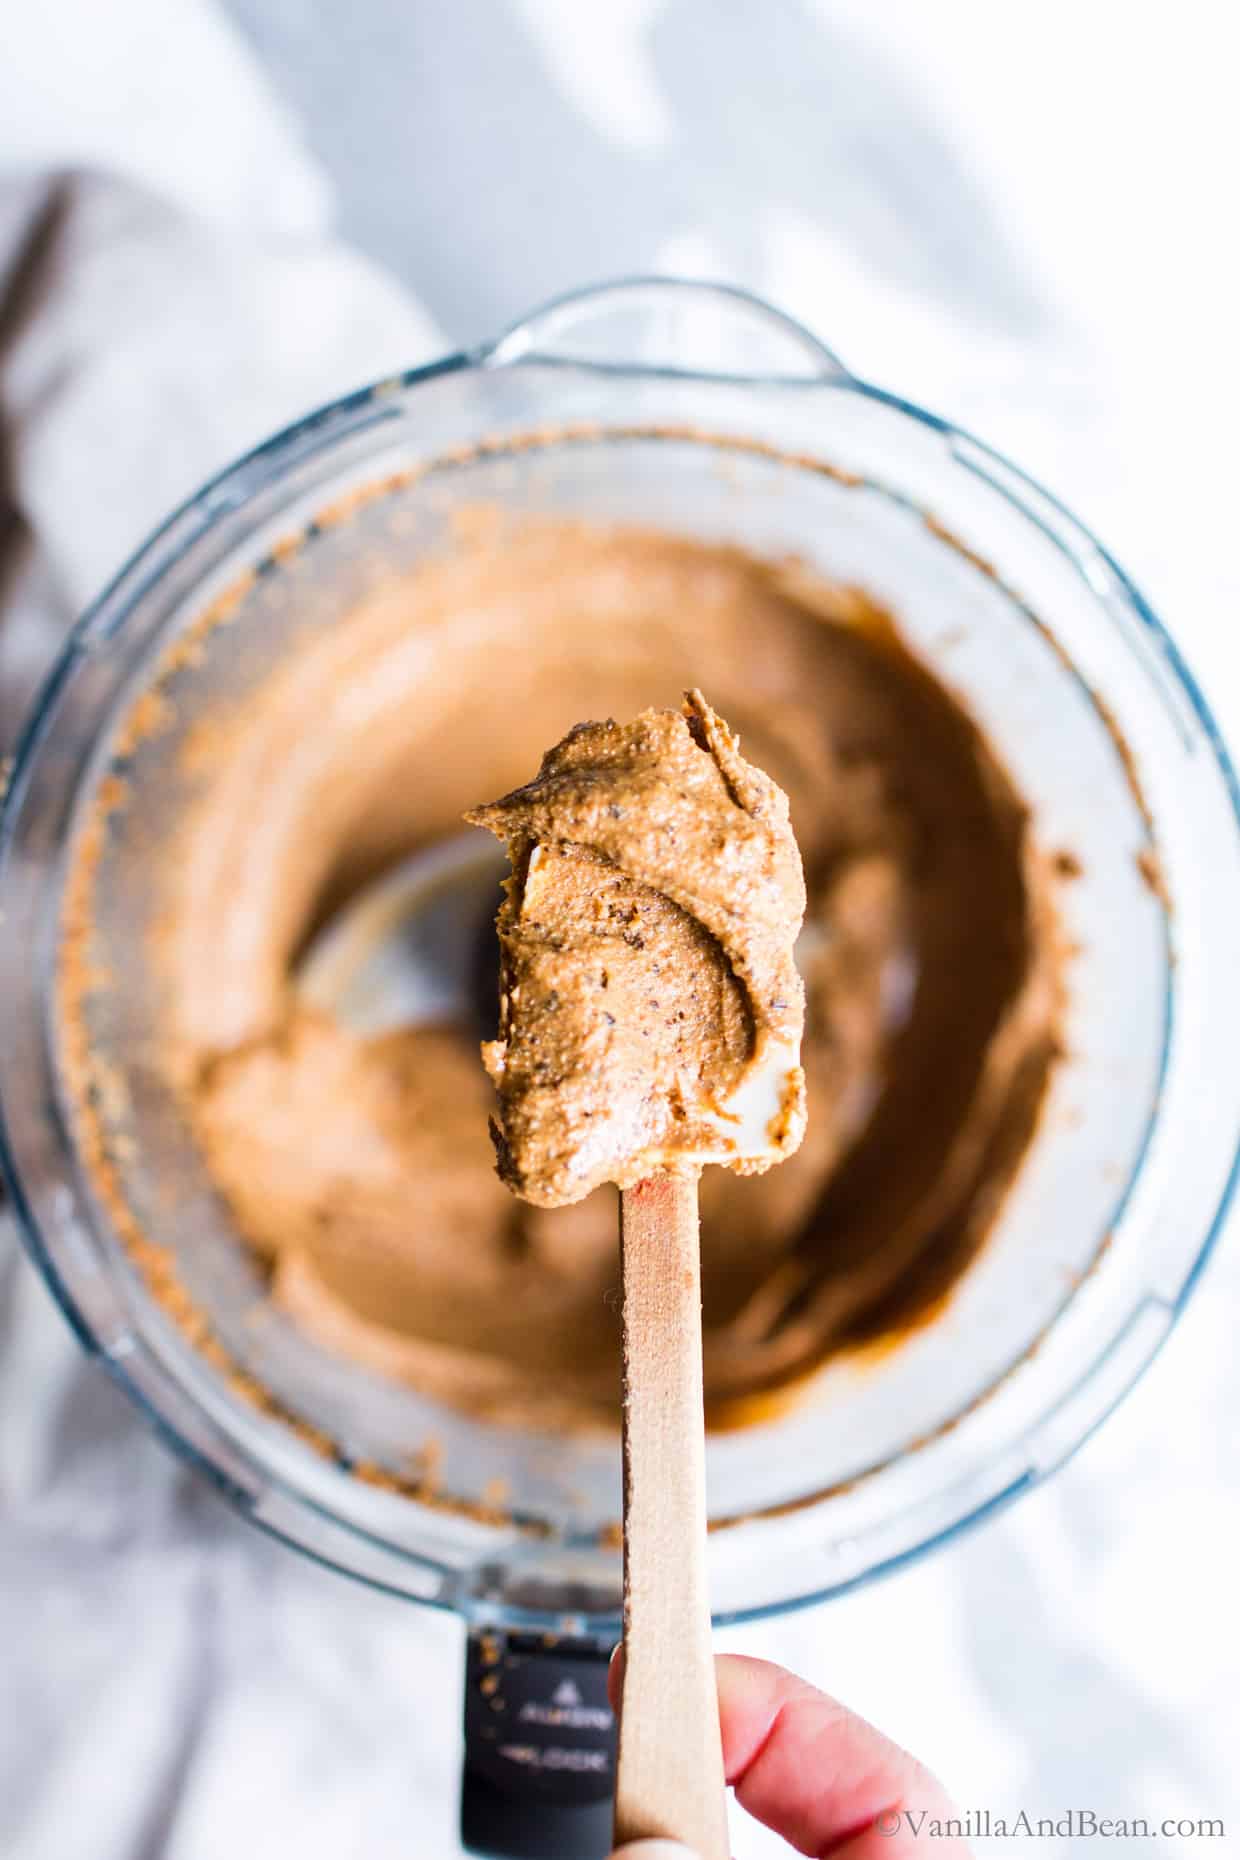
- The four images below reflect the nut butter after if first becomes creamy – at about 8-9 minutes and with the addition of maple syrup.
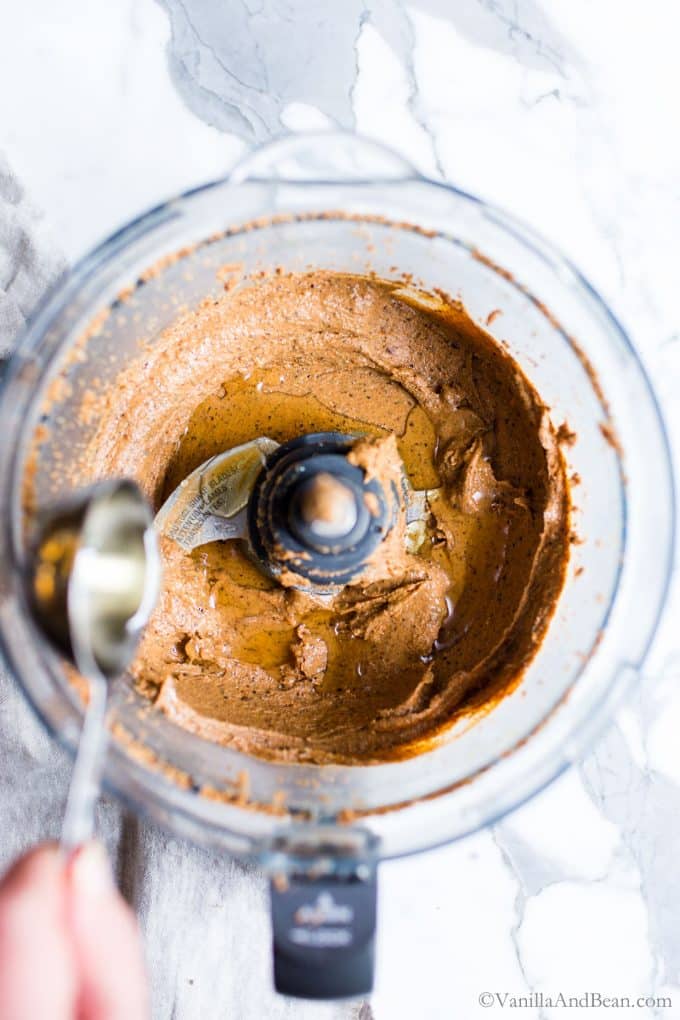
- After adding maple syrup or honey to sweeten the nut butter and a little coconut oil to help keep things moving, process for a additional 16-17 minutes stopping to scrape the bowl frequently and to let your food processor rest if needed.
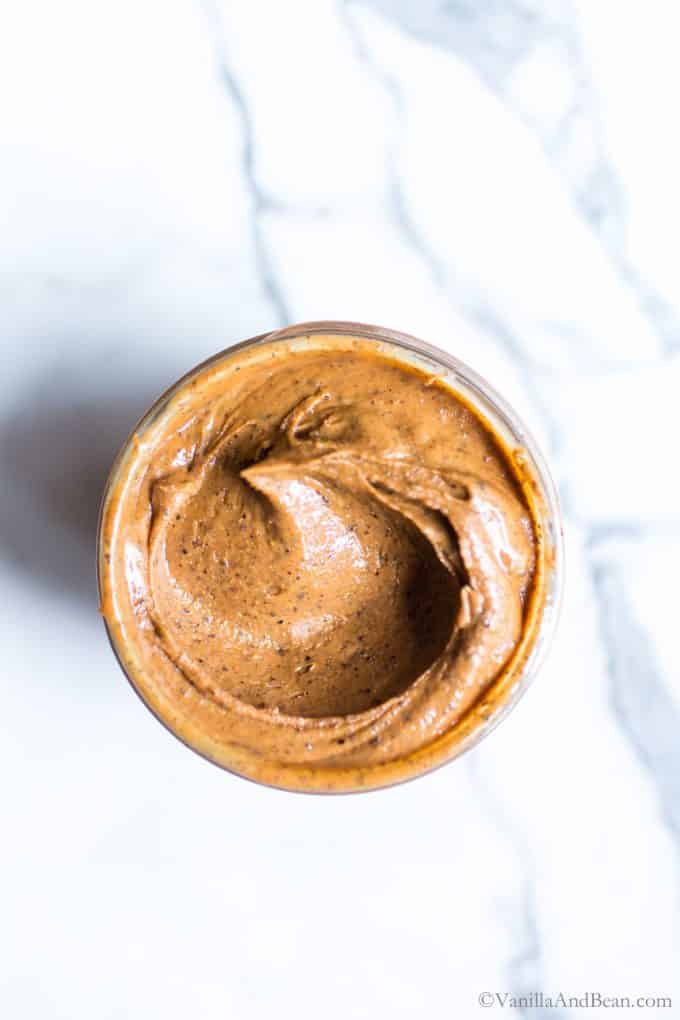
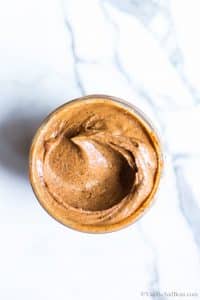
- At 25-26 minutes total process time, a whipped, creamy and flavorful nut butter emerges! This is where patience is needed. Making homemade nut butter is not a quick process.

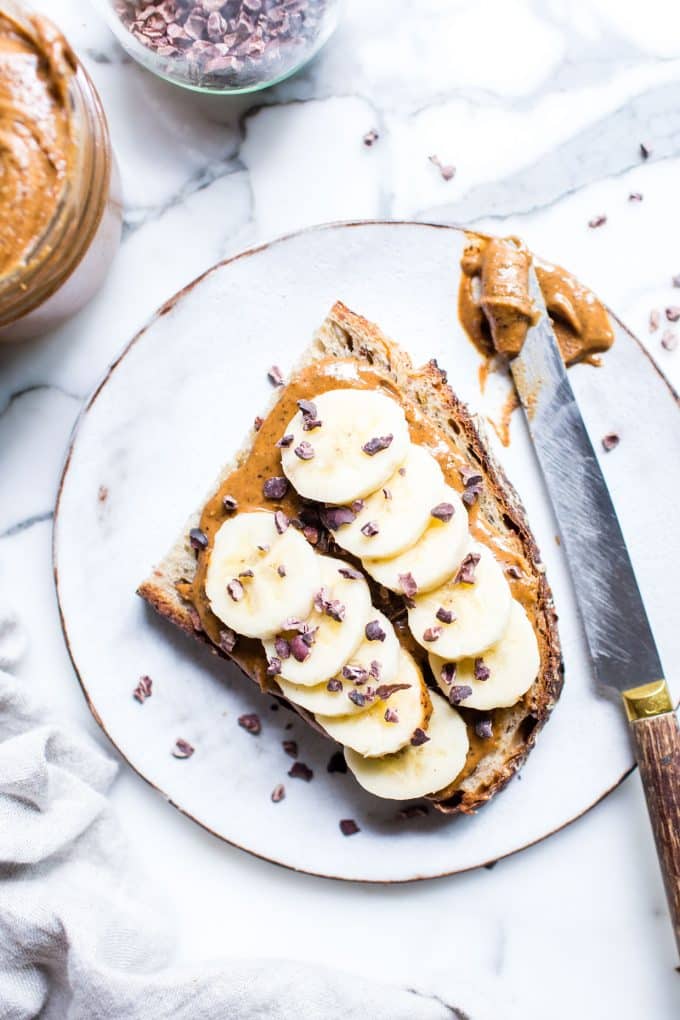
How to Enjoy Nut Butter
- Dollop it on top of oatmeal.
- Stir it into a yogurt bowl.
- Dip celery sticks into it.
- Spread it on toast and top with your favorite fruit.
- Dip apple wedges into it.
- Eat it with a spoon!
New customers, use my special code “NUTSPLEASE” at Barukas.com for 15% off your order! (this is an affiliate link)
Head over to Barukas.com to learn more and to try Baru nuts yourself! Found only at Barukas.com and other online retailers.
Baru Cashew Nut Butter Recipe
Ingredients
- 1 C (150g) Raw Cashews
- 1 C (165g) Baru Nuts I like Baruka Nuts
- 1/2 tsp Fine Sea Salt optional
- 2 Tbs Maple Syrup or Honey optional
- 2 Tbs Coconut Oil melted - warm to the touch, optional
Instructions
- Preheat the oven to 350F (180C). Toast the cashews for 8-10 minutes until golden and toasty. Pop in the freezer for about 10 minutes to cool. There's no need to toast Baruka nuts as they are already toasted.
For Unsweetened, No Oil Added Nut Butter:
- In a large (I use a 12 C) food processor fitted with an S blade, add the Baru and cashew nuts. Turn the processor on and carefully monitor the progress of the nuts, stopping to scrape the bowl as needed and/or stop to allow the machine and/or nuts to cool while processing. Here is the progression and times it took me to process the nuts:Minutes 1-9 with no Maple or Honey or Oil Added: 1.5 Minutes - nuts are crumbly and will stick to the inside of the bowl. 4.5 Minutes - nuts are changing, becoming chunky, yet still crumbly. 6 Minutes - ball of nut "butter" forms yet it's crumbly.7 Minutes - nuts are still grainy and crumbly.8-9 Minutes - Creamy smooth nut butter forms. Add salt if desired, process a few seconds, and It's ready to use. If you like a little sweetness and a whipped texture, press on!
For Naturally Sweetened Whipped Nut Butter:
- Adding honey or maple syrup seizes the fats in the nuts, making the once creamy butter crumbly and chunky again. But processing them for an extended period of time creates a whipped, smooth and creamy butter. Lots of patience, and scraping the bowl down is needed here. You'll notice steam coming from the processor out of the shoot. This is from the nuts heating up (friction) while processing. This is fine, but keep an eye on your food processor so it doesn't over heat. If needed, stop and give it a rest if concerned. Minutes 9-26: add the maple or honey, oil and salt (if not already added) and begin processing again. Continue processing up to 26 minutes, stopping to scrape down the bowl as needed until smooth, whipped and creamy.
How to Store Homemade Nut Butter:
- Transfer the nut butter to a lidded storage container. It can be left out at room temperature if using it up soonish (I'm thinking within a week), but I store mine in the refrigerator to get a little more time out of it. To Refrigerate: I've refrigerated homemade nut butter for up to one month with good results. I'm thinking it could last longer, but haven't tested it. If any off odors, mold emerges, or the nut butter tastes bitter (rancid), toss it out. To soften nut butter, you can allow it to set at room temperature, or microwave it for about 30 seconds at a time, stirring in between, until desired softness.To Freeze: Store nut butter for up to four months in the freezer. Thaw in the fridge overnight.


I tried making baruka butter before and it was a fiasco so I was perplexed to try this. I have several bags of barukas that I had to use up so I gave it a try and it turned out beautifully. Thank you!
Hi Julie! Thank you for your note and giving the recipe a go! I’m so happy to hear you’re enjoying baruka butter! It’s SO good! And, with the cashews, it helps make the butter extra creamy.
Always learning something new and valuable here. As a nut lover I’m very intrigued now with trying baru nuts. Thanks, Traci!
Awh, thank you Jean! Happy to share what I learn!