
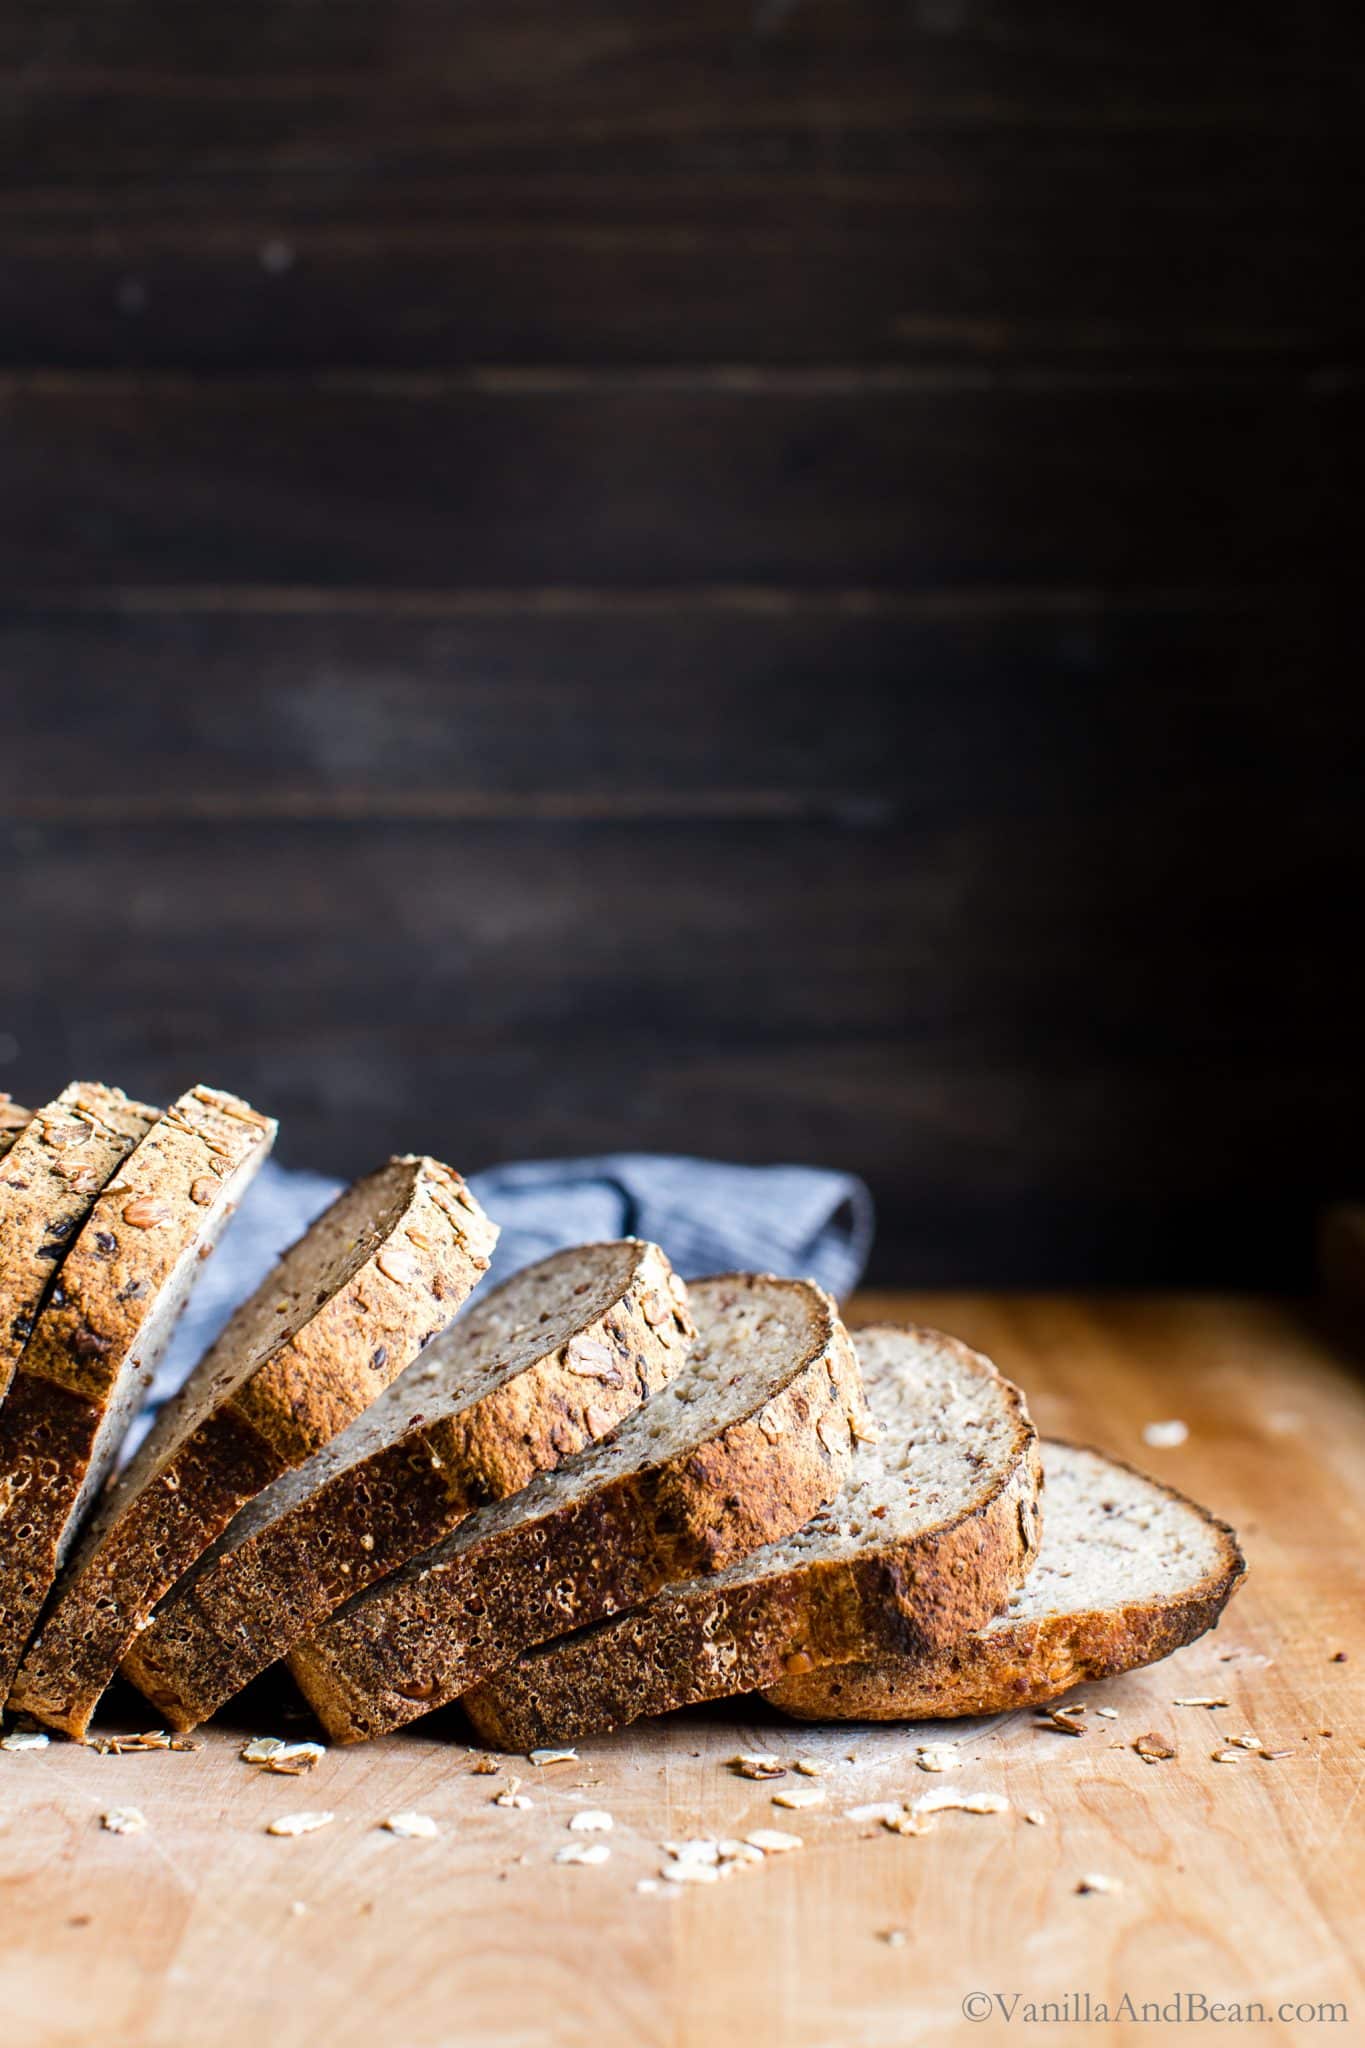
Texture rich, flavorful and tender, homemade Seeded Multigrain Gluten Free Sourdough Bread is gluten free bread you’ll look forward to eating. Use your Gluten Free Sourdough Starter to make this whole grain gluten free bread and love bread again!
Going Gluten Free
Going gluten free for a trial period in the summer of 2018 meant I had to give up my beloved homemade sourdough. After a few weeks of throwing internal fits, I finally decided to explore gluten free flours, and learn the nuances of gluten free baking. I knew it wouldn’t be easy, but I finally embraced the challenge.
After much research, creating a gluten free sourdough starter and baking many loaves of gluten free sourdough bread, testing, tweaking and taking notes along the way, I’m sharing my best loaf yet: Seeded Multigrain Gluten Free Sourdough Bread.
Although I’m eating gluten again, this bread remains one of my most beloved recipes on the blog. I hope you enjoy it as much as my family, friends and V&B readers have.
At a Glance:How to Make Gluten Free Sourdough Bread
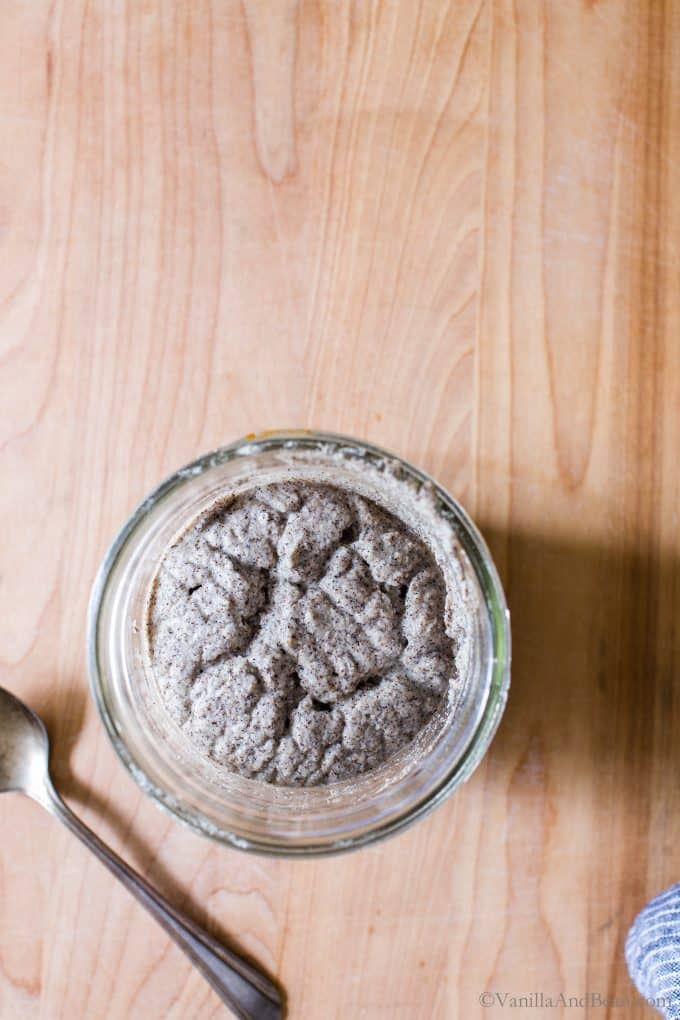
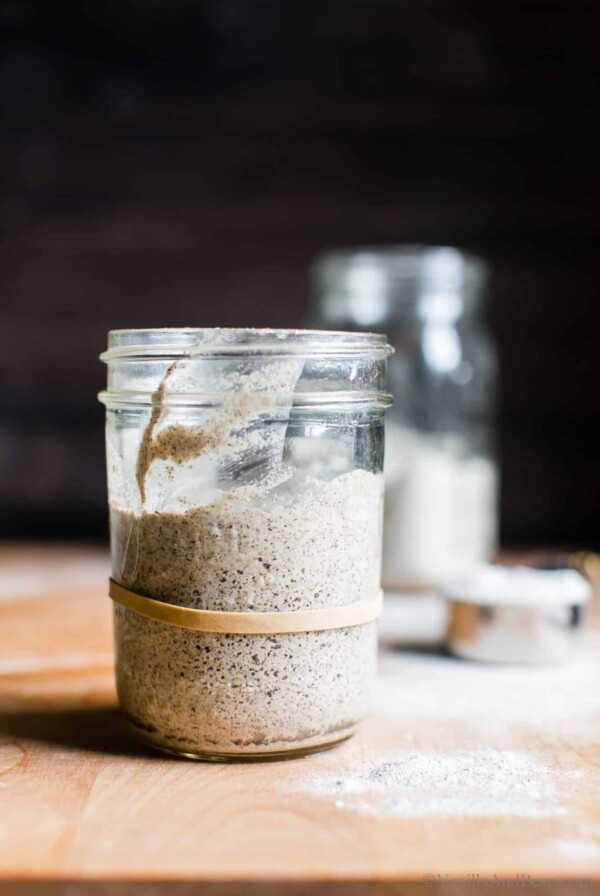
This gluten free sourdough bread recipe is simple to make, but you’ll need a gluten free sourdough starter. My starter recipe takes six to seven days to develop, but once you create it and continue to refresh (feed) it, it’ll be on stand-by next time you’re ready to bake!
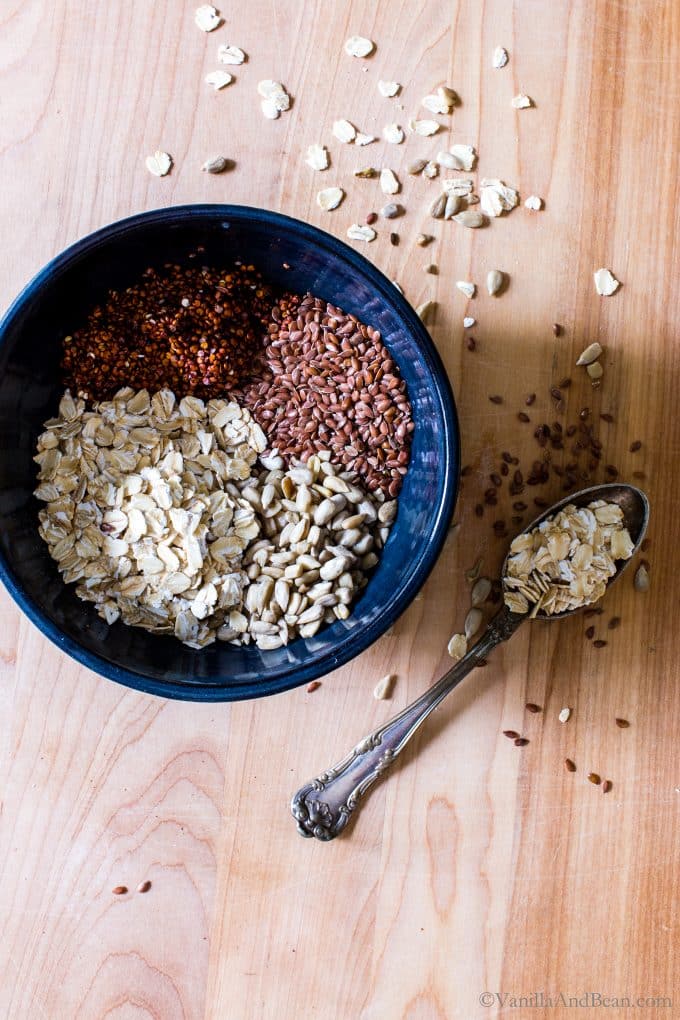
- First, prepare the soaker by placing the flax, oats, quinoa, and sunflower seeds into a small bowl with temperature water. Allow to sit overnight.
- Second, in a medium bowl, whisk the flours including oat, brown rice, millet, tapioca with psyllium husk powder and salt.
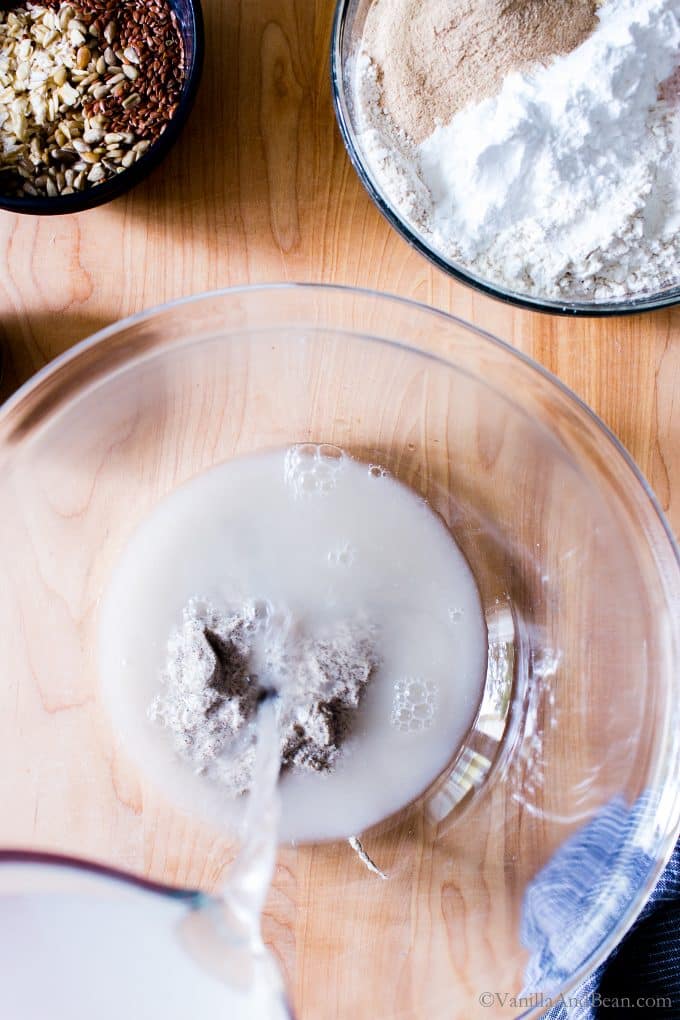
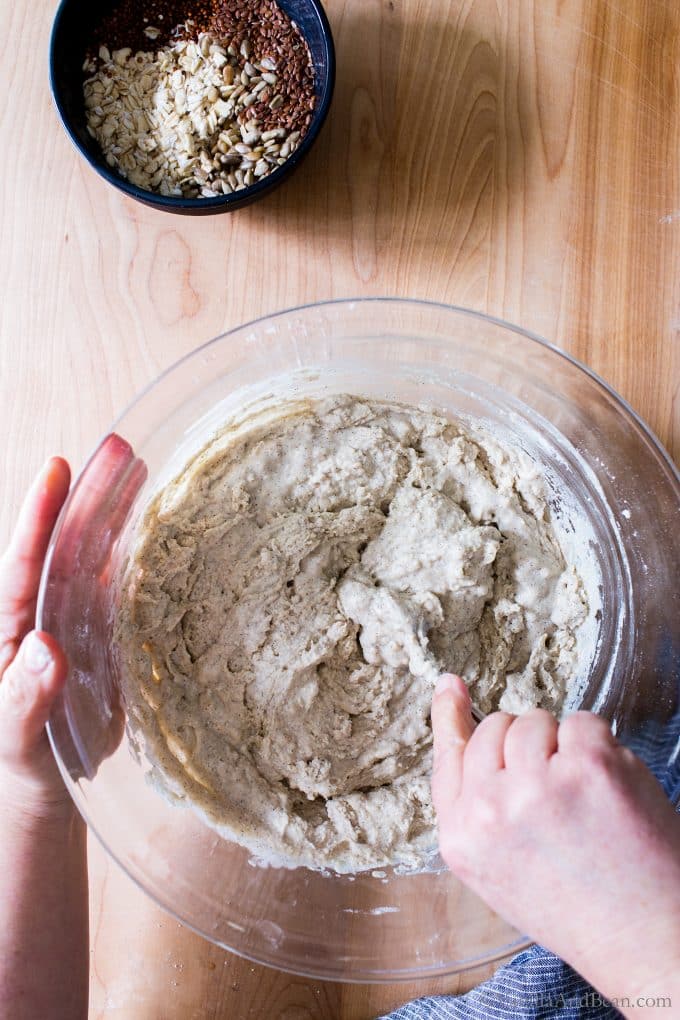
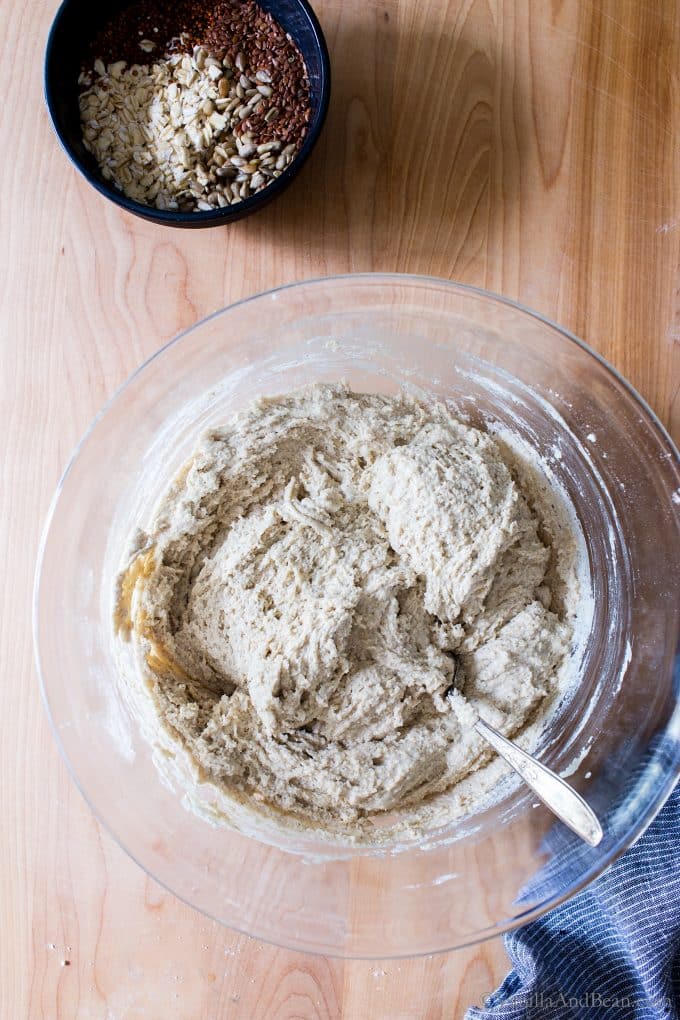
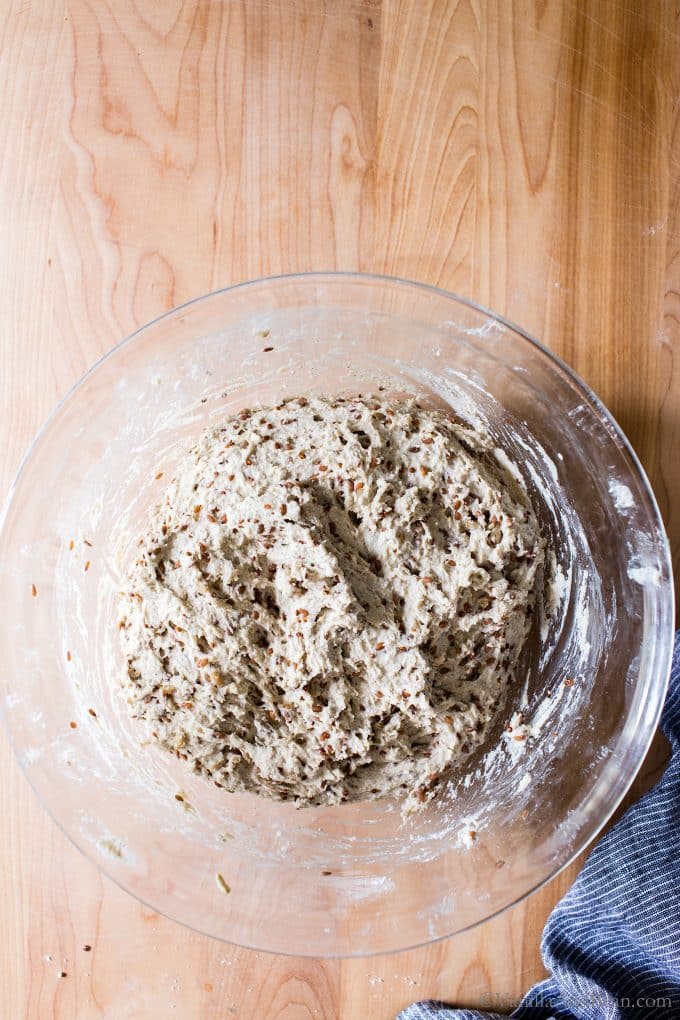
- Third, in a large bowl, whisk your fed and active starter, water, and maple syrup or honey. Add the flour mixture to the starter/water mixture and mix with a fork.
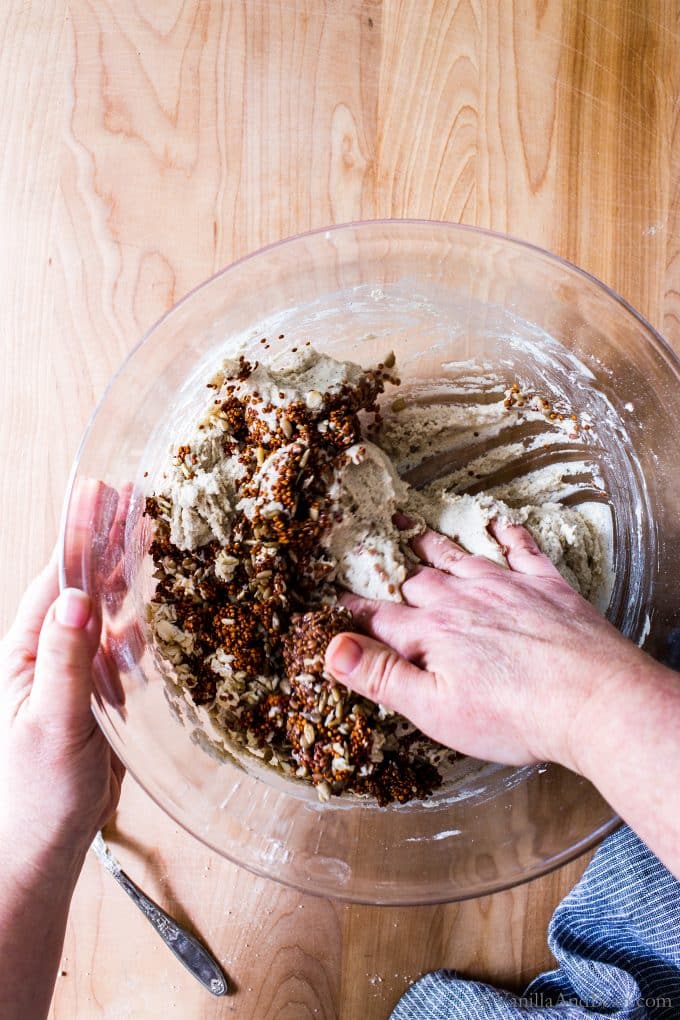
- Fourth, hand mix in the soaker.
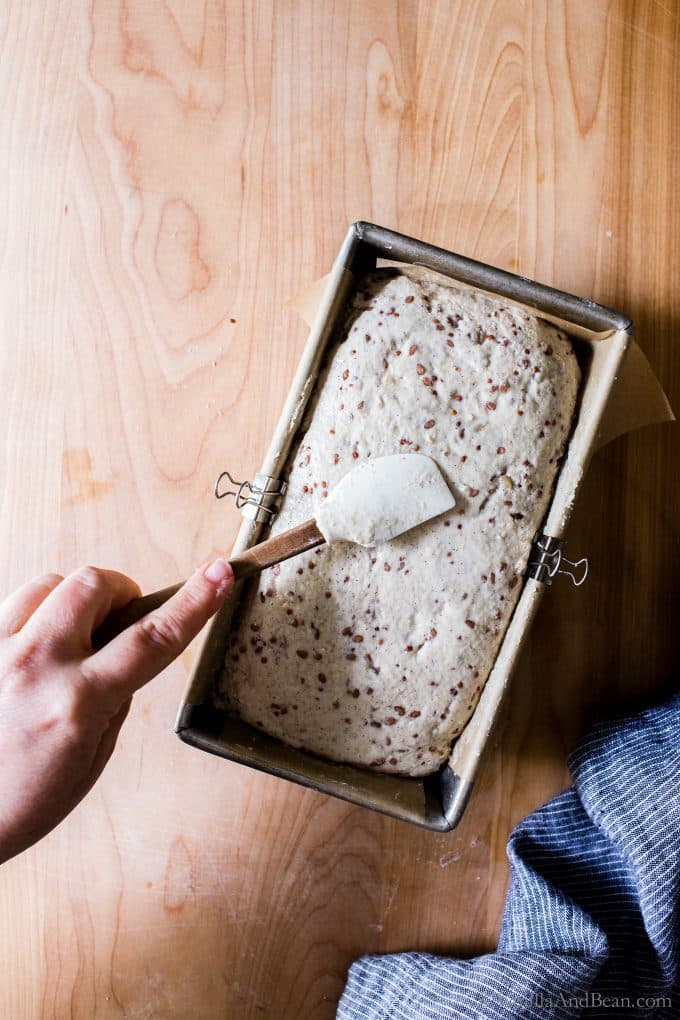
- Fifth, transfer the GF sourdough to a prepared loaf pan, while patting and smoothing the top and rounding the edges of the dough.
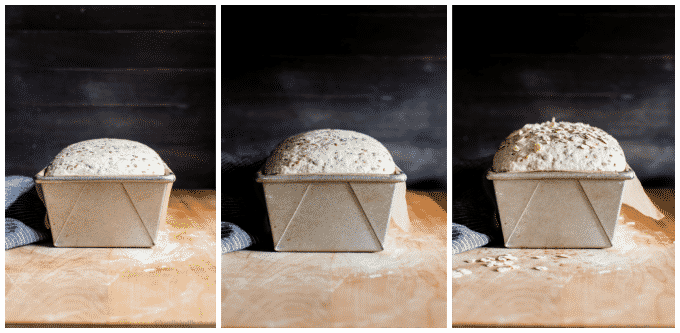
- Next, cover with a damp tea towel and ferment for 12-14 hours at room temperature.
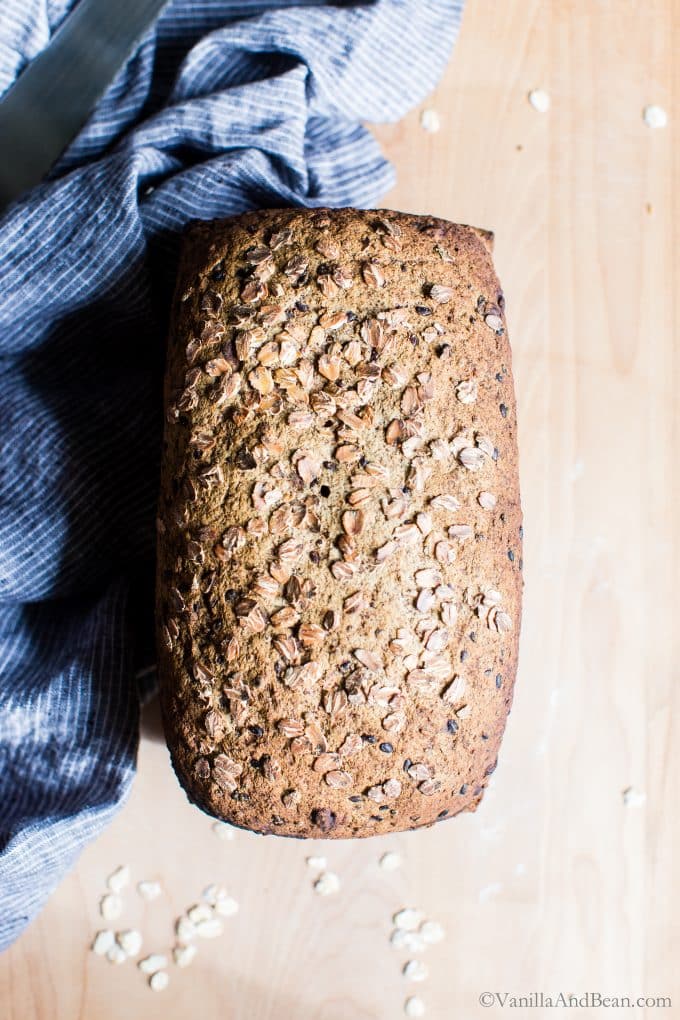
- Last, bake the loaf for about an hour.
You’ll notice there is no proof for this recipe, meaning it only rises once (fermentation). Once the loaf is shaped and undergoes bulk fermentation, it’s ready to bake.
After baking, the gluten free sourdough needs to cool completely, at least a few hours before you slice into it! Waiting until the following day is even better as it allows the bread time to cure.
Using Other Gluten Free Flours in this Recipe
You can certainly give it a go! I’ve tried subbing buckwheat and amaranth flour for millet in this recipe but the bread wasn’t as tender and light. I’ve found thorough trial and error that millet helps give loft to gluten free bread without adding more starch. Also, amaranth was a little too strong for my taste.
How Gluten Free Sourdough Bread Tastes
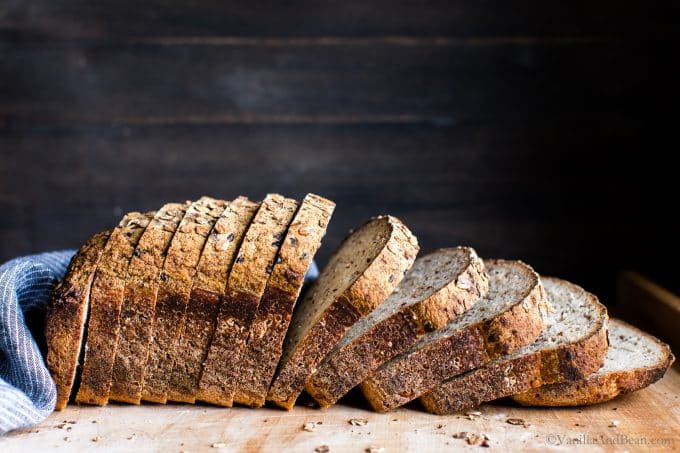
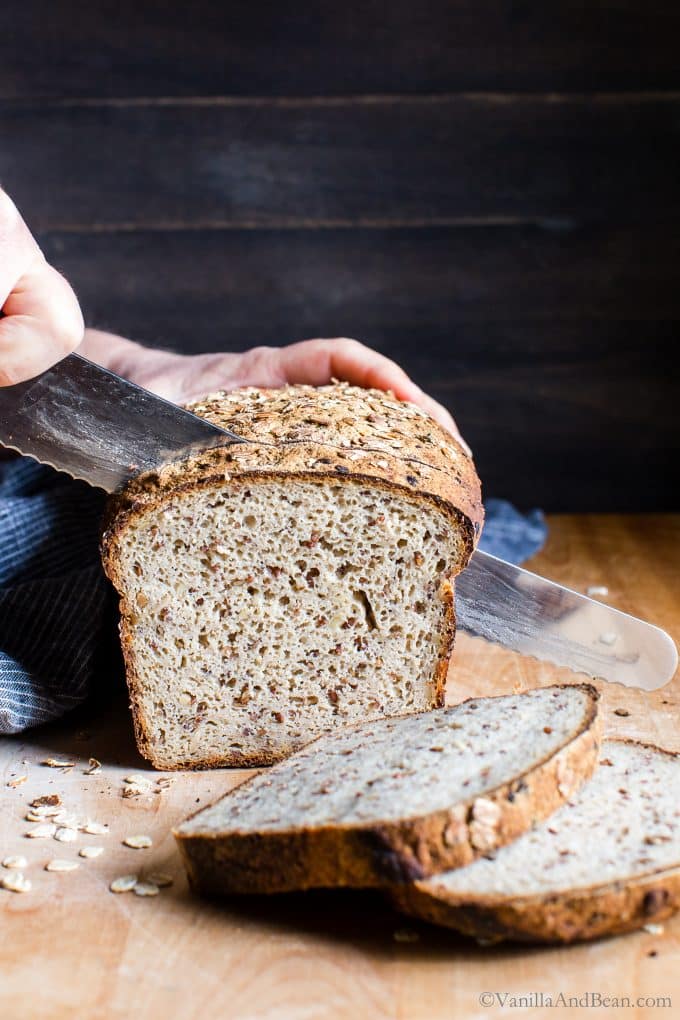
In a word, earthy in such a good way! This GF sourdough bread is texture rich due to the seeds/grains, has a mild oaty flavor, and a chewy interior thanks in part to the binding power of psyllium husk powder, with a nice crisp crust (after toasting).
Because this bread is gluten free, egg and dairy free (yes, vegan gluten free sourdough bread!), mostly whole grain, free of fillers and large quantities of starches, you’ll notice the interior is moist/tacky to the touch. So, it needs to be toasted to bring out its best texture. Sometimes I’ll double toast for breakfast toast, aka, avocado with egg toast.
Storing and Toasting
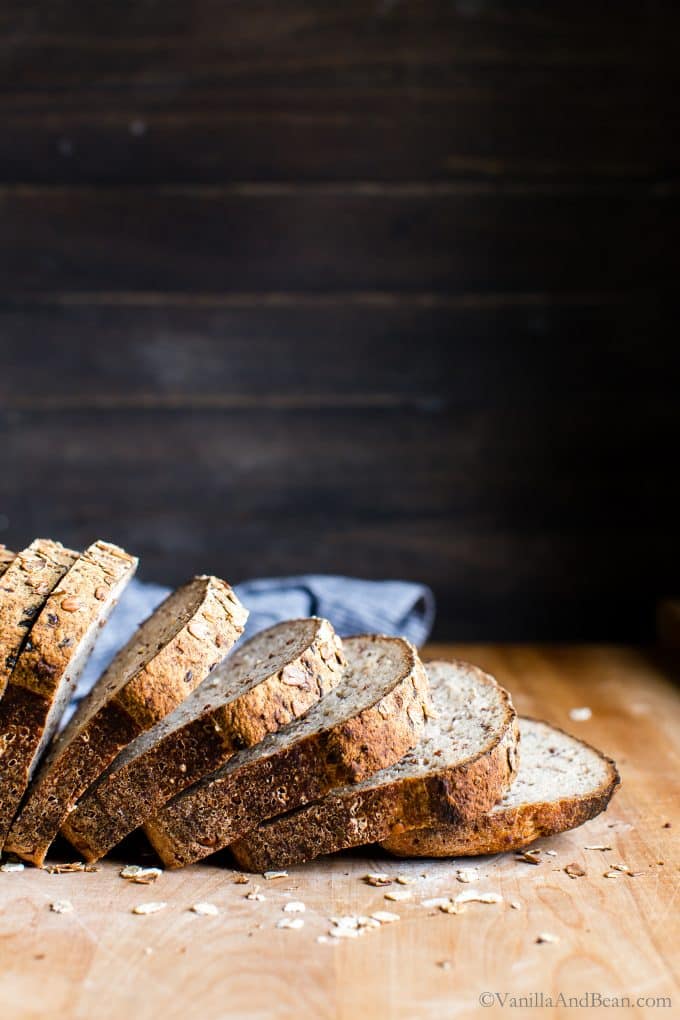
After the bread is completely cool, slice it with a serrated knife. The slices can be stored at room temperature in a closed container for up to three days or frozen for longer storage. For freezer storage, slices can go from freezer to toaster directly – this is also when I’ll double toast a slice.
Traci’s Tips
- Sourdough discard? Save it, put it in a covered container in the refrigerator and then, make these Gluten Free Sourdough Pancakes, Gluten Free Sourdough Waffles, or Gluten Free Sourdough Pizza!
- Dutch oven? I’ve tested this recipe in a Dutch oven in an effort to make a boule. Without walls of a loaf pan to hold the dough together, it spread way too much and was flat. Stick to a loaf pan ( if not experimenting :D ) .
- Shaping and then transferring the dough to the pan is sticky business. I’ve included two ways in the recipe to get the hardest part of the recipe done: a. shaping prior to putting the dough into the pan or b. shaping the dough after putting it in the pan. I prefer method a. as it produces a better shaped loaf – but it’s harder to do. Note the photos show method b.
- With a 119% hydration, this dough is sticky. But I’ve discovered through my testing, gluten free loaves with higher hydration and low starch content have a better rise and produce a more tender crumb.
- One of the flours used in this recipe is oat flour. I DIY oat flour and have a tutorial on the blog if needed.
- Substitutions: I do not recommend subbing any other ingredient for psyllium husk powder. It soaks up the water, gives the bread it’s chew like gluten-full bread has and holds the dough together.
- I’ve tried subbing buckwheat and amaranth flour for millet in this recipe but the bread wasn’t as tender and light. I’ve found millet helps give loft to bread without adding more starch. Also, amaranth was a little too strong for my taste.
- I’ve not attempted subbing a different flour for oat flour.
- Use a scale. In baking, weighing ingredients is important for optimal outcome. I find that especially true in gluten free baking. I recommend investing in a good digital kitchen scale.
Makers Notes
So happy to read y’all are enjoying the bread in the comments below. Please note, I’ve not tried the following substitutions, but want to share what the community has offered. Here are a few community notes that may be helpful when making this recipe:
- Maya commented: “I used sorghum flour for the oats and half buckwheat, half white rice for the millet. It might not have risen as much as your photo, but it still turned out great.”
- Kate said: “It worked great – I substituted the same amount of arrowroot powder for the tapioca flour.”
- Sarah said: “Slice thick and when toasted you get the crusty edges and soft spongy center.”
- Jill said: “…substituted the brown rice, millet, and tapioca for an even exchange of the King Arthur cup for cup gluten free. This loaf came out SOOOOO GOOD!”
- Leah said: “…sorghum for the oat flour and teff for the millet. I got a nice rise and it came out SO good! The teff really gives it a wheaty flavor, almost like pumpernickel. Both times I left out the soaker and it didn’t seem to be a problem.”
Seeded Multigrain Gluten-Free Sourdough Bread
Ingredients
For the Soaker:
- 3 Tbs Whole Flax Seeds
- 3 Tbs Whole Rolled Oats, gluten free
- 3 Tbs Red or Tricolor Quinoa, rinsed under running water
- 3 Tbs Hulled Sunflower Seeds
- 1/3 C (80g) Water, room temperature
For the Bread:
- 1/3 C + 2 Tbs (100g) Gluten Free Sourdough Starter, previously fed, and doubled in size
- 2 1/2 C + 2 Tbs (605g) Water, 80F (27C)
- 3 Tbs Maple Syrup, or Honey
- 1 C (145g) Brown Rice Flour
- 1 C (150g) Millet Flour
- 1 1/4 C (130g) Oat Flour, gluten free
- 1/2 C + 1 Tbs (80g) Tapioca Flour
- 2 1/4 Tbs Psyllium Husk Powder, I use Terrasoul Psyllium Husk Powder
- 3 1/2 tsp Fine Sea Salt, or reduce to preference *See note on salt adjustment
- 1-2 Tbs Whole Rolled Oats, for sprinkling on top, gluten free
Instructions
For the Soaker:
- Prepare the soaker by placing the flax, oats, quinoa, and sunflower seeds into a small bowl. Pour room temperature water over the top of the soaker. Leave out at room temperature for about 6-8 hours. If you forget to do this, you can pour hot water (hot to touch) over the soaker before you start preparing the ingredients for the bread.
For the Dough:
- Line the inside of a 8.5L x 4.5W x 2.75H inch loaf pan (23cm X 13cm) with criss crossing parchment with enough hangover on all sides to later help shape the dough and to be used as handles for removing the bread from the pan. If you have clips to clip the parchment to the sides, use them.
- UPDATE 5/20: Some makers have commented that they "poured" the dough into the baking pan. Please note that the dough should be of a sticky thickish batter-like consistency where it is scraped into the pan and holds together. The dough should not be pourable. In order to achieve this batter-like consistency, Psyllium Husk Powder is essential. I do not recommend substituting this ingredient. Mix the Dough: In a large mixing bowl, add the starter, water and maple syrup (or honey). Whisk until the starter is incorporated. Set aside.In a medium mixing bowl whisk the brown rice flour, millet flour, oat flour, tapioca flour, psyllium husk powder and fine sea salt. Mix throughly so that when the psyllium husk powder hits the water, it wont clump. To the water/starter mixture add the flour mixture. Use a fork to mix the flour into the water until the dough starts to stiffen, about one minute. The dough will feel like a thick batter. Add the soaker and knead the dough with your hand, incorporating the soaker until the mixture is evenly distributed, about one minute. Use the fork to scrape any excess dough off your hands and fingers. The dough will be very sticky. Set the bowl aside for about 10 minutes to rest. It will stiffen a bit as it rests.
- Shape and Pan the Dough: There are two ways to approach shaping. a. if you're in a hurry or b. if you have a bit more time and patience. Either will work but I find I get a better shape out of b. (note that a. was used in the images seen above). A. Scrape the batter into the loaf pan. Use a moist rubber spatula (remoisten as needed) to gently shape the top nudging the edges of the loaf inward to produce a nice dome shape loaf bread is known for. This takes a little practice and finessing. Just do the best you can. Use the 'handles' of the parchment and pull opposite sides inwards towards the center of the dough, helping to round and shape the edges. Moisten your fingers or small spatula and smooth the top to rid any lumpy areas. B. A bench scraper for this method is needed. Moisten your work surface with a bit of water (I use a spray bottle and sprits it a few times). With moistened fingers, nudge the dough out of the bowl and onto the moist surface. The dough will be very sticky. Re-moisten your hands and pat the dough into a rough rectangle/log a little smaller than the size of the loaf pan using the bench scraper as needed to move the dough. Pat and smooth the edges as needed using wet hands (no flour here), rocking the dough back and fourth to help shape it, smoothing and rounding the top into a rectangular dome. This takes a little practice and finessing, just do the best you can. Using one swift move, scoop up the shaped dough with a bench scraper and transfer it to the loaf pan. Use the 'handles' of the parchment and pull opposite sides inwards towards the center of the dough, helping to round and shape the edges. Do this several times. Moisten your fingers or small spatula and smooth the top to rid any lumpy areas. Use a moist rubber spatula to gently shape the top nudging the edges of the loaf inward to produce a nice dome shape loaves of bread are known for.Now is a good time to refresh (feed) your starter and store it for next time.
- Bulk Ferment: Remove the clips from the pan if using. Cover the dough with a wet tea towel and allow the dough to ferment overnight at room temperature (it's okay if the wet tea towel touches the top of the loaf). Fermentation will take anywhere between 12-14 hours depending on how active your starter is and ambient temperature. In my chilly kitchen at 66F, the dough takes about 14 1/2 hours to rise overnight. There is no proof for this recipe. Go right into baking the loaf after bulk fermentation. The loaf is ready to bake when the dough increases to 1 1/2 times in size and has risen to about 1.1/2" (3.8cm) above the lip of the pan at the center. The dough will spring back when gently pressed on top.
- Bake the Loaf: Place a oven rack in the center of the oven and preheat the oven to 550F (288C). Lightly spray or brush the top of the dough with water and sprinkle 1-2 Tbs of rolled oats over the top. Decrease the oven temperature to 475F (246C) and bake the loaf 55-60 minutes or until the internal temperature of the bread is between 200F-205F. If the bread starts getting too dark on top, tent the bread with foil. The bread pictured here is untented. After 10 minutes out of the oven, transfer the bread to a cooling rack. Cool completely, at least for two-three hours, better if cured overnight, before slicing into it. You'll notice the bread is very hard, but will soften as it cools.
- How to Store and Enjoy!: After the bread is completely cool, slice it with a serrated knife. The slices can be stored at room temperature in a closed container for up to three days or frozen for longer storage. For freezer storage, slices can go from freezer to toaster directly.You'll notice the interior of the bread to be tacky. This is normal. I find this gluten free sourdough needs to be toasted before it's enjoyed… sometimes double toasted to bring out its best flavor and texture.
Video
Notes
Nutrition
Nutrition is provided as a courtesy and is an estimate. If this information is important to you, please have it verified independently.
Made it? Leave a comment below!
The most helpful comment may include recipe rating, feedback, any modifications or helping other commentors.





I stumbled upon your wonderful blog when I searched for a chewing gf pizza dough recipe. I have both ATK gf cook books so when I noticed that you adapted your recipe from that I was please. By the way the pizza dough is out of this world amazing it has replaced ATK’s! So thank you. I looked around and saw the sourdough bread and I let our a little squeeze, I have not had bread since December 2019 because I decided to go GF in January and decided to make my own instead of store bought. I have my starter going right now ( day 3) I am making my bread this weekend as written. My question is can I make this bread without the soaker? I really want to make a loaf for someone who has diverticulitis and she cannot have any nuts or seeds. Thank you so much for your receipes , I will be frequenting all the gf carbs!!!
Hi Elle! Thank you for your note and sharing your thoughts. So happy to hear you’re enjoying good pizza again! Hooray for homemade bread! I hope your starter is about ready by now. I have not tried this recipe without the soaker so, it may be a bit of an experiment if you give it a go. I hope this helps!
Hi Traci,
I have made tjis recipe several times and it is sooooo delicious! Instead of leaving out the soaker I only use the rolled oats as the soaker and my friend loved it!!! I of course pointed her straight to your lovely blog . I just wanted to drop a quick thank you. I’m actually making another loaf tomorrow. I now make this recipe varying the soaker, adding some other grains and it comes out delicious everytime! I am going to experiment by making sourdough hamburger buns next with tjis recipe. Thanks again Traci 🙃
Hi Elle! Thank you for your note and sharing your success! So happy to hear you and your friend are enjoying the sourdough. I love the idea of only using rolled oats instead of other inclusions! Can you share how much you used? Please keep in touch regarding the buns… I have a hard time getting this dough to hold its shape when attempting a free form loaf. Thank you again!
Hi Traci,
I used 6 tbsp of rollef oats as my soaker and I still sprinkled the top of course so so delicious! I’ll let you know about the buns.
Hi – i used to bake alot of bread but stopped about 8 years ago when i had to go gluten free. I tried at the time but the breads seem to turn into starch in my mouth while chewing.
Seeing this recipe was very inpsiring. I made it and i got an almost okay rise before the bake, no rise at all in the oven. Still the bread actually tastes great to me and my husband – as in we’ve eaten 2/3s of the loaf in less than 24 hours.
I bake in a long thin cloche so the sides are held up
the challenge is I live at 5600 feet. So i htink maybe i need to do a double rise rather than a single rise becaus ti rises faster.
I am trying a second bread where i left out once cup of flow that i will add to feed the culture for a second rise. I wasn’t sure if that was necessary.
Do you have any suggestions regarding the altitude?
Also, that seems like a huge amount of salt and i thought that salt lessons the rise. Is there a reason you are using so much salt.
I really want to get this right! thank you so much for any help you can give me.
Hi Guruka! Thank you for your note. Regarding high altitude baking, I have no experience. King Arthur Flour has an article on it however. Regarding salt, please feel free to adjust it to your taste. I made this bread many times before posting it here, and the amount in the recipe is what I found to balance the stronger flavors of gluten free flours. I hope this helps!
Thank you so much. My second round I did much better on the rise going back to some high altitude steps that worked with gluten bread.
I still missed the push in the oven but I got a reasonable rise before it went.
The bread is wonderful
I will fiddle with around with decreasing the salt. I’m probably older than you!
Thanks so much for the great recipe and for getting back to me!
I’m so inspired by your GF sourdough bread. May I have your advice if I can use sorghum flour to replace Millet, Teff flour to replace oat flour ? This is what make me delay my baking!
Hi Helen! Thank you for your note. Please see makers notes above the recipe card and comments on this blog post for substitutions makers have made. The only subs I’ve tried: buckwheat then amaranth flour for millet in this recipe but the bread wasn’t as tender and light. Amaranth was a little too strong for my taste. I hope this helps!
This came out beautifully despite my having to make two substitutions: Chia instead of flax seeds and molasses instead of honey or maple syrup (both were made just because they were what I had.) The crumb is the color of a nice dark beer, and you can taste the somewhat char-y molasses. But I am still SO happy with it! The dough did not stick to my Kitchenaid stand mixer’s bowl, which was the bowl that I put the sourdough starter in (also because it was the one clean large bowl I had left). Had zero trouble pouring the dough into my stoneware loaf pan. Ferment was done in my microwave to keep it a little warmer, with a pre-nuked rice pack around it. It rose nicely (though flat on the top). It did rise and mound nicely in the bake. It seems to be forgiving if you can’t quite get your oven up to 550 degrees. However, listen to what the author says on weighing the flour! It took me a cup and a third of millet flour to make 150 g!
Hi Susan! Thank you for you note, sharing your subs and experience! Yes to weighing ingredients – I’m amazed that several of my different brand measuring cups are not equivalent… ! SO happy to hear you’re enjoying the bread!
Hello again. I’ve followed your instructions exactly, for the starter and the bread, and now I’m about to bake… The dough has been rising for 13 hrs, and is still barely ‘over’ the lip of the bread pan. It looks just like a regular size loaf. I think I’m going to bake it anyway ….. You say heat the over to 550, then reduce to 475. Can you tell me why it has to be so high? I’ve never even had my oven that hot…. just a little concerned…!
I will let you know how it all turns out for sure!
Hi Barbara! Remember, time is only a guide as this is the nature of sourdough. The high heat helps with oven spring and to evaporate as much water as possible. This is a very wet dough. I hope this helps!
Hi there, checked up on the heat level and understand about that now. The bread turned out amazing. The taste is totally unique, earthy (as you said), and bouncing with a hearty goodness. I wasn’t expecting it to be a meal on its own, but it is… deliciously so.
The only thing I did wrong was somehow managing to get an ‘air pocket’ between the bread itself and the crust -not huge, but there it is… Not the first couple of slices, but after that. What did I do wrong?
It hasn’t affected the taste or the consistency. The moistness in the centre was a little different so I’m glad you mentioned that. You notice it – and then its gone. Toasting it was utterly divine. Thank you.
I’ll definitely be doing this all over again.
Hi Barbara! hehe… “a meal on its own”… I hear you. SO happy to hear you’re enjoying the bread! The air pocket is the nature of sourdough… however, to minimize the risk of this happening again, simply press the dough firmly into the pan prior to baking. You may still get an air pocket, but it’s not unusual. Thank you for your note!
Thank you for the recipe! I followed it to make my delicious bread. I also added anise seeds. Also used chia seeds instead of psyllium husk and it worked perfectly. Thank you!
Hi Yana! Thank you so much for your note and tip about chia seeds! Hooray! So happy to hear you’re enjoying the bread!
Psyllium Husk Powder- I don’t have any and it will be at least a few days until I get it. Can I omit or substitute something for it? Thanks.
Hi Monica! I’ve not tested this recipe without the psyllium. It’s essential for holding things together and giving the bread it’s ‘chew’ sans gluten.
I had a hard time shaping the dough, had to add a few extra tablespoons of flour, loaf came out very dark on the sides and didn’t rise more than a 1/2 inch above the pan after 14 hours at 70 C. My oven is very old and doesn’t have a good thermocouple so I have no idea what the actual oven temp was! Gooing to turn it down more next time. I’m waiting for the bread to cool before I cut into it…SMALLS AMAZING!!! Thanks for sharing your recipie!!! (This is also my first ever attempt at making bread form sour dough starter).
Hi Mrl… even with a few issues, it sounds like you made a delicious loaf of gluten free sourdough! Way to go you! I hope you’re enjoying it!
Do you know how to adapt this recipe to a bread machine? It has a gluten-free setting? ~ Thanks!
Hi Lydia… unfortunately I do not. If you give it a try, please keep us posted!
Tried making this bread. I had a few issues… My dough going into the pan was quite batter like- it poured into the pan. It did rise nicely over 14h (our house is cold), especially when I put it on top of the warm oven (while baking something else). And my oven only goes to 500F, so that’s what I used to preheat, but found it needed extra baking time. At 55 minutes the internal temp was about 145F. In the end, I baked it about 75min, with foil for the last 20. Not sure if needing extra time was because of the wetness of the dough, the oven temp, both??
But! It looks amazing! Smells amazing! Soooo hard waiting for it to cool!
I had a few of the same issues actually. Found that the batter was much to wet. So just this morning I tried it again and only added about 1, 1/2 cups of water and it seems to look exactly like the pictures. I can’t wait to bake it tonight!
Hi Hannah! Thank you for your note! This is a very wet batter. As it rests, the flours become more hydrated. I found through my testing, GF sourdough rises better with more hydration. Did you bake the loaf with the “much too wet” batter? I hope you enjoy the sourdough!
HI Monica.. Despite the challenges, it sounds like your bread turned out?! The batter is wet, but it shouldn’t be pourable. Humidity can play a role in moisture content of flour, so next time, if you make it again, hold some of the water out and add as needed. Thank you for your note!
Thank you for this wonderful recipe! I’ve been making it into Focaccia bread by spreading a double batch out on a large cookie sheet, using parchment paper under it. The crumb and chew is exquisite! And love all of the whole grain flours in the recipe. wholesome and beautifully delicious.
Hi Sherri! Focaccia!? That’s amazing! Thank you for sharing your tips. SO happy to hear!