
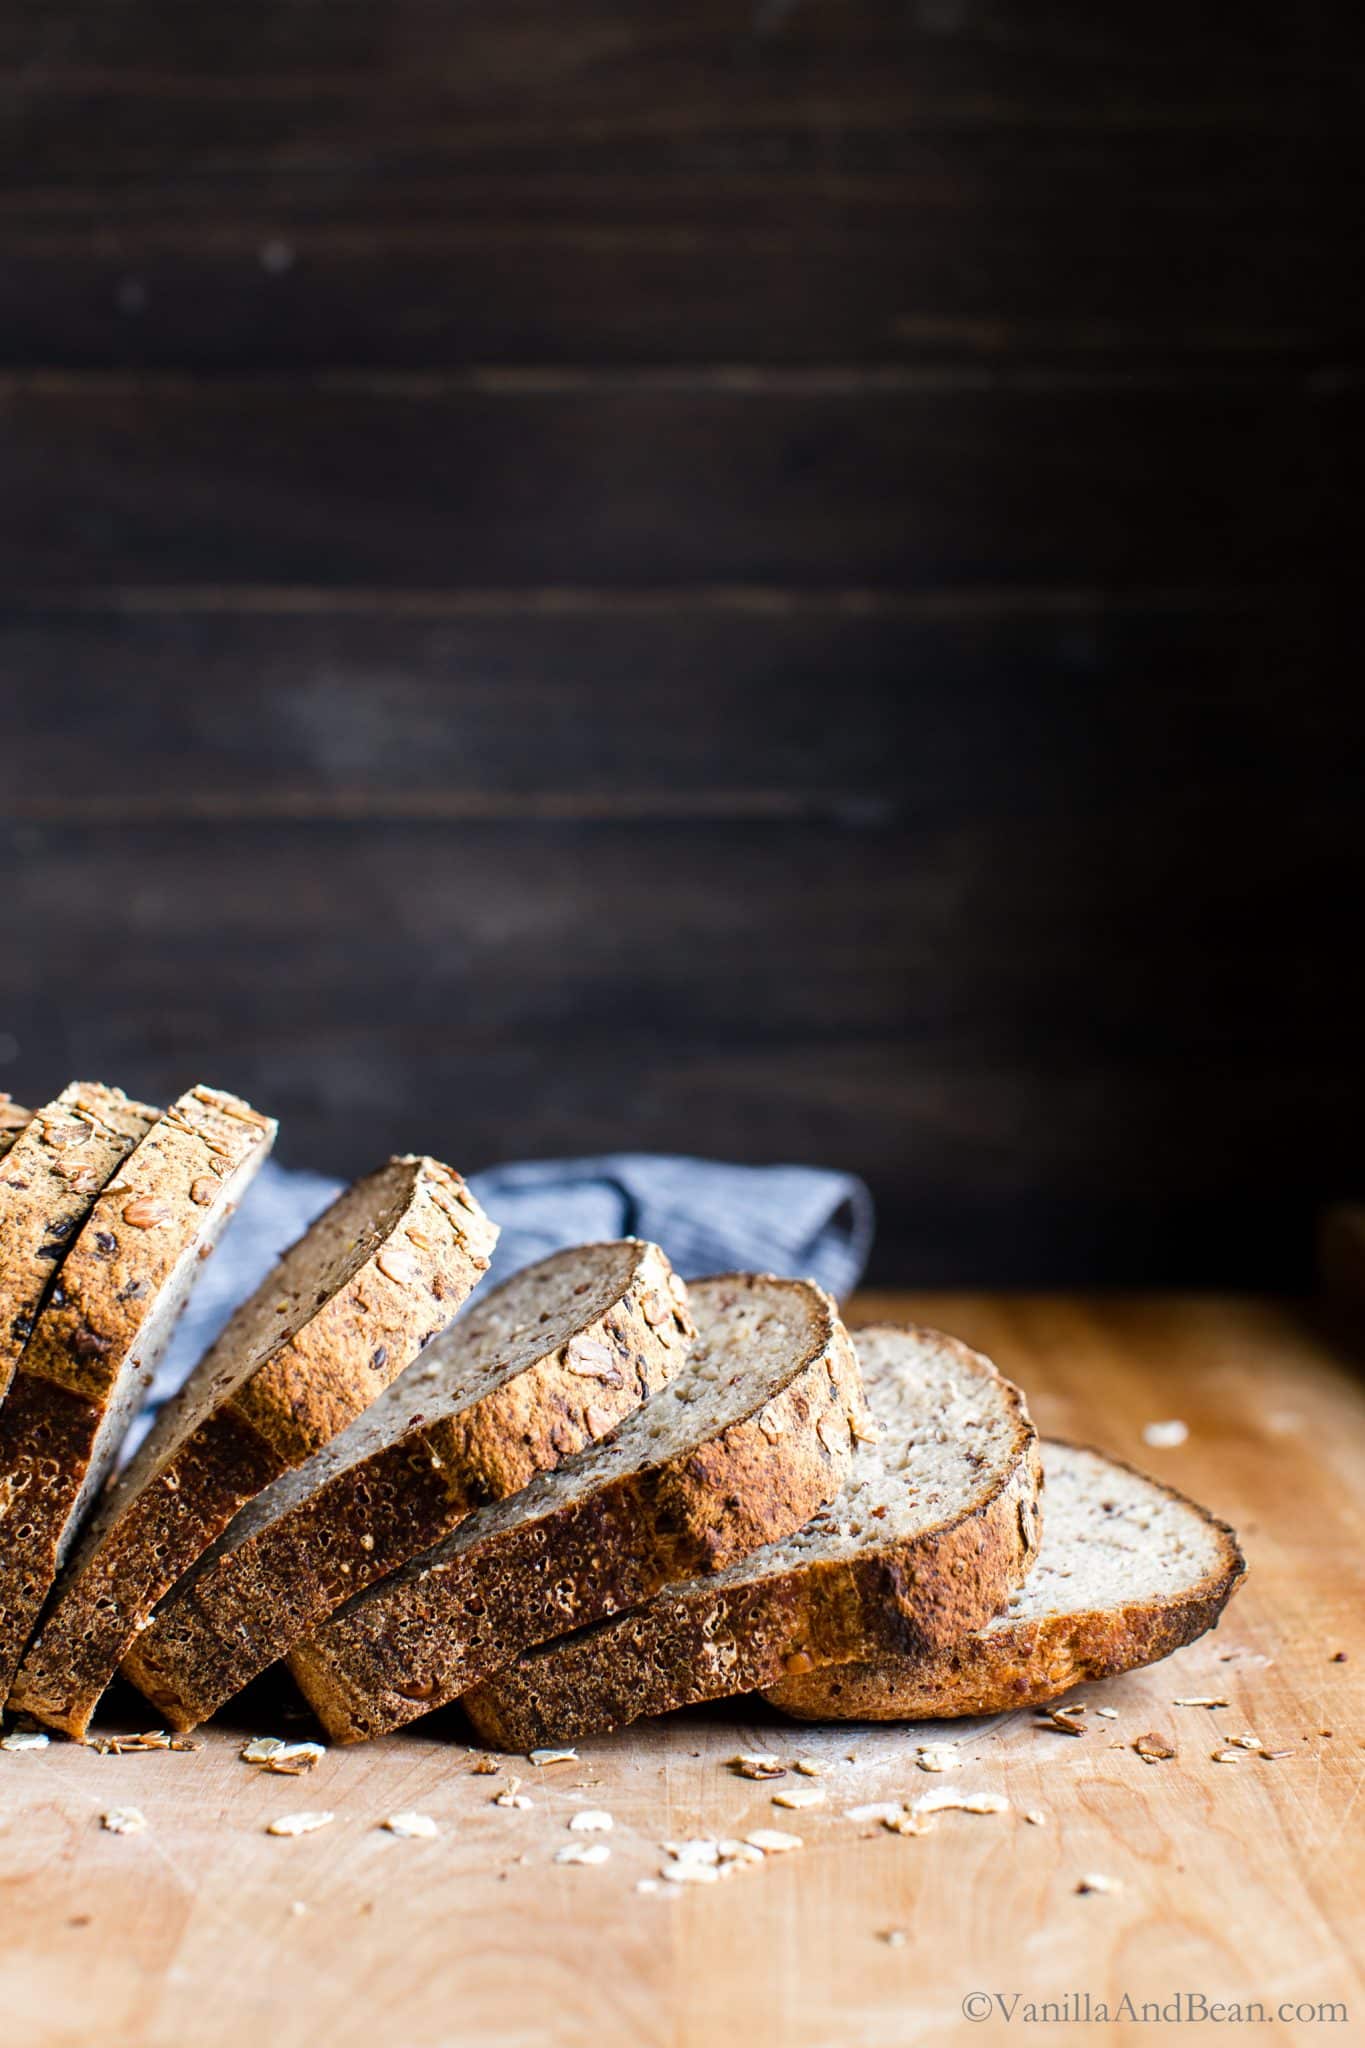
Texture rich, flavorful and tender, homemade Seeded Multigrain Gluten Free Sourdough Bread is gluten free bread you’ll look forward to eating. Use your Gluten Free Sourdough Starter to make this whole grain gluten free bread and love bread again!
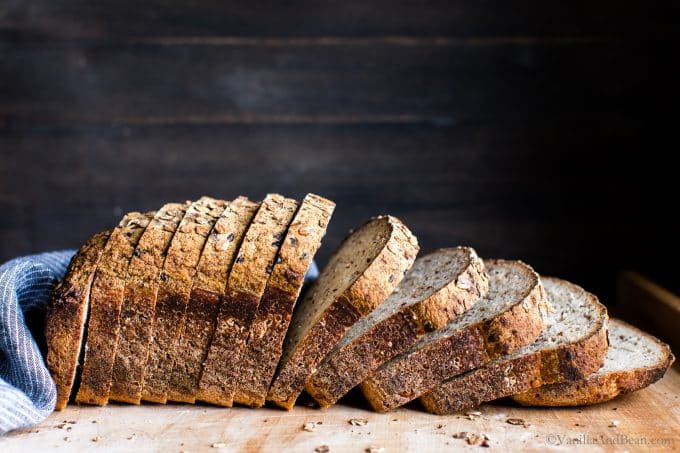
Going Gluten Free
Going gluten free for a trial period in the summer of 2018 meant I had to give up my beloved homemade sourdough. After a few weeks of throwing internal fits, I finally decided to explore gluten free flours, and learn the nuances of gluten free baking. I knew it wouldn’t be easy, but I finally embraced the challenge.
After much research, creating a gluten free sourdough starter and baking many loaves of gluten free sourdough bread, testing, tweaking and taking notes along the way, I’m sharing my best loaf yet: Seeded Multigrain Gluten Free Sourdough Bread.
Although I’m eating gluten again, this bread remains one of my most beloved recipes on the blog. I hope you enjoy it as much as my family, friends and V&B readers have.
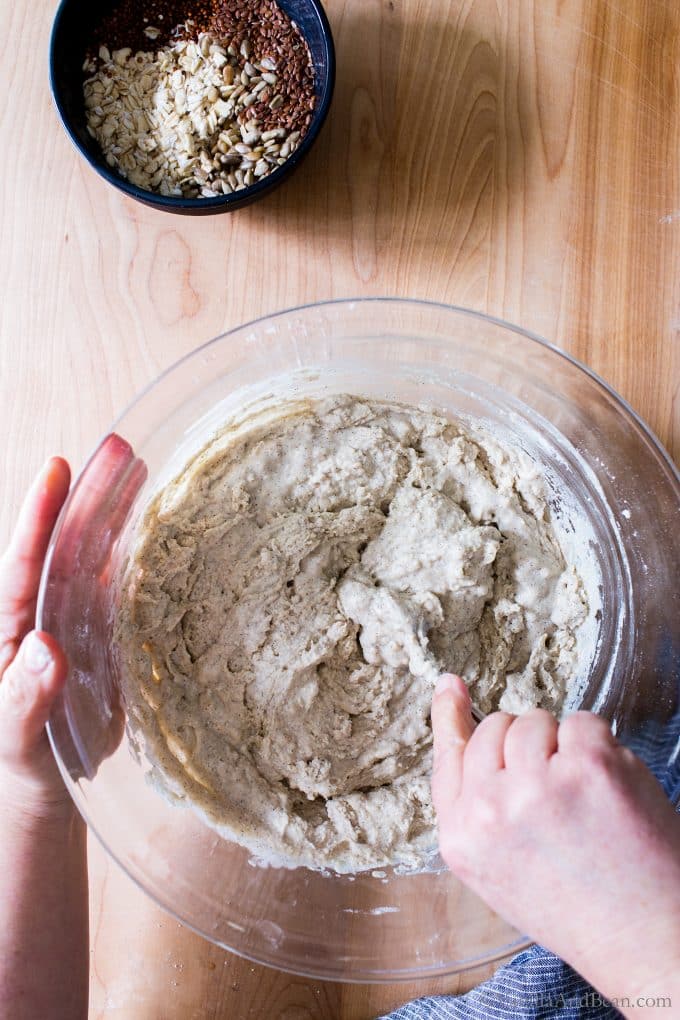
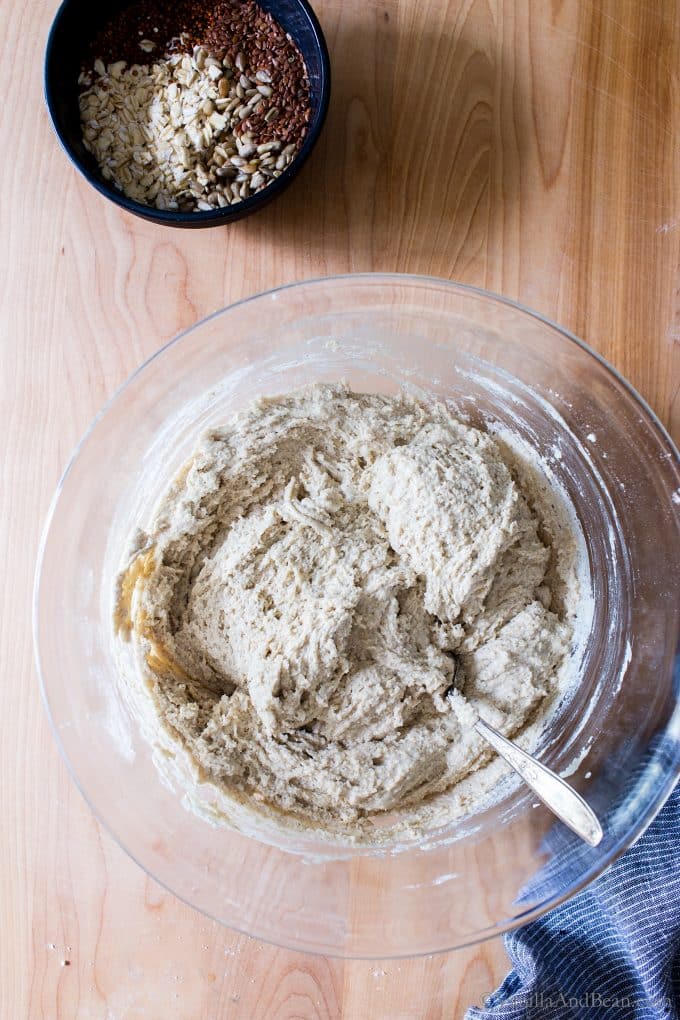
At a Glance:How to Make Gluten Free Sourdough Bread
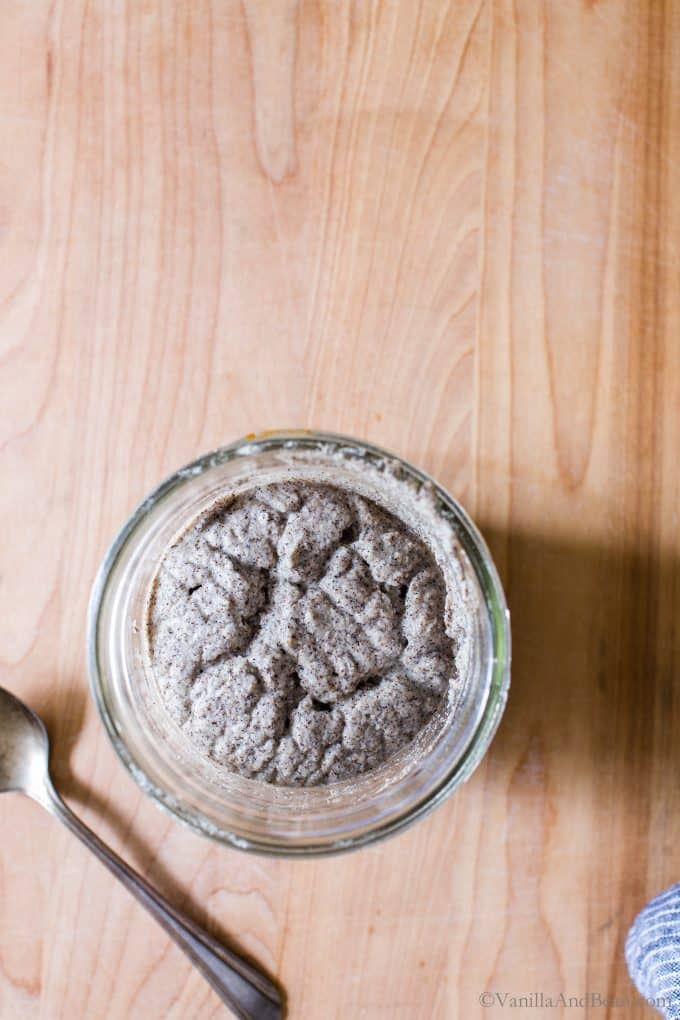
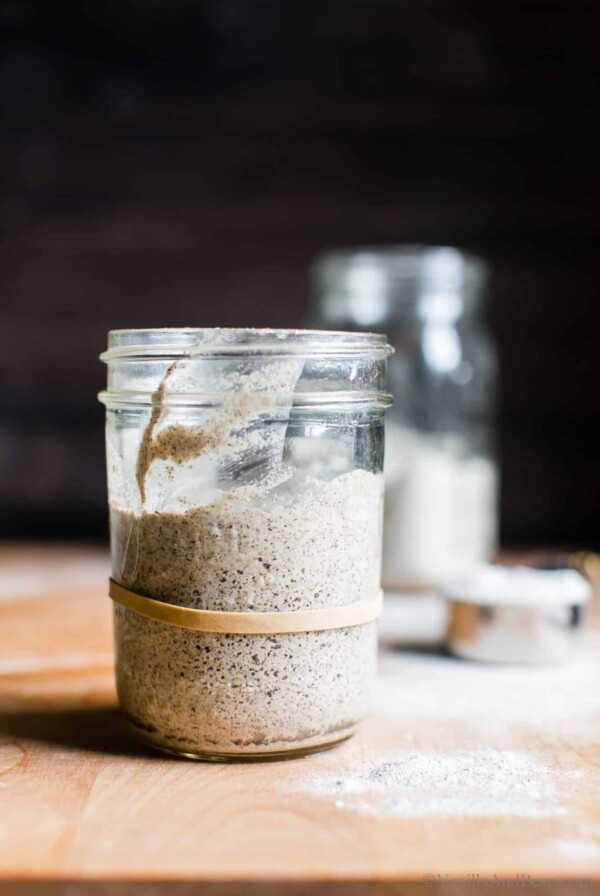
This gluten free sourdough bread recipe is simple to make, but you’ll need a gluten free sourdough starter. My starter recipe takes six to seven days to develop, but once you create it and continue to refresh (feed) it, it’ll be on stand-by next time you’re ready to bake!
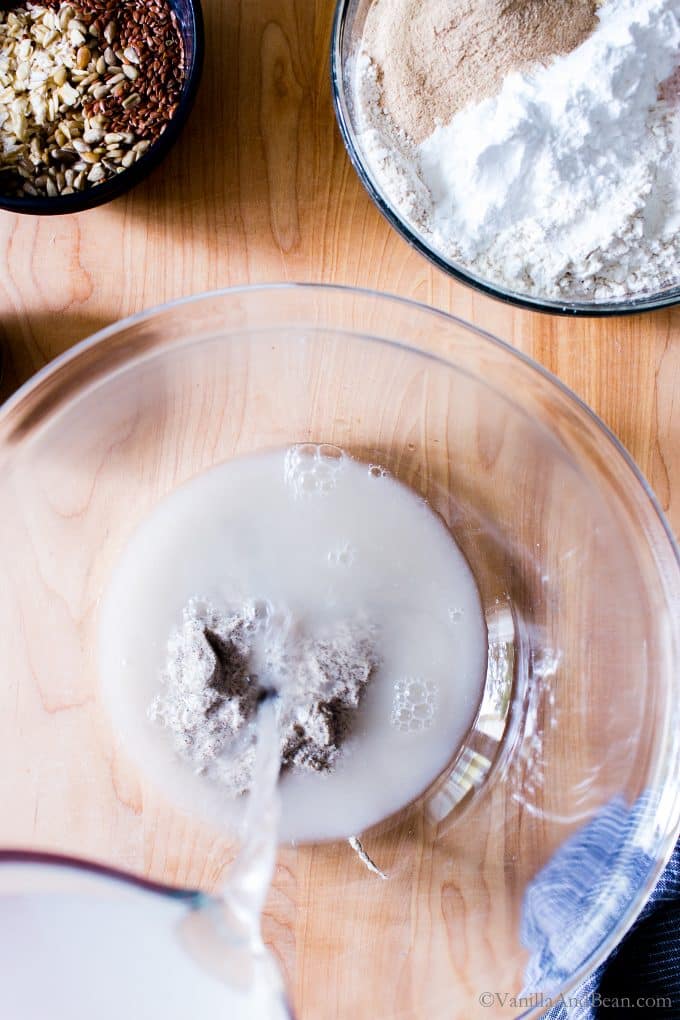
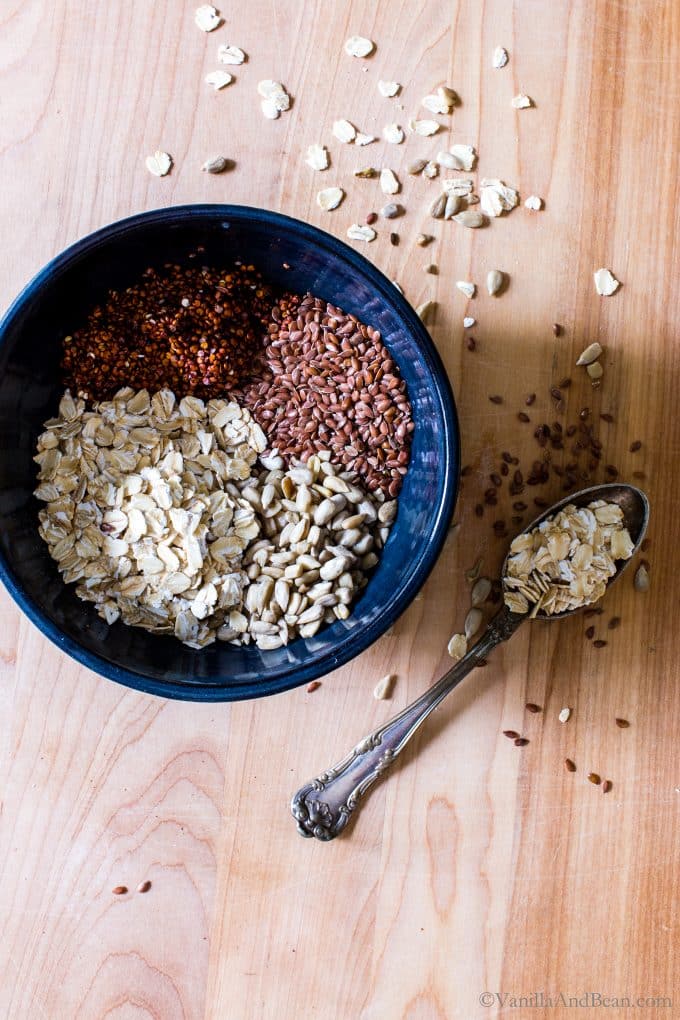
- First, prepare the soaker by placing the flax, oats, quinoa, and sunflower seeds into a small bowl with temperature water. Allow to sit overnight.
- Second, in a medium bowl, whisk the flours including oat, brown rice, millet, tapioca with psyllium husk powder and salt.
- Third, in a large bowl, whisk your fed and active starter, water, and maple syrup or honey. Add the flour mixture to the starter/water mixture and mix with a fork.
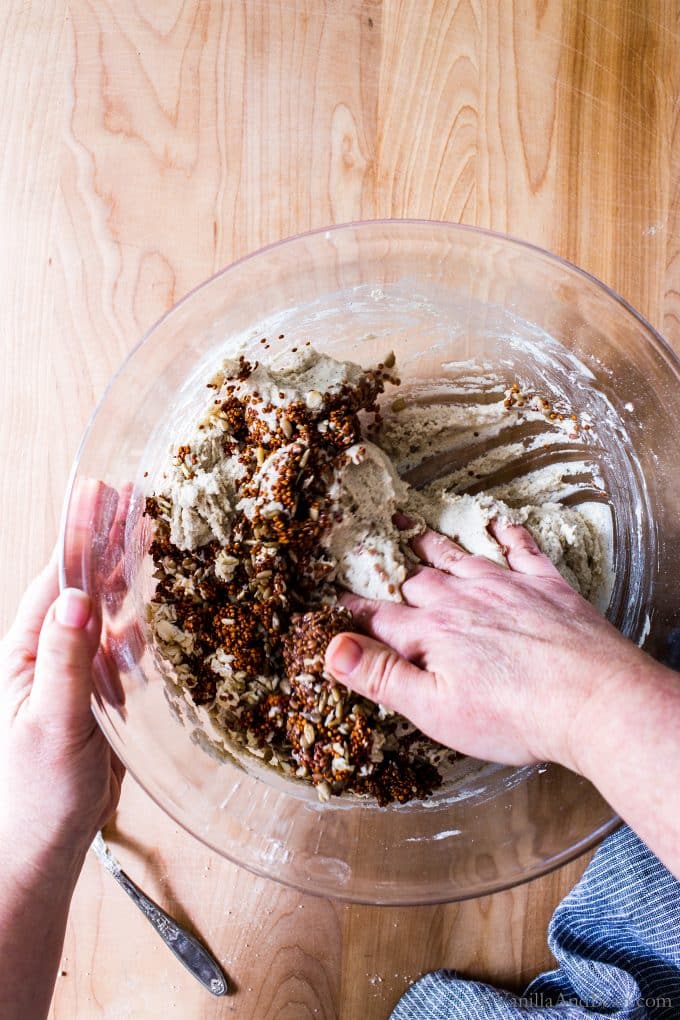
- Fourth, hand mix in the soaker.
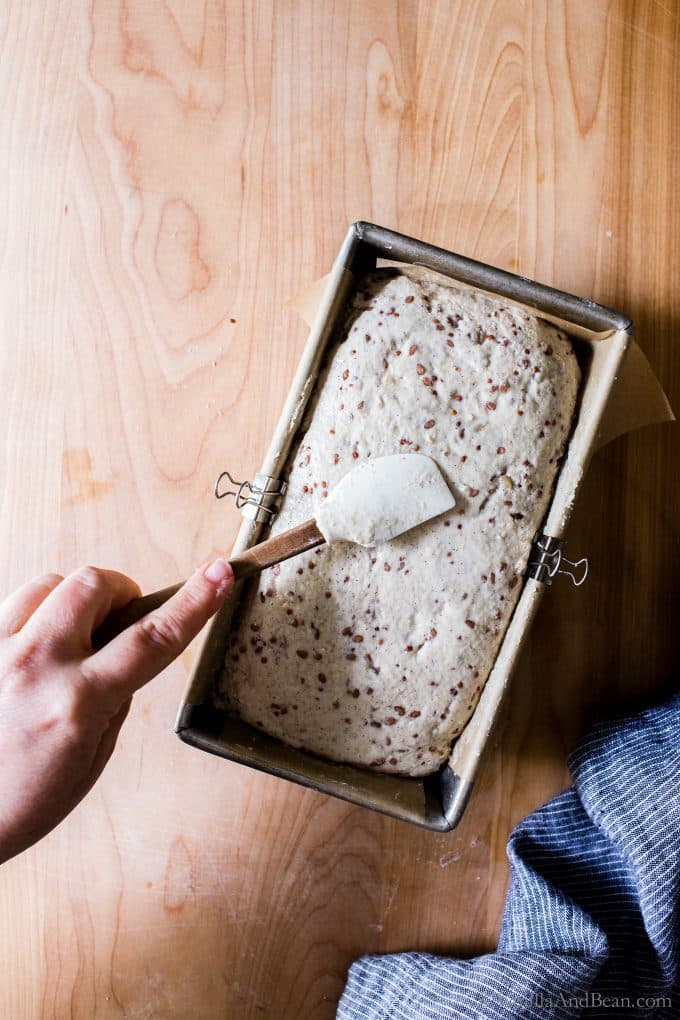
- Fifth, transfer the GF sourdough to a prepared loaf pan, while patting and smoothing the top and rounding the edges of the dough.
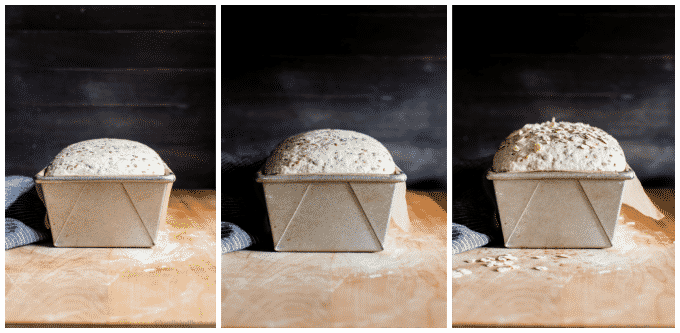
- Next, cover with a damp tea towel and ferment for 12-14 hours at room temperature.
- Last, bake the loaf for about an hour.
You’ll notice there is no proof for this recipe, meaning it only rises once (fermentation). Once the loaf is shaped and undergoes bulk fermentation, it’s ready to bake.
After baking, the gluten free sourdough needs to cool completely, at least a few hours before you slice into it! Waiting until the following day is even better as it allows the bread time to cure.
Using Other Gluten Free Flours in this Recipe
You can certainly give it a go! I’ve tried subbing buckwheat and amaranth flour for millet in this recipe but the bread wasn’t as tender and light. I’ve found thorough trial and error that millet helps give loft to gluten free bread without adding more starch. Also, amaranth was a little too strong for my taste.
How Gluten Free Sourdough Bread Tastes
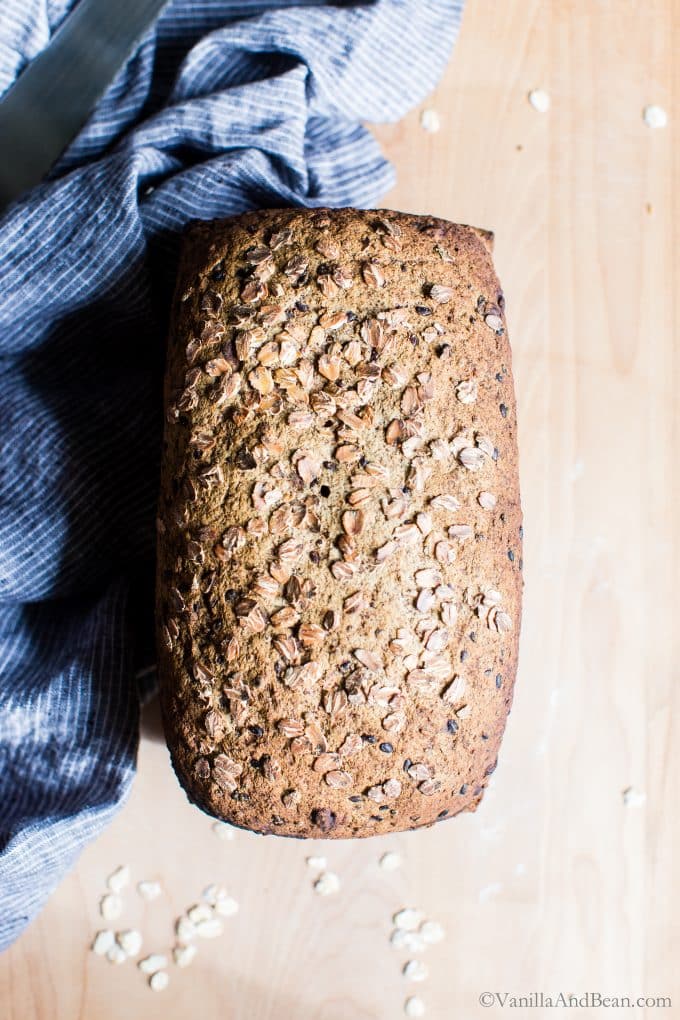
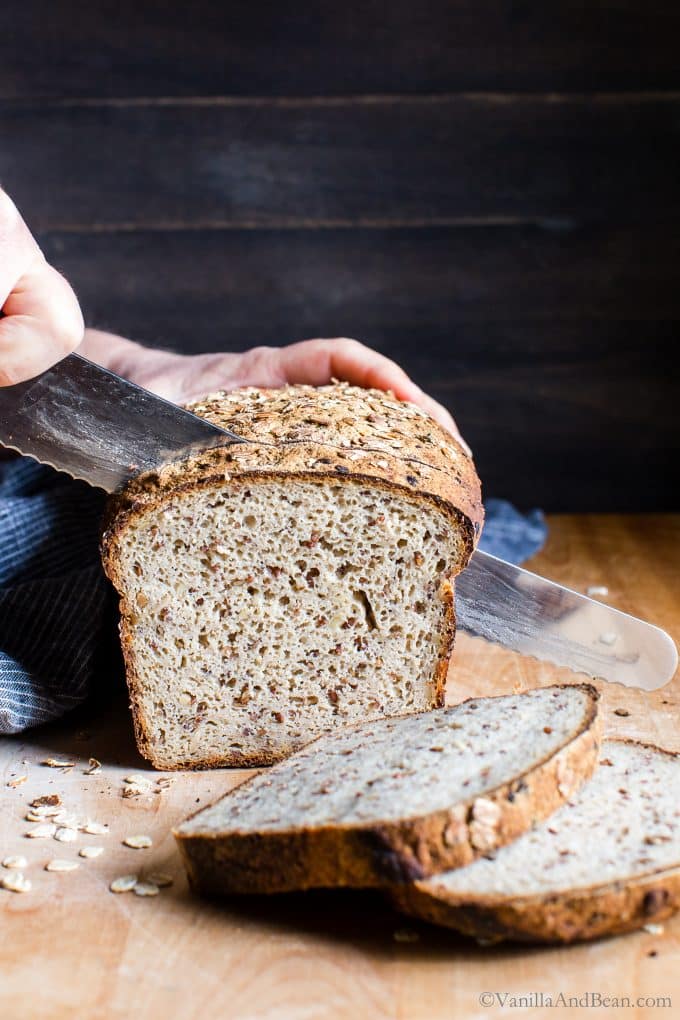
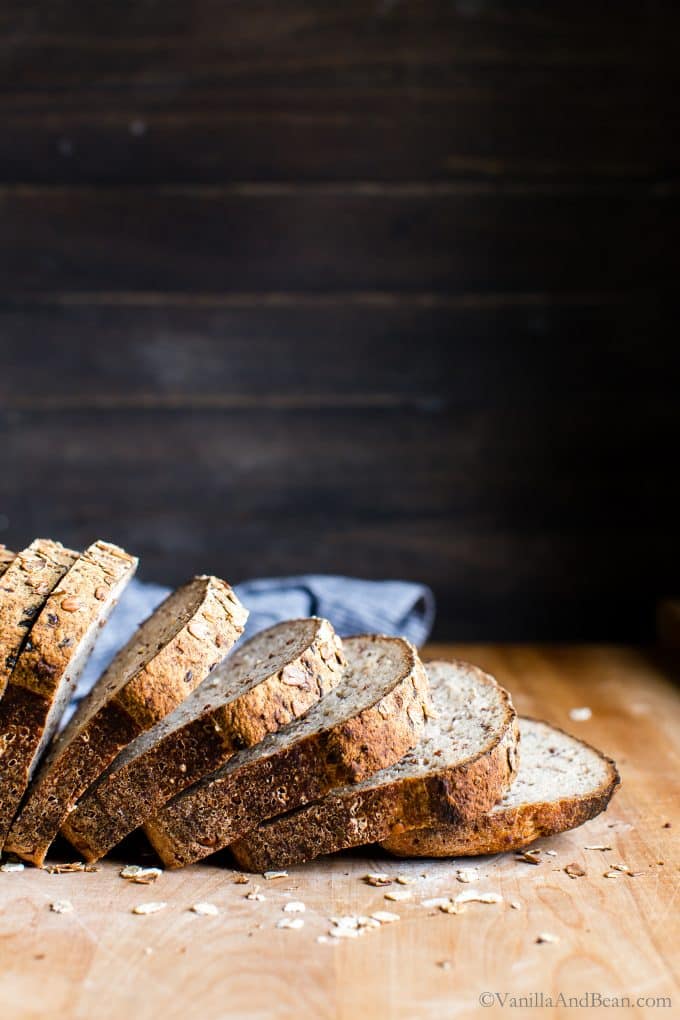
In a word, earthy in such a good way! This GF sourdough bread is texture rich due to the seeds/grains, has a mild oaty flavor, and a chewy interior thanks in part to the binding power of psyllium husk powder, with a nice crisp crust (after toasting).
Because this bread is gluten free, egg and dairy free (yes, vegan gluten free sourdough bread!), mostly whole grain, free of fillers and large quantities of starches, you’ll notice the interior is moist/tacky to the touch. So, it needs to be toasted to bring out its best texture. Sometimes I’ll double toast for breakfast toast, aka, avocado with egg toast.
Storing and Toasting
After the bread is completely cool, slice it with a serrated knife. The slices can be stored at room temperature in a closed container for up to three days or frozen for longer storage. For freezer storage, slices can go from freezer to toaster directly – this is also when I’ll double toast a slice.
Traci’s Tips
- Sourdough discard? Save it, put it in a covered container in the refrigerator and then, make these Gluten Free Sourdough Pancakes, Gluten Free Sourdough Waffles, or Gluten Free Sourdough Pizza!
- Dutch oven? I’ve tested this recipe in a Dutch oven in an effort to make a boule. Without walls of a loaf pan to hold the dough together, it spread way too much and was flat. Stick to a loaf pan ( if not experimenting :D ) .
- Shaping and then transferring the dough to the pan is sticky business. I’ve included two ways in the recipe to get the hardest part of the recipe done: a. shaping prior to putting the dough into the pan or b. shaping the dough after putting it in the pan. I prefer method a. as it produces a better shaped loaf – but it’s harder to do. Note the photos show method b.
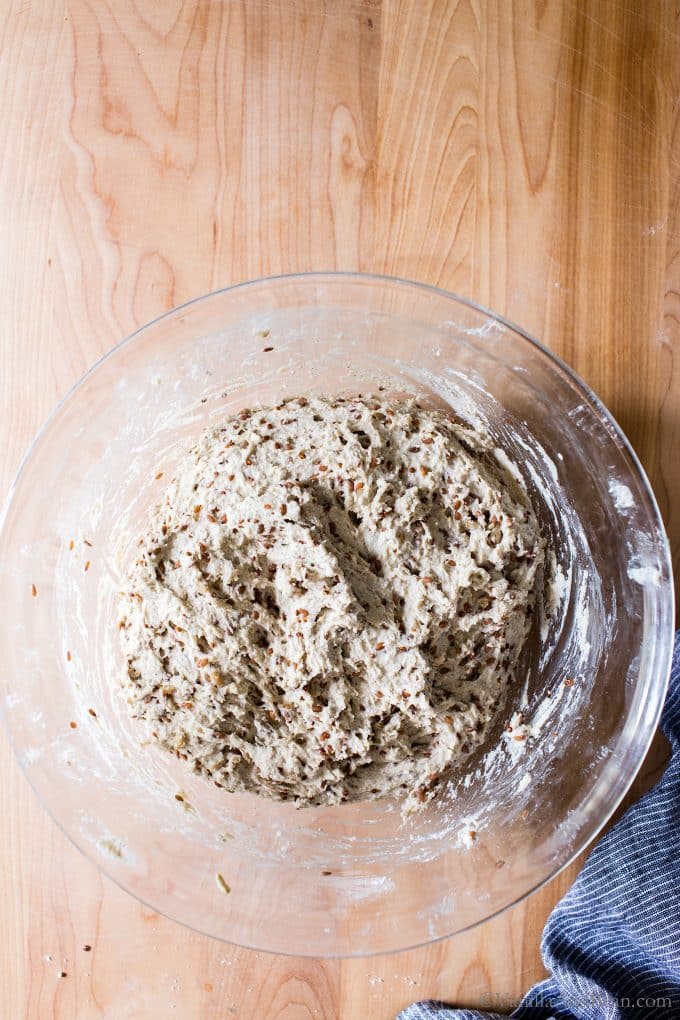
- With a 119% hydration, this dough is sticky. But I’ve discovered through my testing, gluten free loaves with higher hydration and low starch content have a better rise and produce a more tender crumb.
- One of the flours used in this recipe is oat flour. I DIY oat flour and have a tutorial on the blog if needed.
- Substitutions: I do not recommend subbing any other ingredient for psyllium husk powder. It soaks up the water, gives the bread it’s chew like gluten-full bread has and holds the dough together.
- I’ve tried subbing buckwheat and amaranth flour for millet in this recipe but the bread wasn’t as tender and light. I’ve found millet helps give loft to bread without adding more starch. Also, amaranth was a little too strong for my taste.
- I’ve not attempted subbing a different flour for oat flour.
- Use a scale. In baking, weighing ingredients is important for optimal outcome. I find that especially true in gluten free baking. I recommend investing in a good digital kitchen scale.
Makers Notes
So happy to read y’all are enjoying the bread in the comments below. Please note, I’ve not tried the following substitutions, but want to share what the community has offered. Here are a few community notes that may be helpful when making this recipe:
- Maya commented: “I used sorghum flour for the oats and half buckwheat, half white rice for the millet. It might not have risen as much as your photo, but it still turned out great.”
- Kate said: “It worked great – I substituted the same amount of arrowroot powder for the tapioca flour.”
- Sarah said: “Slice thick and when toasted you get the crusty edges and soft spongy center.”
- Jill said: “…substituted the brown rice, millet, and tapioca for an even exchange of the King Arthur cup for cup gluten free. This loaf came out SOOOOO GOOD!”
- Leah said: “…sorghum for the oat flour and teff for the millet. I got a nice rise and it came out SO good! The teff really gives it a wheaty flavor, almost like pumpernickel. Both times I left out the soaker and it didn’t seem to be a problem.”
Seeded Multigrain Gluten-Free Sourdough Bread
Ingredients
For the Soaker:
- 3 Tbs Whole Flax Seeds
- 3 Tbs Whole Rolled Oats, gluten free
- 3 Tbs Red or Tricolor Quinoa, rinsed under running water
- 3 Tbs Hulled Sunflower Seeds
- 1/3 C (80g) Water, room temperature
For the Bread:
- 1/3 C + 2 Tbs (100g) Gluten Free Sourdough Starter, previously fed, and doubled in size
- 2 1/2 C + 2 Tbs (605g) Water, 80F (27C)
- 3 Tbs Maple Syrup, or Honey
- 1 C (145g) Brown Rice Flour
- 1 C (150g) Millet Flour
- 1 1/4 C (130g) Oat Flour, gluten free
- 1/2 C + 1 Tbs (80g) Tapioca Flour
- 2 1/4 Tbs Psyllium Husk Powder, I use Terrasoul Psyllium Husk Powder
- 3 1/2 tsp Fine Sea Salt, or reduce to preference *See note on salt adjustment
- 1-2 Tbs Whole Rolled Oats, for sprinkling on top, gluten free
Instructions
For the Soaker:
- Prepare the soaker by placing the flax, oats, quinoa, and sunflower seeds into a small bowl. Pour room temperature water over the top of the soaker. Leave out at room temperature for about 6-8 hours. If you forget to do this, you can pour hot water (hot to touch) over the soaker before you start preparing the ingredients for the bread.
For the Dough:
- Line the inside of a 8.5L x 4.5W x 2.75H inch loaf pan (23cm X 13cm) with criss crossing parchment with enough hangover on all sides to later help shape the dough and to be used as handles for removing the bread from the pan. If you have clips to clip the parchment to the sides, use them.
- UPDATE 5/20: Some makers have commented that they "poured" the dough into the baking pan. Please note that the dough should be of a sticky thickish batter-like consistency where it is scraped into the pan and holds together. The dough should not be pourable. In order to achieve this batter-like consistency, Psyllium Husk Powder is essential. I do not recommend substituting this ingredient. Mix the Dough: In a large mixing bowl, add the starter, water and maple syrup (or honey). Whisk until the starter is incorporated. Set aside.In a medium mixing bowl whisk the brown rice flour, millet flour, oat flour, tapioca flour, psyllium husk powder and fine sea salt. Mix throughly so that when the psyllium husk powder hits the water, it wont clump. To the water/starter mixture add the flour mixture. Use a fork to mix the flour into the water until the dough starts to stiffen, about one minute. The dough will feel like a thick batter. Add the soaker and knead the dough with your hand, incorporating the soaker until the mixture is evenly distributed, about one minute. Use the fork to scrape any excess dough off your hands and fingers. The dough will be very sticky. Set the bowl aside for about 10 minutes to rest. It will stiffen a bit as it rests.
- Shape and Pan the Dough: There are two ways to approach shaping. a. if you're in a hurry or b. if you have a bit more time and patience. Either will work but I find I get a better shape out of b. (note that a. was used in the images seen above). A. Scrape the batter into the loaf pan. Use a moist rubber spatula (remoisten as needed) to gently shape the top nudging the edges of the loaf inward to produce a nice dome shape loaf bread is known for. This takes a little practice and finessing. Just do the best you can. Use the 'handles' of the parchment and pull opposite sides inwards towards the center of the dough, helping to round and shape the edges. Moisten your fingers or small spatula and smooth the top to rid any lumpy areas. B. A bench scraper for this method is needed. Moisten your work surface with a bit of water (I use a spray bottle and sprits it a few times). With moistened fingers, nudge the dough out of the bowl and onto the moist surface. The dough will be very sticky. Re-moisten your hands and pat the dough into a rough rectangle/log a little smaller than the size of the loaf pan using the bench scraper as needed to move the dough. Pat and smooth the edges as needed using wet hands (no flour here), rocking the dough back and fourth to help shape it, smoothing and rounding the top into a rectangular dome. This takes a little practice and finessing, just do the best you can. Using one swift move, scoop up the shaped dough with a bench scraper and transfer it to the loaf pan. Use the 'handles' of the parchment and pull opposite sides inwards towards the center of the dough, helping to round and shape the edges. Do this several times. Moisten your fingers or small spatula and smooth the top to rid any lumpy areas. Use a moist rubber spatula to gently shape the top nudging the edges of the loaf inward to produce a nice dome shape loaves of bread are known for.Now is a good time to refresh (feed) your starter and store it for next time.
- Bulk Ferment: Remove the clips from the pan if using. Cover the dough with a wet tea towel and allow the dough to ferment overnight at room temperature (it's okay if the wet tea towel touches the top of the loaf). Fermentation will take anywhere between 12-14 hours depending on how active your starter is and ambient temperature. In my chilly kitchen at 66F, the dough takes about 14 1/2 hours to rise overnight. There is no proof for this recipe. Go right into baking the loaf after bulk fermentation. The loaf is ready to bake when the dough increases to 1 1/2 times in size and has risen to about 1.1/2" (3.8cm) above the lip of the pan at the center. The dough will spring back when gently pressed on top.
- Bake the Loaf: Place a oven rack in the center of the oven and preheat the oven to 550F (288C). Lightly spray or brush the top of the dough with water and sprinkle 1-2 Tbs of rolled oats over the top. Decrease the oven temperature to 475F (246C) and bake the loaf 55-60 minutes or until the internal temperature of the bread is between 200F-205F. If the bread starts getting too dark on top, tent the bread with foil. The bread pictured here is untented. After 10 minutes out of the oven, transfer the bread to a cooling rack. Cool completely, at least for two-three hours, better if cured overnight, before slicing into it. You'll notice the bread is very hard, but will soften as it cools.
- How to Store and Enjoy!: After the bread is completely cool, slice it with a serrated knife. The slices can be stored at room temperature in a closed container for up to three days or frozen for longer storage. For freezer storage, slices can go from freezer to toaster directly.You'll notice the interior of the bread to be tacky. This is normal. I find this gluten free sourdough needs to be toasted before it's enjoyed… sometimes double toasted to bring out its best flavor and texture.
Video
Notes
Nutrition
Nutrition is provided as a courtesy and is an estimate. If this information is important to you, please have it verified independently.
Made it? Leave a comment below!
The most helpful comment may include recipe rating, feedback, any modifications or helping other commentors.




Hey have you tried it without maple syrup or honey?
Hi Diana! I have not.
Hi there! Getting excited to bake a loaf – my starter is ready! My son cannot tolerate oats or oat flour anymore, is there another flour that makes for a best substitution? Can I use Xantham gum to replace the Psyllium in equal measure?
Hi Alice! Makers have shared substitution notes in the comments below (and I’ve shared their comments too in the blog post – although I have not tried these subs). I do not recommend substituting Psyllium Husk Powder. I hope this helps!
I wanted to leave a quick comment here sharing my experiences making this bread, since I’ve made four loaves and have learned a bit along the way. With the first two loaves, I didn’t have psyllium husk powder, only psyllium husks. After a failed attempt to grind the husks into a powder, I went with it and just used the husks. This gave me a somewhat pourable batter – not super thin like pancake batter, certainly thicker than a quick bread batter, but definitely not dough. It still worked, though, and I ended up with loaves that tasted great (they also rose a good amount, but didn’t get higher than the top of the pan, so I didn’t get that nice rounded look of a typical loaf of bread). After baking, I let the loaves sit out at room temp for 24 hours, as is directed in the recipe. After that, I sliced the loaves, put a small piece of parchment between slices, and froze. When I want to eat a slice, I pop it in the toaster for a bit and it is perfection.
I just made two more loaves last night, but finally was able to get my hands on psyllium husk POWDER! And this changed everything for me. I put all of the dry ingredients in a bowl and used a whisk to mix that up. I mixed up the wet ingredients, then added to the dry. In the past, I was able to use a whisk to mix the wet and dry ingredients together (then switched to a rubber spatula after adding in the soaker). This time, I had to switch to a rubber spatula pretty much immediately because it was like a proper dough immediately. I had read Traci’s update about using less water, so I used only 10 grams less water. After seeing how thick the dough was, I thought, oh gosh, it’s so thick because I didn’t add enough water, so I added in a bit more. Still very thick. I was confused for awhile, then while in bed and thinking about the bread (yes, these are the things I ponder in bed), I thought, IT’S THE PSYLLIUM HUSK POWDER!!!
My conclusions about this – psyllium husk powder sucks up water like crazy and it will lead to a more dough-like texture (no more batter over here!). I also weigh EVERYTHING, even water (if you don’t have a scale already, spend 20 bucks and pick one up – you will use it more than you could imagine). I had read about other people having troubles with their batter/dough being super liquid-y, so just figured that since I was still getting a great tasting loaf, I didn’t really care if I had batter instead of dough. With the psyllium husk powder loaves, however, I had a good looking dough that also rose above the top of the pan. :D
TLDR: 1 – Use psyllium husk powder and not psyllium husks, as the powder will soak up more water and give you dough, not batter. 2 – Weigh all of your ingredients!!!
Hii Kendra! Thank you for your note and sharing your experience making this recipe! Your insight is super helpful. YES to PHP… it makes all the difference!
Hi! I was really excited about baking GF sourdough bread, but unfortunately, this recipe didn’t work for me. I used the GF sourdough starter recipe that you provided and it seemed to be active enough to bake with (i.e., doubling in size). Like several other commenters, I found the dough to be thinner and I wasn’t able to shape it as was shown in the photos. I weighed out all of the ingredients in the recipe, left it to ferment for 14 hours, and it didn’t rise at all. Do you have any suggestions? Thanks!
Hi Katrina! Thank you for your note. I’m sorry to hear the recipe didn’t work for you. I’m curious about your starter… was it doubled in size when you mixed the dough? How did it smell? Did you make any substitutions of ingredients in the recipe?
Hello!! Was so excited about this recipe also used your gf starter recipe :). So my bread ended up rising a bunch in the oven and when I cut it I had a huge hole in the top like a cave in my bread. Could this be from my oven being too hot? The bread inside was super tacky and I think a little underdone. I toasted it a bit and it still tastes great! Was just wondering what could have gone wrong.
Hi Rebecca! Thank you for your note. What temperature was your oven (I’m not sure I know what “too hot” is). The caverning may be a result of over-proofing the bread, not uncommon, but simply could be a timing and practice issue. So happy to hear you enjoyed the bread otherwise!
Hi, this might be a dumb question, but what is a soaker? If I don’t have one, how else can soak the seeds? Can’t wait to bake this! Absolute beauty!
Hi Rash! A soaker is something you make in a bowl. It’s simply water, seeds and grains.. that’s it! I hope you enjoy the recipe!
Hello! I love this recipe and have made it so many times! It is truly flexible and I have switched out flours with great success: tigetnut flour, buckwheat, quinoa etc. With all the recipes though my dough always comes out more runny and moist than what is pictured. For example, I just pour the batter into the pan and it is never really a dough that needs to be formed. I am curious if you have noticed that? Wondering if I should experiment with less water?
Thank you for sharing this delicious recipe!!
Hi Amy… so happy to hear that you’ve flexed the recipe and you’re enjoying it! With regards to a wet batter… some makers have experienced this too. I have not, no matter how many times I make it, I get consistent results. I’m curious if you’re weighing your ingredients? The reason for batter variations is probably due to local humidity variations and with different flour brands having varying moisture content (this is common too in glutenous flours). Feel free to play with the amount of water used by decreasing it a bit, maybe by starting with 10g. I did find throughout my testing that gluten free flours have better rise with increased moisture. I hope this helps, and please do keep in touch!
Hi there, I want to bake this bread for a friend. I read a review here that someone substituted the listed flours for Measure for Measure flour by King Arthur. May I know what is the substited amount? Also, do I have to add oat flour GF and what amount? Since the Measure for Measure flour has a xanthan gum, do I need to add Psyllium Husk Powder. Thank you so much in advance for your reply.
Hi Cris! Thank you for your note. Since I’ve not made this bread with any other ingredients besides the ones listed in the recipe (outside of my recipe testing), I’m unable to share specifics on weights/amounts substituted by community makers. Feel free to post your question in the comments below with the corresponding substitution comment. Maybe we’ll hear back!
Hi Traci,
Appreciate and thank you for your. I made my sourdough starter, YAY.It’s now the 8th day and I’m excited to make the bread for tomorrow. I am still looking for the substitution for the flour to use King Arthur cup for cup measurement . I hope she replies.
I hope so too… if you experiment, please keep in touch! Hooray for a ready to bake starter! Sending high 5s!
Cris, I have made this wonderful bread many times using Measure for Measure flour in place of the rice, millet and tapioca flours. I did keep the oat flour and added xantham to it (M4M already has xantham gum).
Proportions:
375 g M4M flour [scant 3c]
130g oat flour [1-1/3c]
3/8 tsp xantham
(Another note: When I did not have psyllium powder I reduced the water to 425 g).
Thank you Traci for this recipe!! I make 2 loaves at a time every few weeks. 💗
Hi Cathy! Thank you for sharing your tips, subs and your kind words! So happy to hear you’ve created something new from the base recipe and you’re enjoying delicious sourdough!
Hi Traci,
I’ve been working on my starter for 3.5 weeks and it finally got to the point where it was almost doubling so I’ve bitten the bullet and made a loaf, which is now sitting under a wet tea towel waiting to be baked in the morning once it has risen. I was just reading through the comments below and realised that my mix was probably too wet – it poured into the pan easily – and I’m wondering whether that was because I measured rather than weighed the ingredients, or maybe because I didn’t knead the soaker in with my hands but rather mixed it in with a fork for a minute.
I’ve also realised that my oven only goes up to 220C so I might have a pretty wet loaf on my hands but I’m sure the flavour will be good and I can always toast it ;)
Will let you know how it goes tomorrow and would be grateful if you could let me know whether you think the lack of kneading might be part of my problem.
Thanks for your recipes and replying to so many of the comments! My family loved the sourdough pancakes which we made this morning with one of the many jars of discard sitting in the fridge!
Thanks,
Claire
Hi Claire! Thank you for your note and sharing your experience! SO happy to hear your starter is in good shape and y’all enjoyed the sourdough pancakes (I love that recipe!). Agreed about weighing ingredients… I include volume for convenience, but do recommend weighing ingredients when baking (especially gluten free). Kneading does help develop the dough… I do recommend kneading by hand. I hope you enjoy the bread. Please do keep in touch!
Hi again, I baked the loaf yesterday and things went more or less as I had thought, it did take a lot longer than the usual 55-60 minutes due to its wetness and as a result the sides and bottom were pretty caramelised (although still tasty) and the inside was a little sticky even after 2.5 hours when I eventually took it out (the middle never got above 120 celcius which I think was due to the wetness and my oven not going above 220. However my family have been enjoying it toasted (with the crusts cut off beforehand to avoid charring!) and I’m working on my next loaf, which I’m going to try making as a focaccia taking inspiration from one of the posters below. I think having a broader, thinner bread might work better given my oven situation, and I’ll certainly be sure to weigh every ingredient carefully before I add them this time, and give the dough a good knead (which should be easier if it’s not so wet!). In good news, my starter (which I have named Jacinda after the strong, productive and generous NZ prime minister) is now confidently doubling in size every time I feed her, so things are looking up! Will keep you posted on how the seeded focaccia goes… Am thinking I’ll brush it with olive oil and scatter rosemary and maldon sea salt before baking, what do you think?
Hi Claire! So happy to hear, despite the challenges, you and your family are enjoying the bread! Hooray! I think you have a great strategy with focaccia given your oven situation… I love that idea. YES to rosemary, olive oil and Maldon sea salt! Keep in touch! I’d love to see how it turns out for you!
Hi Traci, just wanted to check in and let you know 1) that the focaccia idea with olive oil and rosemary did work really well, and 2) after recently coming back to it site and noticing your note about the importance of the psyllium husk being powdered, I tried again using psyllium that I blended in my blender, and have now managed to make two really successful loaves in the pan as originally intended. It doesn’t seem to matter that the oven isn’t quite as hot as you suggest, I just turn mine up all the way and let it preheat for a good hot so everything is really hot inside. Thank you, we’re loving having sandwich/toast bread that tastes so good 😊
Is the honey for flavor or does it help the rise of the bread? I don’t eat much sweet things and ideally would not add honey to my bread!
Hi Aria! It’s for color, flavor and does support the yeast as well. I’ve not tried this recipe without it so I’m unable to say exactly how it would impact the bread with out it.