
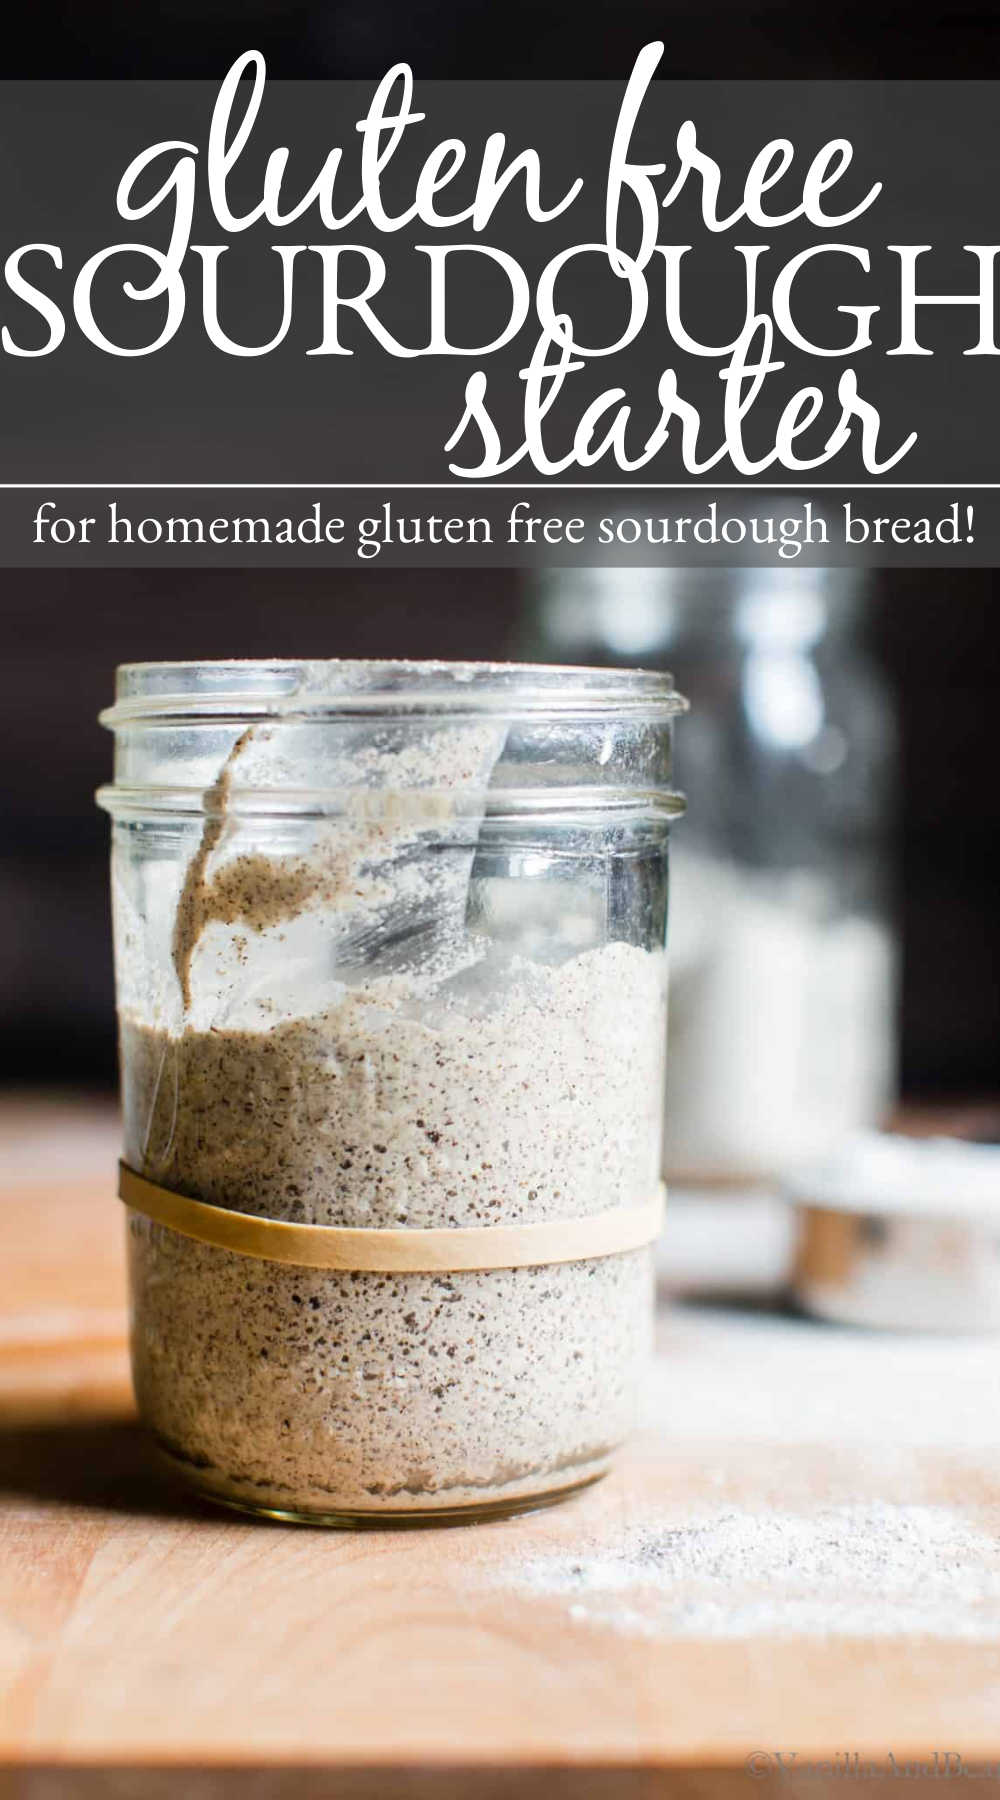
Making a gluten free sourdough starter couldn’t be easier. Start with three simple ingredients, a little time and patience, and your starter is ready to make delicious homemade gluten free sourdough bread, pizza, pancakes, and waffles in about seven days!
A Gluten Free Journey
I started my gluten free sourdough journey in the summer of 2018. At the time I had just recently become proficient at sourdough bread when my doctor declared she wanted me to give a gluten free trial a go. And so the journey began.
I’m eating gluten again, but through the development of this gluten free starter, and consequently seeded gluten free sourdough bread and gluten free sourdough pizza crust, the Vanilla And Bean community has shown interest.
Gluten free sourdough starter is simple to make, but it took a bit of trial and error for me to get to this point. While it’s similar to developing a glutenous sourdough starter, I found some gluten free flours to be more reliable than others in producing a consistent GF sourdough bread starter result. After months of testing, I’m sharing with you my best gluten free sourdough starter.
If you want to learn how to make delicious and flavorful homemade gluten-free sourdough bread recipes, then a strong GF sourdough starter is where to begin.
____________________________
How to Make Gluten Free Sourdough Starter
step by step

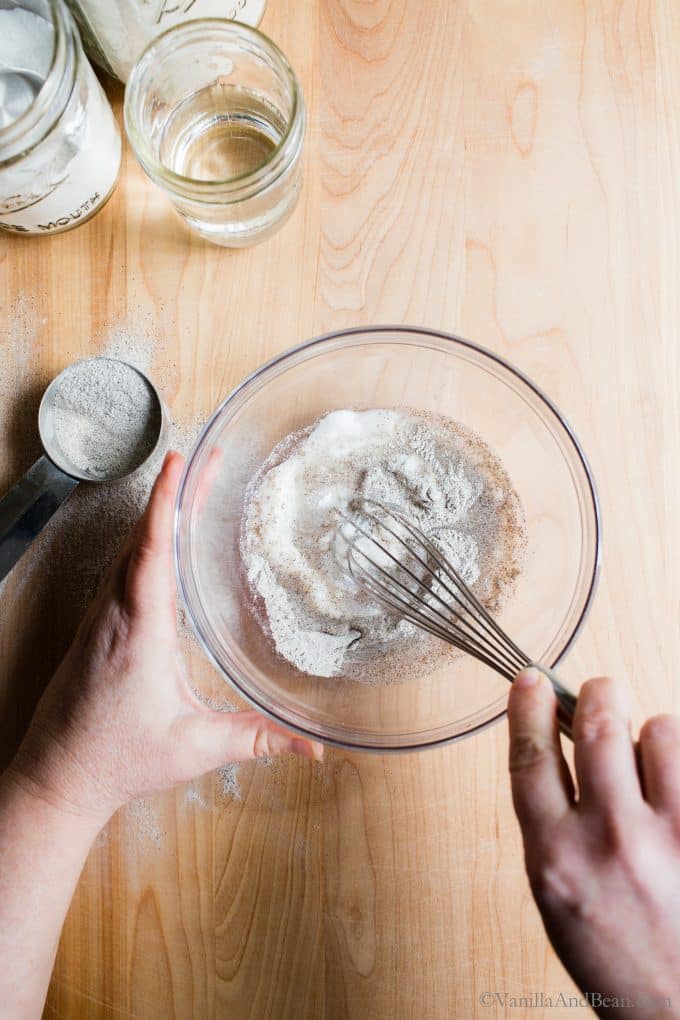
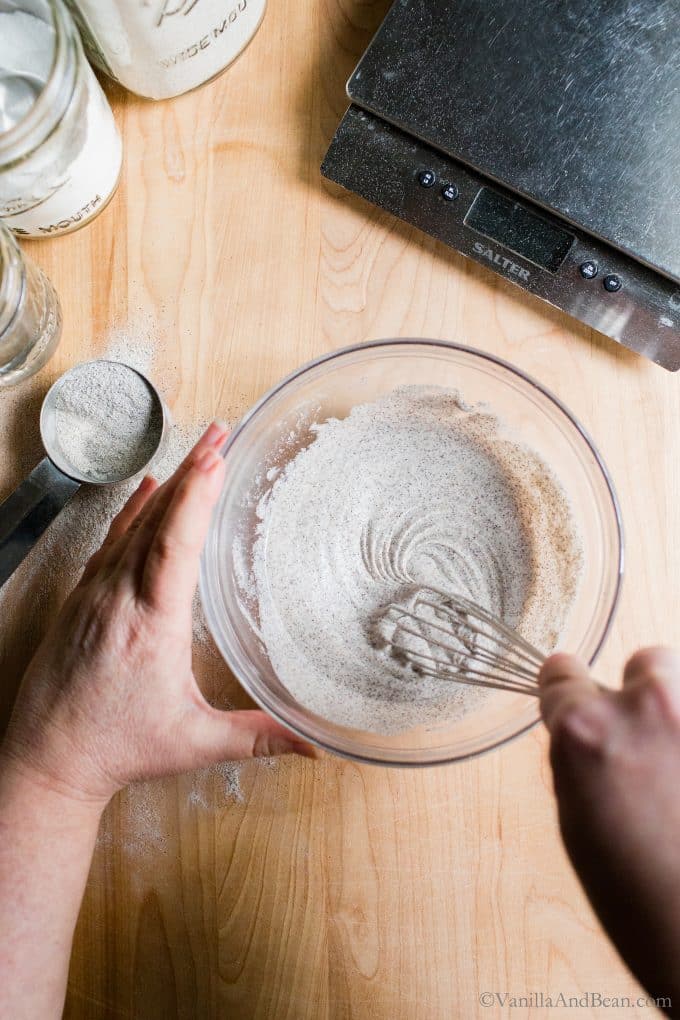

This simple recipe generally takes about 5-7 days to complete, but it could take longer. You’ll think about it more than the time it takes to make it: checking on it periodically, looking for bubbles, taking a whiff for a bit of that sweet and sour aroma we’re after. The key is patience and consistency.
It’s ready when it’s ready.
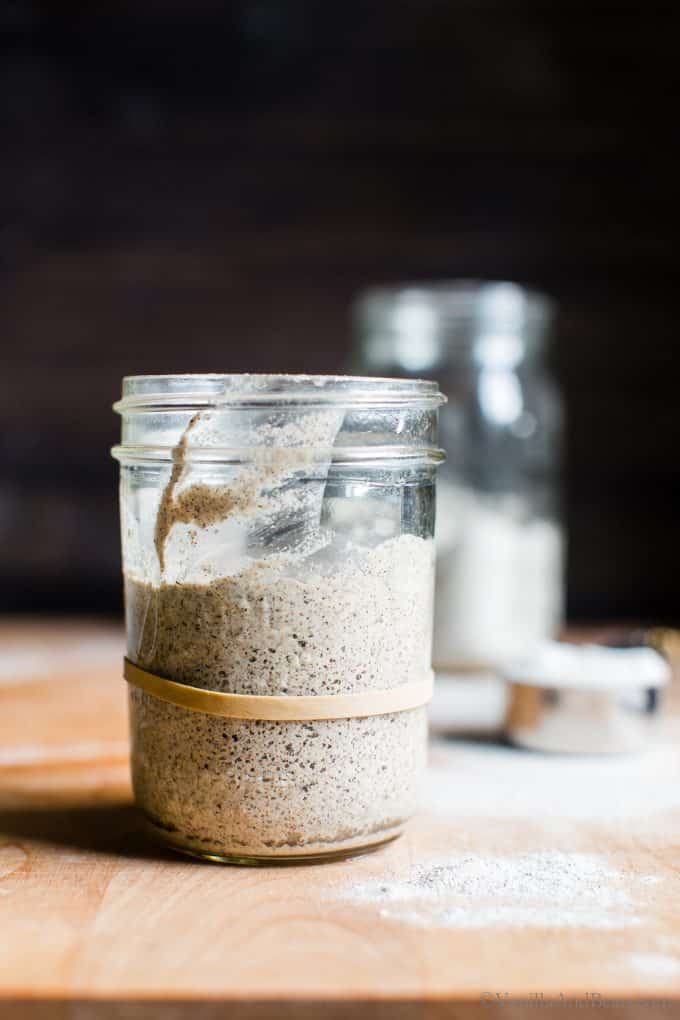
Once the starter is puffy, has a sweet-sour aroma and bubbles are present under the surface (see pictures below), you’re ready for the next step: feed your starter!


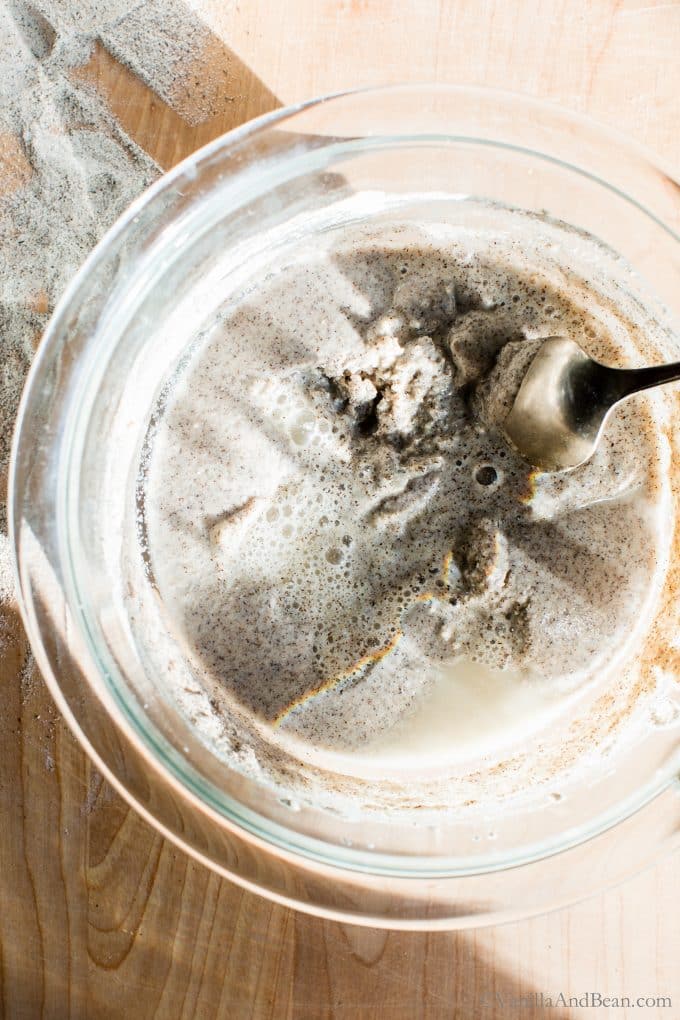
Note: at about day three or four, your starter will begin to smell unpleasant, like sweaty socks. keep going… it will change for the better!
How to Feed Your Gluten Free Sourdough Starter
To keep your starter balanced and strong, you’ll need to refresh it, or feed it before using it in a recipe.
I feed mine at least every other week, once a week if I remember, when stored in the fridge, but always 8-12 hours before I’m ready to mix the sourdough. Also, I keep the starter in a glass jar with a rubber band around the starting level (after I refresh it) so I can track its progress as it develops.
To Feed Your Starter
- First, in a clear jar you’ll add part of your sourdough starter (throw out or save the leftover to make gluten free sourdough pancakes or sourdough waffles using your discard). Then you’ll whisk in the water and add the flours.
- Next, loosely lid and wrap a rubber band around the jar at the height of the starter. This will give you a visual indication of how much the starter has grown as it grows to double in size.
- Last, allow the starter to develop at room temperature for about 8-12 hours. The time will vary due to ambient temperature.
When is the Starter Ready?
Once your GF sourdough bread starter has doubled in size, is bubbly and has a sweet-sour aroma, it’s ready to use in this gluten free sourdough bread recipe. After measuring out the portion needed for your recipe, refresh the starter, as indicated above and store in the fridge until your next feeding.
The starter will not stay in this doubled in size state for long. At some point after doubling in size, it will begin to lose its strength and fall. The exact amount of time will vary from starter to starter but I’ve typically observed a few hours window, at room temperature, where the starter will remain doubled in size. On warm days, it’s shorter. But in the refrigerator, it’ll hold for quite a while. I’ve observed at least over eight hours! Once it starts falling back down after doubling in size, you’ll need to refresh (or feed) it and allow it to double in size again before using it in a sourdough bread recipe.
If your starter is struggling to double in size, you’ll need to go through a few cycles of refreshment to build strength in the starter. You can even refresh twice within a 12 hour period if needed. Doing this builds flavor and will help later in the development of your gluten free sourdough bread. I do a series of refreshments after freezer storage or a long period of neglect in the refrigerator before using it in a recipe.
How to Maintain Gluten Free Sourdough Starter
Think of your sourdough starter as a refrigerator pet that needs regular attention. There’s yeast and bacteria that make up the starter so it needs to be fed (refreshed) on a regular basis. Your starter can be stored at room temperature if you’re baking daily.
However, if baking only once every one or two weeks, store your starter in the refrigerator. This will slow your starter down, yet keep it viable for regular feedings and baking weekly or biweekly.
What is That Layer of Liquid?
Sometimes while you’re building your starter and/or after your starter is established, you may notice a layer of liquid that forms on the surface. This liquid is called hooch, a naturally occurring alcohol that indicates your starter is hungry, that it’s a little past time to feed your starter, and is an indication of a weak (hungry) starter. Hooch should have a pleasant sweet-sour aroma. You can pour it off or stir it into your starter and carry on with refreshment.
If you notice hooch after refreshing your starter, and you’ve missed the doubled in size bake window, you’ll need to feed your starter twice a day, about every eight hours, which will remedy hooch and build strength in your starter. Putting your starter in a cooler area of the house should help too. This will slow down the fermentation process.
Freeze Your Starter to Preserve It!
If you’ll be away from baking for a while and need to store your starter longer than a few weeks, it can go in the freezer, unfed. When ready to use it again, thaw it out in the refrigerator and refresh it a few times within a window of 12-24 prior to baking with it. Be sure to allow it to double in size again.
Remember, your starter is ready when it doubles in size, is bubbly and has a pleasant sweet-sour aroma.

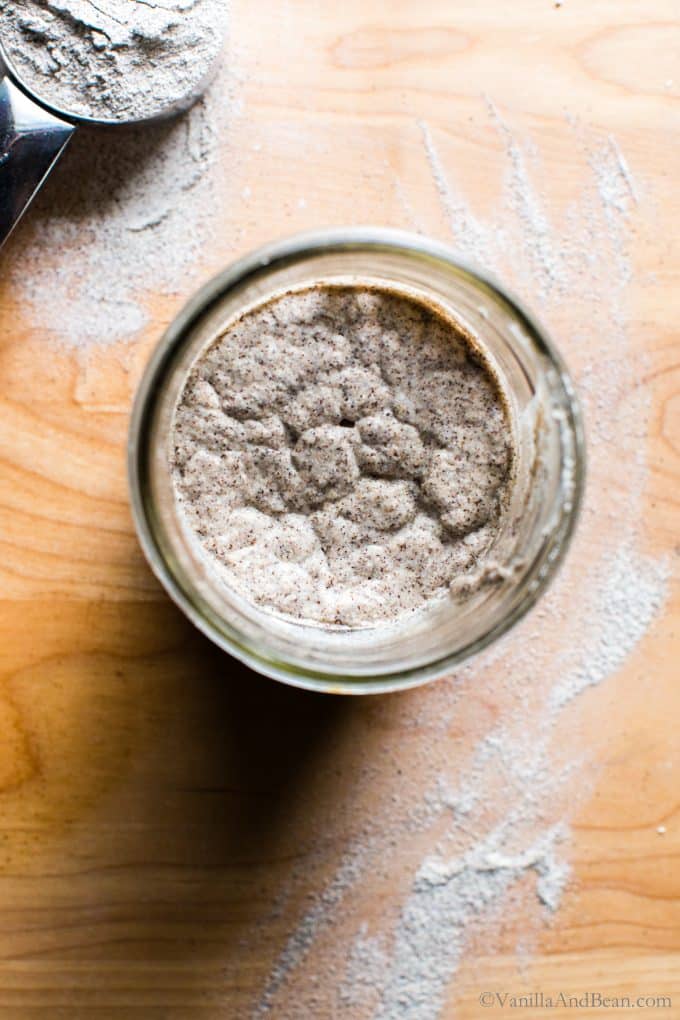

Traci’s Tips
- Time is a guide rather than a determining factor for when the starter is ready. Use the cues and your senses to determine when it’s ready. It may take longer than seven days. It’s ready when it’s ready.
- For leftover sourdough starter (discard), you can keep it in a jar for use in other recipes, give some away or throw it out. It can be used in gluten free sourdough pancakes, sourdough waffles or my gluten free sourdough pizza crust recipe without having to double it in size… and it’s absolutely delicious! I keep a jar in my refrigerator and refill it as I discard the leftover starter at refreshment time. The discard can be frozen too.
- If you see any mold or a layer of pinkish/orange/white slimy color on the top of your starter, throw it out and make a new starter. This can be avoided simply keeping your starter happy and well fed, refreshing it weekly in the fridge or daily at room temperature.
- Float Test: If you’re a glutenous sourdough baker and have used the float test in the past to observe when your sourdough starter is ready, the same idea doesn’t work for gluten free sourdough starter. So, you’ll need to go on observation alone. Remember: the starter doubles in size, smells of a sweet-sour aroma and has air pockets within the starter (or is bubbly).
Note: Through testing this recipe I found sweet white rice flour or Bob’s Red Mill AP 1-1 Gluten Free Baking Flour to be an essential component in developing a strong and consistent gluten free starter. Mixed with buckwheat or brown rice flour yields consistent results.
Gluten-Free Sourdough Starter (Beginner Friendly!)
Ingredients
- Buckwheat Flour, or Brown Rice Flour
- Sweet White Rice Flour, or Bob's Red Mill AP 1-1 gluten free baking flour
- Water, room temperature **see note
Instructions
- Day One: In a medium glass bowl or jar, whisk together 2 T (20g) buckwheat or brown rice flour, 2 T (20g) sweet rice flour and 1/4 C (60g) of water. Cover with a damp tea towel and rest at room temperature for 24 hours.
- Day Two: In a clean medium glass bowl or jar, whisk 2 T (40g) of mixture you made yesterday (throw out the leftovers), 2 T (20g) buckwheat or brown rice flour, 2 T (20g) sweet rice flour and 1/4 C (60g) of water. Cover with a damp towel or loose fitting lid and rest at room temperature for 24 hours.
- Day Three Through Day Six or Seven (or beyond): Repeat step two using the previous days starter until the mixture becomes puffy, has a pleasant sweet-sour aroma and bubbles begin or air pockets are visible under the surface. This process takes about six to seven days (as this has been my experience) – but it may take longer. Time is not a determining factor for when the starter is ready, it's simply a guide. It's ready when it's ready. Use the cues and your senses to determine when your starter is ready. This is the nature of sourdough. Before using your new starter in a recipe, you'll need to refresh (feed) it.
How to Refresh your Gluten Free Sourdough Starter:
- Once you have an established starter, you'll need to feed it.In a clean lidded jar, add 1/4C (60g) of sourdough starter (throw out or save the leftover 'discard'). To the starter, mix in 1/3 C (80g) room temperature water. Add 3 T (30g) buckwheat flour and 3 T (30g) sweet white rice flour to the water mixture. Mix well until the flours are hydrated. Wrap a rubber band around the jar at the height of the starter. This will give you a visual indication of how much the starter has grown. Put a lid on the jar (it doesn't need to be loose – just regular) and allow the starter to develop at room temperature for about 8-12 hours* or until it doubles in size. The time will vary due to ambient temperature.If your starter is struggling to double, place it somewhere warm, like inside a turned off oven with a light on. You can also try feeding twice a day to nudge the starter along.Once the starter has doubled in size, is bubbly, and has a sweet-sour aroma, it's ready to use in your gluten free sourdough bread recipe.After measuring out the portion needed for your recipe, refresh the starter, as indicated above and store it until ready to use again.
How to Store Your Starter:
- Room Temperature: The starter can be stored at room temperature if you bake daily, which also means it will need to be refreshed daily. Store it in a glass jar with a lid. Refrigerator: Ideally, you'll want to refresh your starter (feed it) each week if stored in the refrigerator. When preparing for mixing, and after pulling the starter from the fridge, you may need to refresh it twice within a 12 hour period to get it going again. This is not always the case, but sometimes the starter can be sluggish. Store it in a glass jar with a lid. Freezer: For longer storage, place your starter in the freezer. It will revive after it thaws in the refrigerator and goes through a few refreshments. Store it in a glass jar with a lid.
How to Store Your Discard if Saving:
- Once you have an established starter, you can use it for bread, and your discard for pancakes, waffles, pizza and other recipes to add that tangy sourdough flavor. Store it in the fridge, in a lidded glass jar, for up to two weeks. You may see a layer of hooch, and this is not unusual. You can pour it off or stir it in. If you see any white, orange or pink film or mold, toss it. You can also store your discard in the freezer for longer storage. Thaw it in the fridge before using in a recipe.
Video
Notes
Made it? Leave a comment below!
The most helpful comment may include recipe rating, feedback, any modifications or helping other commentors.






I’m confused about the amounts!
While establishing the starter, it seems to be fairly straightforward. 1/4 C starter/water/flour.
But I’m confused about the directions for refreshing. Going by volume, it’s 1/4 C starter, but 1/3 cup water, and 6T flour… wondering why these amounts are not equal parts anymore?
By weight it says 60 g starter, 80 g water, and 60 g flours (which does not appear to add up to the volumes listed above).
Can you clarify? Thank you!!
Hi Emma! When extensively testing this recipe, increasing the water in refreshment was the sticking point for the starter doubling in size. When you’re working on making your starter, you’re not looking to double it in size, rather you’re working to actually create a mini micro-biome. So the purpose of creating a starter is different than refreshing the starter. So, if you’re looking at it from a ‘recipe’ stand point, the recipes are two separate recipes. The goal of making the starter is different from the goal of refreshing the starter. So the weight/volume of making the starter and the weights/volume of refreshing the starter are supposed to be different. I hope this helps!
I’m wondering if my starter is developing correctly or if I should start over? I started it and days 1-5 it was bubbling up but didn’t have a good smell to it yet. Then on day 6 and forward it hasn’t bubbled at all. I figured I’d keep feeding it to see if it changed but I’m on day 10 and still not bubbling/growing. Also it still smells and not yogurty at all. What should I do? Thanks!
Hi Cami… I’m sorry to hear the starter isn’t developing. I think at this point since there’s no yogurty/sweet smell, it sounds like it’s not developing and it may be a good idea to start over. Ten days seems like plenty of time for it to get movin’. Are you using any flour substitutes?
I’m using white and brown rice flour. Also I live at 8,500 feet. Can high altitude effect it?
Hi Cami! So happy to hear you’re giving it a go. I’m not sure if high altitude will effect the starter. I did a quick Google search and didn’t find a definite yes or no. I’m almost certain it will effect rising and baking the loaf, but am not sure how. Will you let us know how it goes?
Hi there! I am on to my second gluten free starter attempt. I can’t find sweet rice flour so I am using 50/50 buckwheat flour and brown rice flour and 100% hydration of filtered water. Both attempts got a pink tinge to the top around day 3 – 4. I read loads of posts and articles before starting, and during, and most say pink means mold, but some say don’t worry about a pink tinge. It didn’t look or smell like mold and the starter still smelt really nice (yeasty and and a bit floral-y which I read are good signs). It was also super bubbly already, so I felt really contradicted! But, I chucked the first attempt though, as better safe than sorry. I started again, same mix and the same thing has happened, it has a pink tinge on the top, but smells lovely and is super bubbly even though it’s only day 4. What do you think is happening here? Do you think my flours could be off? They are both freshly bought and organic. Any advice would be much appreciated!
Hi Mandy… Thank you for your note. So glad your starter is off to a good start, but then the pink tinge. I don’t know what it is or if it’s okay to attempt to bake with. Without looking at that pink tinge under a microscope and with a scientist identifying what it is, it’s hard to say what it is. I like the lovely smell and that it’s nice and bubbly.. but I just don’t know about the pink. I wish I could be more help here. Consider reaching out to King Arthur flour on their bakers hotline? If you’re able to get to the bottom of it, will you let us know what you find?
I am making the sourdough starter. It’s been a few days and I can already smell it developing beautifully. Thank you so much for the amazing recipe.
I did have a quick question- is it possible to increase the volume of the sourdough starter finished product? Should I just double or triple quantities? I would like to be able to make multiple recipes from the starter at a time and want to keep a healthy amount of starter for the following week.
Thank you!
Hello LP! So happy to hear your starter is coming along! All you’ll need to do is double the refreshment. Just make sure to mix it in a larger vessel. Be sure to take a look at my GF Sourdough Pancakes to use that discard in and enjoy! Please let us know how your starter turns out!
I am new to the sourdough game so I had another question pop up. What is the reason for the discard for the established starter? Is it possible to feed without discarding (or using for another purpose) the leftovers? Could I treat the discard as it’s own starter and just feed that also? Thank you so much for your great recipes!
Hello LP! Thank you for your note and welcome to the great sourdough journey! The purpose of feeding the starter is that there are living bacteria and yeast that make up the starter. At some point, if not refreshed, they will eat all the available food and will starve. Refreshing simply gives them new nourishment. The starter discard can be used to make gluten free sourdough pancakes, waffles, pizza and many other things. I have a recipe for gf sourdough pancakes – using the discard – with a waffle and pizza recipe in the works! You can treat the discard as it’s own starter too – give it to a friend or try some new flours in your new starter! I hope this helps. Let us know how your starter turns out!
Hello again! The sourdough starter started to have air bubbles under the surface and also started smell pleasantly sweet and sour so after 7 days, so I fed it to get it ready for a recipe. After 12 hours it did not double in size. It grew maybe 1/2 inch around the rubber band mark. Should I feed it again? I am not sure what that means about the starter, if it’s viable or not?
Also, you mentioned that if I wanted to increase the volume of the starter I should feed it twice? The second time, should I still discard a portion of the starter?
Thank you so much for your help and recipes! I can hardly wait to make the sourdough bread!
Hi LP ~ Ohhh so happy to hear it smells pleasant! You are on the right track. Feed it again… and just give it more time. If you like, to speed the process, you can warm the water to 80F. They may help give it a boost! As for doubling the recipe… make sure your starter doubles in size first. That way you won’t be attempting to double a starter that isn’t ready. When you’re ready to double the recipe, weigh out 120g of starter – to get this much starter you may need to refresh it or feed it again to get this amount of starter (discard any leftover or save it for pancakes), stir in 160g water, then add 60g buckwheat flour and 60 grams white rice flour. Give it a stir and mark your vessel at the starting point and watch for it to double in size. I hope this helps LP! Keep in touch.
Thank you so much For your help. I have continued to feed the sourdough starter and it still has not doubled in size. It continues to rise regularly but instead of doubling it reaches maybe halfway. It continues to bubble, and smell like what I assume sourdough starter should smell like. It has now been almost 2 weeks since I started the starter. Do I just keep feeding it until it doubles or should I start baking with it assuming that this is as good as it will get? Thank you so much for all of your help I am so excited to start baking with it.
Hello Lp… Are you using the same flours indicated in the recipe? I’m sorry it’s not doubling… but it smells like it should. I’m perplexed. I’ve not come across this problem before. If you’d like to go ahead and bake, you could it a go… but I’m not sure the dough will fully rise. It should be doubling by now. If you’ve been feeding for two weeks, I’m sure this is as good as it’s going to get. Please keep in touch and let us know how you do!
I have exactly the same problem with lack of doubling
Hi Hanna… I’m sorry to hear your starter isn’t doubling. How many days have you been feeding it?
Thanks for your insights and notes!
I regularly bake glutenous sourdough and thought I’d give gluten free a shot!
Just starting my journey out with 100% millet flour at 100% hydration, hoping to see some rise in the next 12-24 hours.
Not easy to find sweet rice flour in India, but buckwheat and regular rice flour are options i want to try to experiment with!
Hello Dhananjay! Thank you for your note! Isn’t it fun and interesting baking both types of bread? Please let us know how your bread turns out with 100% millet and hydration. My curiosity is piqued!
Bread has been my biggest disappointment since going gluten free years ago. I now have hope. Thank you, can’t wait to try. I have never been a bread maker or worked with a starter so lots of new for this gal. Thank you for sharing
Debbie
HI Debbie! Thank you for your note. SO much new… I get it. Please let me know if you have any questions/concerns along the way. I’m here to help! traci@vanillaandbean.com
Thank you for the concise instructions. Since being GF I have missed sour dough bread so much! I’ll be giving this a try very soon.
It”s hard to imagine what really went into all the development of the recipe for this starter. As always, your instructions and photos are so instructive. This really has been quite the journey for you!
Oh my Jean… it has! Thank you so much for your support along the way :D
Thank you for this post. I am looking forward to trying this bread. For clarification, are you making a new starter each day for 3 days and what you have on the third day is what you will actually be using and what is left behind in each jar on days 1 and 2 gets discarded? Thank you.
Hi Patty! I’m sorry for the confusion. To clarify, you’ll have a discard everyday except day one. “DAY 3 through 6…or 7: Repeat day two until the mixture becomes puffy, has a pleasant sweet-sour aroma and bubbles begin to form under the surface. How many days it takes to complete to get to this point depends on ambient temperature and available, naturally occurring yeast and bacteria, but it should be ready between 6-7 days. Once the starter is puffy, has a sweet-sour aroma and bubbles are present under the surface (see pictures below), your initial starter is ripe or ready.” Then you’ll refresh (feed) it before using it in a recipe. I hope this helps and you enjoy the process!
WONDERFUL, thank you as I’m a bread maker and now have to go gluten free. Will you be posting your gluten free sourdough recipe also? It would be so greatly appreciated.
Hi Alice! Oh noooo… that’s such a challenge. I’m sorry to hear. But YES (!!), here is my gluten free sourdough! https://vanillaandbean.com/seeded-multigrain-gluten-free-sourdough-bread/ I hope you enjoy the recipe!