
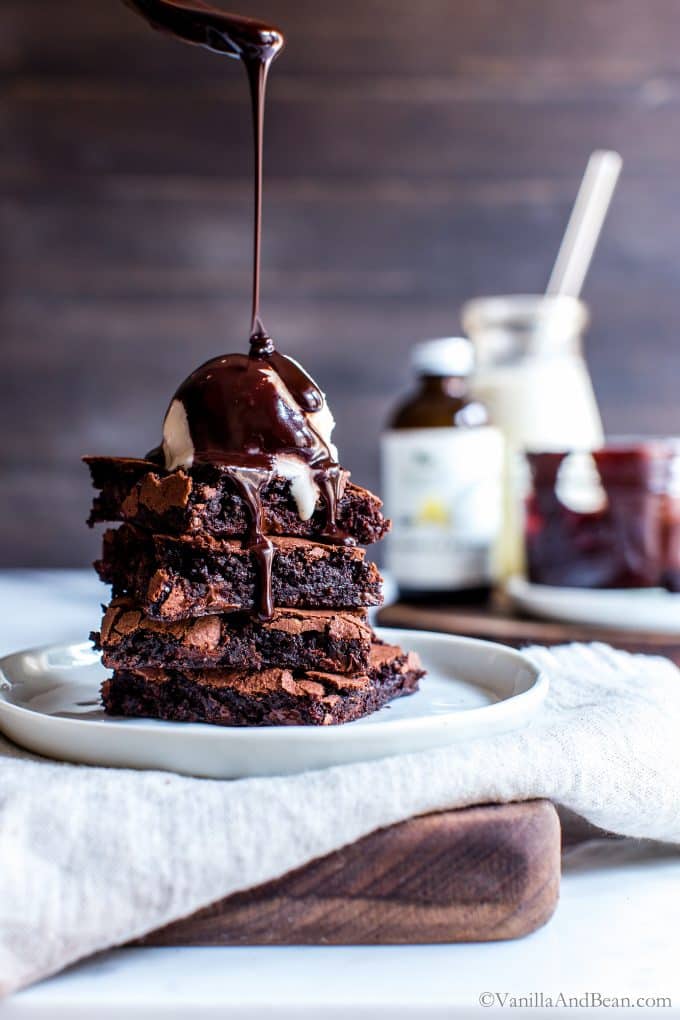
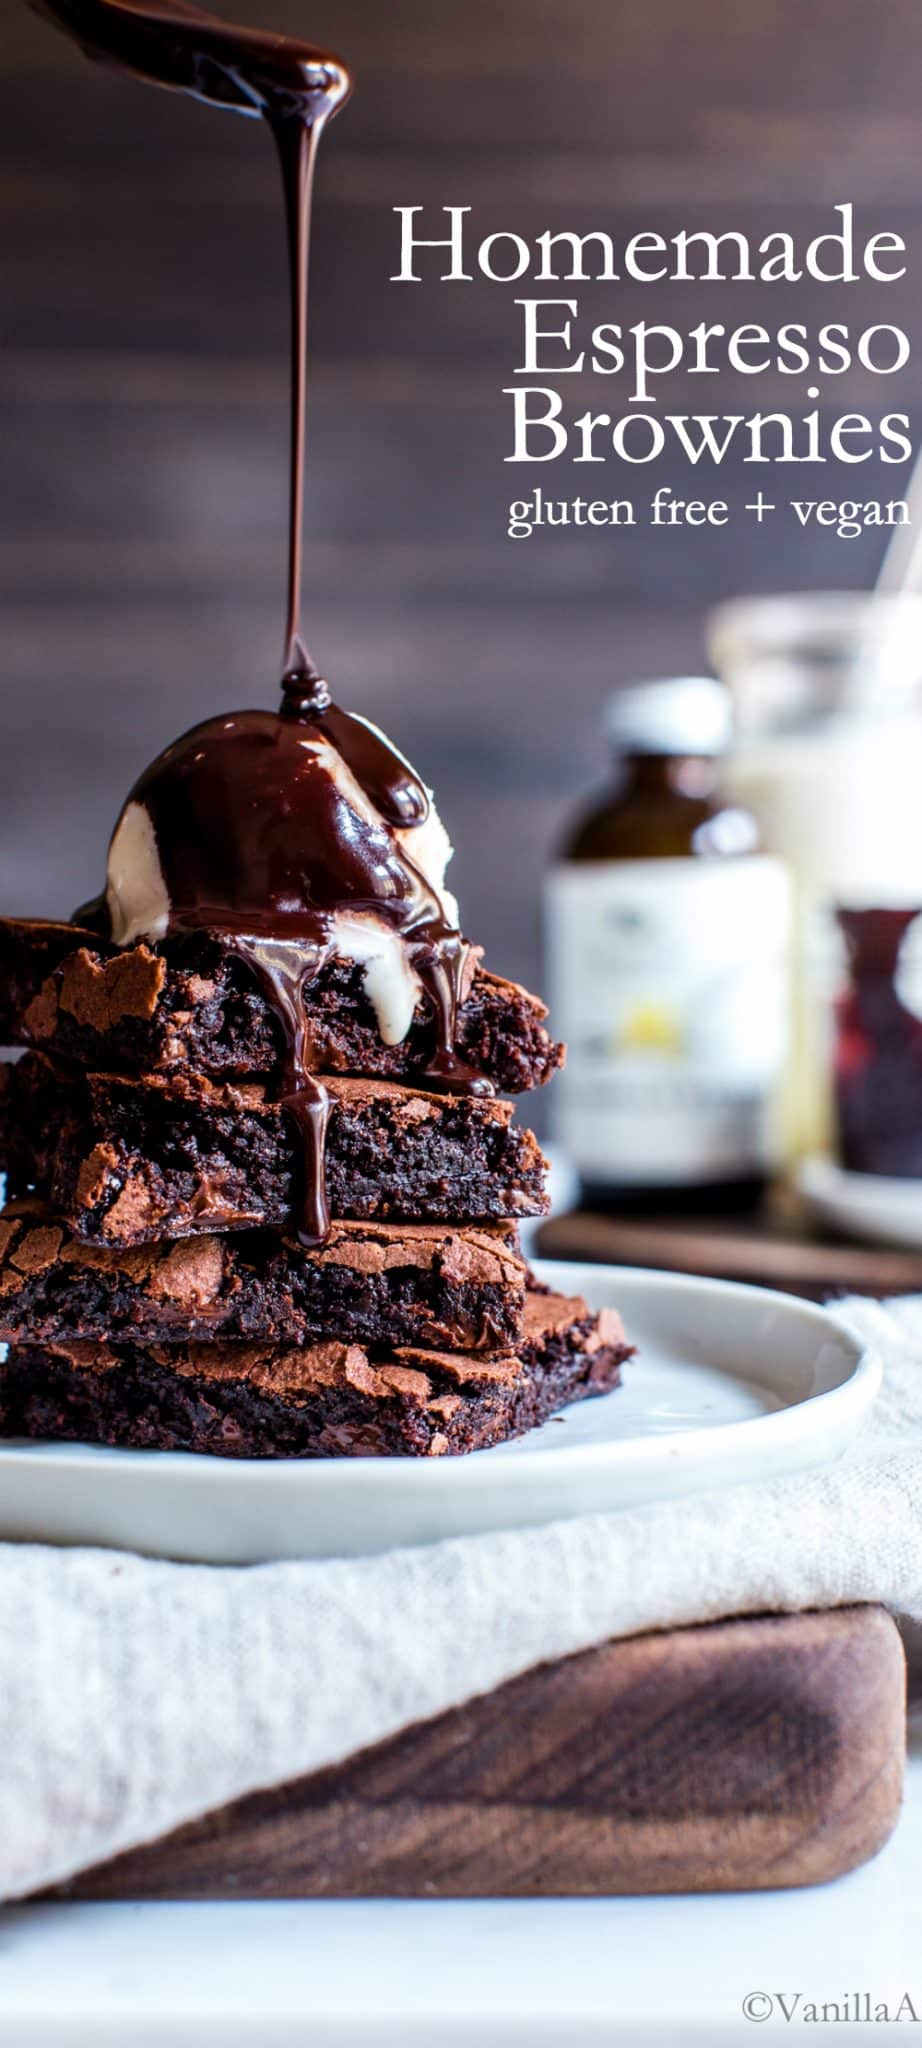
Like a chocolate truffle in brownie form, my Homemade Espresso Oat Flour Brownies are fudgy, rich and easy to make. Made with oat flour, tapioca flour, and almond butter for an earthy flavor and a fudgy texture. Share with a scoop of vanilla ice cream for a rich and decadent dessert. This recipe is vegan and easily gluten free | Disclosure: This post is sponsored by Rodelle.
Rich and Chocolatey Oat Flour Brownies
Does the world need another brownie recipe? Yes please!
Homemade and made with whole grains, you’d never know there’s oat flour in these melt in your mouth brownies! They’re quick to whip up in only about 10 minutes hands on time. Share with a scoop of vanilla ice cream for a rich and melty dessert.
This Recipe Is
- rich and chocolatey
- spiked with espresso
- vegan and easily gluten free
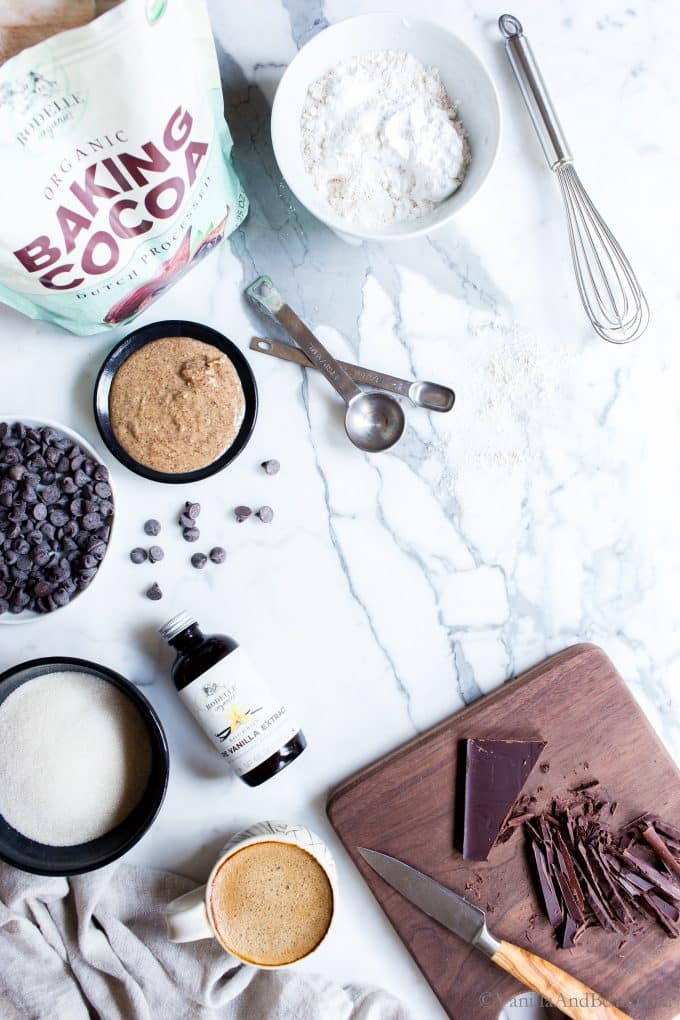
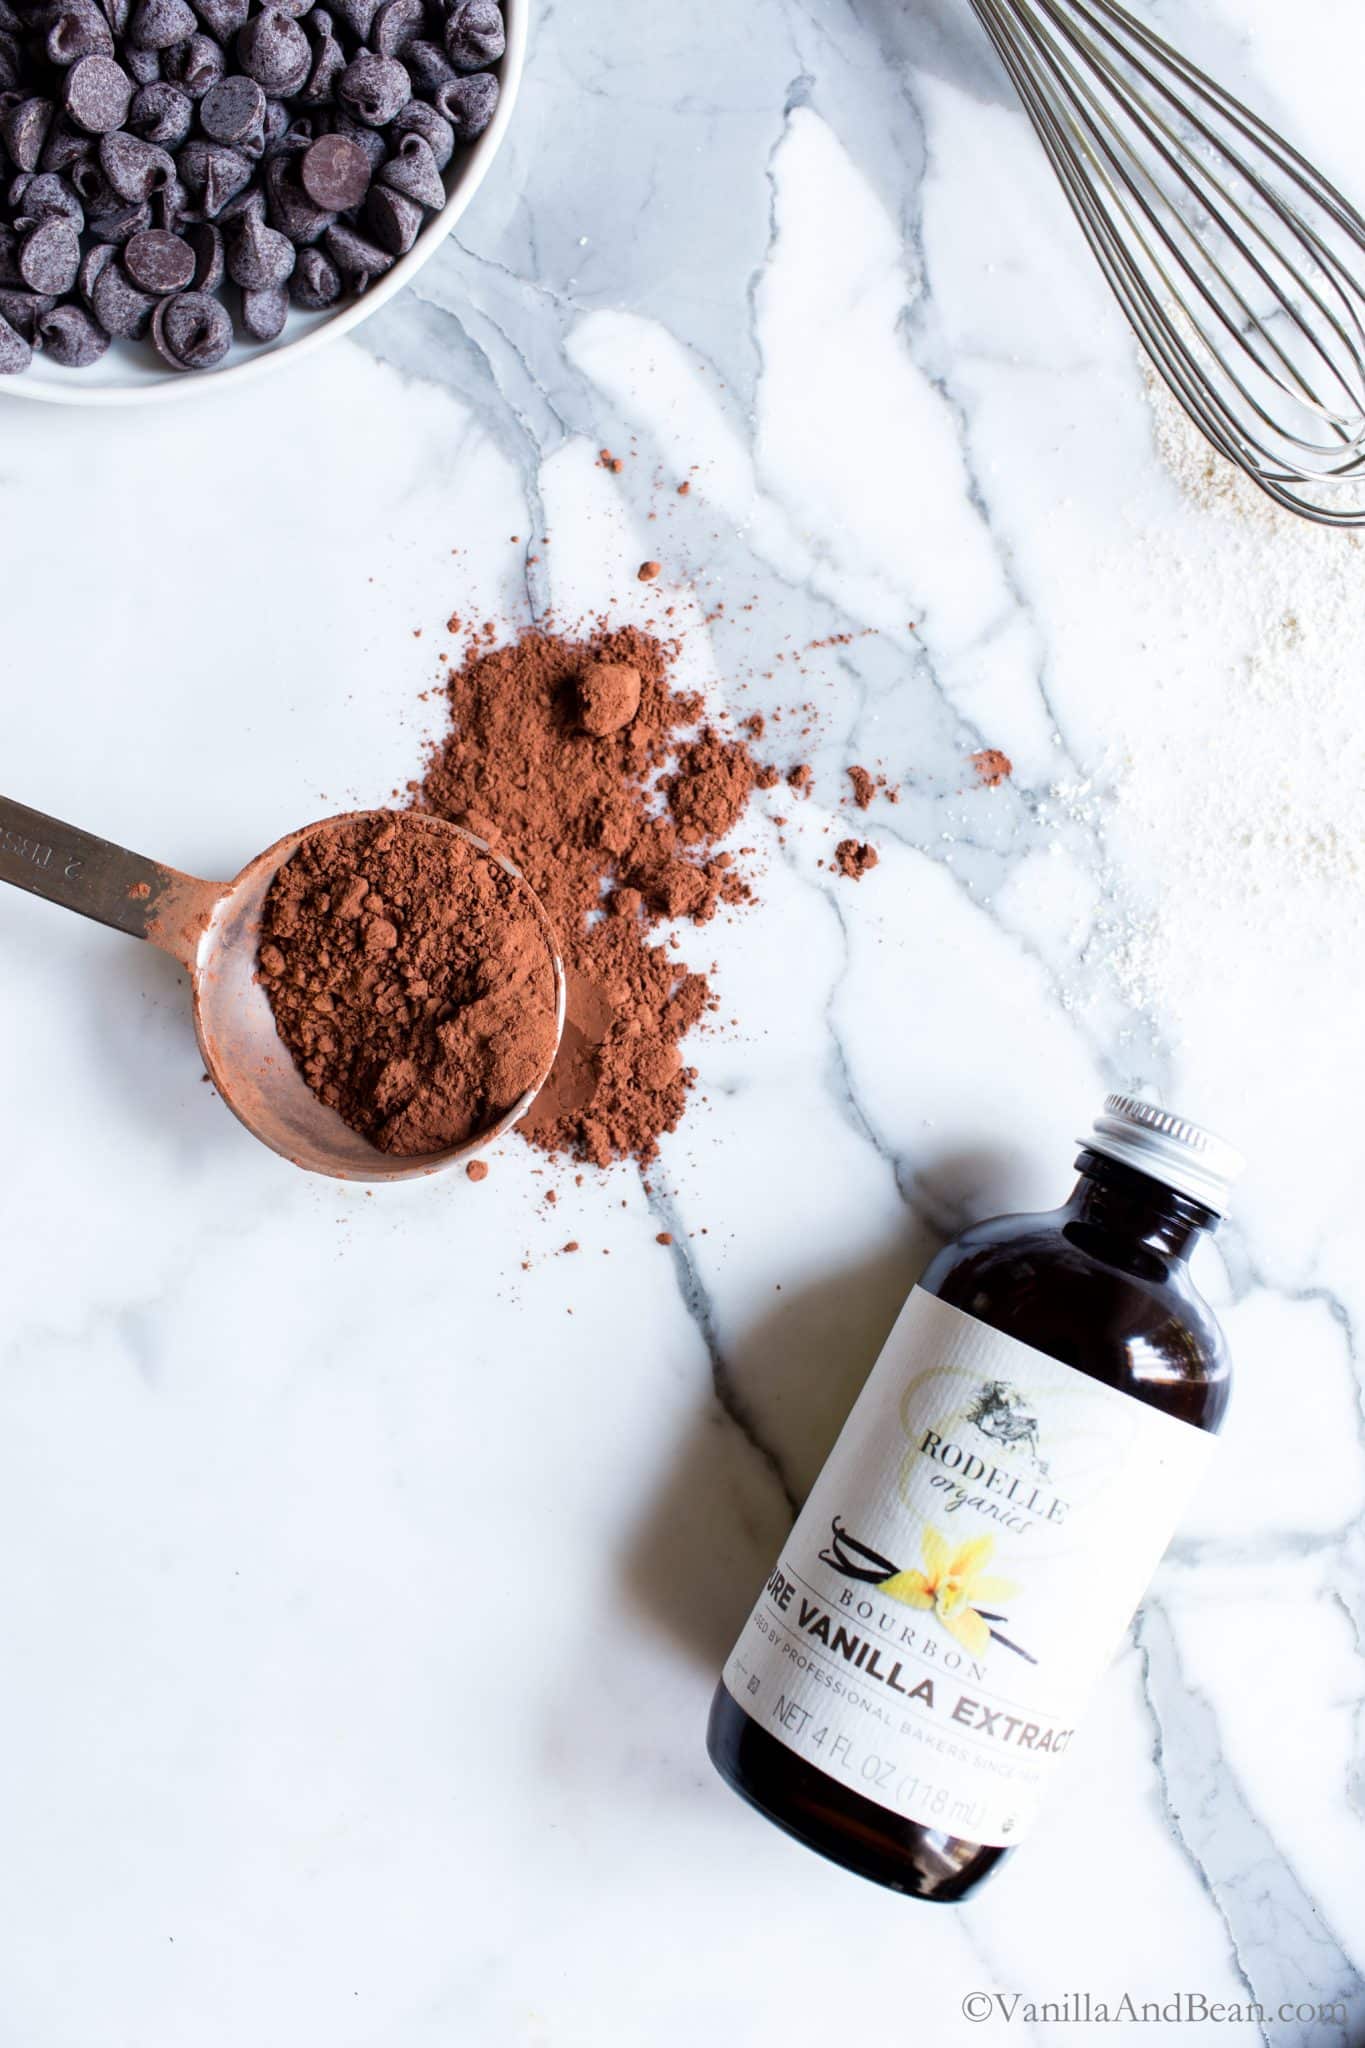
Organic Ingredients
Rodelle produces delicious Organic Baking Cocoa and also makes a most fragrant and vanilla rich Organic Vanilla Extract.
Rodelle’s vanilla program is the most traceable and farmer focused supply chain in North America because they buy directly from the farmer. Sahanala Madagascar, a Rodelle Farmer Partnership, is a farmer-owned association of 3500+ vanilla farmers. Rodelle works with Sahanala to purchase vanilla beans at a fair market value.
At a Glance: How to Make Homemade Oat Flour Brownies
Making vegan brownies from scratch is simple and tastes far better than anything you can buy in a pre-packaged box. Because this brownie recipe is gluten free and vegan, there’s no butter to melt or eggs to whip, so this recipe is super simple to whip up.
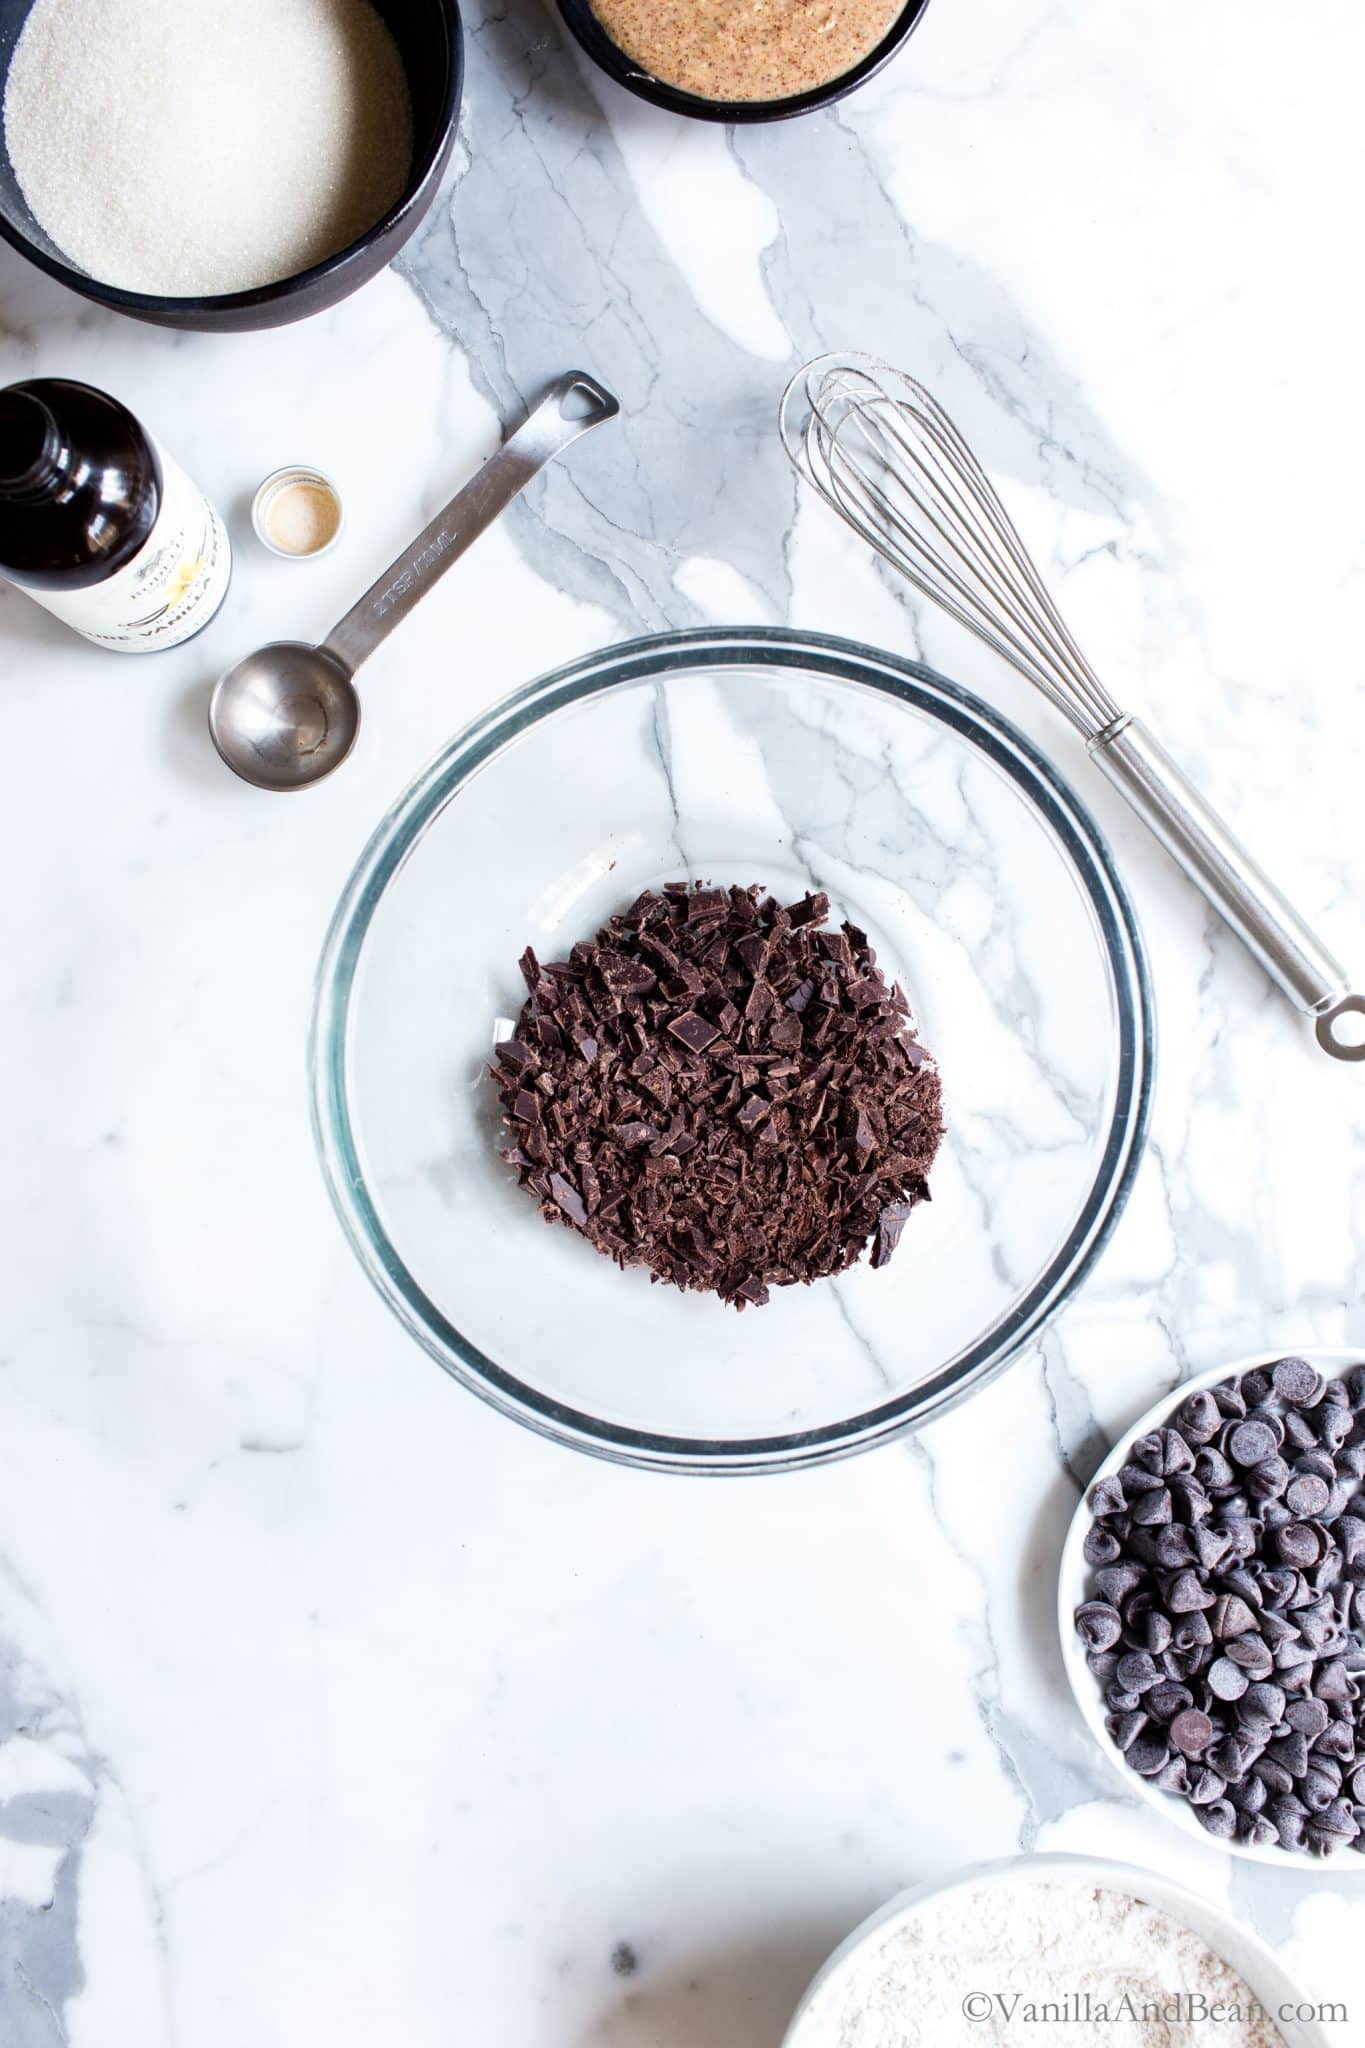
- First, brew your favorite espresso or strong coffee then pour it over chopped chocolate to melt. Take a deep inhale to stir all your senses.
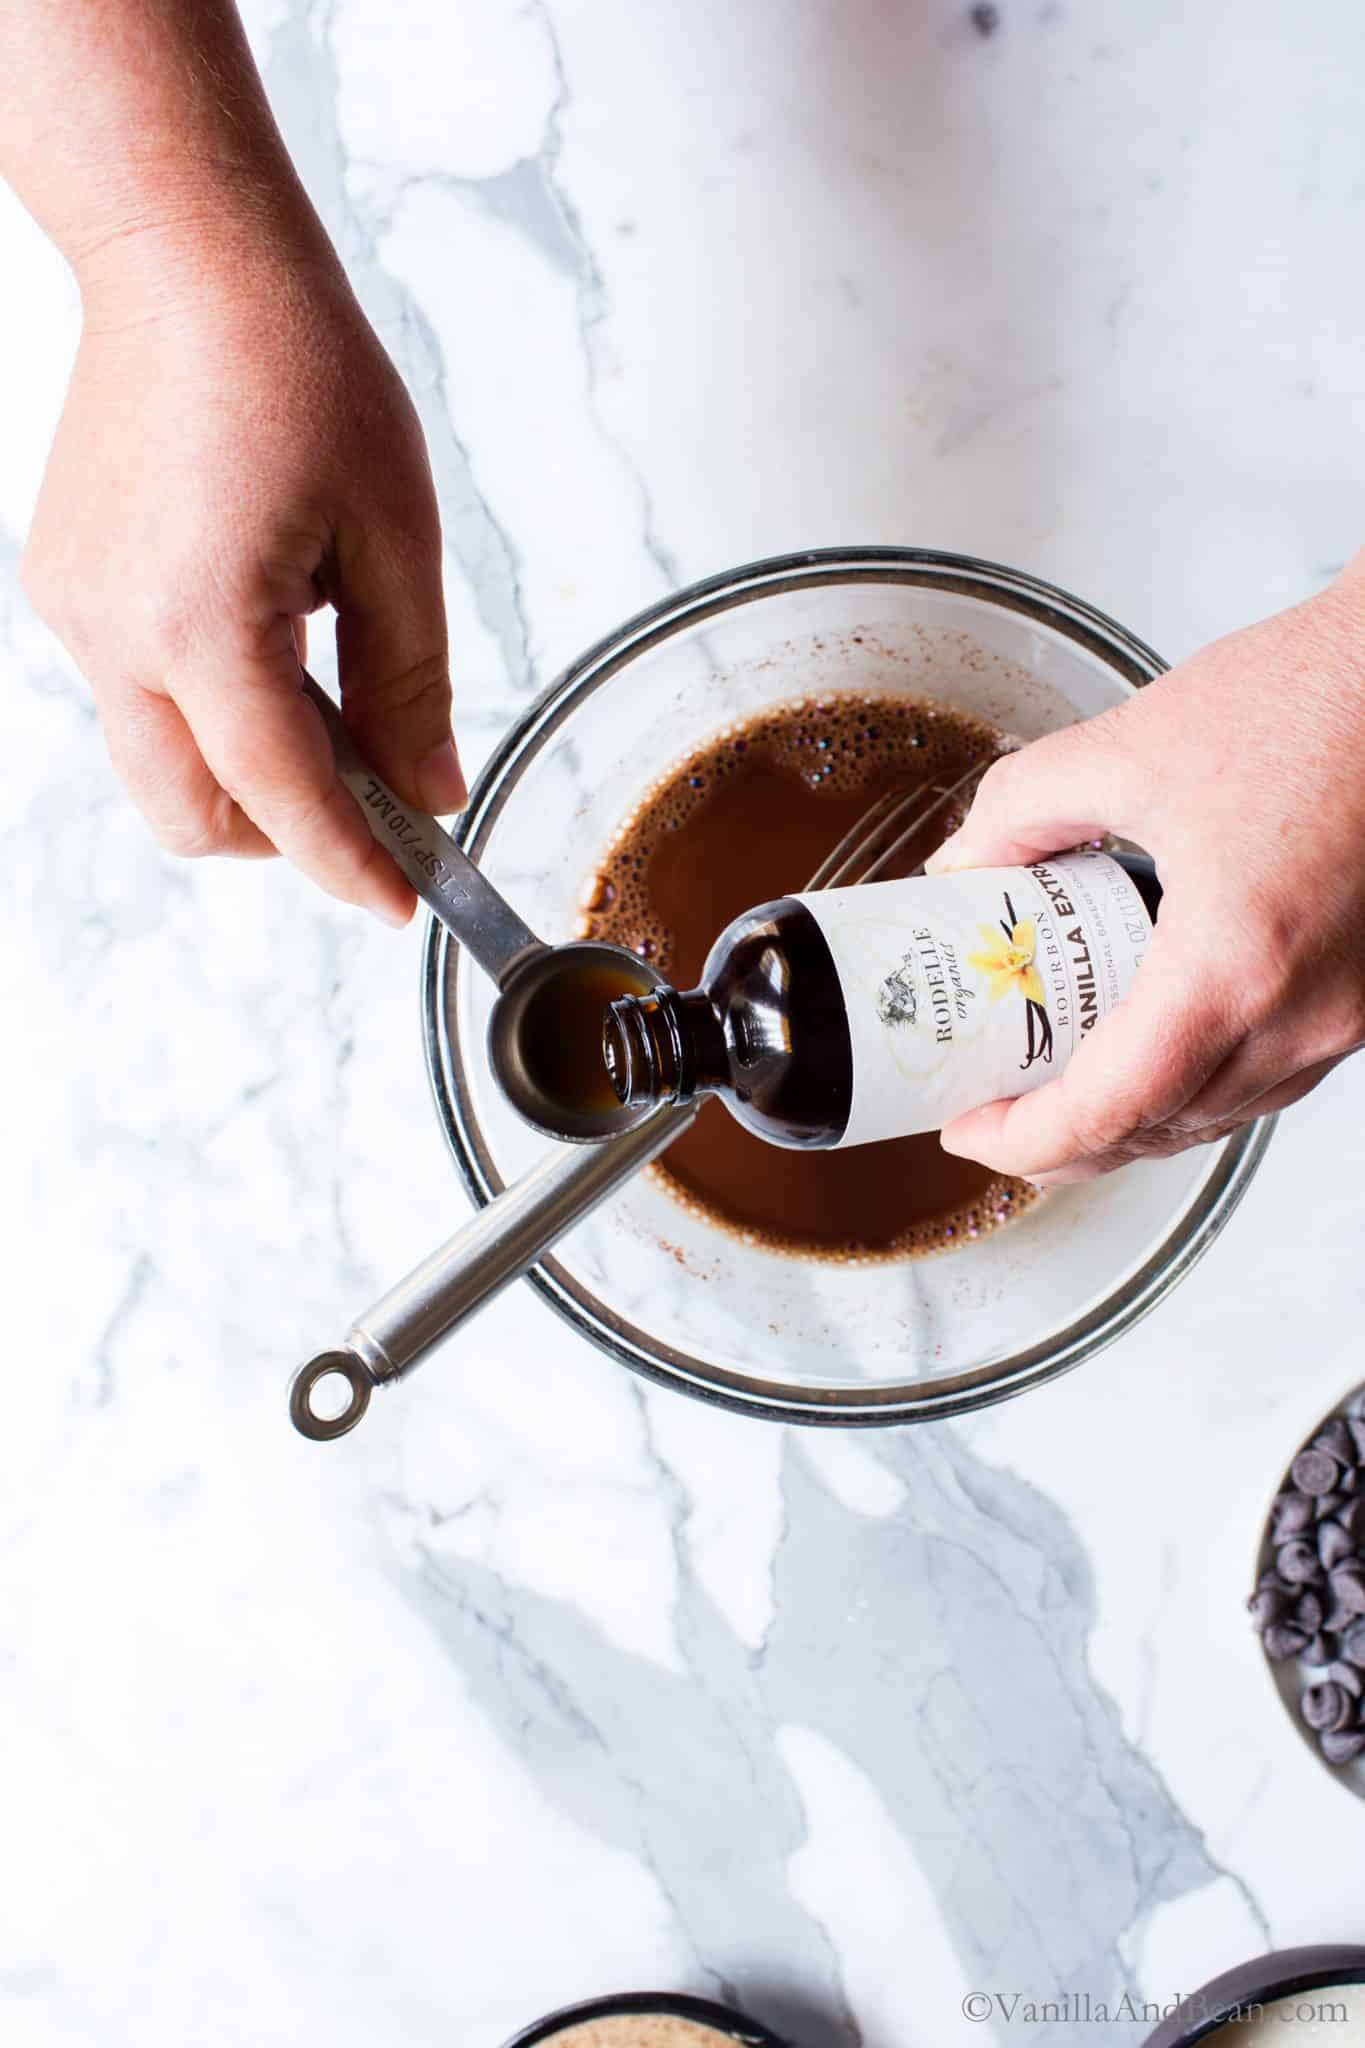
- Second, add the sugar, almond butter, and vanilla extract. Whisk… whisk, whisk. Then whisk in the oat flour and cocoa mixture.
- Next, once the oven is preheated, fold in the chocolate chips, and spread the batter in the pan.
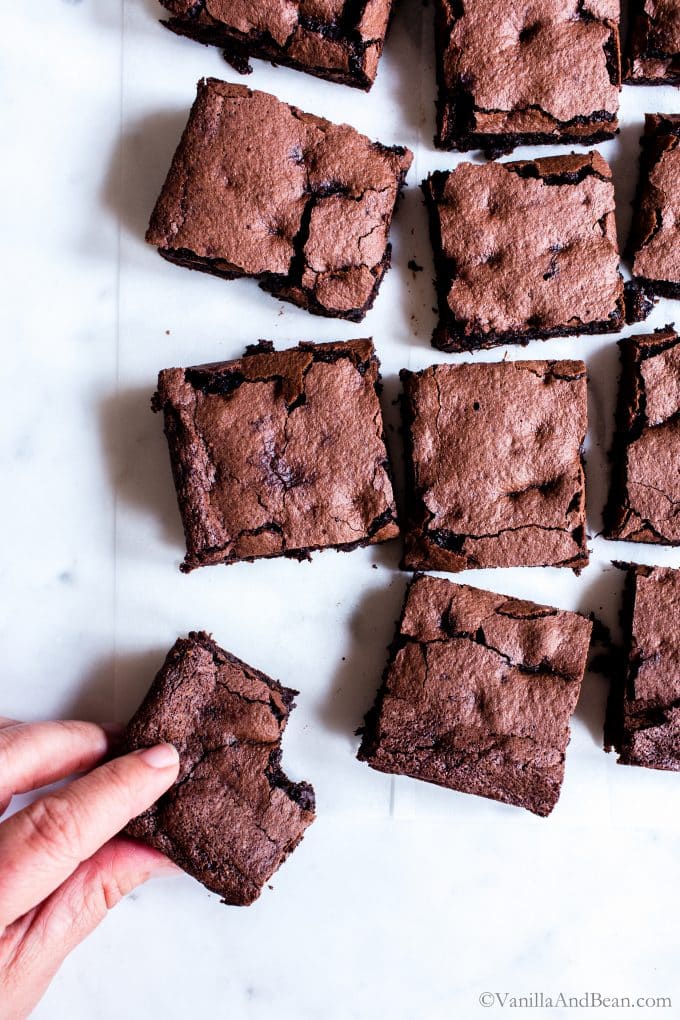
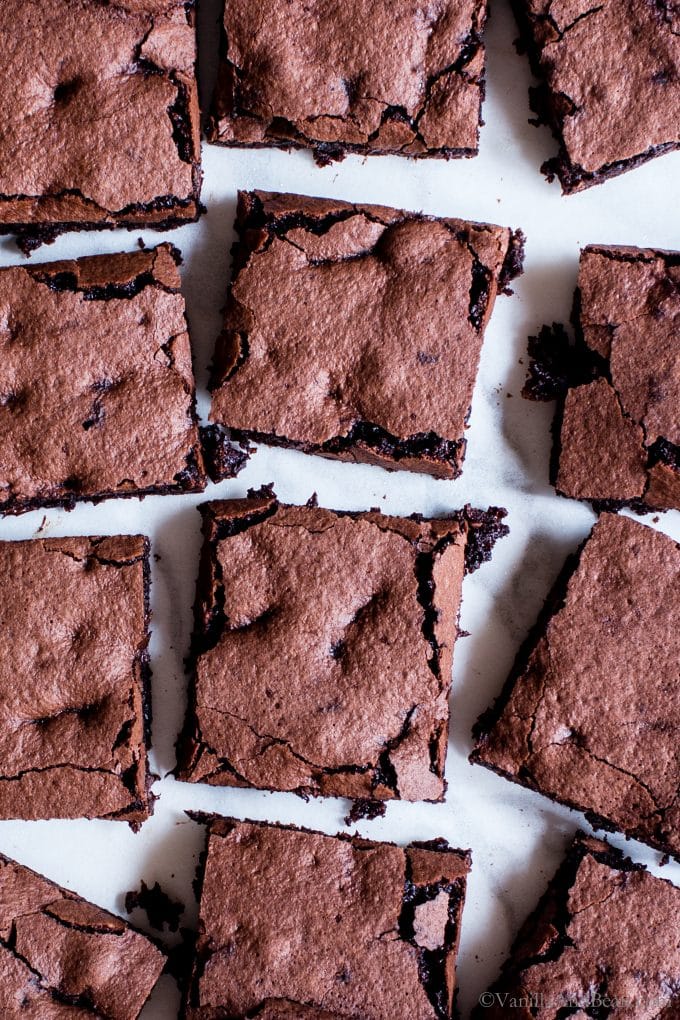
- Last, bake until fudgy or cakey/chewy. Which do you prefer?
Pictured here are fudgy brownies. I absolutely love their delicate, melt in your mouth texture. But for a bit longer bake, the brownies won’t slightly sink in the center and will hold their loft producing a chewy, cake-like brownie.
Traci’s Tips
- The Toothpick Test: Because there are chocolate chips in these luscious brownies, it’s a bit challenging to have the toothpick come out clean. If you’re going for a fudgy brownie, it’s not going to happen anyway. For the chewy/cake like brownie, you can poke around to find a ‘no chocolate chip’ spot and the toothpick should come out with a few crumbs when they’re ready.
- Because these brownies are gluten free and vegan with no added binders, they are delicate. Handle gently when removing them from the pan and cutting.
- Brownies need to cool before handling. Give them at least an hour to cool before removing from the pan. I recommend letting them cure or rest for at least eight hours before slicing – a practice in patience. Giving the brownies a rest overnight helps them hold together much better than otherwise. But, if you just can’t wait, remove them from the pan, cut and carefully put a slice in a bowl (rewarm if you like), top with ice cream and fudge sauce!
- This recipe calls for gluten free oat flour if needed. I DIY oat flour using Old Fashioned Rolled Oats. It’s super easy to do – see my how to make oat flour post for more details.

Homemade Espresso Oat Flour Brownies (Vegan)
Ingredients
For The Brownies:
- 3/4 (80g) Oat Flour gluten free if needed | I DIY my oat flour - see notes below*
- 2 Tbs Tapioca Flour (see Annie's note in comments for Arrowroot sub)
- 4 Tbs (30g) Unsweetened Cocoa Powder I use Rodelle
- 1/2 tsp Baking Powder
- 1/4 tsp Baking Soda
- 1/2 tsp Fine Sea Salt
- 1/4 C (70g) 70% - 75% Dark Chocolate chopped fine
- 1/2 C (110g) Espresso or Strong Coffee fresh brewed
- 2 tsp Vanilla Extract I use Rodelle
- 1/4 C (70g) Almond Butter room temperature
- 2/3 C (155g) Organic Cane Sugar
- 1/2 C (100g) 60% - 70% Semi-Sweet Chocolate Chips
Instructions
For the Brownies:
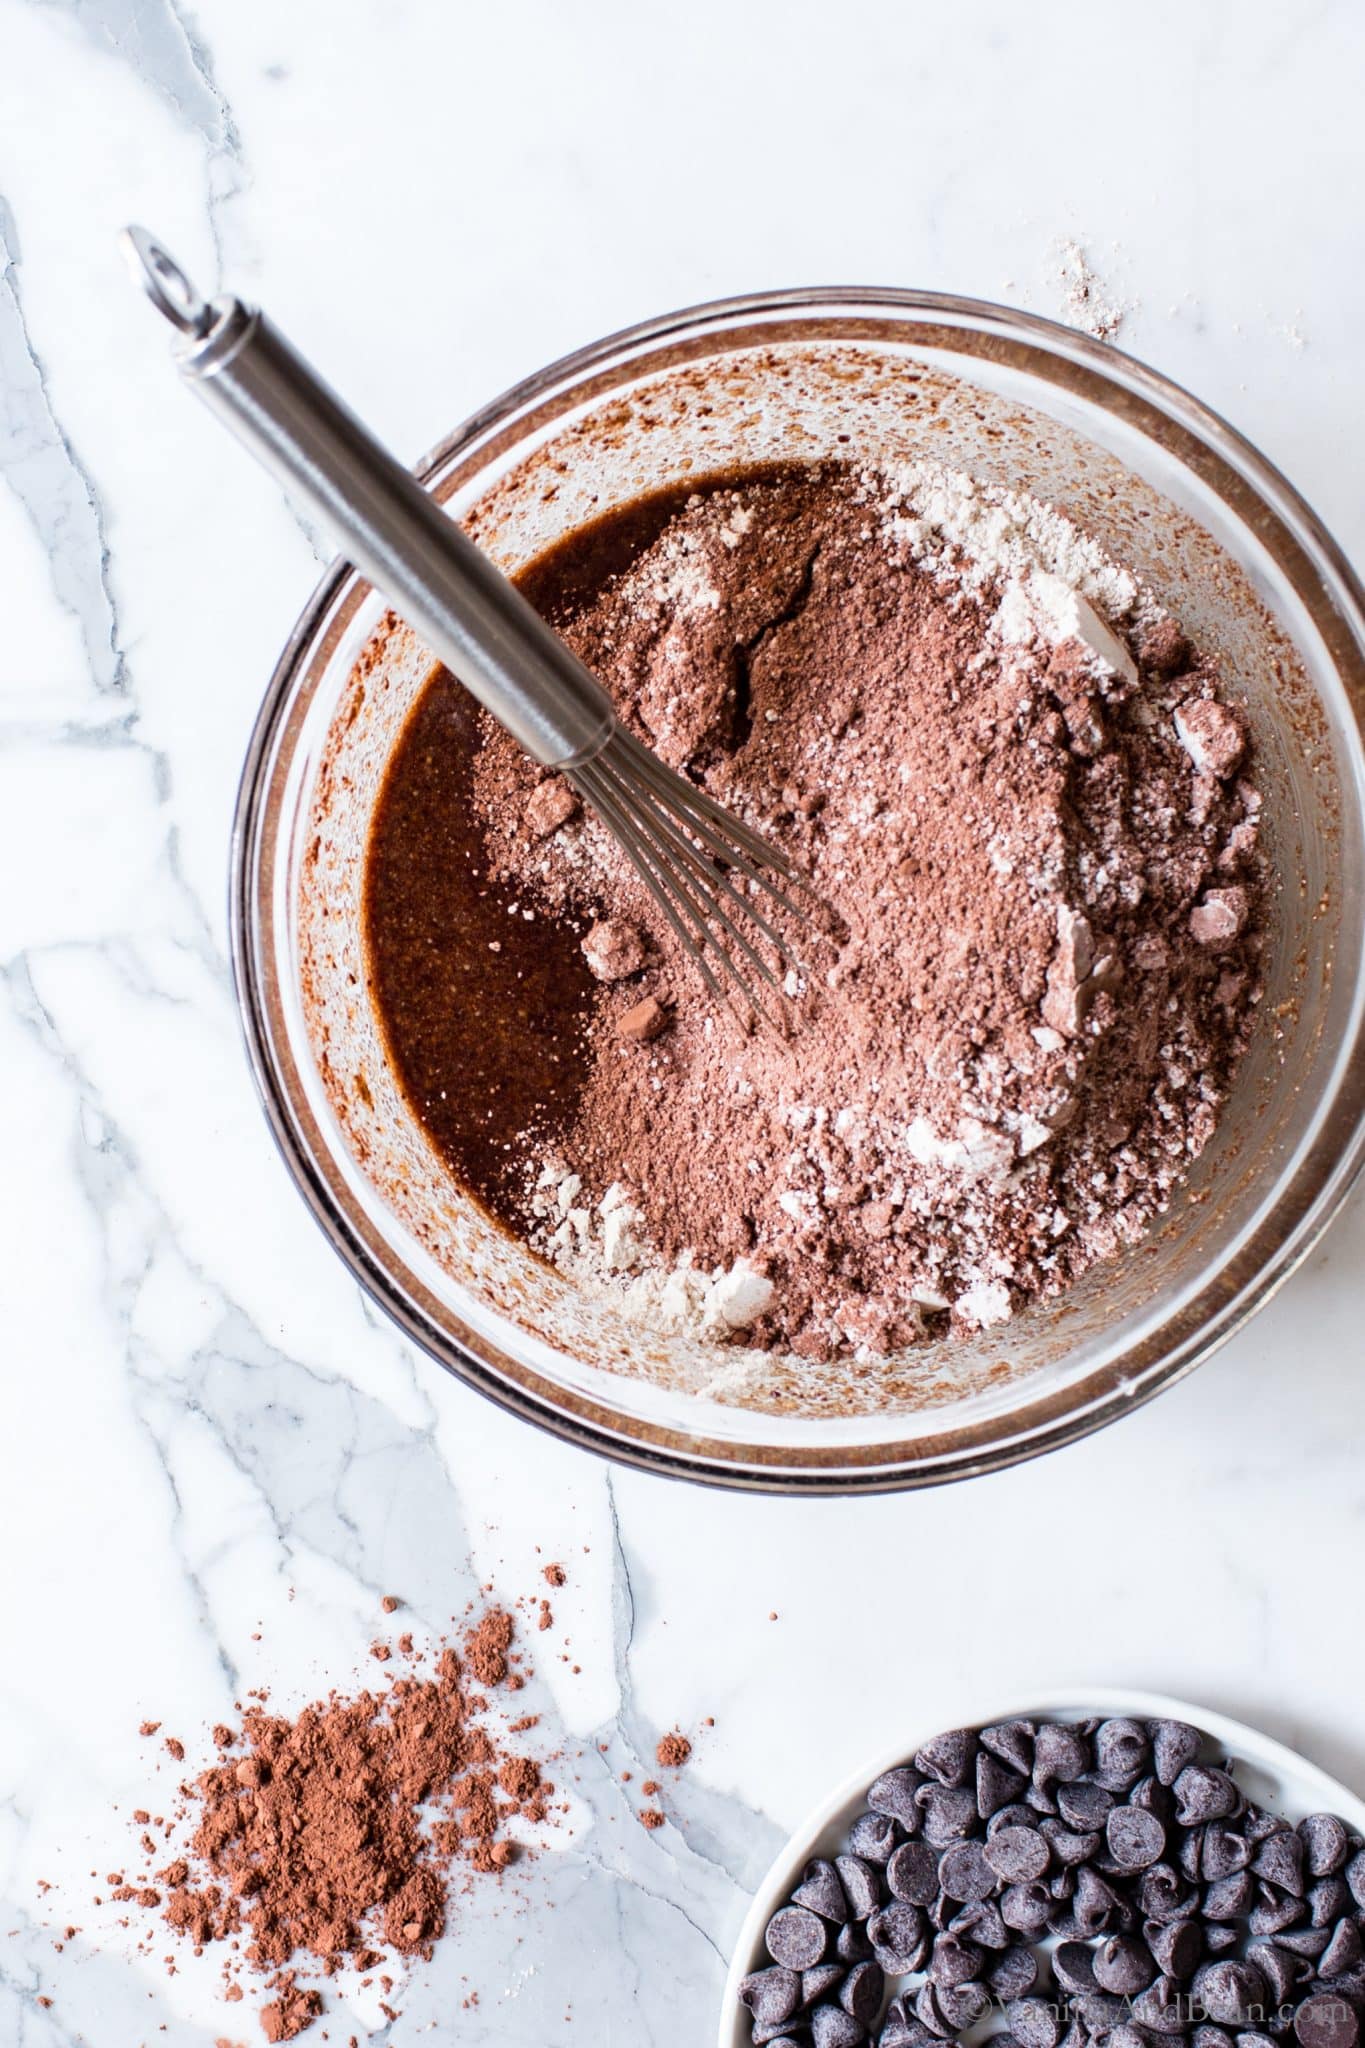
- In a medium mixing bowl, measure in the oat flour, tapioca flour, cocoa powder, baking powder, baking soda and salt. Whisk to distribute the dry ingredients. Set aside.
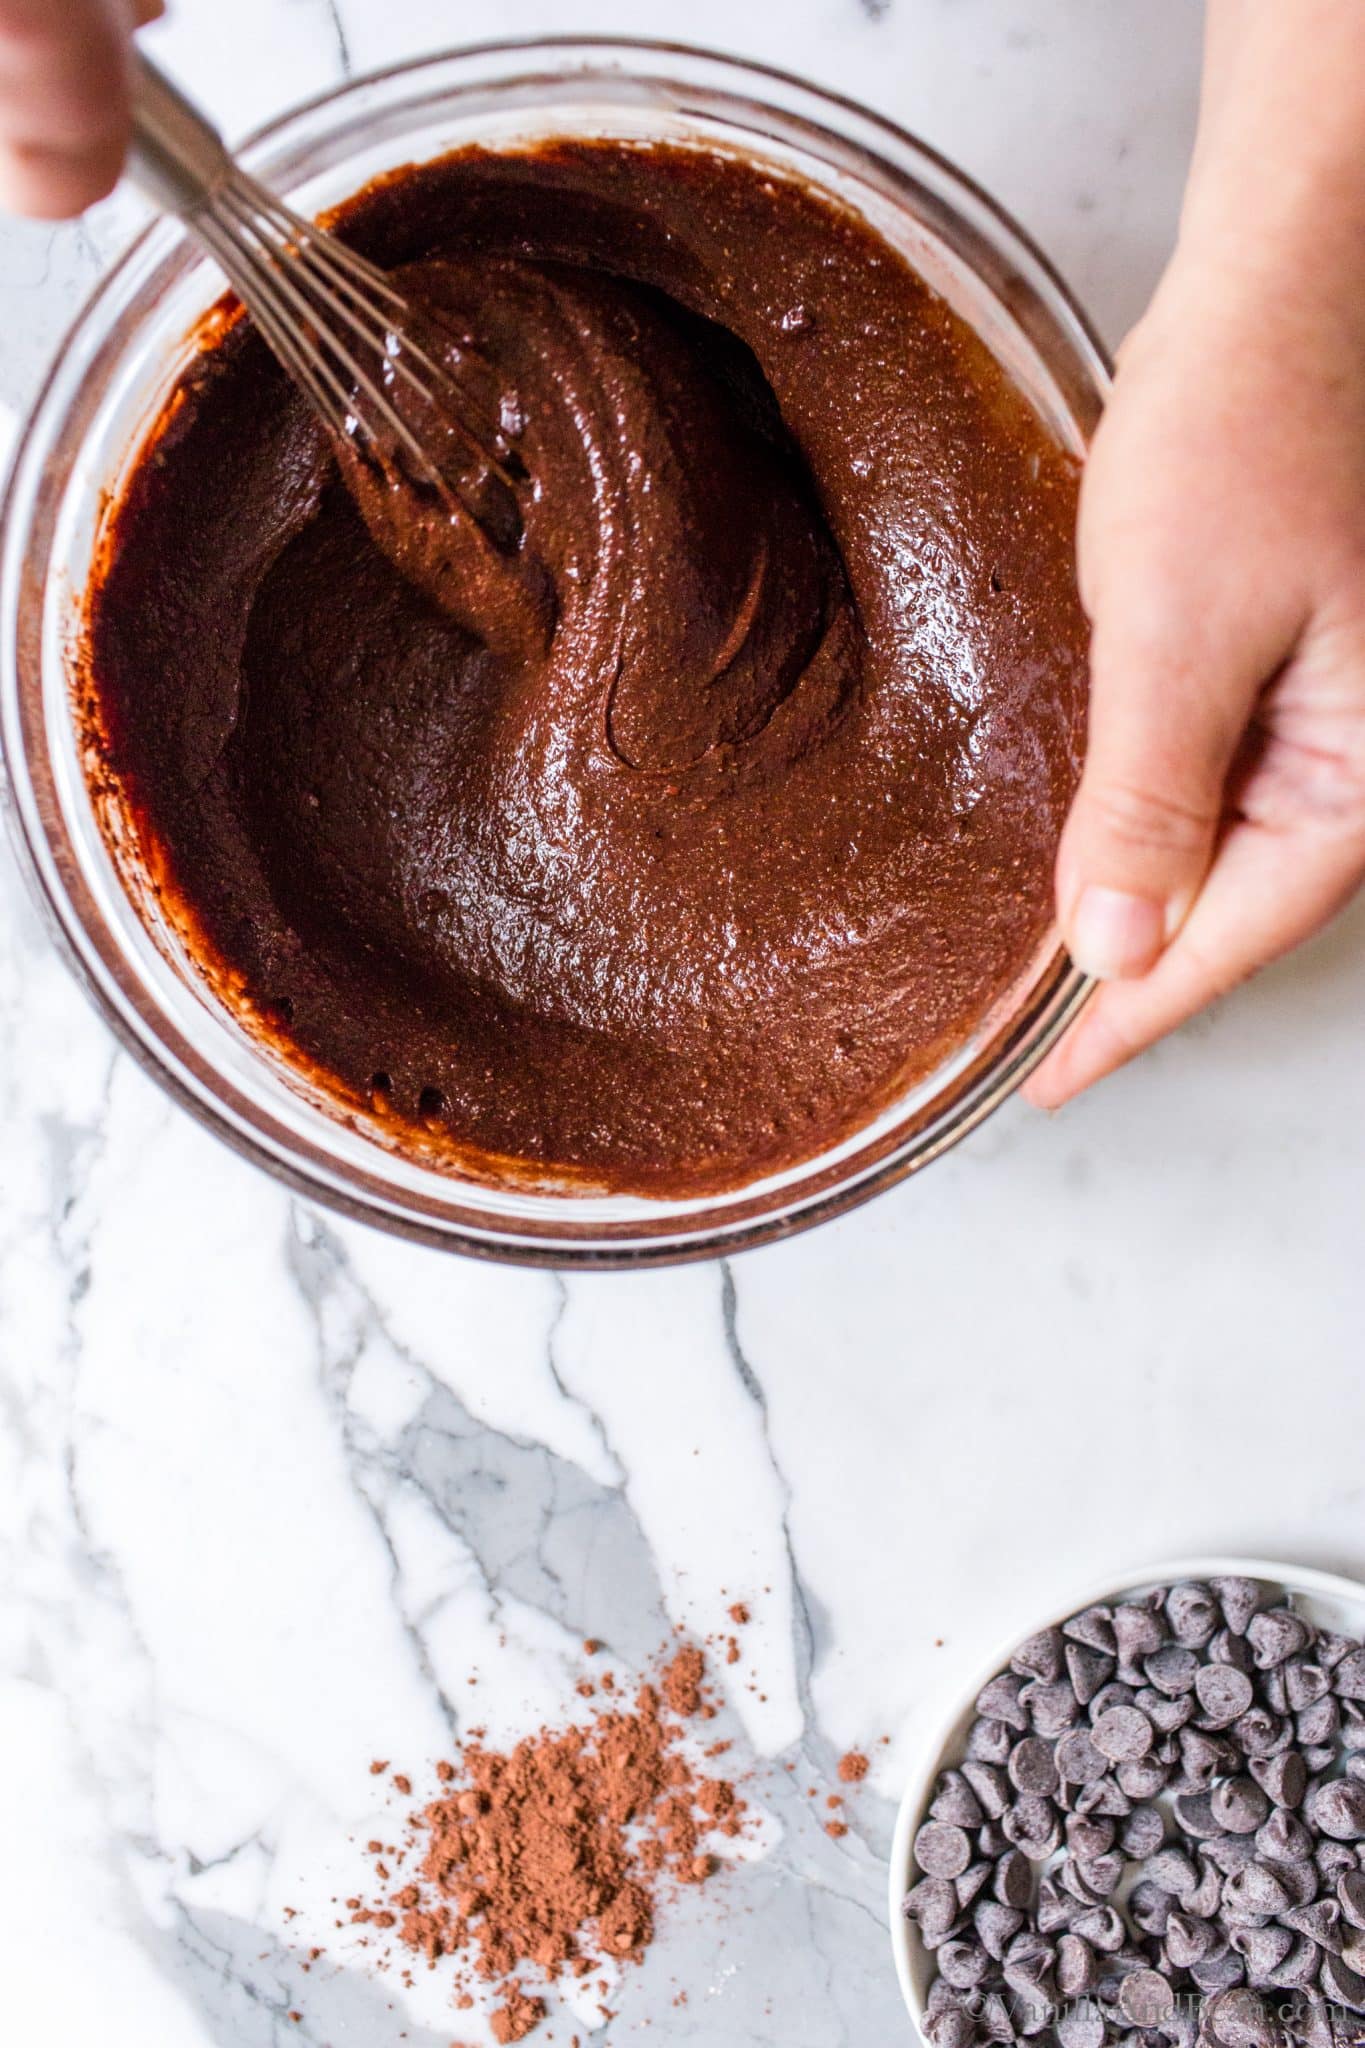
- In a medium mixing bowl add the chopped dark chocolate. Pour the hot espresso over the chocolate, leaving it to set for one minute. Whisk to incorporate and melt the chocolate, then add the vanilla extract, almond butter, and sugar. Whisk until smooth.
- To the wet ingredients, add the dry ingredients. Whisk vigorously for one minute so no clumps remain. Set aside.
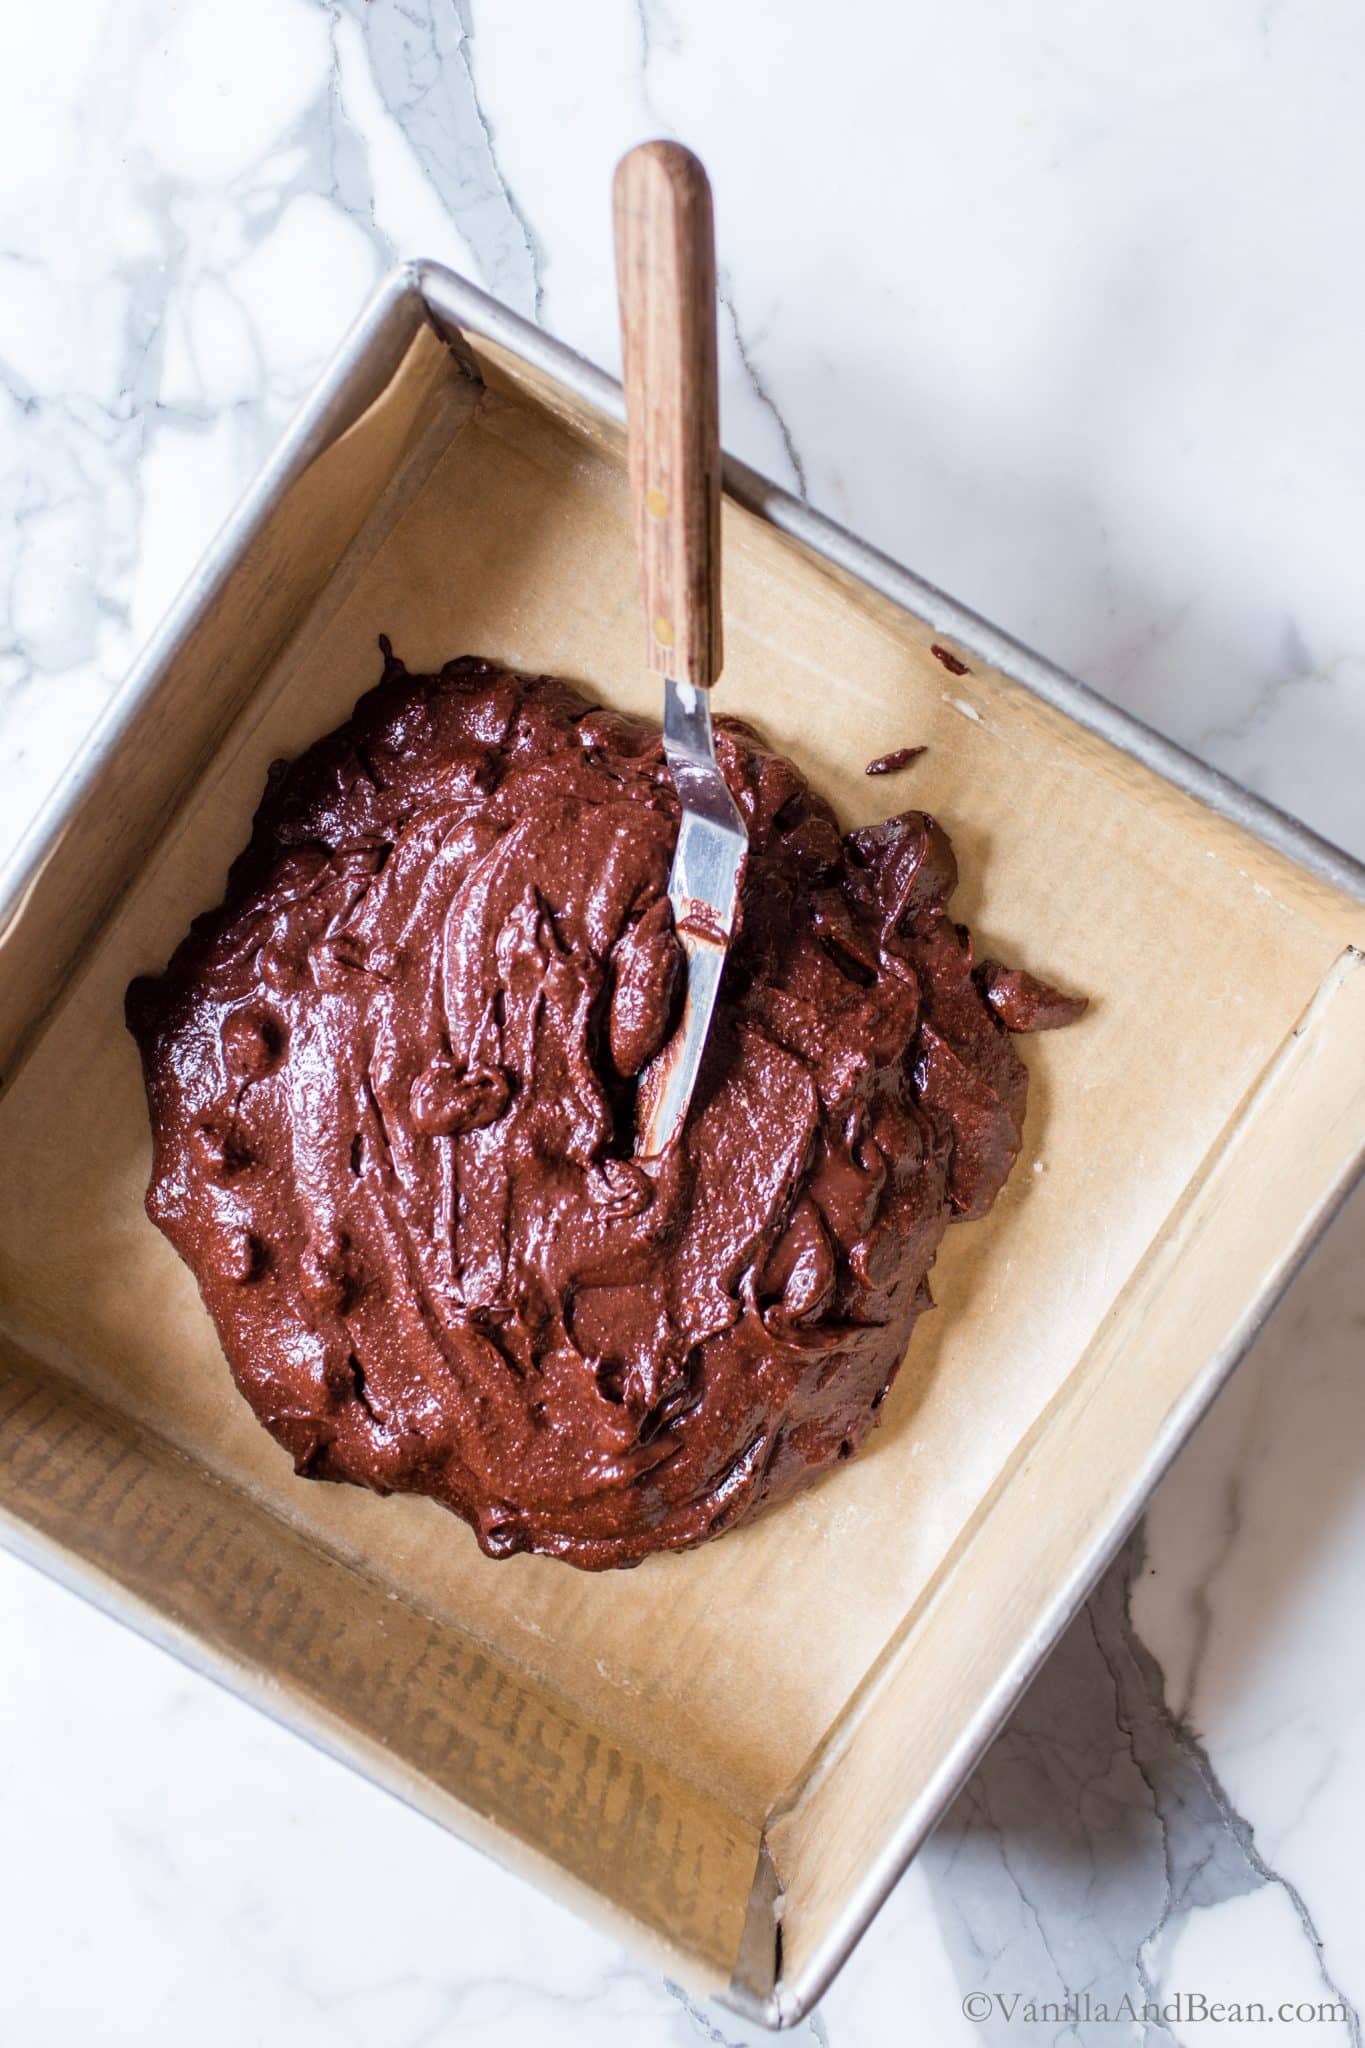
- Position the oven rack in the center and preheat to 350F (180C). Use pan spray or melted coconut oil to lightly grease an 8" square baking pan. Line pan with two crisscrossed pieces of parchment paper cut to size so that the paper lines the walls. Lightly spray or oil the surface and sides of the parchment. Set aside.
- Once the oven is preheated, mix the chocolate chips into the brownie batter - the batter will be very thick. Spoon the batter into the pan and spread it evenly in pan. The layer will be thin.
- For Fudgy Brownies: Bake the brownies for 18-19 minutes (I pull mine at 18 minutes). The toothpick test for doneness wont work here since these are fudgy, chocolate chip brownies, but the center will be soft, and the edges firm. Remove from oven and cool for one hour or longer before removing from the pan or cutting. The center will sink slightly. Resting the brownies for at least 8 hours improves their texture and ability to hold together. Remove the brownies from the pan like a cake by placing a small parchment lined sheet pan on top of the brownie pan then turning the brownies out. If the brownies don't fall on to the pan, flip them back over and use a small pairing knife to ease the corners and edges of the brownies. Repeat turning the brownies out. Lifting these fudgy brownies out of the pan with the parchment as handles wont work because the structure is too soft (I've tried it and made a mess!). Carefully flip the brownies back over, using the same method, so that the top is facing up. Now they're ready to cut (see cutting instructions below).For Chewy/Cakey Brownies: Bake the brownies for 21-22 minutes. To test for doneness, use a toothpick to poke around to find a 'no chocolate chip' spot. The toothpick should come out with a few crumbs when they're ready. Remove from oven and cool for at one hour or longer before removing from the pan or cutting. The center will stay lofty and should not sink. Resting the brownies for at least 8 hours improves their texture and ability to hold together. Use the parchment has handles to carefully lift the brownies from the pan. Now they're ready to cut (see cutting instructions below).
- How to Cut Brownies: After removing the brownies from the pan and to get the cleanest cut, use a large serrated knife and dip it in very hot water (I use a tall glass). Wipe the knife dry then cut firmly down without dragging the knife through the brownies to get it out - just lift it straight back up. Repeat until all cuts have been made. Lift the brownies with a spatula, gently nudging them from the parchment.Serve rewarmed with ice cream and fudge sauce. How to Rewarm Brownies: We all love warm brownies with ice cream! To rewarm, place in a 350F oven for about 10 minutes.
How to Store Brownies: Store brownies at room temperature in a covered container for up to four days. How To Freeze Brownies: Wrap snugly in foil, then place in a storage container or bag. Freeze for up to a month. Thaw at room temperature.
Hey Traci (and anyone else you may have tried)
Is there a substitute for the cane sugar that has worked for you for this recipe? I was thinking maple syrup, date syrup etc.
Thanks!
Hi Roops! While I’ve not tried it, you could give coconut sugar a go or, I’m thinking maple syrup could work, but reduced to 1/2 cup. Maple syrup has worked for me in other recipes as a substitute (decreasing by about 1/4 cup from the original cane sugar measure), but I’ve not tested it in this recipe. If you experiment, please keep us posted!
These look fabulous and I would like to try them, I looked for the comment from Anna, about subbing arrowroot for the tapioca but could not find it, would you mind telling me what the sub is, I can not eat tapioca or cassava, or cornstarch (I did see that comment). Thank you Traci
Hi Debbie! Ohhh yes.. here it is: “I didn’t have tapioca flour so I subbed 1 Tbs arrowroot powder and they turned out wonderfully.” I hope you enjoy the brownies!
Thank you Traci, I will make a note about the arrowroot
Hi Traci – This looks like an amazing and perfect recipe, I can’t wait to make it! Can I double the recipe to fit a 9″x13″ pan?…I really enjoy your wonderful blog! Thanks! :)
Hi Michele! Thank youuu 🥰. I wouldn’t hesitate doubling, however the bake time may be longer. Keep an eye on it and do the toothpick test. I hope you love the brownies!
My pleasure Traci! Great, thanks! It’s too hot now…But when I make the brownies I’ll definitely let you know, and I’m sure that they’ll be awesome!
Hi Traci, grateful to find this recipe for a friend who is GF DF, and no peanuts or Eggs. (I have been a V&B fan since I first visited your website looking for a sourdough pizza recipe 3 yrs ago and have since made many of your creations.) Best to you for a full and fulfilling spring! Bern in VT
Hi Bern in VT! Thank you for sharing your thoughts and coming back since three years ago (your note made my day!!).
Made the brownies today and… WOW. Friend loves them. So do I. Highly recommend to everyone – with or without dietary restrictions. At a party with a group, this would be a great offering as everyone can likely eat these. Gratitudes! BT in VT
Hi Bern from VT! Thank you for your note and giving the recipe a go! Hooray for tasty brownies that everyone can eat… SO happy to hear!
Hello i made the brownie.it was very healthy..tasty n delicious. I didnt had any nut butter so i put dairyfree butter.The only prb is that was falling apart when i cut it n eat with spoon :)
Hi Nena! So happy you enjoyed the recipe! Indeed, the nut butter helps hold things together. Glad you made it work for you anyway!
Can I substitute cornstarch for the tapioca flour?
I Neha! Try using 1/2 tsp cornstarch for the tapioca flour. I hope this helps and you enjoy the recipe!
I’ve made these brownies a couple times, and they always come out great! I love how they’re not too sweet — they taste super chocolatey! Yum… I have made them using both the oat flour as written in the recipe, and using sorghum flour plus a bit of xanthan gum in place of the oat flour, and it comes out pretty much the same both ways. So yummy!
Forgot to note that I have used tahini and soy nut butter in place of the almond butter, as I can’t have nuts. They still come out great!
Hi Sophia! Thank you so much for coming back and leaving a note, and your 5 star rating. So happy to hear you’re enjoying the brownies! Thank you too for sharing your subs.. super helpful!
The brownies were delicious but were what my 9-year-old called “A fail”. Are 3/4 cup of oat flour and 2 tbs of tapioca flour the correct amount of dry ingredients? I’m not sure where we went wrong, but our brownies didn’t rise and there didn’t seem to be enough batter when I poured everything into the pan. Our turned out pretty flat (won’t say what it looked like coming out of the oven) and not thick like yours, but they were tasty the next day after we let it chill in the refrigerator overnight.
Hello Jasmine! Thank you for your note. I’m sorry these didn’t work out for you. This is the first I’ve heard of any problems. The ingredients are correct. A few things to consider… I’ve found in baking, especially gluten free baking, weighing ingredients is essential for optimal outcome. It sounds like your leaveners could be expired, if you had no rise at all. Proper oven temperature is essential as well. I find having an external oven thermometer (I use two) to be helpful in monitoring the temperature of my oven. I glad they tasted good the next day, however and it wasn’t a total loss.
Question, could I use coconut oil instead of almond, I am nut free?
Hi Rachel! I don’t think so because of the protein content in the almond butter. And since I’ve not tried it with a coconut oil swap, I’m unable to say if it would work or not. I’m sorry I’m unable to be of more help.
I don’t not have tapioca flour, can I just sub with more oat flour or is it absolutely necessary? Hope I can because these look incredible!
Hi Christine, thank you for your note and kind words! Tapioca plays a strong role in these brownies for texture and a bit of binding power. Subbing cornstarch may work – 1 Tbs., and I’ve read it’s a good substitute, but I’ve not tried it. Epicurious has a few notes about tapioca subs. I’m sorry I can’t be more help here. Please let us know how whatever sub you use works out!
Hi, I’m not the original poster but, I wanted to comment. I didn’t have tapioca flour so I subbed 1 Tbs arrowroot powder and they turned out wonderfully. Thanks for a wonderful recipe!
Hi Annie! Thank you so much for coming back and leaving a note, and your tip! So happy to read!
These look amazing! Question…having a GF friend over who is allergic to coffee (poor girl). What sub liquid would you recommend if not making these with coffee? Thanks!
Hi Sandra… Oh no! No coffee? Although I’ve not tried it, I think that almost boiling water would work just fine. I hope this helps Sandra and that you (and your friend) enjoy the recipe!
There will always be the quest for the best brownie recipe-so much fun in all the testing! Love the versatility of this recipe for camps fudgy and cakey. Thanks for all the helpful info, as usual. I was only familiar with Rodelle’s vanilla products. The vanilla bean paste is decadent. Will now have to track down the baking cocoa. Enjoy the holiday weekend, Traci!
And SO much testing went into these… (six tries)! You know, Jean, they have to be just so. You’re going to love Rodelle’s Baking Cocoa. It has such a clean, not acidic, flavor… super rich. Thank you for your note and kind words, Jean.