


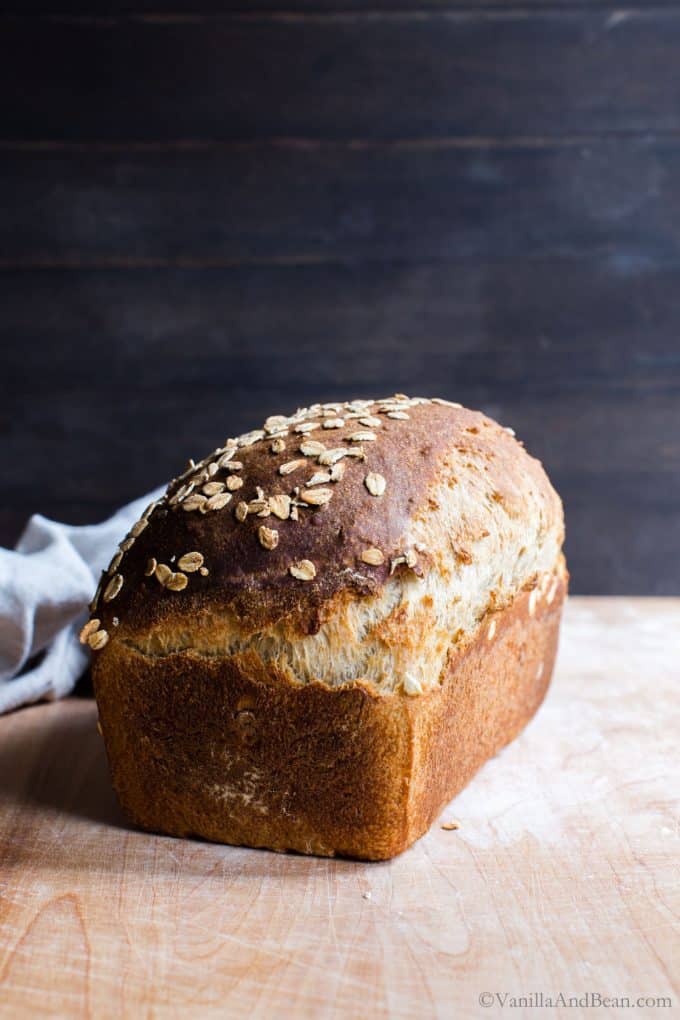
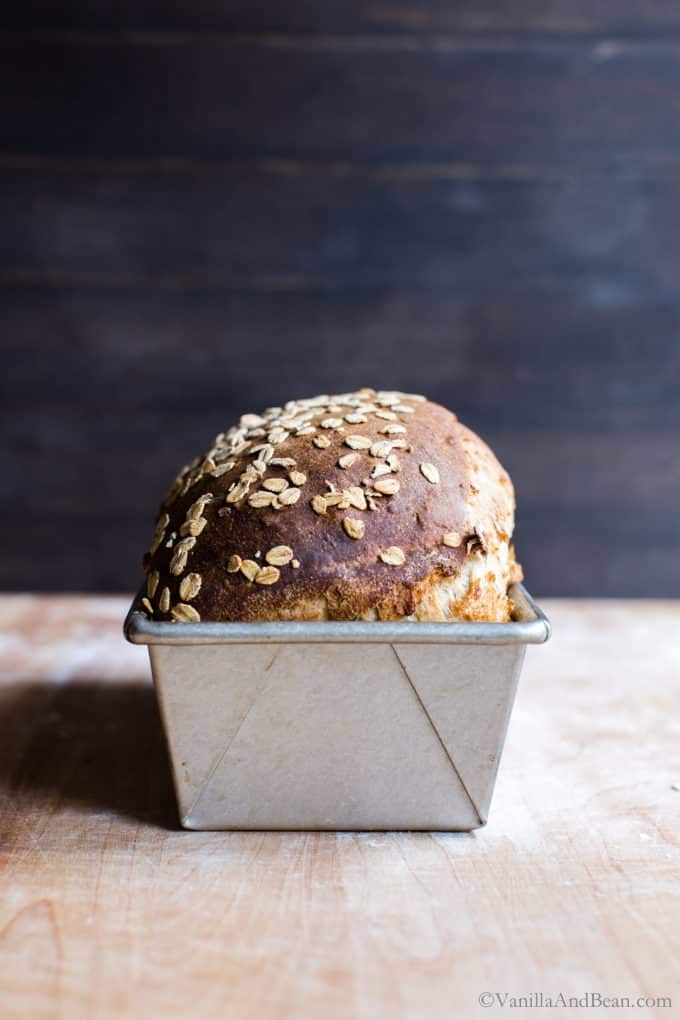
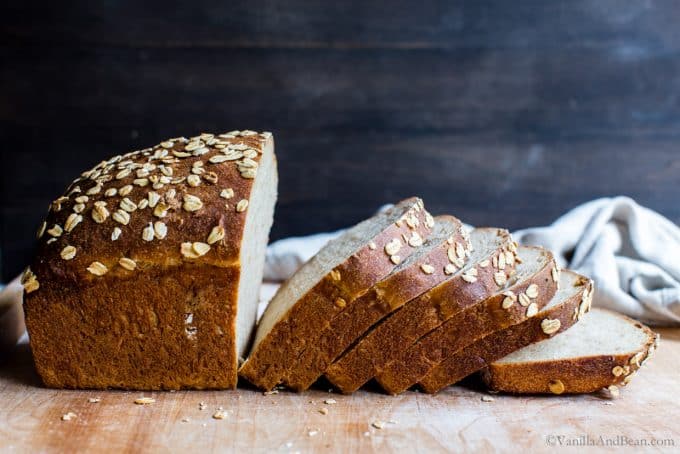
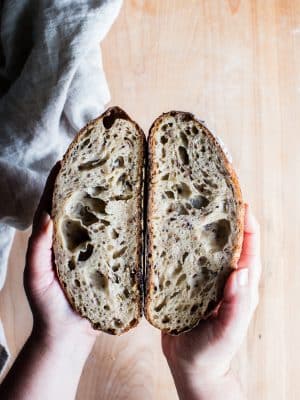
Lightly sweetened, my overnight maple oat sourdough sandwich bread features whole rolled oats and whole wheat flour. It has a soft tender crumb and earthy flavor, ideal for sammies and toast! Use a fluffy, doubled in size Sourdough Bread Starter for the best crumb.
⭐️⭐️⭐️⭐️⭐️ Recipe Review: “Found this recipe a couple of months ago and it turns out perfect every time! It’s my new go to for sandwich bread.” ~ Kris
Sourdough Love
There are many sourdough variations, and while I adore a crusty classic or multigrain sourdough, I can never pass up a softer loaf for toast, sandwiches, and French toast.
So I set out to create a softer loaf with earthy flavors in the shape of traditional sandwich bread. This loaf, my Soft Multigrain Sourdough Sandwich Bread and Fresh Sourdough Sandwich Bread are among my favorites. They all stand up to the sandwich test and taste delicious!
This Recipe Is
- made overnight with a short morning proof
- earthy, and lightly sweetened
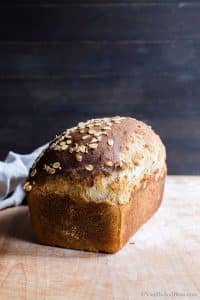
- tender and so soft
If you make homemade sourdough bread recipes, you’ll love this reader favorite sandwich bread.
Need a sourdough starter? Follow my step by step guide to make Homemade Sourdough Bread Starter.
__________________________
How to Make Maple Oat Sourdough Sandwich Bread
step by step
The rolled oats are a nice surprise in this dough. They soften as the dough ferments, so they’re barely noticeable in the crumb yet add a soft, earthy flavor to this loaf.
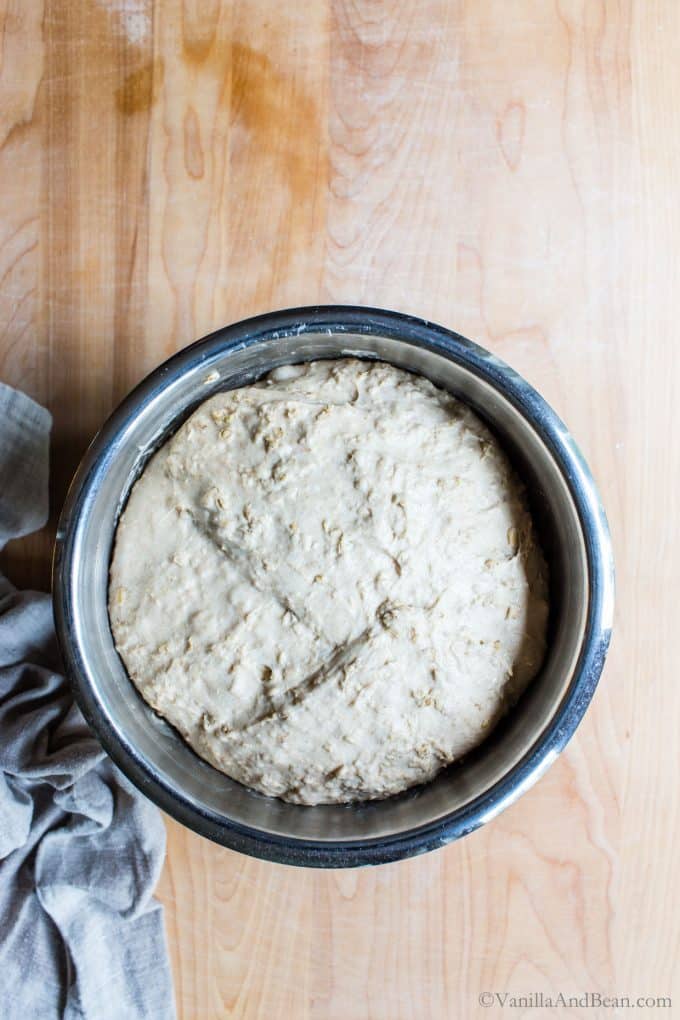
Bulk fermentation (first rise) is complete when the dough no longer looks or feels dense, is tacky, not sticky, is jiggly when the bowl is shaken, and has about doubled in size. You may also see a few large bubbles on the surface of the dough.
_____________________
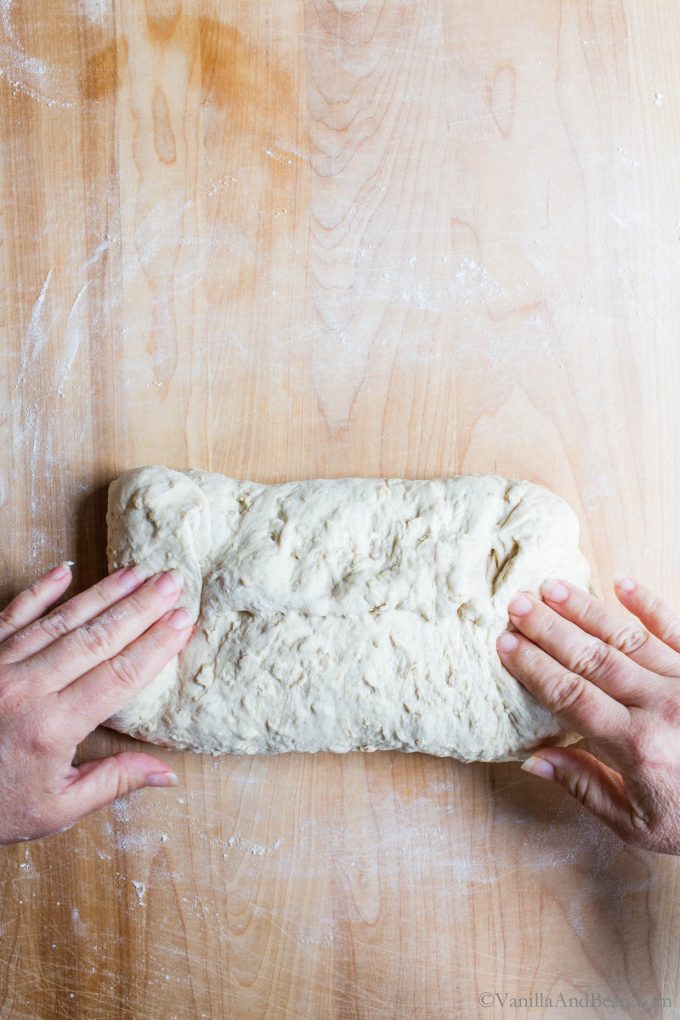
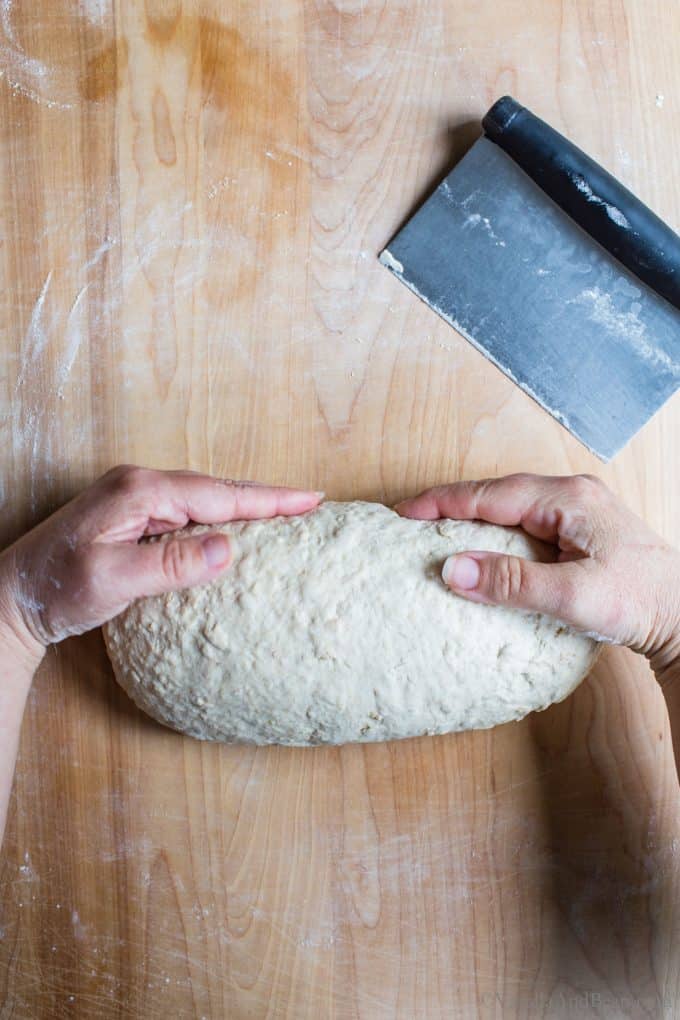
How to Shape the Dough
Fitting Sourdough into Your Schedule
When it comes to sourdough, fitting it into your schedule can be achieved through a little strategic planning and, if needed, using a technique I keep in my back pocket for when something comes up and I need to extend the time between mixing and proofing…
…because things come up, right?
Retarding the dough is optional but is a tool for bread bakers to manage the speed at which the dough rises. Retardation is simply the process of placing the dough in the refrigerator to slow down fermentation so the rise takes longer. This is handy for flavor development but also, as a time management tool.
When to Retard the Dough
I do this when I mix in the morning. I just pop it in the fridge for the day, then pull it to room temperature before I go to bed. It’s doubled in size by morning!
During Bulk: for this loaf, retard during bulk to slow down the rise allowing flexibility for when the dough will be shaped, proofed and baked. The dough still needs to double in size during bulk fermentation (first rise), so after refrigeration I pull it to room temperature, and let it finish rising, until it doubles in size. I’ve not tested the limits of this, but up to about 10 hours in the refrigerator generally fits my schedule.
When is the Second Rise (proof) Done?
When the dough has risen in the loaf pan to about 3/4″ – 1″ (2cm – 2.54cm) above the lip of the pan at the center. Have a ruler ready for this part! The amount of time it takes to proof will vary depending on ambient temperature. At 70F (21C) proofing takes about an hour. It can take up to twoish hours in a chilly kitchen (raises hand!).
If you’d like to speed this process along, you can put the loaf in a turned off oven with the light on. Just be sure to remove the loaf before preheating your oven for baking!

Traci’s Tips
- Whole Wheat Bread Flour: this maple oat sourdough sandwich bread calls for whole wheat bread flour, which can sometimes be hard to find. If unavailable, use regular whole wheat flour. The difference is subtle, but whole wheat bread flour yields a little bit stretchier dough and is easier to work with.
- Kitchen Tools: I recommend a digital oven thermometer for monitoring accurate oven temperature and weighing your ingredients using a digital kitchen scale for best outcome (affiliate link).
Overnight Maple Oat Sourdough Sandwich Bread
Ingredients
For the Soaker:
- 1 C (100g) Whole Rolled Oats plus 2 Tbs for the top
- 1/2 C (105g) Water room temperature
For the Dough:
- 3/4 C (150g) Sourdough Starter 100% hydration, previously feed and bubbly
- 1 C (230g) Milk (nut milk or whole dairy milk) I use 1/2 diluted unsweetened cashew milk – 80F (26C)
- 1/4 C (80g) Maple Syrup
- 1 Tbs (14g) Olive Oil + more for oiling the pan
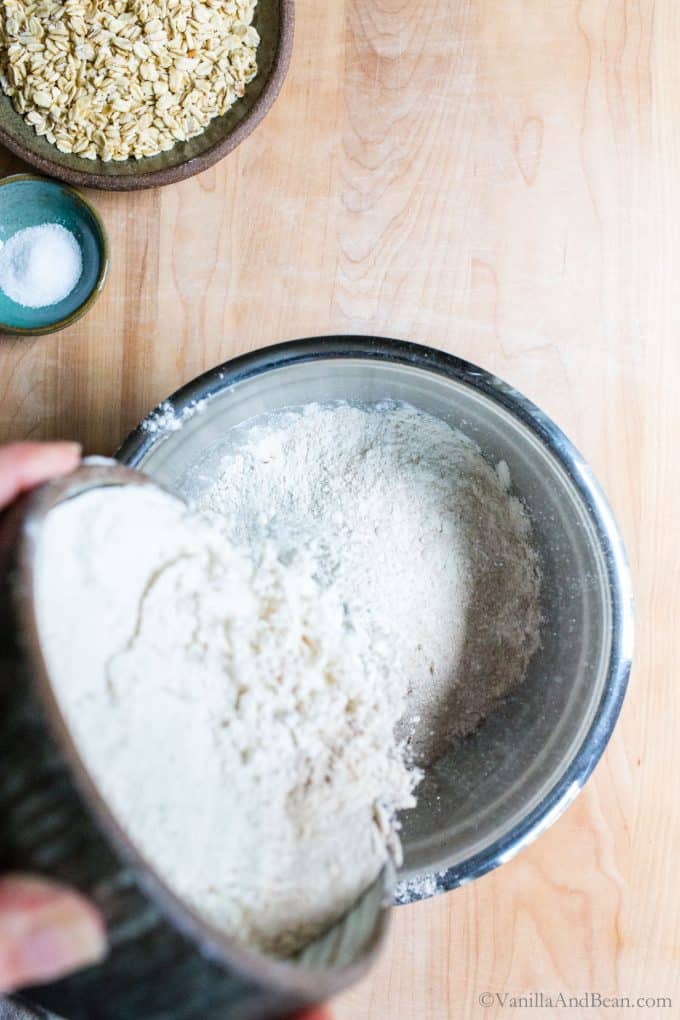
- 1/2 C + 1 Tbs (100g) Whole Wheat Bread Flour (see note**) or whole wheat flour
- 2 C + 3 1/2 Tbs (300g) Bread Flour
- 1 1/2 tsp (10g) Fine Sea Salt
Instructions
For the Soaker:
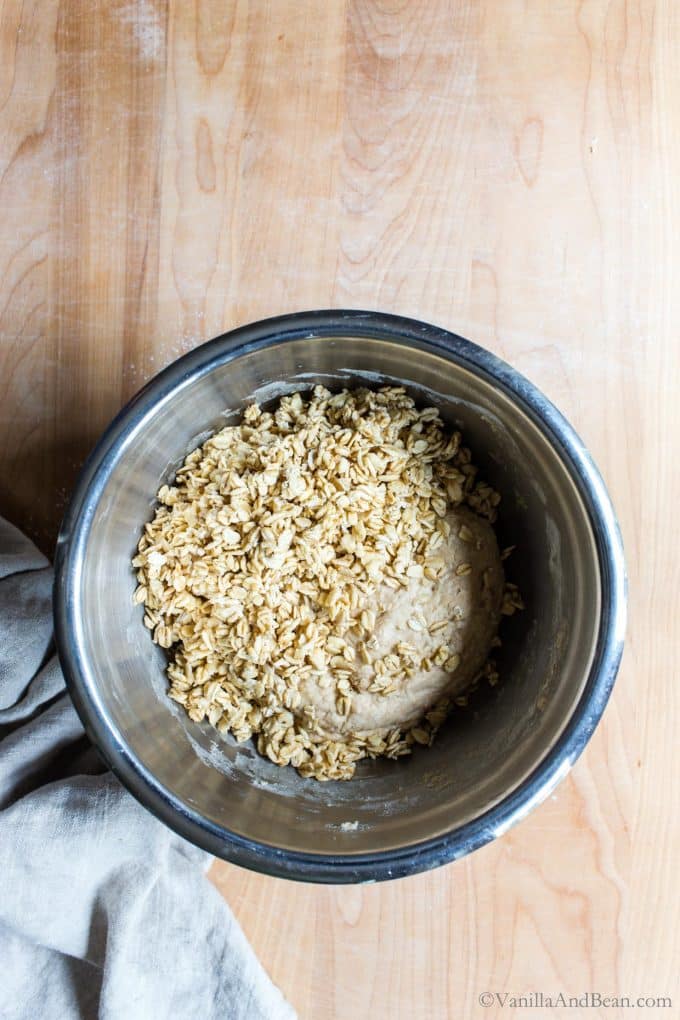
- Add the oats to a small bowl and pour the water over them. The water wont fully cover the oats – that's okay. Set aside.
For the Dough:
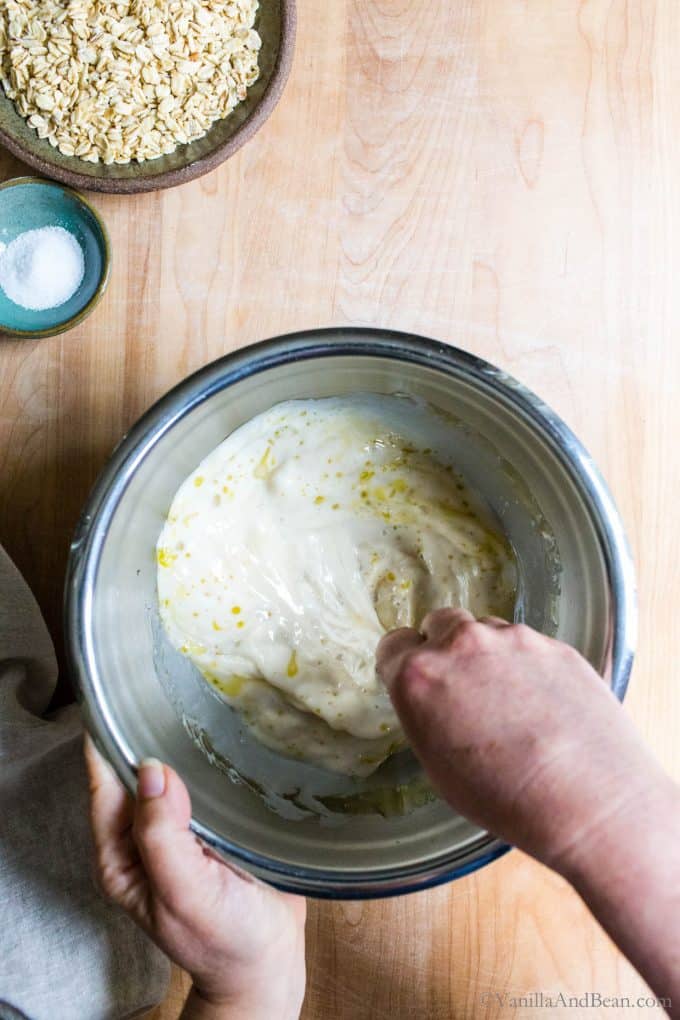
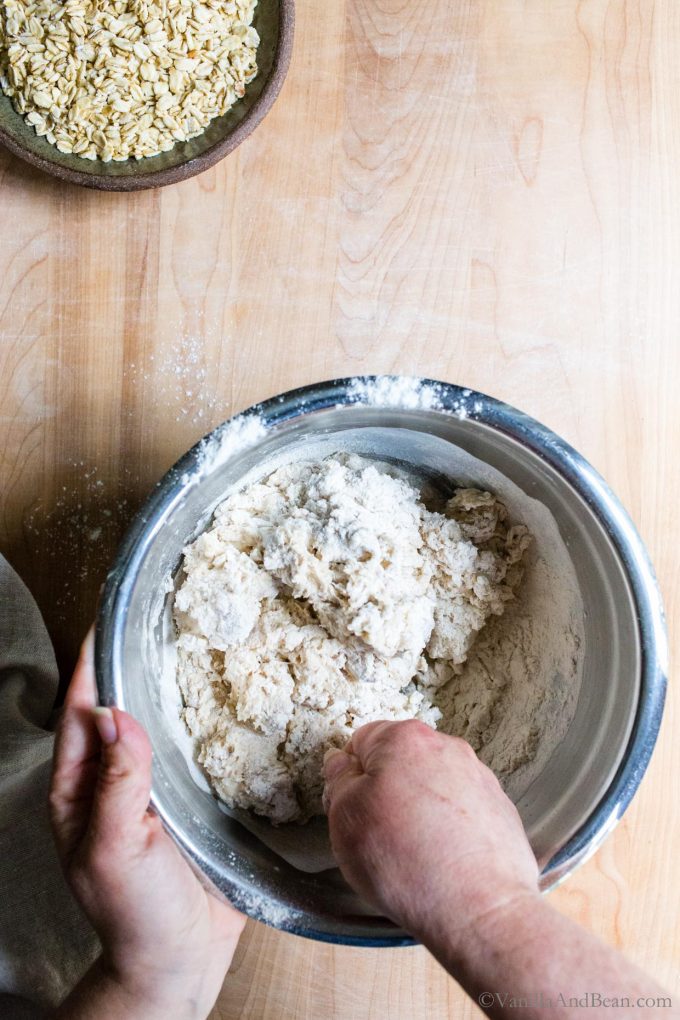
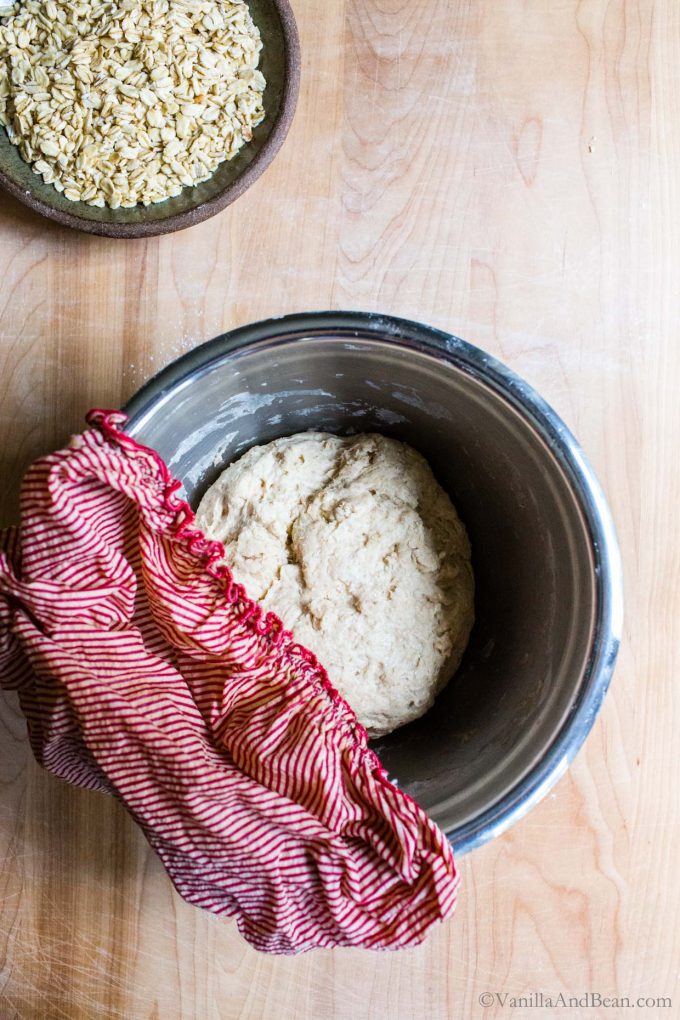
- Mix the Dough: In the evening, whisk the starter, milk, maple syrup and oil together in a large bowl with a fork. Add the flours and salt. First, mix with a fork, the dough will be shaggy. Then mix by hand, mixing, folding and pushing the dough until the flour is fully incorporated and no dry bits are present. It will seem dry at first, but the more you work the dough, the more hydrated it will become. The dough will feel stiff and it will stick to your fingers as you go. Do this for about 3-4 minutes. Use the fork to scrape off the dough on your fingers as much as you can. Cover bowl with a damp tea towel. Set a timer for for 30 minutes and allow the dough to rest for 30 minutes. Now is a good time to feed/refresh your starter.
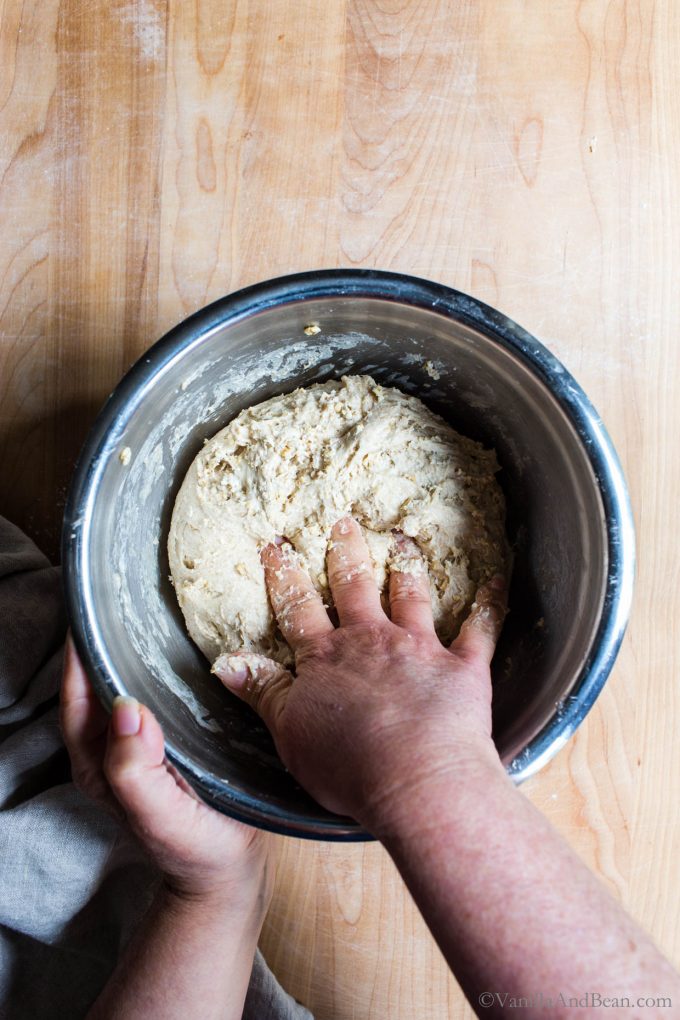
- Incorporate the Soaker: After the dough has rested, mix in the soaker. To do this, dump the soaker on top of the dough and begin kneading and folding the dough over and on top of itself, incorporating the ingredients of the soaker. Do this for about 2-3 minutes or until the soaker is evenly distributed in the dough. It will seem like a lot of added bits, but as you work the dough and as the dough develops through fermentation, the soaker will incorporate. The dough will be stiff, wet and sticky. Cover bowl with a damp tea towel, set a timer for 30 minutes and allow the dough to rest for 30 minutes.
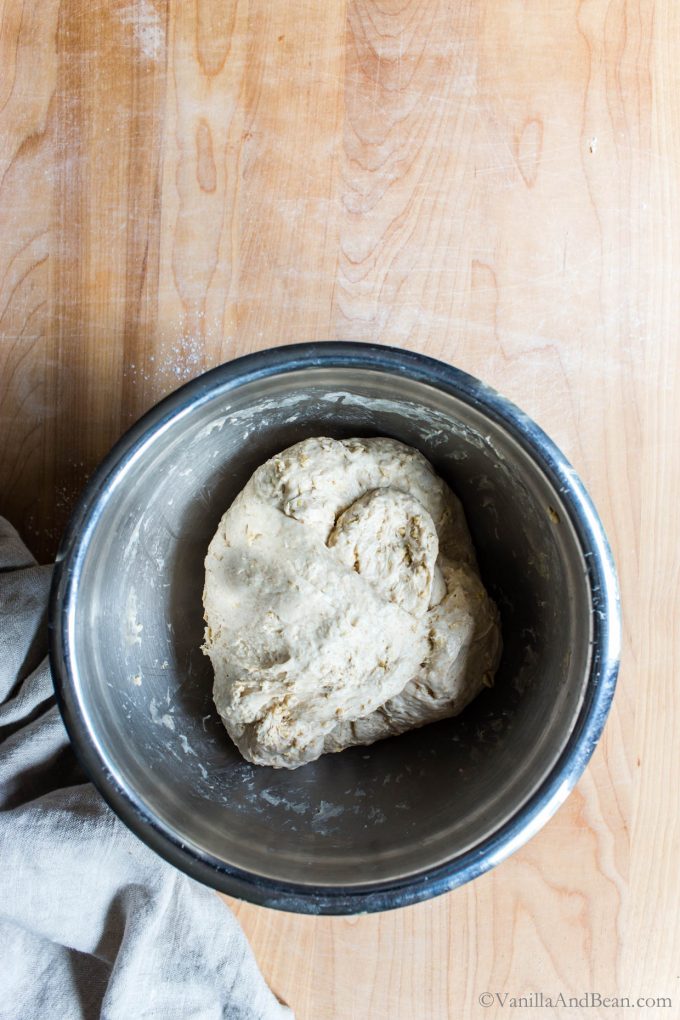
- Fold the Dough: After the dough has rested, fold the dough. To do this, grab a portion of the dough while it remains in the bowl, stretch it up and fold it over, pressing your fingertips into the center of the dough. You'll notice the dough is a little less stiff and more workable at this point. Repeat, until you've worked your way around the dough. If the dough feels *too* stiff, you can always let it rest another 15 minutes. This is the first fold, and you can stop here and begin bulk fermentation, but If time permits, and optimally, you'll want to repeat this fold two more times as it improves the final dough's structure and crumb. Allow for about 30 minutes between the second and third fold.
- Bulk Fermentation (first rise): After the last fold, cover the bowl with a damp towel and allow to rise overnight at room temperature (see note* on optionally retarding the dough). This will take about 8-10 hours at 70F (21C), but in a cooler kitchen the dough can take up to 12-14 hours to rise – this is the norm in my chilly kitchen 66F (18C). Use the time as a guide and not a determining factor. The dough is ready when it no longer looks dense, is jiggly when the bowl is shaken, and has about doubled in size.
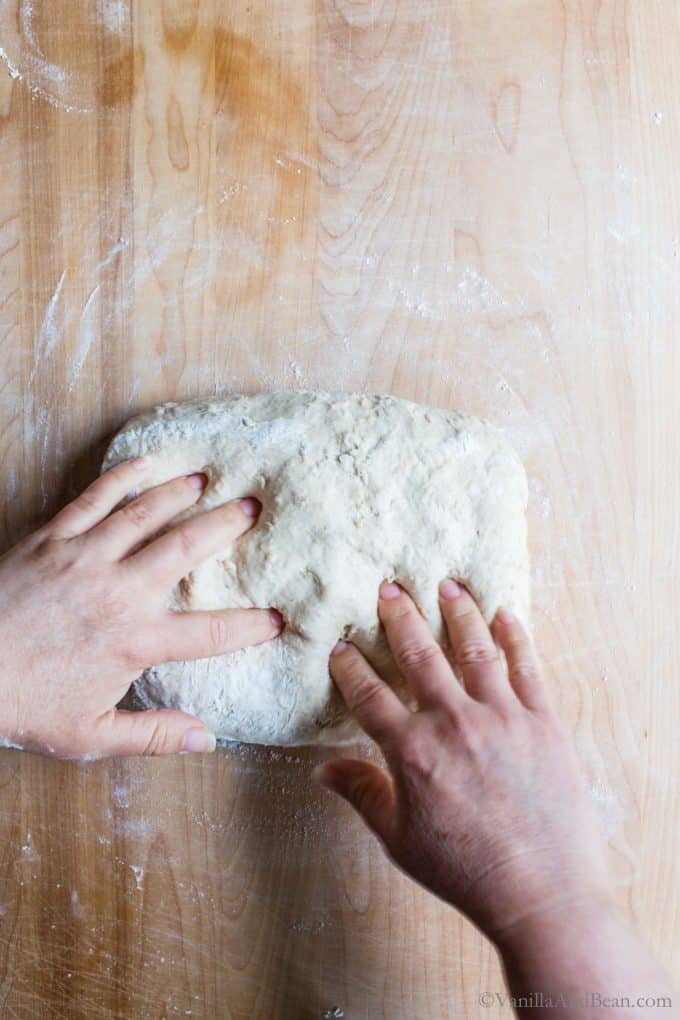
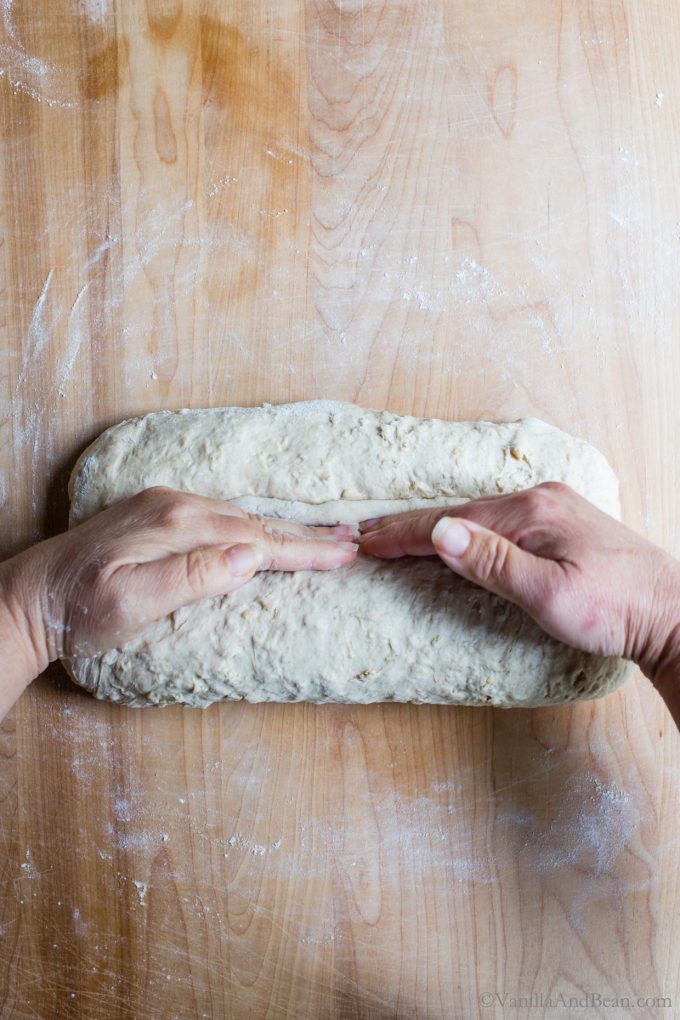
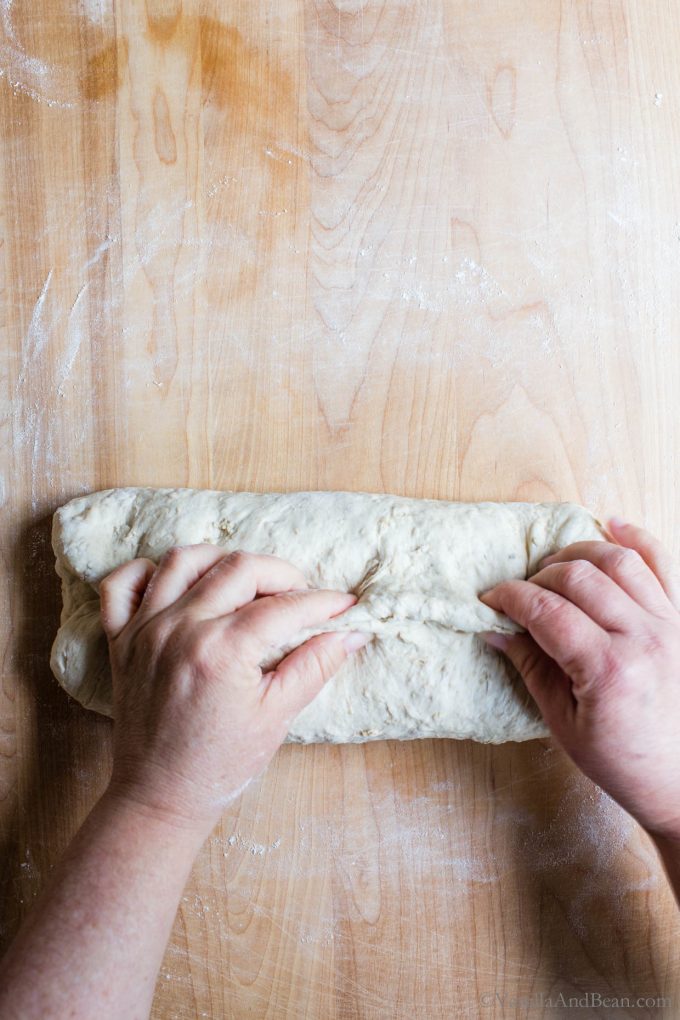
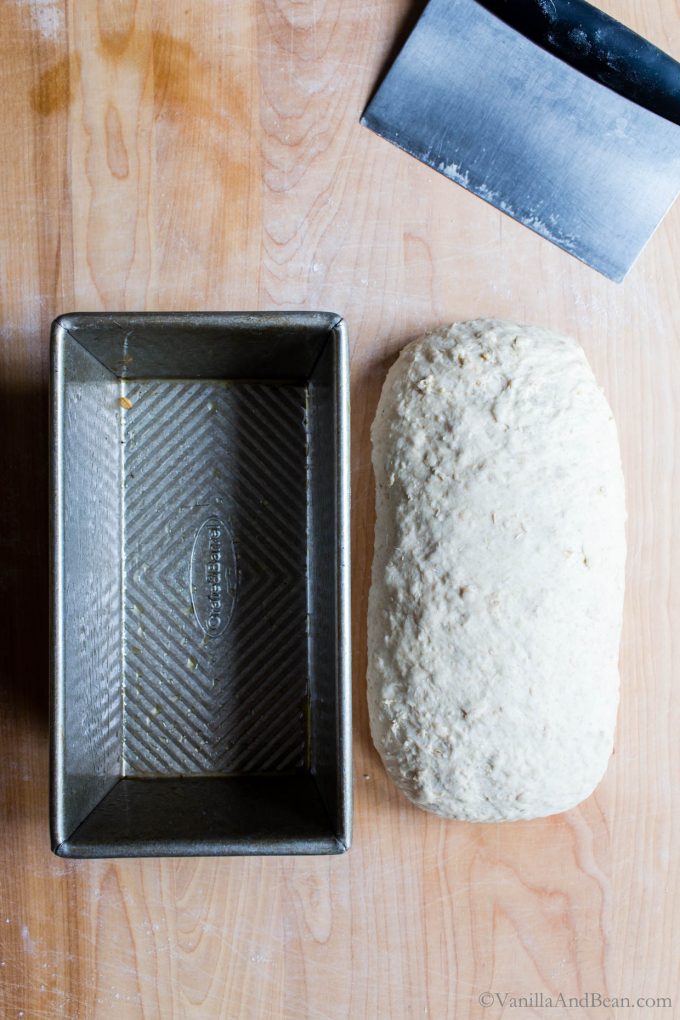
- Shape the Dough: In the morning, and with damp fingertips, coax the dough into a floured work-surface. With moist fingers, take a portion of the dough, gently stretch it towards you and fold it over towards the center, pressing it down gently. Repeat this process until you work the dough all the way around the dough. Using a bench scraper flip the dough over, cover with a tea towel rest the dough for 15-20 minutes. While the dough rests, throughly coat the inside of a 9×5" (23cm X 12cm) loaf pan with olive or coconut oil. Set aside.Flour the work surface and using a bench scraper flip the dough back over. Use the photos in the blog post to help guide shaping. Gently shape the dough into a rough rectangle (sort of a football/oblong shape if you can) by dimpling the dough (think focaccia), to roughly 6" wide and 8-10" long. Fold the dough lengthwise 2/3 over onto itself and crease it firmly using the pinky side of your hand. Fold the 1/3 piece left towards the crease and pinch the seam closed. Fold in the ends, coming in about an 3/4" – 1" and pinch the seam closed. Flip the bread over and rock it back and fourth a bit and gently fluff the ends in. Cover with a tea towel and allow the dough to rest for about 5-10 minutes. Scrape your work surface area of any excess flour and very lightly spritz it with water. Place the dough on the spritz of water (seam side down) and using lightly floured hands, cup the back of the dough and gently pull it towards you until the surface is taught. Gently "fluff" the ends in again if needed to fit into the loaf pan.Once the surface is taut and with one swift move, use the bench scraper to scoop the dough up and, place the dough into the prepared loaf pan. If there's any misshapen edges that need tucking in, use a moist rubber spatula to gently finesse and shape the edges of the dough down into the pan.
- Proof the Dough (second rise): Cover the pan with a damp tea towel and allow the dough to rise until the dough rises to about 3/4" – 1" (2cm – 2.54cm) above the lip of the pan at the center of the dough. The amount of time will vary depending on ambient temperature. At 70F (21C) proofing takes about an hour. In my chilly kitchen, about two hours.Set an oven rack in the center of the oven. Preheat your oven to 450F (232C).
- Bake the Dough: Lightly spritz the top of your loaf with water and sprinkle 1-2 Tbs of Rolled oats over the top. Place the loaf into the oven and then, reduce the oven temperature to 400F (204C). Bake for 45-55 minutes, rotating and tenting the loaf at about 25-30 minutes so it doesn't get too dark. The bread is ready when the internal temperature of the loaf is between 190F – 205F (87C – 96C). When done, transfer to a wire rack. Cool for 10 minutes in the pan, then transfer to a cooling rack. Cool 1 hour before slicing.
- Storage Notes: Sourdough is best consumed on the same day it's baked, but it lasts for 3-4 days stored at room temperature. Store at room temperature cut side down.This bread freezes beautifully. Store baked bread in a freezer bag either whole or sliced for up to two weeks. Thaw at room temperature. This bread can go straight from freezer to toaster to make the most delicious toast!


Excellent recipe!
Thank you, Heidi for sharing and sending a smile!
This recipe is great. Just wondering why is my bread really brown on the external but slightly wet on the inside?
Hi Zen! Thank you for your note. So glad you’re enjoying the sourdough! It sounds like oven temperature might be the culprit. Are you employing an external oven thermometer? I’m curious also about the internal temperature of the bread before removing it from the oven.
Thanks Tracy for taking time to provide this feedback. I would definitely invest in a thermometer now.
Also I love your sourdough discard recipes, it’s always my guilt to throw them away
Tried your banana muffin last night, the sourdough discard added so much flavour to the ordinary muffin. I don’t think I could ever bake muffin without fermented ingredients anymore.
Maple-oat sourdough loaf turned out wonderful. Soft, airy, easy, and delicious. This recipe takes love (a.k.a. time), but that is the natural sourdough-life. I like that Traci’s recipes are foolproof and can withstand deviations (not that it is needed). Her recipes are spot on. I made no changes to the ingredients or the proofing periods. Only thing I did different was cook at 380 degrees for 30 minutes because we have a new Frigidaire oven which cooks everything faster.
Hi Diana! Thank you for your note and sending a smile. I’m so happy you’re enjoying the blog, and this Maple Oat Sourdough Bread! Yes to sourdough bread love – we are on the same page!
So I baked this up as a sandwich loaf, following the same baking steps I use for my regular sandwich sourdough (400F 15 mins with steam, 375F 25 mins), and it turned out amazing! This will definitely be added to our bread rotation!!
Hi Joanne! Thank you for your note and giving the recipe a go! Love your steam tip.
So delicious!! Due to time constraints I made this recipe with sourdough discard and modified the recipe a little bit. Because I used discard, I added about 1/2 Tbsp of instant yeast to the warm milk and ended up baking it for 45-50 minutes. Will definitely be making again.
Hi Hanna! Thank you for your tips and note! What a terrific idea.
We absolutely love this recipe! Really is foolproof.
I’ve made this loaf a dozen times and it has became our bread of choice.
Bravo Vanilla Bean!
Hiii Tina! Thrilled to read your note. Thank you for giving the sourdough a go – SO excited it’s your bread of choice (yay!).
Very happy with this recipe! I’ve made other oat/maple/honey breads and this one stands out. I’ll keep this recipe in the future. I added a tsp of maple extract to enhance the flavor. It’s what I was going for.
I have vital gluten powder and all purpose unclenched and whole wheat flour. How do I make bread flour?
I have made this bread so many times now I couldn’t count!
I substitute honey for maple and use butter instead of oil.
My husband adores this bread and has a slice everyday!
Thank you for sharing this.
I’ve just started this but have now realized I don’t have a loaf pan. Can I (a) put this in my round 4 qt Dutch oven? Or (b) shape them into rolls to fit in my square baking pan? Bonus question: is the maple syrup/honey really necessary when baking sandwich bread? Thank you in advance.
Hi there Elise! a) yes b) maybe, depends on the size of your square pan c) no, but it creates a softer texture and adds interest and flavor. I hope this helps and you enjoy the sourdough!
Thank you! I’ll bake it in my Dutch oven – I make almost all of my sourdough in that. Never fails me.
I love this bread and have made this recipe multiple times, though I substitute a small amount of ground flaxseed for some of the whole wheat. Your loaf pic doesn’t look scored, and the instructions don’t include a scoring step except in the notes that discuss how a chilled loaf is easier to score.
Anyway, I’ve learned that my loaves bust out at the side if I don’t score them pretty deeply down the middle. Still tasty though!
Hi Hannah! Thank you for your note and five star review. This loaf isn’t scored. But a cold dough (a boule for example) is easer to score. You could score this loaf, but I like the side bulge in sandwich loaves. If you want a little less bulge, reduce the proof time a bit, letting the dough rise not quite as high as indicated in the recipe. So glad you’re enjoying the loaf!
Found this recipe a couple of months ago and it turns out perfect every time! It’s my new go to for sandwich bread. Thank you for sharing this recipe
Lovely recipe! Will become a favorite.
I’m wondering for if you bulk ferment in the fridge after folding do you think the next morning it would take as long to ferment? Like potentially 8-12 hours? Or are you saying after fridge shape right awa and then rise in pan before baking?
Hi Marie! Thank you for your note! If you bulk in the fridge after your folds, it will need to come back out to room temperature and double in size. The time it takes to do this will depend on ambient temperature and how active your starter is. Typically, I’ll mix in the morning, bulk in the fridge during the day for 8-10 hours, then pull the dough and set it at room temperature and let it double in size overnight. After the dough doubles, you can shape it, proof and bake. I hope you enjoy the sourdough!
I’ve made this bread several times and it’s wonderful! However, I have a problem with my tea towel drying out during the overnight proof and the top of the dough getting dry and crusty. What do you suggest?
Hi Susan! SO happy you’re enjoying the sourdough. To prevent your tea towel from drying out, try doubling it up with two moist tea towels. Thank you for your note and five star review!
This was the my first time doing a honey oat or whole wheat style sourdough. It was so easy to make! And it was a good workable dough to shape. I’m a beginner sourdough baker and your steps were so easy to follow! Thank you!
My top sourdough recipe. Have made many times….even if a little wet one time or a little dry another before it proofs, it still comes out perfect once baked. Rave reviews from anyone I’ve given a loaf to. Amazing for avocado toast, friends swear by just butter to not take away from the bread itself. We make our own maple syrup and it is a perfect sweetness . Love, love, love.
Thank you Caryn for your note and sharing your experience. Isn’t it so interesting the way hydration can fluctuate throughout the seasons? I just made my rustic sourdough bread – per the recipe, not paying attention to hydration and it was a blob! Amazing that you’re making this with home grown maple syrup! SO lovely!
Just tried this recipe—what a beautiful and delicious loaf!! Thank you!
It’s a lovely recipe and we enjoyed it. Now I am looking into doubling the recipe. Is there any tips to double the recipe or if it’s as simple as doubling the ingredients?
Thank you for your note and five star review, Marilyne! I don’t have any concerns with doubling. Just hold some water back during mixing and assess after you add the soaker.
Looks beautiful the loaf I made this morning, waiting to cool for a taste which I’m sure will be delightful! Thanks, like the recipe format with the soaker!
I love steel cut oats and decided to try it in this recipe and used only 130g milk and 205g water to cook 100g steel cut oats for 10 minutes only, then cool to 80 degrees. Also added 25g powdered milk then proceeded with recipe as written. Very pleased with taste and rise. Thank you for this recipe.
Hi Carmelle! Thank you for sharing your tips with us and five star review. So happy you’re enjoying the sourdough!
This is the 3rd time I have made this recipe, always comes out beautifully.
Great crumb and texture.
It has became my go to for pb&J and toast!
This is so Delicious !! I didn’t change anything and the bread disappeared in 2 days ( only 3 of us) so will make a double batch tomorrow.
Hi Heather! Woooot! So excited. Thank you for your note and star rating :D
It turned out perfect!!! I did modify it quite a bit. I used rye instead of whole wheat, honey instead of maple syrup ( I can’t stand the taste), and soaked the oats in all the water and milk, mixed everything and rested and folded as instructed. It got too late so I shaped and folded it into the tin and shoved it into the fridge wrapped in a plastic bag. Took it out in the morning and let it rise and then baked it. I’m a sucker for a little to no work with bread dough and this was so easy :D
Hi Angelica! Thank you for your note, sharing your tips and five star rating. Hooray for an easy loaf and tasty bread!
This is a great recipe! The photos are helpful and the instructions are well thought out and complete. Consequently I was able to fit this into a tough schedule by making the dough in the early afternoon, refrigerating it for 8 hours or so, taking it out arouns 10:30 pm and letting it rise at room temperature overnight. It was ready to bake around 7 am. The flavor was complex and beautiful. I have been baking sourdough bread for 5 years, struggling to get my loaf pan breads to rise sufficiently. This bread was gorgeous. And I liked feeding my starter 6-7am and using it in the afternoon.
Hii Alice! Thank you for your note and star rating. I looove how you made this bread fit into your schedule! Sourdough is SO flexible, I think it just takes some trial and error, playing with it to see what works for you. Feeding the starter in the morning and using it in the afternoon is the way to go!
In the process of making this recipe now. It sounds DELICIOUS! You mentioned a video in the shaping section. Is there one? That was the only part of the recipe I was confused slightly. Fingers crossed.
Hi Hannah! So excited! I don’t have a shaping video, but rather, step by step photos of shaping. I hope this helps and you enjoy the sourdough!
This has been my go to sourdough sandwich bread recipe. It’s delicious and always comes out so beautiful. I switch back and forth between maple syrup and honey for the sweetener. Both work well. I also play with the amount of wheat flour, I have even subbed it out completely for bread flour a few times. When it comes to shaping. I have used many different techniques. This dough is very forgiving and no matter how I shape it, it turns out beautifully!
The shaping and “ Place the dough on the spritz of water (seam side down) and using lightly floured hands, cup the back of the dough and gently pull it towards you until the surface is taught. Gently “fluff” the ends in again if needed to fit into the loaf pan.” was a total mess. My hands just ended up covered in wet flour and dough, so much stuck to the water spritzed counters, and I don’t think the dough got taught as I had no idea how to do that (the pictures didn’t seem to show, and if they did they didn’t make sense). And what the heck is ‘fluffing’ the dough?
One of the great joys of sourdough is how easy it is; shaping this recipe was so difficult I’ll never make it again. Making a regular yeast oatmeal bread in a stand mixer is easier!
I have made this about 10 times now and it has been delicious every time!! It’s a super easy bread as I have had to use different flours at times and had to stick in fridge a few times at different times in the process. Thank you for an amazing recipe!
Oh my goodness, Cece! Your note made my day. I love how versatile it is for you… that’s the best thing about sourdough! Thank you for your review and enjoying the sourdough!
Made a great loaf. Friends and family loved it. Refreshingly easy overnight proof compared to my usual 2 day sourdough. Thinking about adding a little bit of molasses next time cause why not? Glad to have found a vegan softer bread recipe. 5 stars!
Hooray, Samantha! The molasses sounds delicious! Thank you for making, sharing and five star rating!
Fabulous toast!
Wooo! Love hearing this, Mandy! Day made :D
I just made this recipe I subbed in spelt flour for whole wheat and all purpose for the bread flour as that is what I had on hand it was awesome, thanks or the recipe have passed it on to my kids
Hi Susan! Thank you for your note and sharing your flour tips. Oh my… spelt and whole wheat sound delish! Thank you for making and sharing!
This recipe turned out perfectly! I shaped and proofed the dough in the bread pan in the fridge overnight and put it right in the oven the next morning- it’s perfect!
Hi Hannah! SO happy to receive your note and that you’re enjoying the sourdough. Thank you for your tip about cold proofing!
By far the best sandwich sourdough recipe I’ve used! I don’t have a proper bread pan yet, so I let the dough cold proof overnight in my Bundt pan and placed directly in a preheated oven from the fridge. Beautiful oven spring, crumb, and the flavor is spot on! Thank you so much!! This will be my go-to recipe for sandwich loaves from now on.
Best. News. Ever!! Thank you for your note, tip about cold proofing and giving the sourdough a go, Melinda! SO excited!
I’m a beginner & still learning about the starter. Can this recipe be made with the discard & would I need instant yeast? If so, how much? Is that something you would recommend?
Hi Letty! Thank you for stopping by. This recipe *could* be made with discard and instant yeast, but since I’ve not tried it, I’m not exactly sure. Discard creates a much more slack dough, so without testing I’m afraid I’m unable to make a recommendation. Please keep us posted if you experiment!
I didn’t attempt to discard/instant yeast but made the recipe as you have it. The process was so worth it & the bread came out delish!!
Perfect, delicious sandwich bread. Well worth the time and effort.
This was the best and by far my favorite sourdough sandwich bread recipe!! So good!
Hooray! Thank you for your note and giving the sourdough a go, Brittany!
Such easy to follow instructions! I will be sending my family that has joined me on this sourdough journey towards this recipe!!
Thank you for your FIVE STAR review, Karissa and for sharing with your family (what fun!).
Can I replace the wheat dough with wheat bran?
Hi Karissa! I’m not sure if it’ll work. If you give it a go, please keep us posted!
It worked! I did end up incorporating a little more bread flour as I was kneading because it was a smidge too sticky but it turned out delicious!
Hooray! Thank you for letting us know, Karissa! SO happy to hear.
Such an amazing loaf of bread. Your instructions were so detailed and perfect. I think this is now my number one recipe to follow.
Hi Sylvia! Thank you for your feedback, star rating and giving the sourdough a go! Super excited you’re enjoying the recipe!
I made this bread before and it was delicious. Wondered if I could use more whole wheat flour and add ground flax meal also. If so, how much of each?
Hi Gail! So happy to hear you’re enjoying the sourdough. You can use more whole wheat flour, I’d go up to half, but you’ll need more water. I’m not sure about how much ground flax meal to add, since it’s thirsty and you’d need more water. You can play with it, adjusting water after you add your soaker.
I’ve made this multiple times, with honey and maple syrup. I also substitute all bread flour. The first time I made it I also accidentally did 1 c water and 1 c oats and it was a stickier dough, but it still turned out! Everything else I keep the same and it is SO good. I’ve made many sourdough loaf recipes and this is by far my favorite. It’s a great loaf to bring to a gathering with some butter. Will continue to make over and over. :)
Hi Faith! Thank you for your note, star rating and sharing your success. I’m thrilled to hear you’re enjoying the sourdough!
Can this recipe be doubled to make two loaves, please?
Hi Elisa! Makers have commented that they’ve done this with success. I’d divide the dough prior to bulk fermentation for easier handling. I hope this helps! Keep us posted!
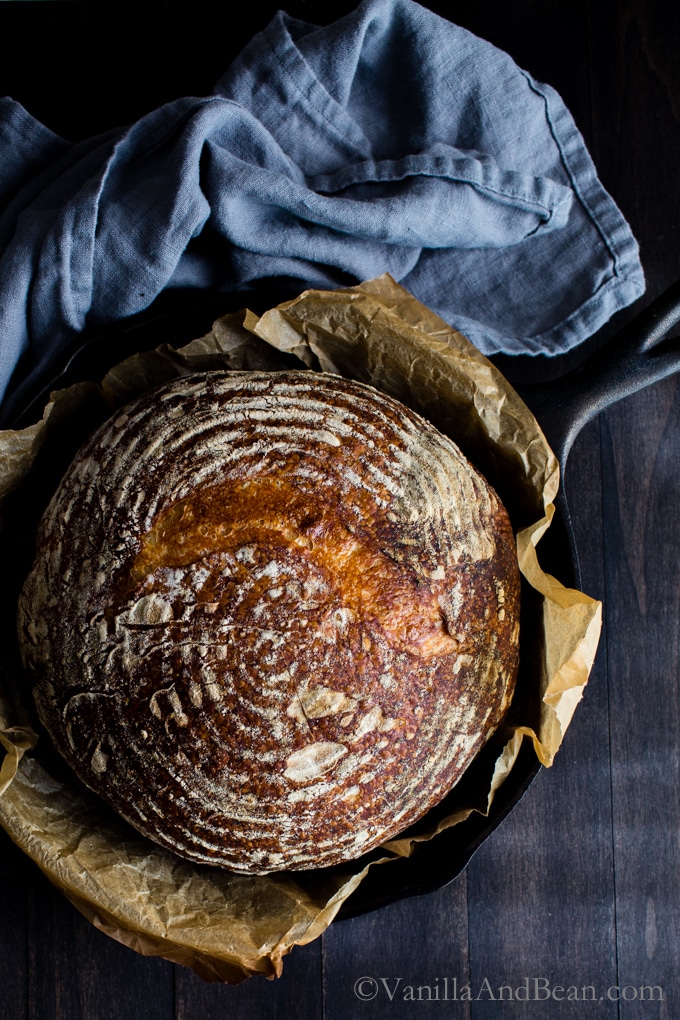
This bread cane out perfect! My husband likes the boule shape. Can this recipe be used for a boule as well?
Hi Swati! Hooray! Thank you for your note and giving the sourdough a go! This recipe can be used for a boule for sure. I bake mine in a Dutch oven. Let us know how it goes!
Very good. Nice and light bread. I made 3 small loaves. Coors them for 25 minutes
Hi Kim! Thank you for your note and baking tip! SO happy you’re enjoying the sourdough :D
I’ve made it twice now, very tasty. Just wondering if I could use honey instead of maple syrup? We don’t usually have maple syrup in the house but usually have honey. Thanks!
Hi Karla! Hooray for a tasty sourdough loaf! You can use honey instead of maple. Several makers have commented they’ve had success with it!
Hi Traci,
I followed your recipe exactly, used the same brand of bread flour. But the inner part seems dense rather than fluffy, the 2 times that I have tried. The crust is fine, though. Also, the dough seems a bit sticky even after 3 sets of stretch and pull. Suggestions please?
Hi Audarya! I’m sorry to hear your bead is dense. My first thought is your starter. Did it pass the float test? Also, I’m curious about bulk fermentation… at what temperature, and is the dough fully doubling during bulk? Keep us posted!
About the dough being sticky… hold off a bit of water (two to three tablespoons) next time and compare how the dough feels and bakes up.
What would the vegan recipe for this bread look like? And is sprouted wheat an acceptable substitute for the whole wheat flour?
Hi Robert… the images for this recipe is of a vegan loaf. I always use homemade cashew milk, but you can use your favorite plant milk. I’ve never baked with sprouted wheat but a quick google search landed me on Cooks Illustrated where they said you can sub sprouted wheat for whole wheat. Lmk if you give the loaf a go!
Thanks for the info. I am going to try if out this weekend with sprouted flour.
Have you tried baking this loaf in a covered pan?
Hi Robert! I’ve not attempted baking this loaf in a covered pan. Keep us posted on your sprouted flour bake!
I made it today and it made great turkey Rueben paninis. I always up the whole grains, so I used 200 grams of whole wheat, part of which was wheat germ and 200 grams of bread flour. I didn’t sprinkle on oats because they often fall off when slicing bread. I used 1% milk because that was all I had.
Hi Debra! Thank you for your note and giving the sourdough a go! Rueben paninis sound like a delicious way to enjoy this bread!
I just made this recipe but my loaf isn’t as tall as yours. I must’ve done something wrong. I let it rise in the pan until it was about an inch over the rim. Smells divine though.
Hi Glenda! It sounds like maybe your starter may have not been quite ready? Did you start with a doubled in size, active starter? Please let me know if you have any questions. I hope you enjoy the bread!
This must be the best sourdough loaf I’ve made. I did play fast and loose with your method, as I do, as I was too tired to bother to start it the night before. Instead of leaving 8 hrs and folding again, I did it an extra 3 times beforehand and put straight in tin. Left in my conservatory for 6 hrs and was huge. Also used 200g wholemeal nstead of 100, as I like the fibre. Tastes great. (Didn’t wait an hour to eat some either;))
Hi Stephanie! Thank you for your note and sending a smile. SO happy to hear!
Wow, this was delicious! It’s a lovely dough to work with, and I love the overnight room temp proof. I have a chilly house too, so it was nice to go to bed knowing it wouldn’t over-proof! I used white whole wheat flour and had no trouble with the dough.
Hi Allison! SO happy to read your note and that the sourdough is a success! Thank you for your tip on the white whole wheat flour (a flour I love).
I love this bread! I have made it 3 times in the last two weeks. I make mini loaves or buns with it but today I doubled the recipe and made 2 larger loaves and 2 mini loaves. I only have all-purpose flour so that’s what I used. I have made bread before so I added a bit more flour but it was still very tacky. My kitchen is on the cool side so it takes longer to rise (12 hrs overnight then about 4 hrs for the second rise) but it turns out yummy every time. Definitely a keeper!
Hiii Liza! Thank you for your note, giving the sourdough a go and sharing your tips on the flour and mini loaves! SO happy to hear you’re enjoying the bread.
After being delighted with your fluffy Sourdough banana muffins I am also delighted by this Maple oat sourdough sandwich bread recipe. I did use light brown sugar as that was all I had, I used 1 cup of King Arthur unbleached organic bread flour, 1/2 cup of Red Mill 100% stone ground whole wheat flour and added 1/2 cup of bourbon soaked golden raisins (just because). My final proofing took over two hours but the ultimate end result was very good. The taste and texture are delightful. Thank you once again for you clear directions from the beginning process to the end. I am no longer intimidated by making sourdough bread, as this has been my first time encounter…and I am old.
SO happy to hear of your success, Jean! Thank you for sharing your tips (that’s the combination of flours I use too)! Way to go you for jumping in to sourdough bread making… You’re doing it!!
I made this loaf and am so pleased with the result. I am still learning the sourdough process but this loaf was perfect, not sticky and rose beautifully and tastes delicious.
Hi Lyn! Thank you for your note of success and hooray for enjoying the sourdough process – isn’t it so satisfying?