

Tender, and lightly sweetened, these Spiced Pumpkin Scones are a tasty seasonal indulgence. Lightly sweetened with brown sugar, they feature pumpkin puree’, pumpkin pie spices, and heavy cream with a crunchy raw sugar sprinkle on top! They’re make-ahead ready and freezer-friendly.
With optional inclusions, you can make candied ginger pumpkin scones or pumpkin scones with dried cranberries. Either way, they’re such a treat!
⭐️⭐️⭐️⭐️⭐️ Recipe Review “These scones turned out perfectly..so tasty…!” ~ Deb

You will receive recipes and kitchen tips, along with information about our partners and offerings. For more details, review the Vanilla And Bean privacy policy.
Tender and Lightly Spiced Homemade Pumpkin Scones
When I was in pastry school, we made a lot of scones. It was then that I learned the techniques and ingredient roles to create delicious bakery-style scone recipes.
If you love to make and eat scones, you’re in for a treat! These are a fresh take on a fall classic, tender and not too sweet. For a ginger forward pumpkin ginger scone, you can mix in candied ginger or for a pop of tart flavor, try dried cranberries.
Make the scones ahead and freeze them; they can go straight from the freezer to the oven for ultimate ease and freshness! Finish with an easy 3 ingredient maple glaze to add a touch more sweetness and maple flavor.
This Recipe Is
- make ahead ready
- tender
- freezer friendly
If you enjoy making homemade sweet breads, you’ll enjoy this tasty recipe for pumpkin scones.

About the Key Ingredients
- Corn Starch – softens and tenderizes the crumb while also soaking up excess moisture. It also aids in creating nice crisp edges and a craggy top.
- Pumpkin Pie Spice – a combination of cinnamon, nutmeg, cloves and ginger. You can use a spice blend or DIY your own (in recipe notes) to customize the flavor profile.
- Pumpkin Puree’ – you can use canned pumpkin puree or fresh homemade pumpkin puree in the scones. Just don’t use canned pumpkin pie.
- Sweetened Dried Cranberries or Candied Ginger – optional ingredients, but either adds another layer of flavor and texture (details in the recipe notes).
- Egg – we’re using an egg to brush the exterior of the scones before baking for a golden finish. For an egg free scone, you can wash the scones with heavy cream.
- Turbinado Sugar – for sprinkling on top of the scones. It adds a layer or texture (crunch!).
_______________________
How to Make Tender Pumpkin Spice Scones
step by step


When working the scone dough, work quickly so it stays cold. If it gets too sticky or the butter feels like it’s melting, pop the dough in the freezer for 10-15 minutes!


Pumpkin Spice: you can purchase this prepared or to customize your blend, mix 1/4 teaspoon each: ground ginger, cloves, nutmeg and 1/2 teaspoon of cinnamon.


Make Ahead for Easy Pumpkin Scones
For easy pumpkin scones, mix, shape and cut the scones, then pop em’ in the freezer. Once frozen, and when you’re ready to bake, egg wash the scones and sprinkle with sugar, then bake. They can go straight from the freezer to the oven!
Here’s why I like to make scones like this:
- you can bake on your schedule.
- fresh scones taste best!
- prepping ahead means the morning is easy.


Traci’s Tips
- Shaping Technique: if you’d like to see my shaping technique for scones, check out the recipe video on my Cranberry Orange Sourdough Scones recipe card.
- Work quickly when mixing the butter with the flour. The butter should remain cold and pliable throughout the mixing process. If the butter starts getting melty, pop the whole bowl in the freezer (before adding any liquid) for about 10 minutes.
- Kitchen Tools: I recommend an oven thermometer and weighing your ingredients using a digital kitchen scale for the best outcome.
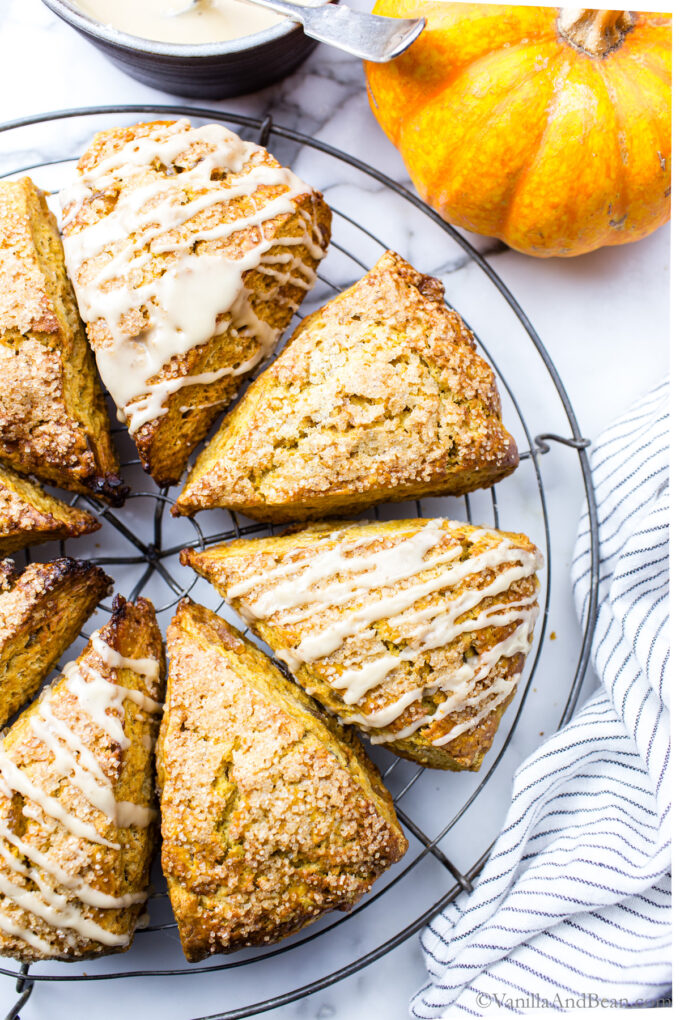
Tender Spiced Pumpkin Scones with Maple Glaze
Ingredients
Dry Ingredients:
- 2 1/3 cup (325 grams) All Purpose Flour
- 1 Tablespoon Corn Starch
- 1/3 cup (65 grams) Light Brown Sugar
- 1 1/4 teaspoon Pumpkin Pie Spice, see recipe note for DIY
- 1/2 teaspoon Ground Cinnamon
- 1 teaspoon Baking Powder
- 1/2 teaspoon Baking Soda
- 1/2 teaspoon Fine Sea Salt
- 1/2 cup Unsalted Butter, one stick, cold, straight from refrigerator
Wet Ingredients:
- 1/2 cup (120 grams) Heavy Whipping Cream
- 1/2 cup (125 grams) Pumpkin Puree , fresh or canned (not pumpkin pie) – add one Tablespoon of water if using canned pumpkin
- 1 1/2 teaspoons Vanilla Extract
Just Before Baking:
- 1 Egg , + 1 tablespoon water
- 2 teaspoons Turbinado Sugar, or raw/demerara sugar
Maple Glaze:
- 1 cup (106 grams) Powdered Sugar
- 1/4 cup (60 grams) Maple Syrup
- 1 teaspoon Vanilla Extract, or 1/2 scraped vanilla bean
Instructions
- Line a large sheet pan with parchment paper and make room in the freezer for the pan. Set aside.
- Mix the Dry Ingredients: Whisk the all purpose flour, corn starch, brown sugar, pumpkin pie spice, cinnamon, baking powder, baking soda, and salt into a large mixing bowl.
- To the flour mixture, grate in the cold butter (just from the fridge) using the largest holes on a grater. Toss the butter with the flour just to coat the butter. The butter should remain cold and pliable throughout the mixing process. If the butter starts getting melty, pop the whole bowl in the freezer (before adding any liquid) for about 10 minutes. Stir in the candied ginger or dried cranberries now if using (*see recipe notes). Make a well in the center. Set aside.
- Mix the Wet Ingredients: In a spouted bowl, whisk the cream, pumpkin puree (+ water if using canned pumpkin puree) and vanilla extract.
- Mix/Shape the Scones: Working quickly, pour the wet ingredients into the dry ingredients. Use a silicone spatula to gently stir the mixture until the flour is just moistened. There still should be some dry patches of flour. Use your hand to scoop the dough up and fold it over on top of itself. Do this 10-12 times (this helps build layers). The dough will be a shaggy mess.Transfer the dough to a floured work surface and knead/press the dough together to form a disk. Use a bench scraper to help you gather the bits of dough and to fold the dough over onto itself. The dough will seem dry at first, but as it is folded it will begin to hydrate. Work gently, but quickly as the dough needs to stay cold. If the dough becomes too sticky, pop it in the freezer for 15 minutes to chill. Reflour your work surface and flour your rolling pin. Roll the dough out to 3/4 inch thick circle that's about 7-7 1/2 inches in diameter and cut into eight wedges using a knife in one quick motion down. No sawing here. Place scones on the parchment lined sheet pan, and place in the freezer for 30 minutes. Make Ahead**: At this point, scones may be frozen solid for a quick bake in the morning or for longer storage.
- Bake: While the scones are in the freezer, arrange an oven rack in the center of the oven and preheat the oven to 425 Fahrenheit (218 Celsius). Just before baking, crack the egg in a small bowl and whisk with a tablespoon of water. Use a pastry brush to lightly brush the top of the scones with the egg wash then sprinkle with turbinado sugar.Bake for 5 minutes at 425 Fahrenheit, then reduce the temperature of the oven to 375 Fahrenheit, baking an additional 15-20 minutes or until golden. The tips of the scones may get dark (it's okay!). The internal temperature of the scones, when checked with a digital food thermometer should be 200 – 210 Fahrenheit (93 – 99 Celsius) when done. For a dryer scone, turn the oven off, leave the scones in the oven, and prop the oven door open for about 10 minutes.Remove from oven and transfer scones to a cooling rack.
- Make the Drizzle: While the scones are cooling, whisk the powdered sugar, maple syrup, and vanilla. Add a teaspoon of water to thin the drizzle. The scones should be warm, but cool enough to handle now. Use a small whisk or fork to drizzle the glaze over the scones.
- To Store: These scones are best served fresh and warm. Store covered at room temperature for up to two days. Store drizzle at room temperature with a piece of cling wrap directly over the surface of the mixture. This keeps it from getting crusty. To Freeze Before Baking: Freeze scones individually on a sheet pan, then transfer to a freezer bag or storage container for up to two weeks. Frozen scones can go straight from freezer to oven baking a few minutes longer if needed.To Freeze After Baking: Allow scones to cool completely before freezing. Freeze scones individually on a sheet pan, then transfer to a freezer bag or storage container for up to two weeks.To Rewarm: Thaw at room temperature, then rewarm scones in a 350 Fahrenheit oven for about 5-8 minutes.
Notes
Nutrition
Nutrition is provided as a courtesy and is an estimate. If this information is important to you, please have it verified independently.
Made it? Leave a comment below!
The most helpful comment may include recipe rating, feedback, any modifications or helping other commentors.

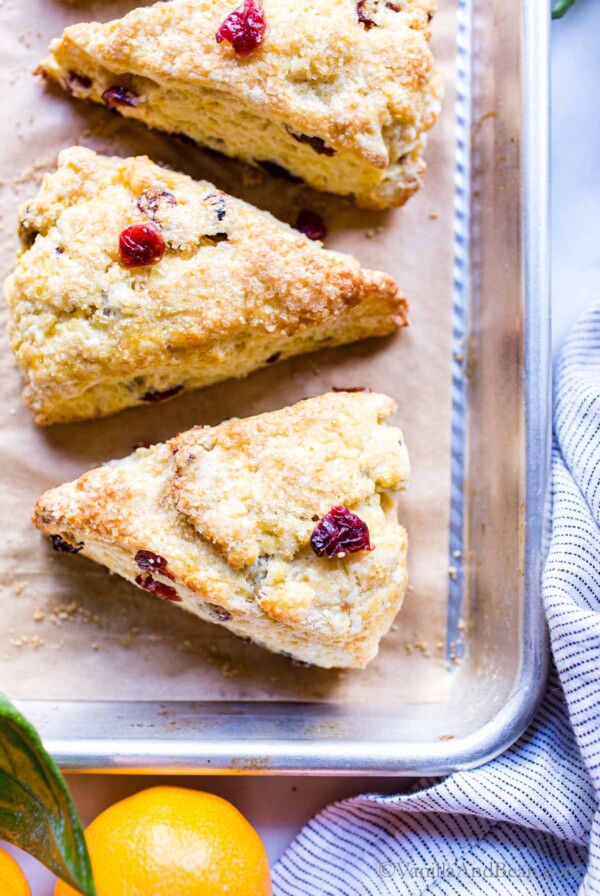




These scones turned out perfectly..so tasty! I added the soaked and drained cranberries and used cane sugar in place of turbinado. They were delicious!
Love hearing this Deb! The cranberries are such a delicious and perfect addition. Thank you for your note and five star review!
First time I’ve made scones in about 35 years! These are delicious. I didn’t have turbinado sugar, but used Costco’s organic cane sugar instead. Not quite the same. I was out of candied ginger so used dried cranberries. I am a fan of ginger scones so wonder if adding a tablespoon or two of grated fresh ginger would give it the tang I love.
Love hearing this, Terri! Thank you for your note. Grated ginger would be perfect in this! I’d start at 1-1 1/2 tablespoons. Thank you for your note, Terri!
Can I use whipped cottage cheese instead of the heavy whipping cream? Can I used cooked Kuri squash in stead of pumpkin?
Hi Veronica! I’m not sure about the whipped cottage cheese. Cooked kuri should be fine. If you experiment, keep us posted!
Hi Traci. I have just been reading some recipes in your blog & have a question: in the baked goods, you seem to often use some cornstarch in recipes that do not traditionally include it. (I was looking at scone recipes). Any reason for the addition of cornstarch?
Hi there! I do sometimes use cornstarch in baked when I’m looking to bring out specific characteristics in a recipe. It’s a baking ‘secret’ ingredient! Cornstarch does several things in baked goods: it tenderizes the interior crumb (softening the proteins) creating a lighter texture, creates a crisp exterior, and can soak up excess moisture. It also can help prevent cookies from spreading! It’s virtually tasteless so it doesn’t impact the flavor of whatever you’re adding it to. I always use organic cornstarch. I hope this helps!
If I were to cut into the mini scones by doing 3×3 squares in half, would you cook the same time? Also would it be best to make a 6×6 square to start?
Hi Caitlin! You would reduce the bake time for 3×3 scones, but by how much I’m not exactly sure. If you give it a go, I’d look for signs of a golden top and bottom. Keep us posted!
I ended up making the 3×3 scones and I think they cooked for about the same time actually. They were a big hit! Thanks so much!
Hi Caitlin! Thank you for your note and coming back to share with us. SO excited they were a hit!
Have you made this recipe gluten free? I would like to use 1 to 1 GF flour with zanthum gum in it, but wondered if it would be ok to use same measurements as your regular flour version. They look very tasty.
Hi Ann! I haven’t made this recipe with 1 to 1 GF flour, so I’m hesitant to recommend. I’m sorry I’m unable to help here.
Question -Would they freeze well if baked?
Yes! Just be sure to cool completely before freezing. Add the glaze after they’re fully thawed. Thaw at room temperature. I Hope this helps and you enjoy the scones Jeanne!!
I froze six of the seight cones, after baking and glazing, and have taken them out of the freezer as needed, bake at about 350 degrees, without thawing, for 10 minutes and they turn out beautifully.