
I’m sharing How To Roast Pumpkin Seeds with an easy smoky sweet spice mix. Be sure to check out How to Make Pumpkin Puree too! It’s fall y’all! Let’s enjoy the pumpkins!

A Fall Delight: Roasted Pumpkin Seeds
Pumpkins are as beautiful as ever in stores and at the farmers markets. If you’re like me and roast your own pumpkins for pie or savory dishes, be sure to save the pumpkin seeds for roasting!
Pumpkin seeds are so delicious for snacking and worth the effort! I know extracting pumpkin seeds from a pumpkin can be such a stringy mess, but my method will take some of the frustration out of preparing them.
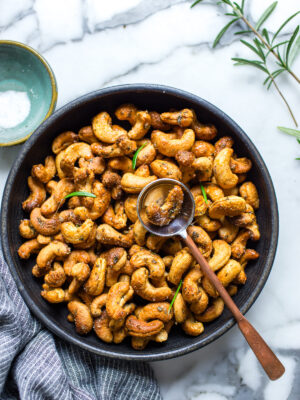
The pumpkin seeds we’re roasting still have a seed coat on them, so they’re chewy. I don’t recommend peeling each seed, rather, the entire seed is to be enjoyed!
If you enjoy pumpkin recipes, you’ll have fun making this tasty seasonal snack.
RELATED: Whip up the most silky and flavorful Homemade Pumpkin Puree to use in all your homemade pumpkin recipes! See my Pumpkin Puree recipe to learn more!
How To Roast Pumpkin Seeds in the Oven
These homemade pumpkin seeds are chewy and such a delight to make. Scoop the pumpkin seeds from the pumpkin before you roast it, then whip these sweet and spicy seeds up in no time. In summary, here’s how to roast pumpkin seeds (see recipe card below for details):
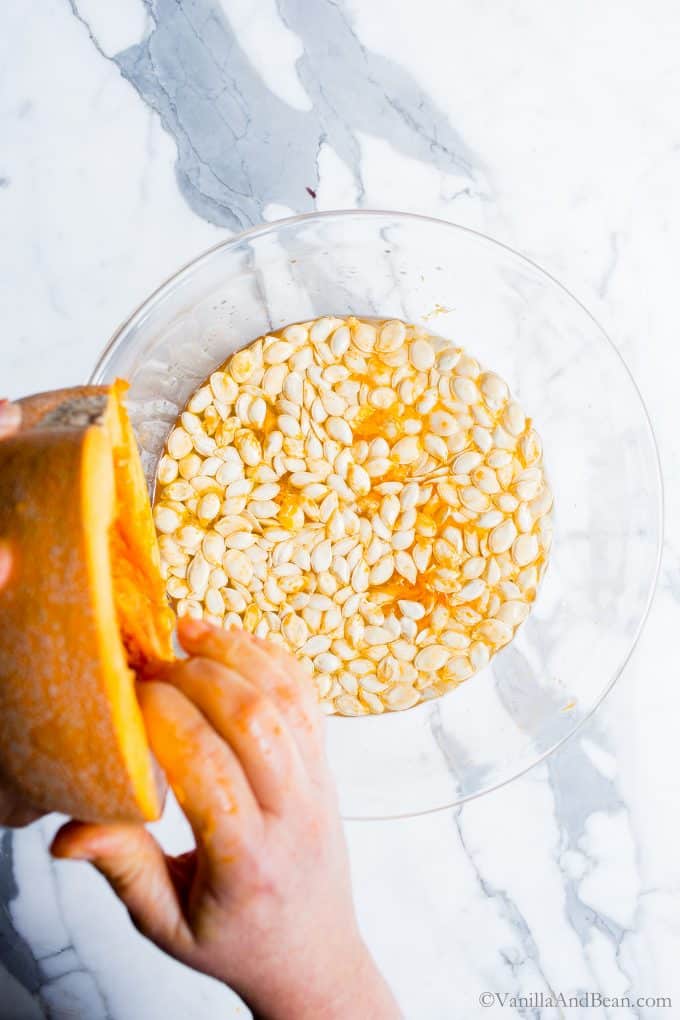
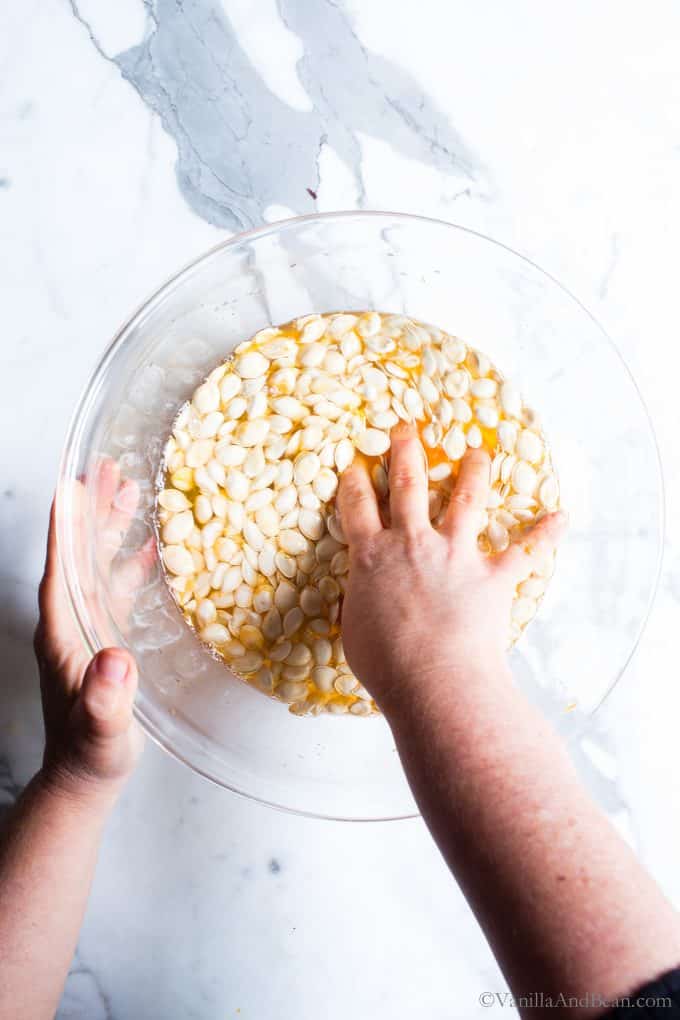
- First, place the pumpkin seeds in a bowl of water and give them a good agitation. Swish them around!
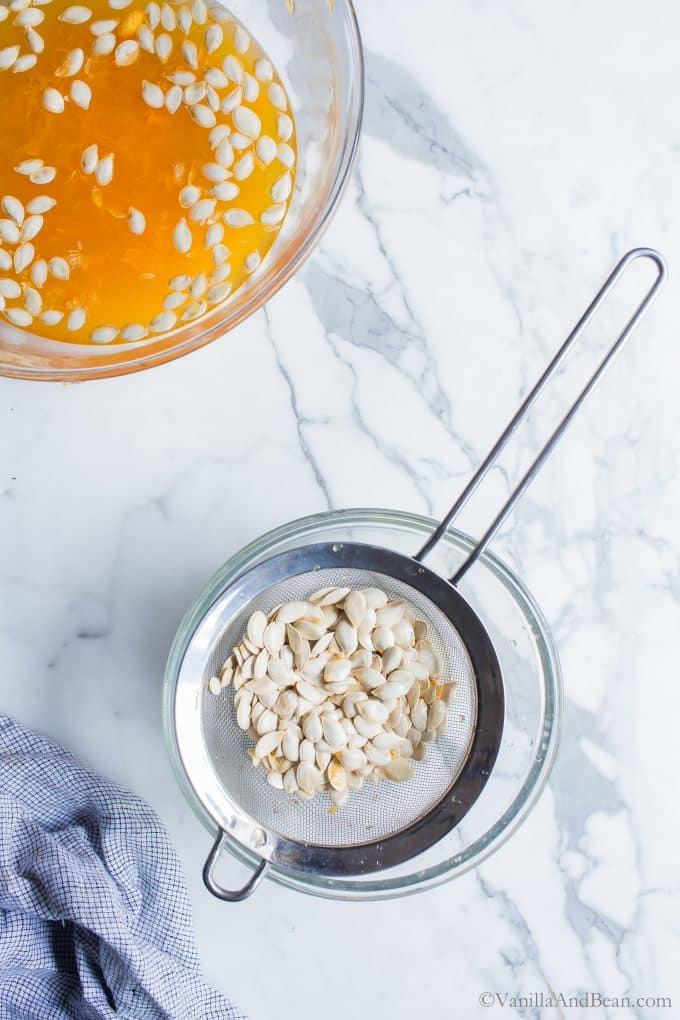
- Second, skim the seeds off the top and transfer to a colander. Rinse the seeds under running water. Discard the water and solids.
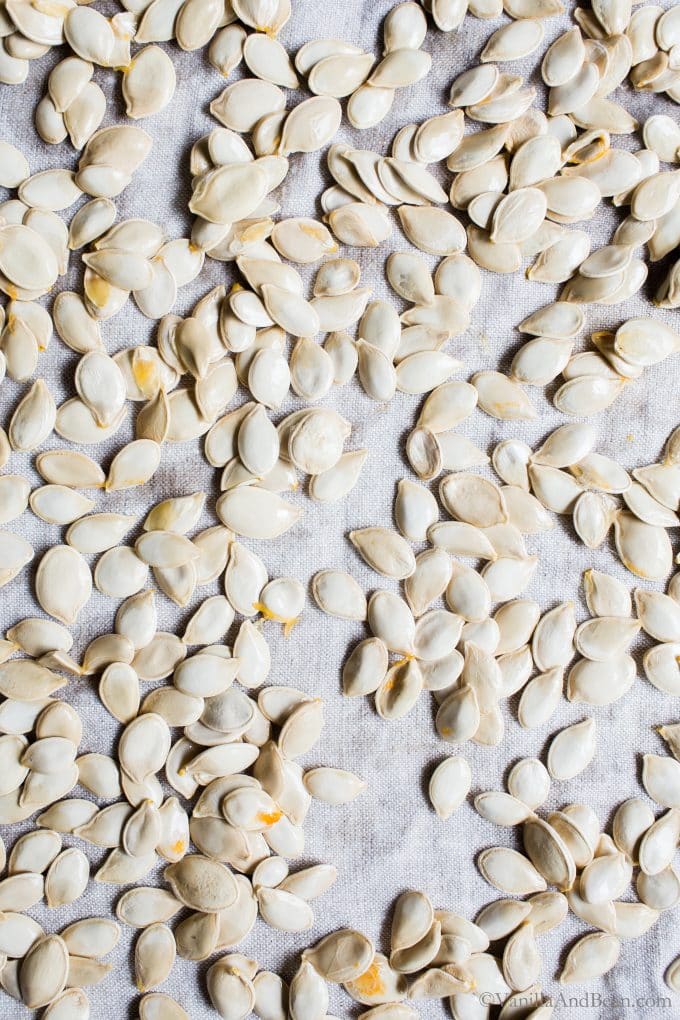
- Third, transfer the seeds to a towel and cover with another towel. Blot dry. Be patient here, this takes a few minutes. As you continue to blot, some of the pumpkin solids will fall away. If you have time, allow the seeds to air dry further for about 30 minutes.
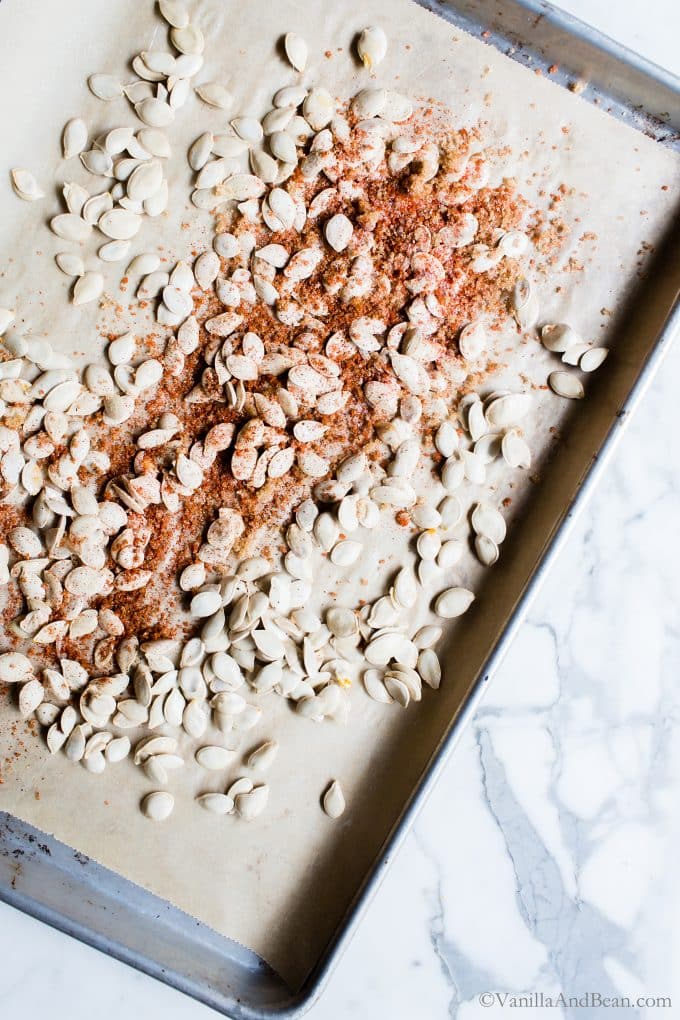
- Fourth, preheat to 300F. Place the dry seeds (they’ll still be a bit slippery) on a parchment or silpat lined baking sheet. Sprinkle 1 Tbs of coconut oil over the seeds. Use your hands to toss the seeds until they are all coated. I recommend about 1 Tbs of coconut oil per cup of seeds.
- Fifth, sprinkle the seeds with the smoky sweet spice blend (or create your own favorite blend!).
- Next, toss with hands to distribute the seasoning.
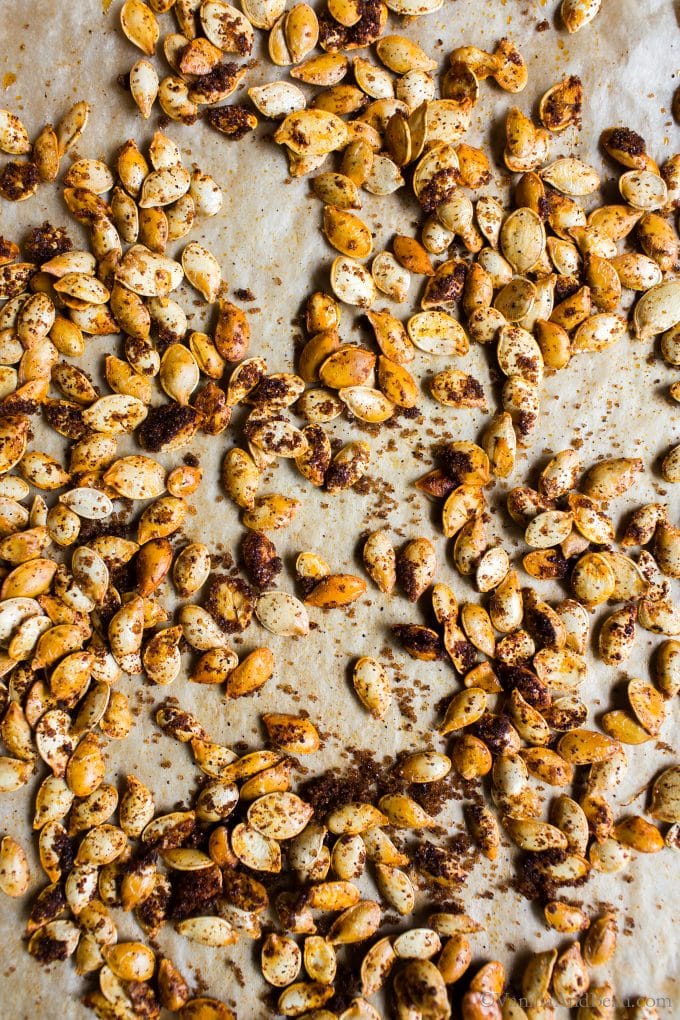
Last, roast seeds for about 30-35 minutes or until lightly golden.
Cool homemade pumpkin seeds completely before storing at room temperature in a covered container. Homemade roasted pumpkin seeds are best enjoyed within a few days.
Pro Tips
- For this homemade pumpkin seeds recipe, you’ll roast the seeds for about 30-35 minutes. I sometimes push this to upwards of 40 minutes because I like my seeds extra crunchy. Due to oven variations, keep an eye on them! Roast until golden to golden brown without burning the sugar. The transition from extra crispy to burned can happy quick!
- DIY SPICE BLENDS: Make your own spice blend and play with those flavors! Try a Cajun spice blend, pumpkin pie spice or BBQ. The possibilities are endless! If mixing and matching, mix the spices in a small bowl and taste before adding the seasoning blend to the oiled seeds.
- For one cup of seeds, you’ll need 1 tablespoon of oil and about 1 teaspoon of spices (this doesn’t include the salt and brown sugar).
Watch a Video Below See How Simple This Recipe Is!
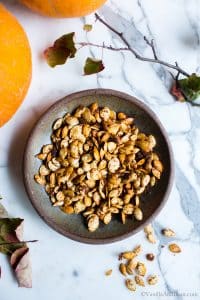
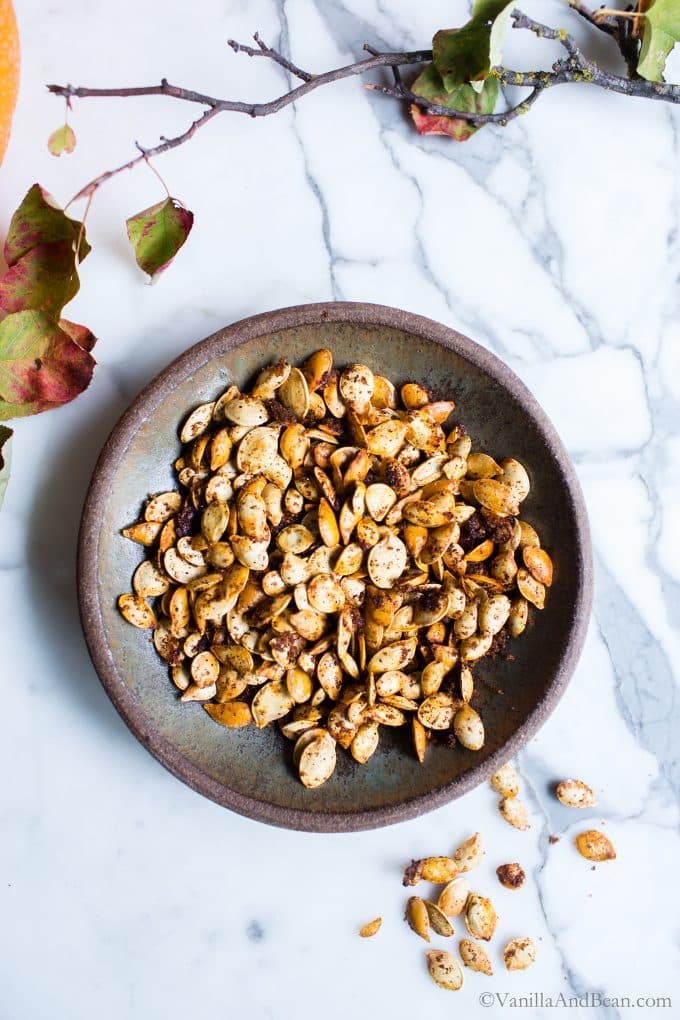
Sweet and Spicy Roasted Pumpkin Seeds
Ingredients
- 1 C Scooped out Pumpkin Seeds
- 1 Tbs Coconut Oil melted, or other vegetable oil like olive oil
- 1/4 tsp Fine Sea Salt
- 1 Tbs Brown Sugar
- 1/2 tsp Smoky Paprika
- 1/4 tsp Chili Powder
- 1/4 tsp Garlic Powder
Instructions
- Add the scooped out pumpkin seeds, about 1 cup, to a large bowl of water. In the bowl of water with the pumpkin seeds, give them a good agitation. Swish them around! The seeds will float to the top. Place the seeds in a colander to drain. Transfer the seeds to a towel and cover with another towel. Blot dry. Be patient here, this takes a few minutes. As you continue to blot, some of the pumpkin solids will fall away. If you can let the seeds set on a new, dry towel for about 30 minutes, this will help them dry out further.
- Preheat the oven 300F. Place the dry seeds on a parchment or silpat lined baking sheet. Sprinkle 1 Tbs of coconut oil over the seeds and use your hands to toss the seeds until they are all coated. Sprinkle with all the remaining ingredients for a smoky sweet blend (or create your own favorite blend!)
- Toss with hands to distribute the seasoning. Roast seeds for about 30-35 minutes (or up to 40 minutes) or until fragrant and golden. Cool completely before storing them at room temperature in a covered container for up to two days.


Roasting pumpkin seeds brings back such a flood of memories for me. I remember the first time my Mom made these with me and my sister. It’s still one of the best parts of carving the pumpkins for me. I love the sweet and spicy seasoning mix here. Thanks for sharing this seasonal treat, Traci.
Thank you! So much easier than the way I’ve been doing it. I miss roasting pumpkin seeds. I’ll definitely give this recipe a try.
I roasted my pumpkin whole, can i not use the seeds now?
Hi Denice… I’m sure you still can, although I’ve not tried it. I’ve always removed mine first if toasting the seeds. I hope this helps.
what’s the best way to de-shell the pumpkin seeds?
I ended up chopping the pumpkin into semi circular slices! Can I still make the puree?
That’s fine. Just be sure to cover the pumpkin with foil before roasting, otherwise the exposed edges tend to dry out.
Made the roasted seeds with the seeds of a pumpkin we carved in my Early HeadStart class and sent them home with the kids they are a huge hit!! Thank you!!
I made both recipes. Yummy goodness!!! Thank you so much for sharing!!!
Hi Cheryl! So glad to be of help! Thank you for sharing your success! :D
This was so handy Traci! I am bookmarking this for later. In the UK, pumpkin cans are very hard to come by – I have to buy mine online! So seeing this tutorial really inspires me to stop being a wimp and to just buy + prepare a whole pumpkin of my own…it’s so much cheaper and you sell it as being 10 x tastier too! Great photo’s, I’m Looking forward to making my own pumpkin puree!! :)
Hi Tash! Yes, tasty indeed! So glad you have pumpkins available too! Go for it! I think you’ll love the results!