

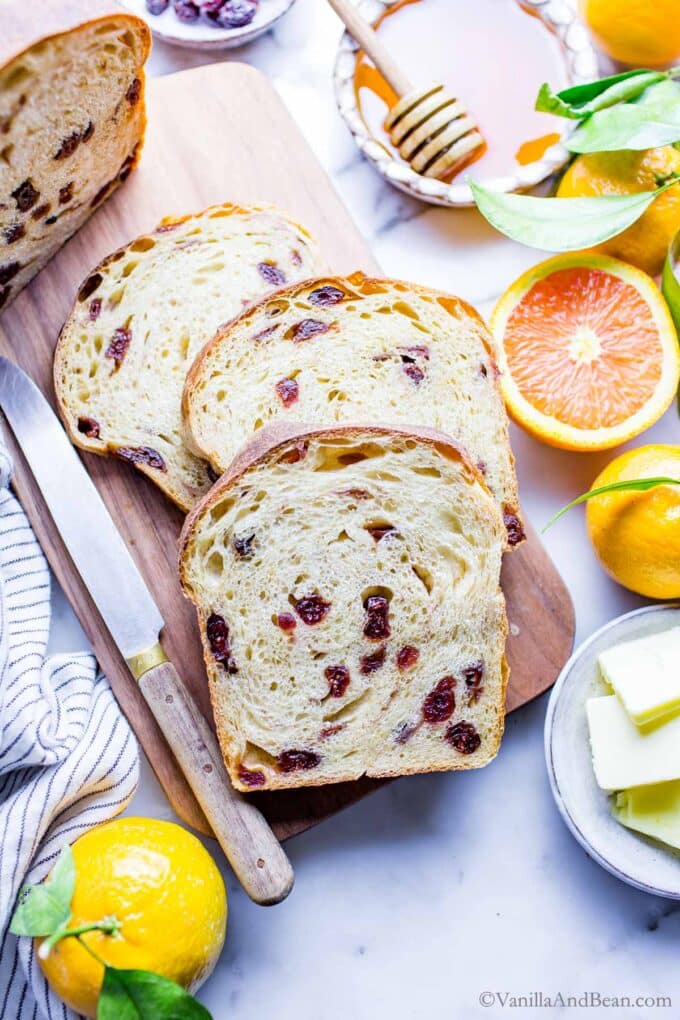
Cranberry Orange Sourdough Bread features fresh orange zest and juice, plump dried cranberries and is naturally sweetened with honey or maple syrup! Make cranberry sourdough bread with a doubled in size Sourdough Bread Starter. It’s a delight shared toasted with a slather of butter. This recipe is vegetarian or vegan.
⭐️⭐️⭐️⭐️⭐️ Review: “I do believe this is the most delicious bread I’ve ever made & I’ve made a whole lot of breads.” ~ Katherine
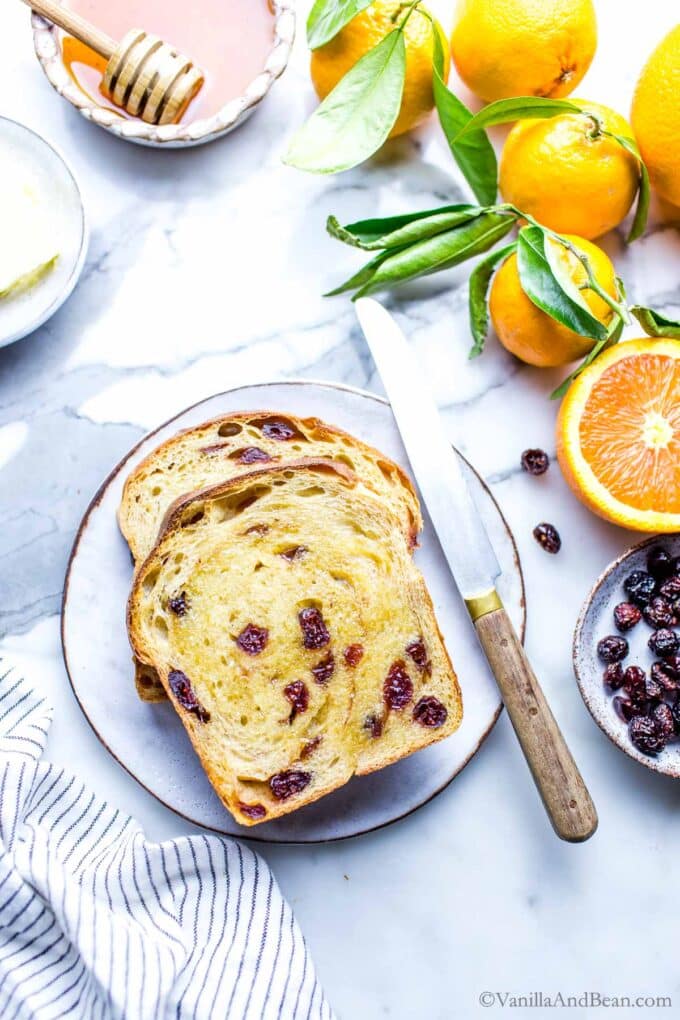
Cranberry Sourdough Bread with Orange
A classic flavor pairing like these Cranberry Orange Sourdough Scones, this sourdough bread recipe is a seasonal delight. Fresh orange juice and zest offer a sunny, citrusy loaf with tangy and tart dried cranberries.
This Sourdough Recipe Is
- tender and delicious, crispy crust when toasted
- bright and citrusy
- simple to make
- naturally sweetened
If you love homemade Sourdough Bread Recipes, you’ll love this flavorful breakfast loaf.
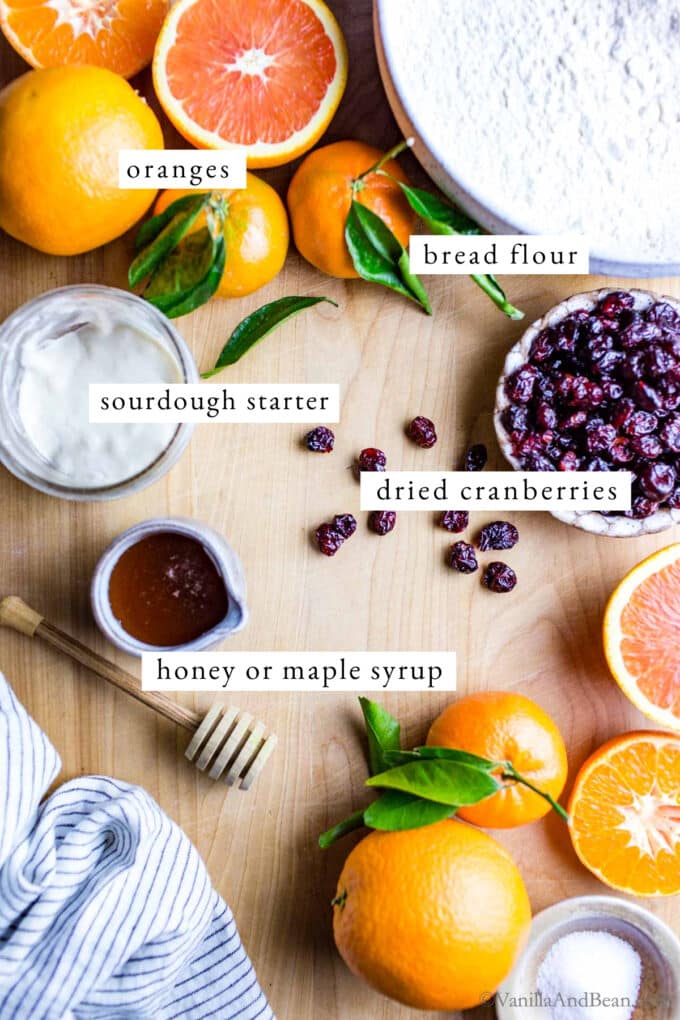
About the Key Ingredients
- Sourdough Bread Starter: you’ll use a ripe, doubled in size, active sourdough starter. I use 100% hydration.
- Bread Flour with a Touch of Whole Wheat Flour: bread flour gives this loaf structure with a tender crumb. A touch of whole wheat flour offers a bit of rustic and earthy flavor.
- Honey or Maple Syrup: use either in this sourdough cranberry bread for a touch of sweetness, and it aids in softening the loaf.
- Orange Zest and Juice: using both in this cranberry orange loaf brings out a lovely citrus fragrance and light orange flavor. I love Cara Cara orange in this recipe!
- Dried Cranberries: opt for apple juice sweetened cranberries for best flavor. I find sugar sweetened cranberries to be a little too sweet in this recipe. Find apple juice sweetened cranberries in the bulk bins for best value. You can use unsweetened cranberries, for a more tart experience!
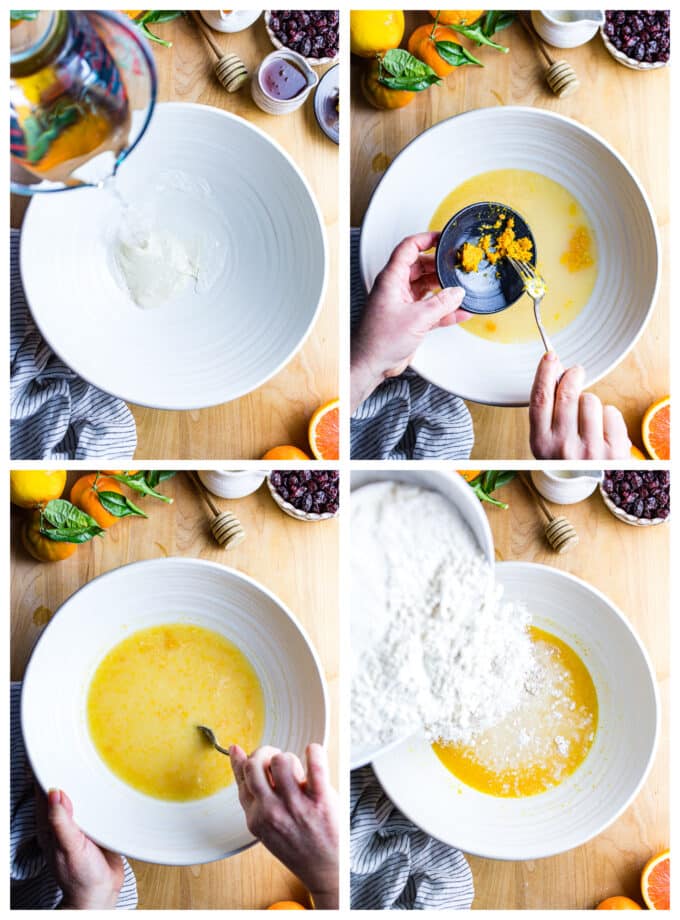
At a Glance: How to Make Cranberry Orange Sourdough Bread
- First, whisk the starter, water, orange zest and juice, and maple syrup or honey.
- Second, to the wet ingredients, add the bread flour, whole wheat flour, and salt.
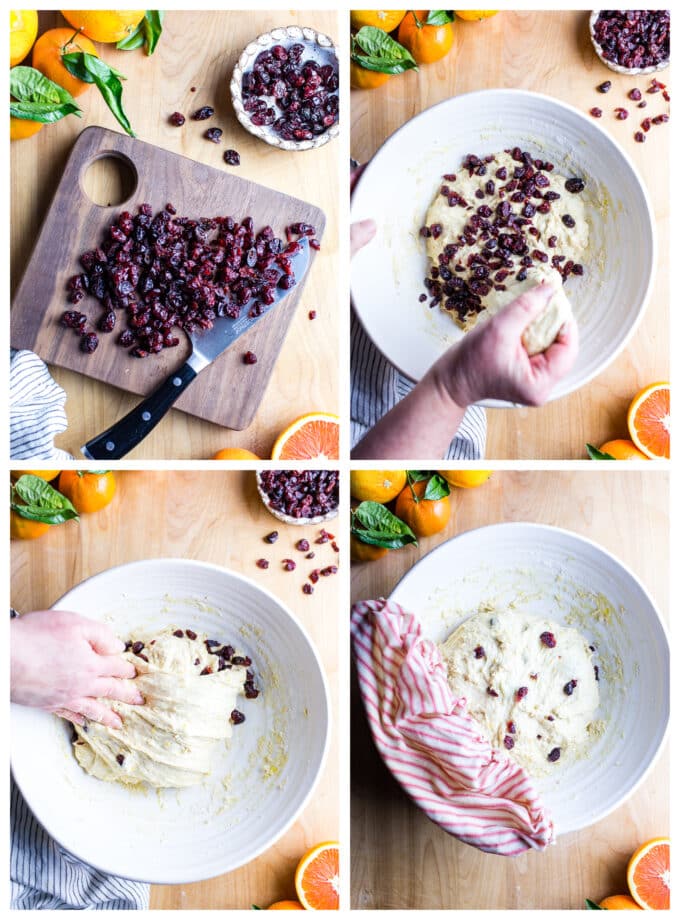
- Third, cover and rest the dough for 30 minutes. Meanwhile chop the cranberries.
- Fourth, fold in the cranberries. Allow the dough to rest for 30 minutes.
- Fifth, fold the dough one to two more times with a 30 minute rest in between. \
- Next, bulk ferment overnight.
- Last, shape the dough, proof for one to two hours, then bake!
The aromas wafting through the house is such a delight!! Allow the cranberry sourdough bread to cool, then slice. This cranberry sourdough bread is best toasted, slathered with butter.
How to Store Sourdough Bread
Store your sourdough bread, cut side down on a cutting board for up to three days at room temperature.
How to Freeze Sourdough Bread
Slice your bread, then store it in a freezer safe bag for up to two weeks. When you’re ready to enjoy, this bread goes from freezer to toaster in a snap!
Example Baker’s Schedule
Since this bread has a fair amount of sugar in it, bulk fermentation is long. Give yourself plenty of time and allow the dough to fully double in size before shaping and panning. Here’s an example schedule:
- Friday: Feed your starter and allow it to ripen, or double in size.
- Saturday Morning: Mix the dough, fold in the cranberries, do one or two more folds, then allow the dough to double in size. At 68F, this will take about 12-15 hours.
- Saturday Night: Shape, pan and proof the dough, then bake. Proofing will take about 1-2 hours.
Speed this process along by putting the dough, covered, in a turned off oven with the light on. Using this method, I can get this dough to ferment in about 10-12 hours and proof in about an hour.
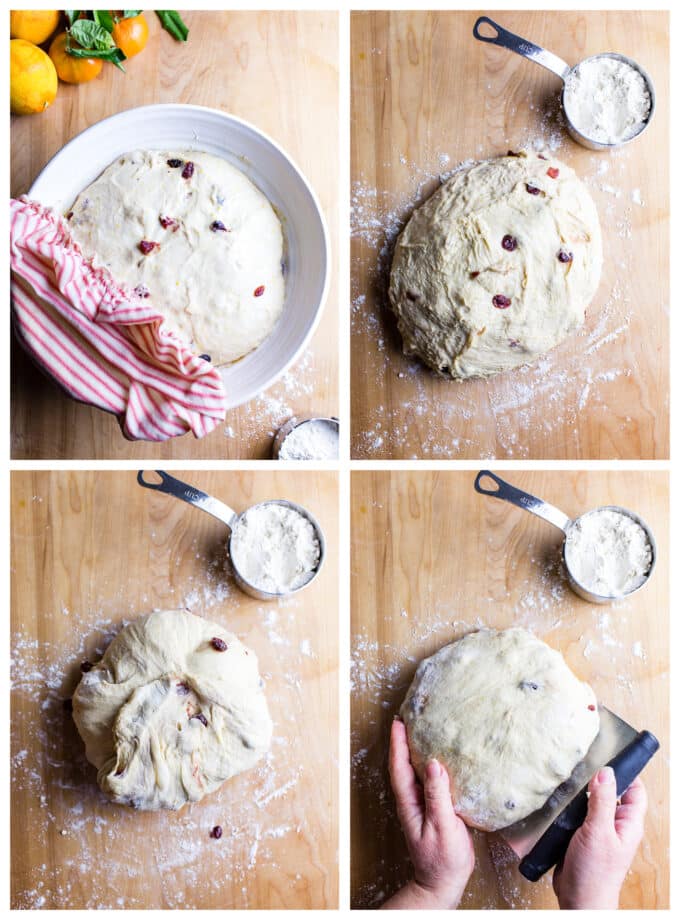
When is the First Rise (bulk) Done?
Knowing when bulk fermentation is complete takes a little practice and a watchful eye. Bulk fermented dough is ready for shaping when:
- it no longer looks or feels dense
- is jiggly when the bowl is shaken
- has about doubled in size
- you’ll see a few large bubbles just below and on the surface of the dough
When is the Second Rise (proof) Done?
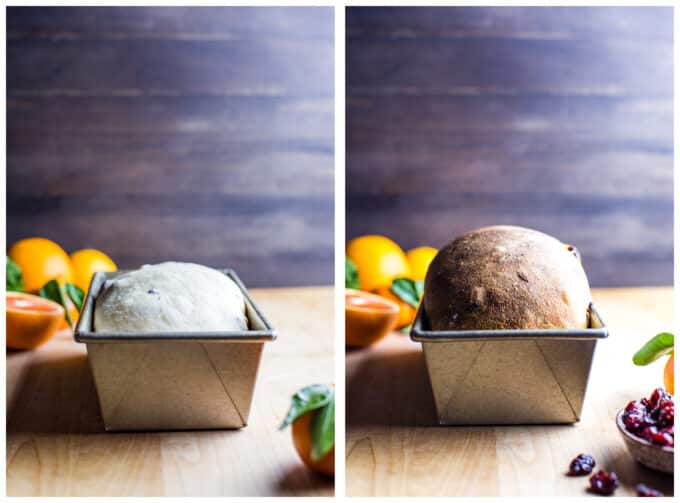
For this cranberry sourdough bread recipe, when the dough has risen in the loaf pan to about 1″- 1 1/4″ (2.5cm – 3cm) above the lip of the pan at the center. Have a ruler ready for this part! The amount of time it takes to proof will vary depending on ambient temperature. At 68F (20C) proofing takes about one to two hours.
If you’d like to speed this process along, you can put the loaf in a turned off oven with the light on. Just be sure to remove the loaf before preheating your oven for baking!
Sourdough Bread Making Tools
In addition to a large stainless steel or ceramic mixing bowl to ferment the dough, these are some of my favorite tools to make sourdough bread (affiliate links).
- 9 inch x 5 inch (23cm x 12cm) Loaf Pan – this one is similar to the one I use
- Bench Scraper – to handle the dough and for quick and easy cleanup
- Internal Temperature: to know when the bread is done baking, check the internal temperature using a digital food thermometer. The loaf should read between 190 – 205 Fahrenheit (87 – 96 Celsius) when done.
- Kitchen Tools: I recommend a digital oven thermometer and weighing your ingredients using a digital kitchen scale for the best outcome.
- Bowl Bonnets – so handy and durable! For bread making, I wet the bonnet and cover the bowl. Then I drape the bowl with a moist tea towel. This keeps the dough moist and I don’t have to use plastic.
Traci’s Tips
- About the Flour: This recipe calls for unbleached bread flour and a touch of whole wheat flour. You can use all bread flour if desired.
- Cranberries: I find sugar-sweetened cranberries to be overly sweet. Be sure to look for apple juice-sweetened cranberries in bulk bins or on Amazon. They’re just lightly sweet.
- Pro Tip: If your cranberries seem dried out, you can soften and plump them up by soaking them in hot water for about 10 minutes. Drain and pat dry before using them in the recipe.

Soft Homemade Cranberry Orange Sourdough Bread Recipe
Ingredients
- 1/4 cup (50 grams) Sourdough Starter, 100% hydration, previously fed, doubled in size
- 1 1/4 cup (270 grams) Water, 80 degrees fahrenheit (26 celsius)
- 1 tablespoon Orange Zest, from about three large oranges, like Cara Cara
- 1/3 cup (75 grams) Orange Juice, fresh squeezed
- 5 tablespoons (95 grams) Honey, or maple syrup* (see note)
- 3 1/2 cups + 3 tablespoons (475 grams) Unbleached Bread Flour
- 1/4 cup + 1 tablespoon (50 grams) Whole Wheat Flour, stone ground
- 1 1/2 teaspoons (9 grams) Fine Sea Salt
- 1 cup (145 grams) Dried Cranberries, apple juice sweetened**, rough chopped
Instructions
- Mix the Dough: In a large mixing bowl, using a fork, mix the sourdough starter, water, orange zest and juice, and honey.
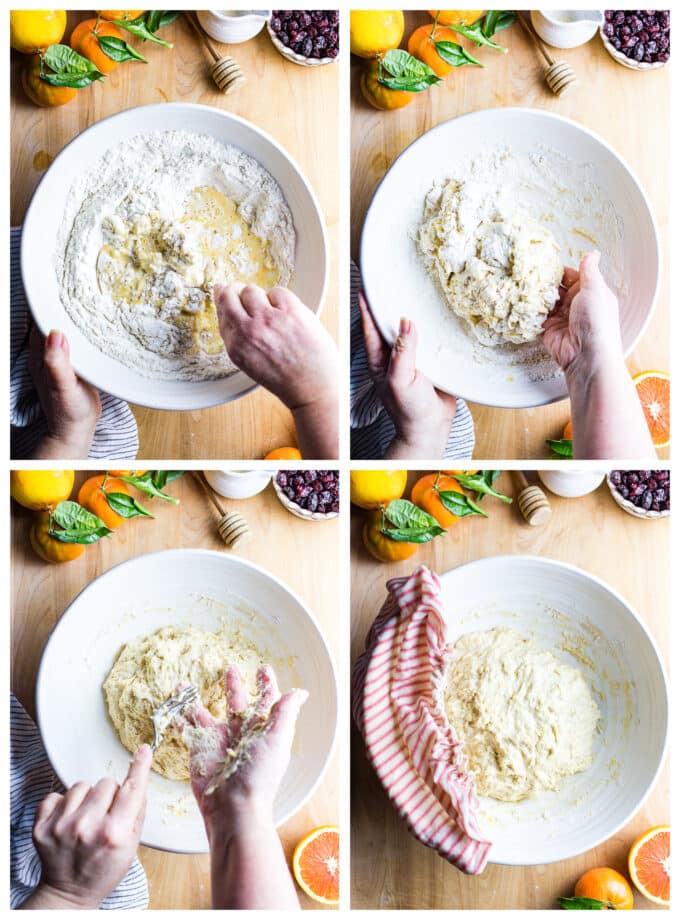
- To the wet ingredients, add the bread flour, whole wheat flour and salt. First, mix with a fork, the dough will be shaggy. Then mix by hand, mixing, folding and pushing the dough until the flour is fully incorporated and no dry bits are present. The dough will seem dry at first, but the more you work the dough, the more hydrated it will become. The dough will feel stiff and it will stick to your fingers as you go. Do this for about 3-4 minutes. Then, use the fork to scrape the dough off your fingers as much as you can. Cover the bowl with a damp tea towel. Set a timer for for 30 minutes and allow the dough to rest for 30 minutes. Now is a good time to feed/refresh your starter.
- Add the Cranberries: After the dough has rested, mix in the cranberries. To do this, add the cranberries to the dough in three additions. Dump 1/3 of the cranberries on top of the dough and begin folding the dough over and on top of itself, about four times, incorporating the cranberries. Do this two more times until there are no remaining cranberries. Do this for about 2-3 minutes or until the cranberries are evenly distributed in the dough. The dough will be stiffer, and sticky. Cover bowl with a damp tea towel, set a timer for 30 minutes and allow the dough to rest for 30 minutes.
- Fold the Dough: After the dough has rested, fold the dough. To do this, grab a portion of the dough while it remains in the bowl, stretch it up and fold it over, pressing your fingertips into the opposite side of the dough. You'll notice the dough is a little less stiff and more workable at this point. Repeat, until you've worked your way around the dough. This is the first fold. You can stop here and begin bulk fermentation, but If time permits, and optimally, you'll want to repeat this fold one to two more times as it improves the final dough's structure and crumb. Allow for about 30 minutes between the second and third fold.
- Bulk Fermentation (first rise): After the last fold, cover the bowl with two damp tea towels and allow to rise overnight at room temperature. This will take about 12-15 hours at 68F (20C). You can speed this along by putting the dough in a turned off oven with the light on. This way the dough will ferment in about 10-12 hours. Use the time as a guide and not a determining factor. The dough is ready when it no longer looks dense, is jiggly when the bowl is shaken, and has about doubled in size.
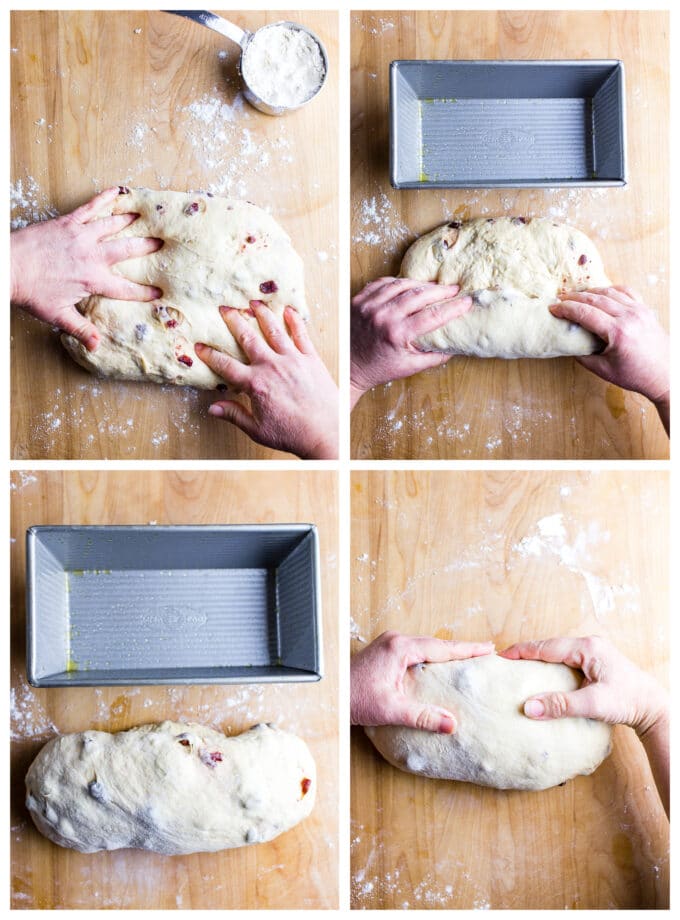
- Shape the Dough: With damp fingertips, coax the dough into a floured work-surface. Take a portion of the dough, gently stretch it towards you and fold it over towards the center, pressing it down gently. Repeat this process until you work the dough all the way around the dough. Using a bench scraper flip the dough over, cover with a tea towel rest the dough for 10-15 minutes. While the dough rests, throughly coat the inside of a 9×5" (23cm X 12cm) loaf pan with olive or coconut oil. Set aside. Flour your work surface and using a bench scraper flip the dough back over. Use the photos in the blog post to help guide shaping. Gently shape the dough into a rough rectangle by tugging on the ends and by dimpling the dough (think focaccia), to roughly 6" wide and 8-10" long (use the length of your bread pan to guide shaping). Starting at the long end, roll the dough up, like a cinnamon roll, and pinch the seam. I like to remove any cranberries on the surface and nudge them underneath the dough because they tend to burn if allowed to stay on top. Arrange the dough so that the seam is on the bottom. Rock it back and fourth a bit and gently fluff the ends in towards the center of the bread. Scrape your work surface area of any excess flour and very lightly spritz it with water. Place the dough on the spritz of water (seam side down) and using lightly floured hands, cup the back of the dough and gently pull it towards you until the surface is taught. Gently "fluff" the ends in again if needed to fit into the loaf pan. Once the surface is taut and with one swift move, use the bench scraper to scoop the dough up and, place the dough into the prepared loaf pan. If there's any misshapen edges that need tucking in, use a moist rubber spatula to gently finesse and shape the edges of the dough down into the pan.
- Proof the Dough (second rise): Cover the pan with a damp tea towel and allow the dough to rise until the dough rises to about 1"- 1 1/4" (2.5cm – 3.2cm) above the lip of the pan at the center of the dough. The amount of time will vary depending on ambient temperature. At 68F (20C) proofing takes about an hour and a half to two hours. In an turned off oven with the light on, about an hour. Set an oven rack in the center of the oven. Preheat your oven to 400F (204C).
- Bake the Dough: Place the loaf into the preheated oven and then, reduce the oven temperature to 375F (290C). **Bake for 25 minutes, then take a large piece of foil and tent the bread, otherwise it will get too dark**. Continue baking for another 20-30 minutes, for a total bake of 45-55 minutes. The bread is ready when the internal temperature of the loaf is between 190F – 205F (87C – 96C) and the surface of the dough is dark golden brown. Transfer to a wire rack. Cool for 10 minutes in the pan. Remove the bread, then transfer to a cooling rack. Cool 1 hour before slicing.
- Storage Notes: Sourdough is best consumed on the same day it's baked, but it lasts for 3-4 days stored at room temperature. Store at room temperature cut side down on a cutting board. This bread freezes beautifully. Store sliced bread in a freezer bag for up to two weeks. Thaw at room temperature. This bread can go straight from freezer to toaster to make the most delicious toast!
Notes
*Honey or Maple Syrup: if using honey, you’ll need to tent the bread, otherwise it gets too dark. If using maple, there’s no need to tent.
**Dried Cranberries: opt for apple juice-sweetened cranberries for best flavor. I find sugar-sweetened cranberries to be a little too sweet in this recipe. Find apple juice-sweetened cranberries in the bulk bins for best value. You can use unsweetened cranberries for a tarter experience!
Nutrition
Nutrition is provided as a courtesy and is an estimate. If this information is important to you, please have it verified independently.
Made it? Leave a comment below!
The most helpful comment may include recipe rating, feedback, any modifications or helping other commentors.



This is always a hit! I always make 3 loaves as long as I’m going to the trouble of heating up my oven. I slice the extra loaves and flash freeze each slice on a cookie sheet before reassembling it back into a bread bag. Pulling out a slice or two for toast or a snack is a dream this way. Everyone always wants the recipe. Thanks for a winner!!
Thank you for your note and freezer storage tip, Karen! SO glad you’re enjoying the sourdough – hooray for three!
If I used this recipe for cinnamon raisin bread instead of orange cranberry would I add more water to equal the amount of orange juice in original recipe?
Hi Jamie! I assume that would be fine, and that’s where I’d start too. A cinnamon raisin bread is on my list! Let us know how it goes.
Thank you…I will.
Could you make this recipe into rolls instead I’d a loaf. I was thinking it would be a nice grab and go breakfast.
Hi Jennifer! Yes… follow my Sourdough Rolls recipe for shaping and baking, tucking in any cranberries that are on top so they don’t burn. Also, if the rolls start getting too dark, tent with foil. I hope this helps!
This bread turned out perfectly delicious! The crumb is spot on!!
Hi Linda! Best news ever! Thank you for your note and five star review 😀
This bread was so good! I have been struggling with a couple of other sourdough recipes and was so happy when I had a win with this one. Bread was light and fluffy on the inside and flakey on the outside. Now to stop myself from eating the whole loaf.
I would order this from a bakery! I swapped the honey for sugar and cut it in half since I used sweetened craisins. The bread is to die for! Also baked in a Dutch oven like other users. Definitely adding this to my make again list.
This is one of my favorite recipe. My family all agree. Thank you for sharing
Hi!
I would like to ask if it is possible to make this bread with regular dried yeast (and if yes, what should be the quantity)? (I live in a warm country and because of that I have a lot of problems with the sourdough starter – it spoils easily).
Thank you!
Hi Joana! You could, but you would need to adjust the water, maybe some of the orange juice due to the acidity that it introduces into the bread and like you said, add dried yeast. How much, I don’t know. If you experiment, please keep us posted!
Great recipe – I made it exactly as the recipe is written. The first time I did it in a loaf pan and the second time I made it in a Dutch oven (with no changes to the temperature). I preferred the Dutch oven version. I used a banneton to shape it and preheated the Dutch oven and lid before placing the loaf in it to bake. I removed the lid after about 25 minutes to brown the top.
Hooray! Thank you for your note, and sharing your tips, Barb. SO happy you’re enjoying the sourdough!
I rarely comment on recipes, but this is really a wonderful bread! I used maple syrup, maybe 4 Tablespoons, and doubled it with no trouble. I am thinking about adding wild rice next time!