
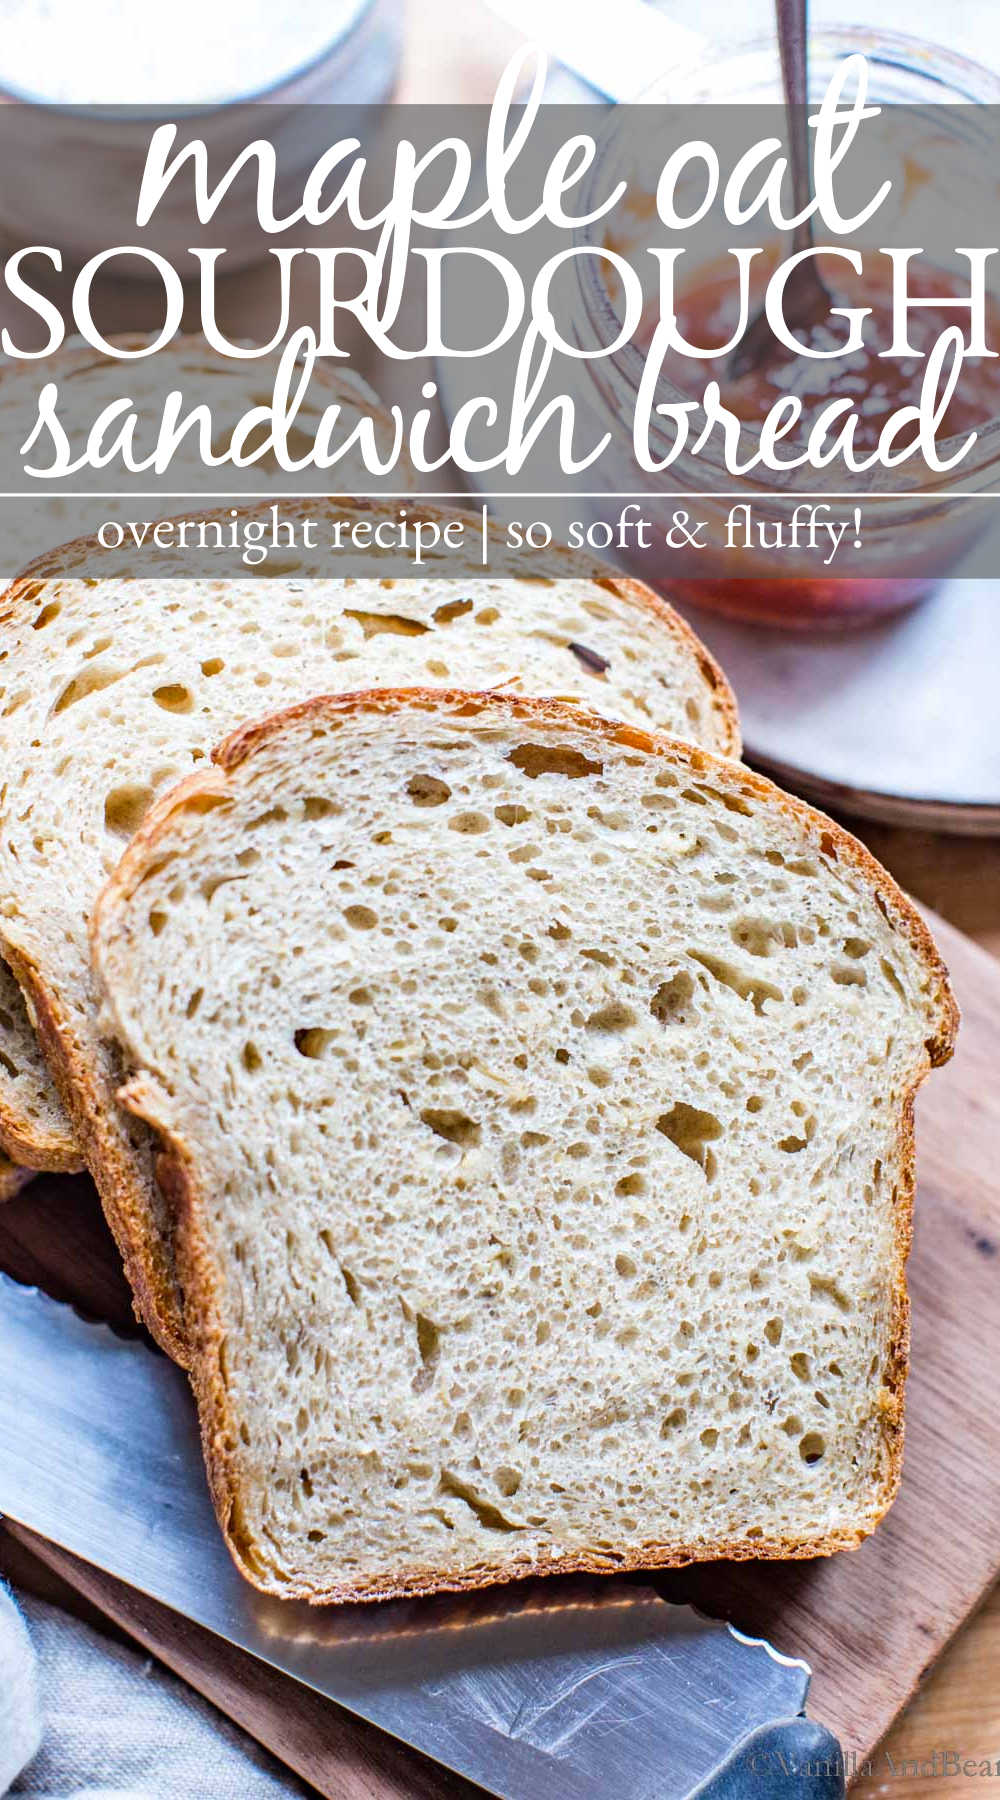
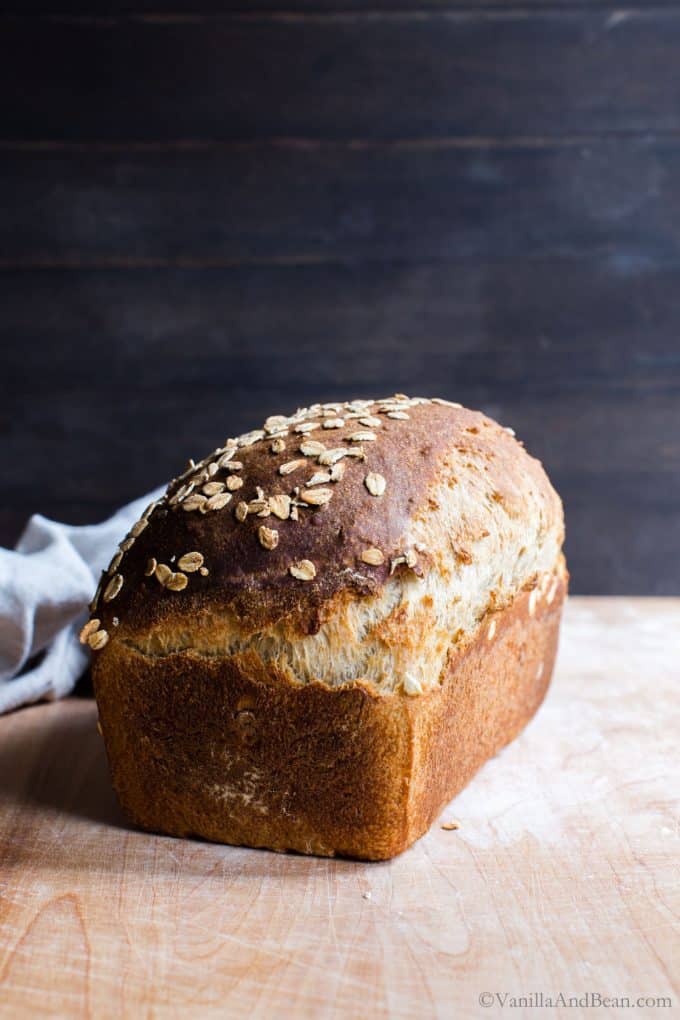
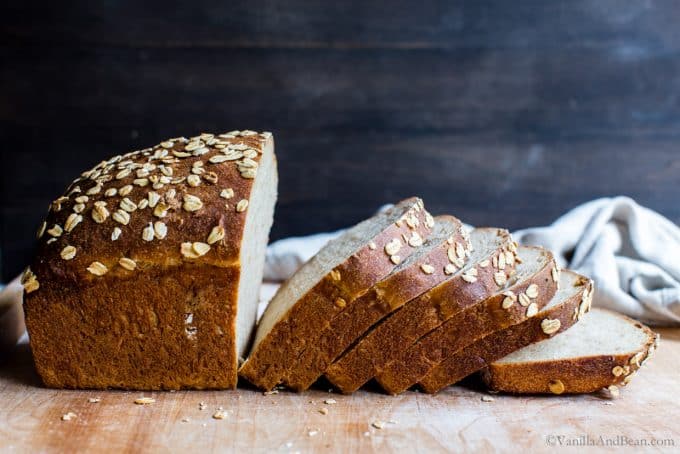
Lightly sweetened, my overnight maple oat sourdough sandwich bread features whole rolled oats and whole wheat flour. It has a soft tender crumb and earthy flavor, ideal for sammies and toast! Use a fluffy, doubled in size Sourdough Bread Starter for the best crumb.
⭐️⭐️⭐️⭐️⭐️ Recipe Review: “Found this recipe a couple of months ago and it turns out perfect every time! It’s my new go to for sandwich bread.” ~ Kris
You will receive recipes and kitchen tips, along with information about our partners and offerings. For more details, review the Vanilla And Bean privacy policy.
Sourdough Love
There are many sourdough variations, and while I adore a crusty classic or multigrain sourdough, I can never pass up a softer loaf for toast, sandwiches, and French toast.
So I set out to create a softer loaf with earthy flavors in the shape of traditional sandwich bread. This loaf, my Soft Multigrain Sourdough Sandwich Bread and Fresh Sourdough Sandwich Bread are among my favorites. They all stand up to the sandwich test and taste delicious!
This Recipe Is
- made overnight with a short morning proof
- earthy, and lightly sweetened
- tender and so soft
If you make homemade sourdough bread recipes, you’ll love this reader favorite sandwich bread.
Need a sourdough starter? Follow my step by step guide to make Homemade Sourdough Bread Starter.
__________________________
How to Make Maple Oat Sourdough Sandwich Bread
step by step
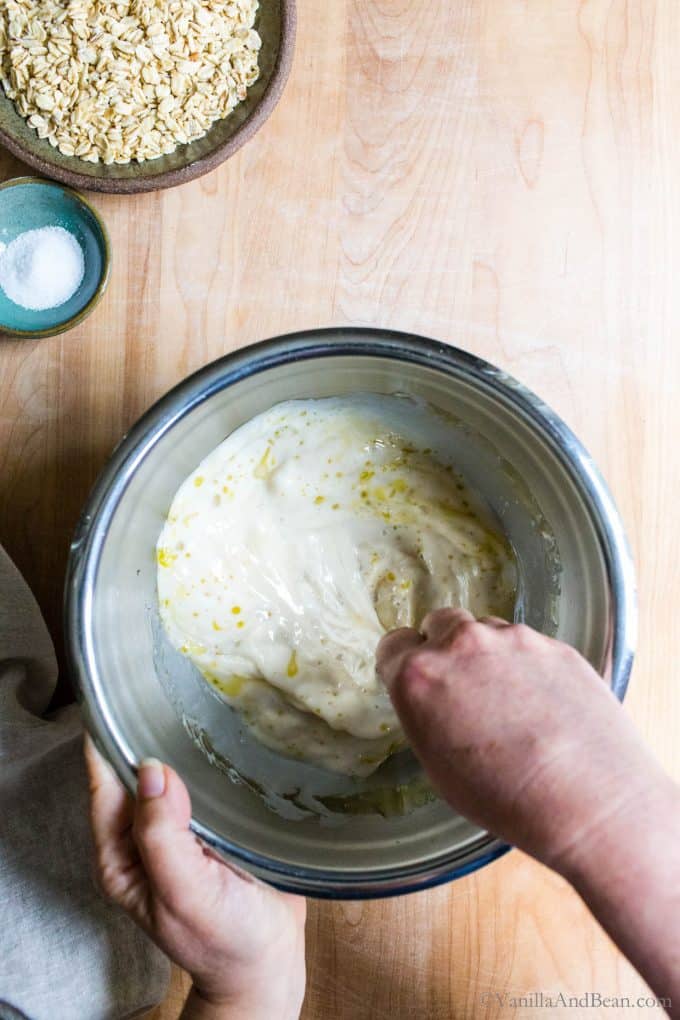
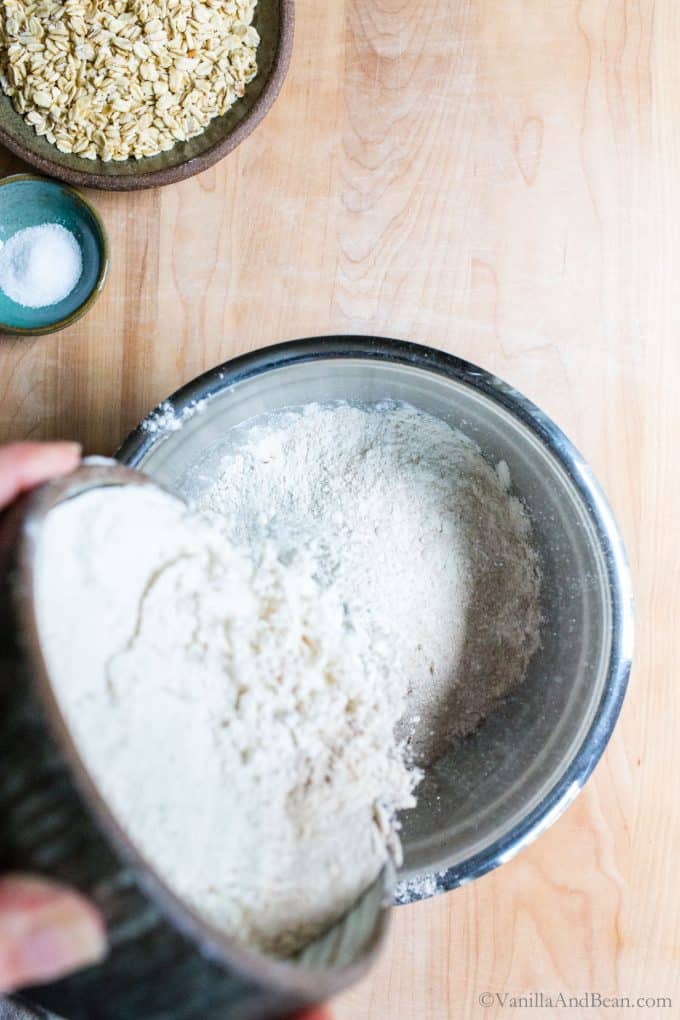
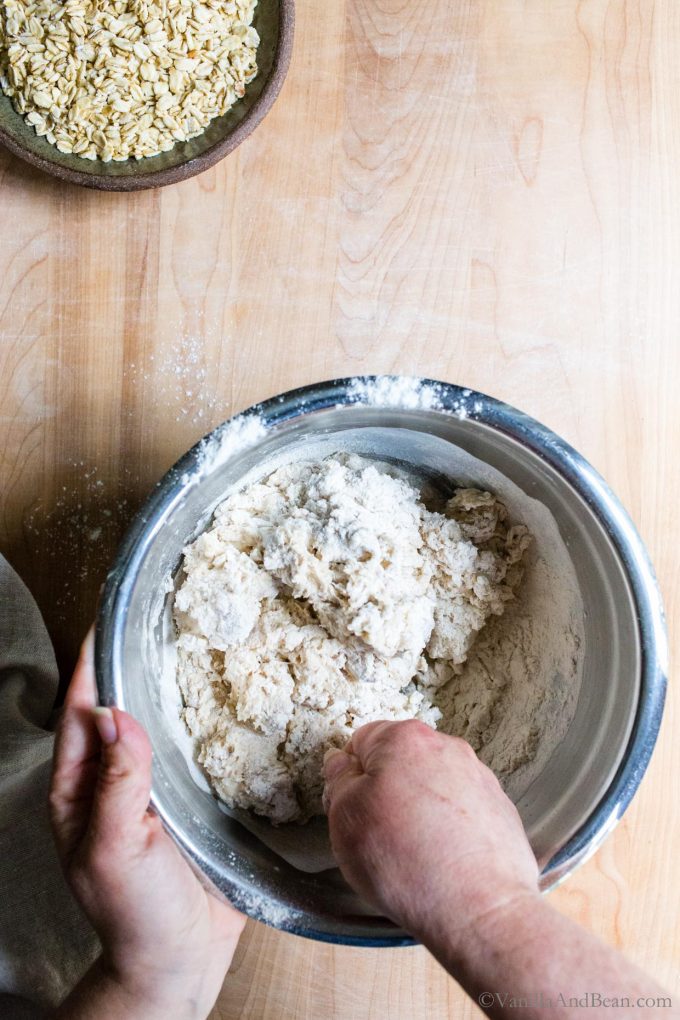
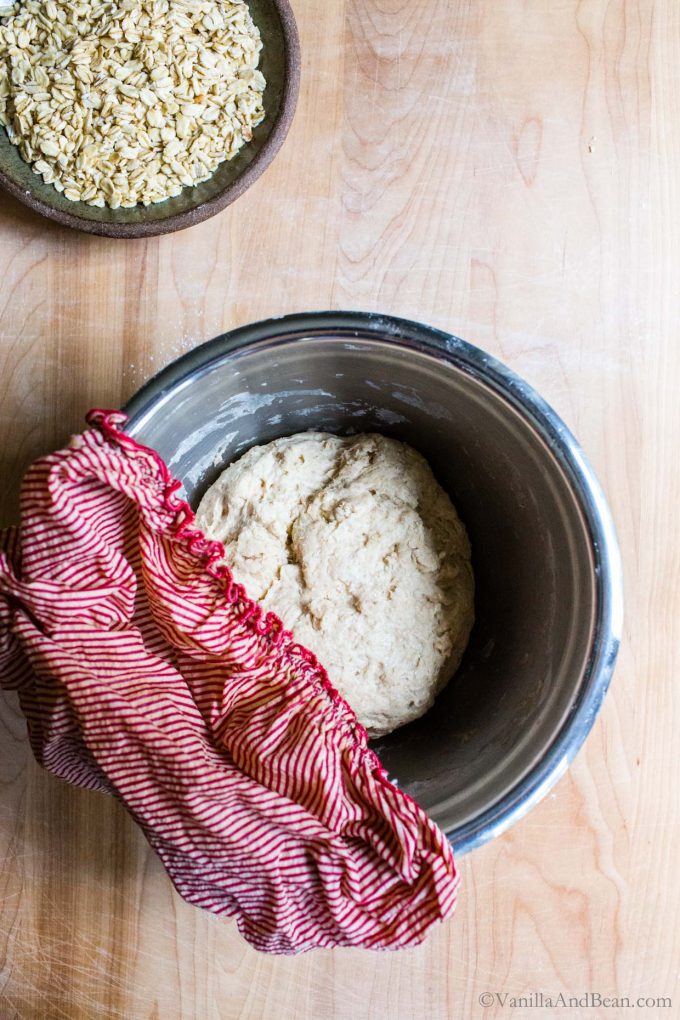
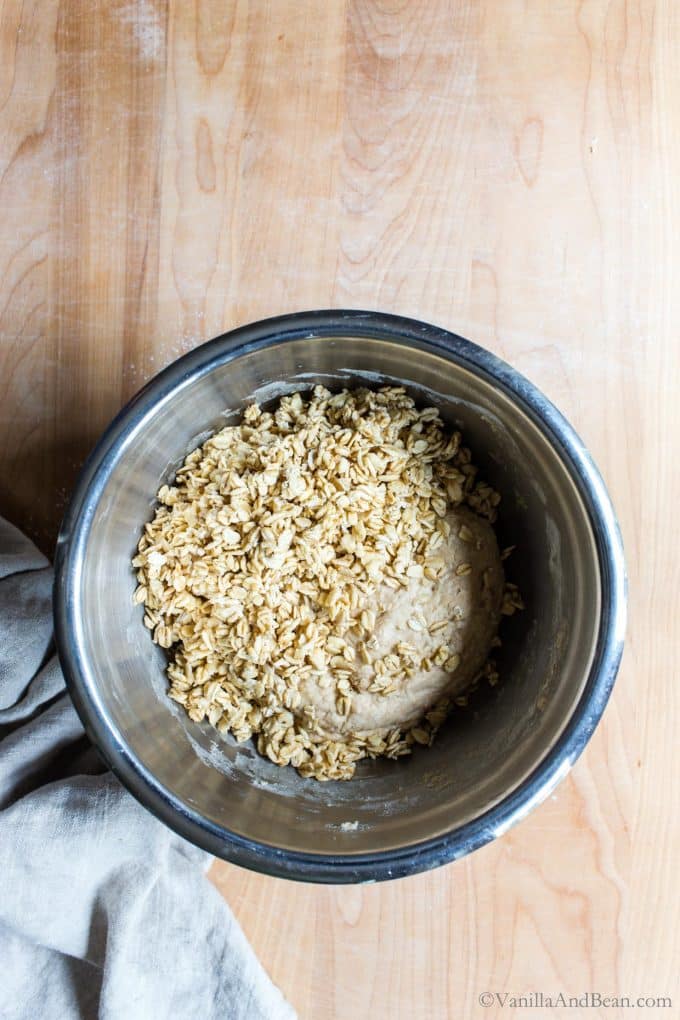
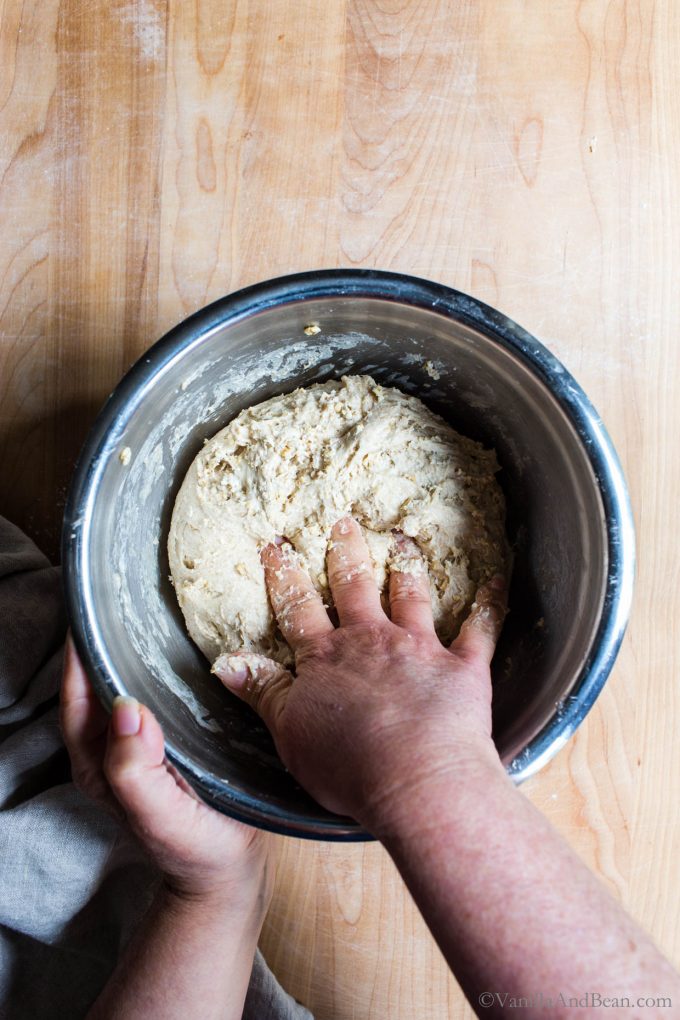
The rolled oats are a nice surprise in this dough. They soften as the dough ferments, so they’re barely noticeable in the crumb yet add a soft, earthy flavor to this loaf.
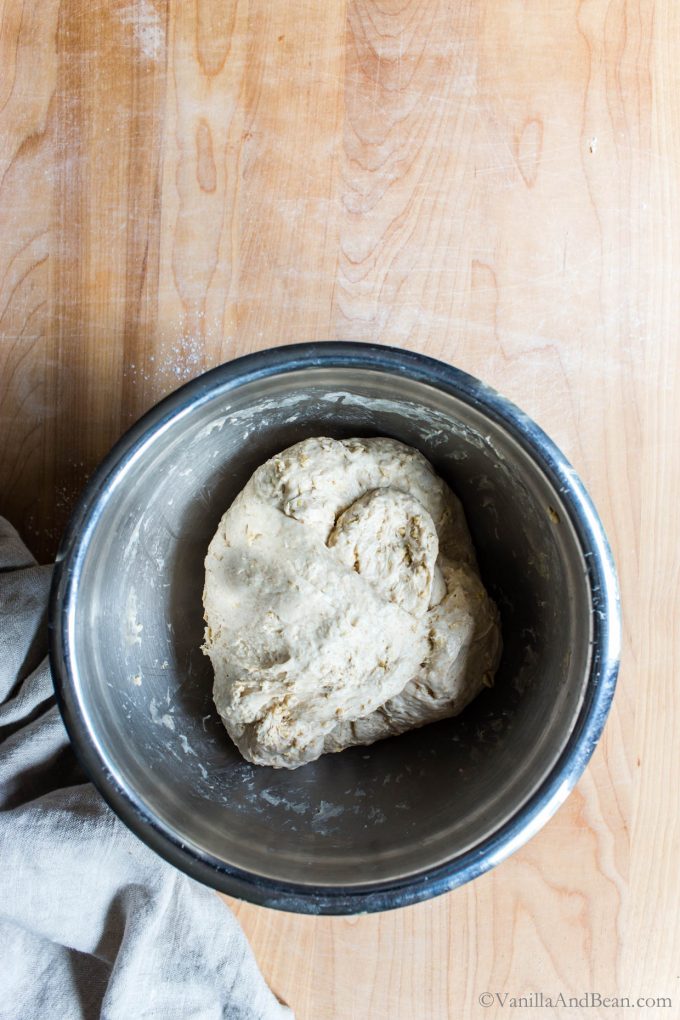
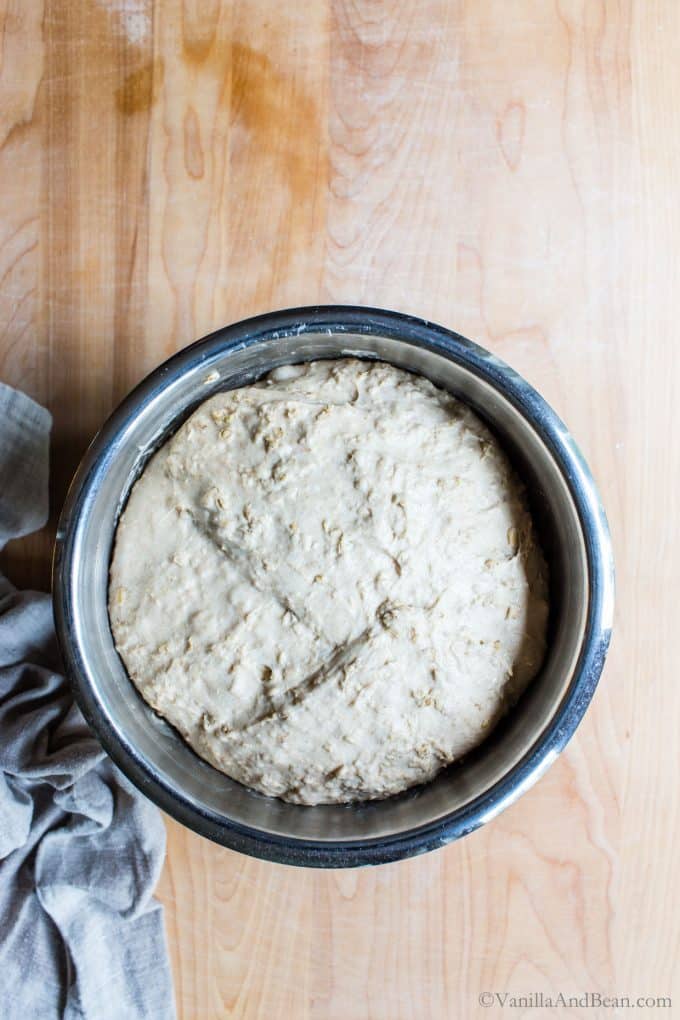
Bulk fermentation (first rise) is complete when the dough no longer looks or feels dense, is tacky, not sticky, is jiggly when the bowl is shaken, and has about doubled in size. You may also see a few large bubbles on the surface of the dough.
_____________________
How to Shape the Dough
Fitting Sourdough into Your Schedule
When it comes to sourdough, fitting it into your schedule can be achieved through a little strategic planning and, if needed, using a technique I keep in my back pocket for when something comes up and I need to extend the time between mixing and proofing…
…because things come up, right?
Retarding the dough is optional but is a tool for bread bakers to manage the speed at which the dough rises. Retardation is simply the process of placing the dough in the refrigerator to slow down fermentation so the rise takes longer. This is handy for flavor development but also, as a time management tool.
When to Retard the Dough
I do this when I mix in the morning. I just pop it in the fridge for the day, then pull it to room temperature before I go to bed. It’s doubled in size by morning!
During Bulk: for this loaf, retard during bulk to slow down the rise allowing flexibility for when the dough will be shaped, proofed and baked. The dough still needs to double in size during bulk fermentation (first rise), so after refrigeration I pull it to room temperature, and let it finish rising, until it doubles in size. I’ve not tested the limits of this, but up to about 10 hours in the refrigerator generally fits my schedule.
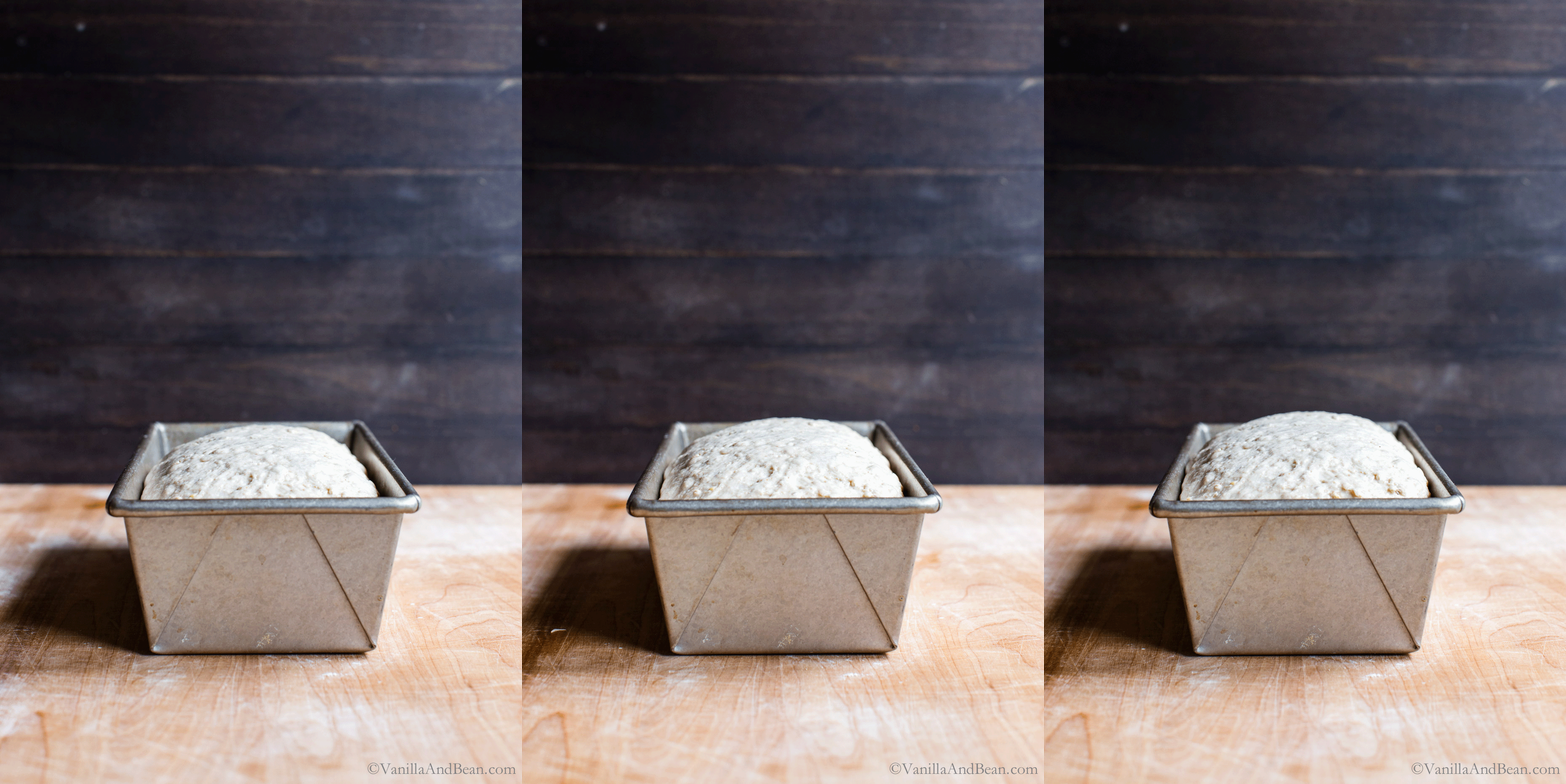
When is the Second Rise (proof) Done?
When the dough has risen in the loaf pan to about 3/4″ – 1″ (2cm – 2.54cm) above the lip of the pan at the center. Have a ruler ready for this part! The amount of time it takes to proof will vary depending on ambient temperature. At 70F (21C) proofing takes about an hour. It can take up to twoish hours in a chilly kitchen (raises hand!).
If you’d like to speed this process along, you can put the loaf in a turned off oven with the light on. Just be sure to remove the loaf before preheating your oven for baking!

Traci’s Tips
- Whole Wheat Bread Flour: this maple oat sourdough sandwich bread calls for whole wheat bread flour, which can sometimes be hard to find. If unavailable, use regular whole wheat flour. The difference is subtle, but whole wheat bread flour yields a little bit stretchier dough and is easier to work with.
- Kitchen Tools: I recommend a digital oven thermometer for monitoring accurate oven temperature and weighing your ingredients using a digital kitchen scale for best outcome (affiliate link).
Overnight Maple Oat Sourdough Sandwich Bread
Ingredients
For the Soaker:
- 1 C (100g) Whole Rolled Oats, plus 2 Tbs for the top
- 1/2 C (105g) Water, room temperature
For the Dough:
- 3/4 C (150g) Sourdough Starter, 100% hydration, previously feed and bubbly
- 1 C (230g) Milk, (nut milk or whole dairy milk) I use 1/2 diluted unsweetened cashew milk – 80F (26C)
- 1/4 C (80g) Maple Syrup
- 1 Tbs (14g) Olive Oil, + more for oiling the pan
- 1/2 C + 1 Tbs (100g) Whole Wheat Bread Flour , (see note**) or whole wheat flour
- 2 C + 3 1/2 Tbs (300g) Bread Flour
- 1 1/2 tsp (10g) Fine Sea Salt
Instructions
For the Soaker:
- Add the oats to a small bowl and pour the water over them. The water wont fully cover the oats – that's okay. Set aside.
For the Dough:
- Mix the Dough: In the evening, whisk the starter, milk, maple syrup and oil together in a large bowl with a fork. Add the flours and salt. First, mix with a fork, the dough will be shaggy. Then mix by hand, mixing, folding and pushing the dough until the flour is fully incorporated and no dry bits are present. It will seem dry at first, but the more you work the dough, the more hydrated it will become. The dough will feel stiff and it will stick to your fingers as you go. Do this for about 3-4 minutes. Use the fork to scrape off the dough on your fingers as much as you can. Cover bowl with a damp tea towel. Set a timer for for 30 minutes and allow the dough to rest for 30 minutes. Now is a good time to feed/refresh your starter.
- Incorporate the Soaker: After the dough has rested, mix in the soaker. To do this, dump the soaker on top of the dough and begin kneading and folding the dough over and on top of itself, incorporating the ingredients of the soaker. Do this for about 2-3 minutes or until the soaker is evenly distributed in the dough. It will seem like a lot of added bits, but as you work the dough and as the dough develops through fermentation, the soaker will incorporate. The dough will be stiff, wet and sticky. Cover bowl with a damp tea towel, set a timer for 30 minutes and allow the dough to rest for 30 minutes.
- Fold the Dough: After the dough has rested, fold the dough. To do this, grab a portion of the dough while it remains in the bowl, stretch it up and fold it over, pressing your fingertips into the center of the dough. You'll notice the dough is a little less stiff and more workable at this point. Repeat, until you've worked your way around the dough. If the dough feels *too* stiff, you can always let it rest another 15 minutes. This is the first fold, and you can stop here and begin bulk fermentation, but If time permits, and optimally, you'll want to repeat this fold two more times as it improves the final dough's structure and crumb. Allow for about 30 minutes between the second and third fold.
- Bulk Fermentation (first rise): After the last fold, cover the bowl with a damp towel and allow to rise overnight at room temperature (see note* on optionally retarding the dough). This will take about 8-10 hours at 70F (21C), but in a cooler kitchen the dough can take up to 12-14 hours to rise – this is the norm in my chilly kitchen 66F (18C). Use the time as a guide and not a determining factor. The dough is ready when it no longer looks dense, is jiggly when the bowl is shaken, and has about doubled in size.
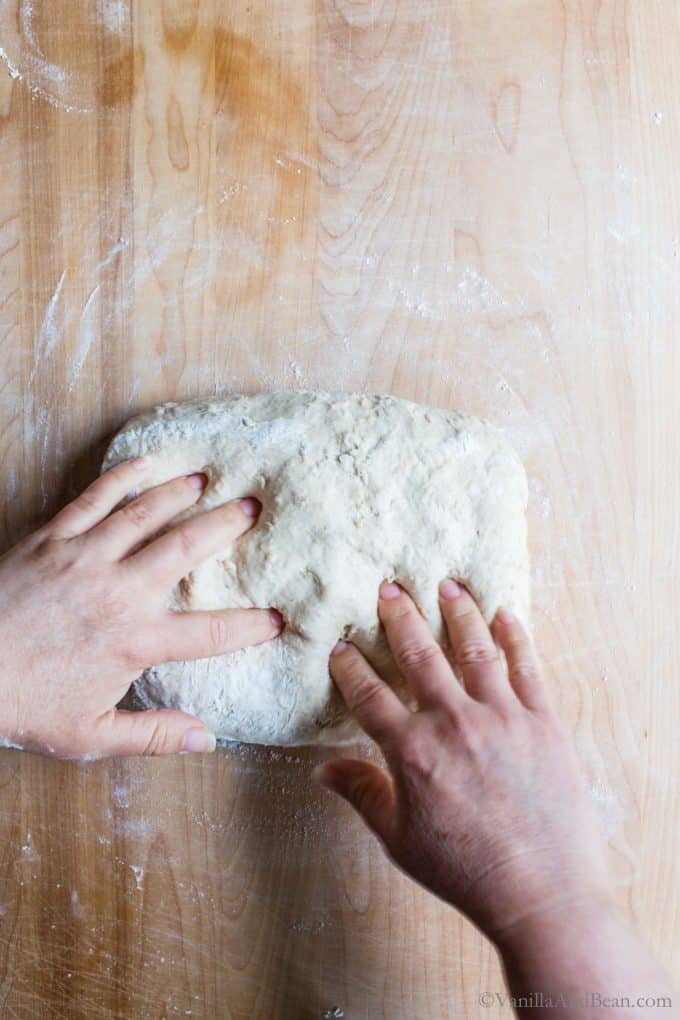
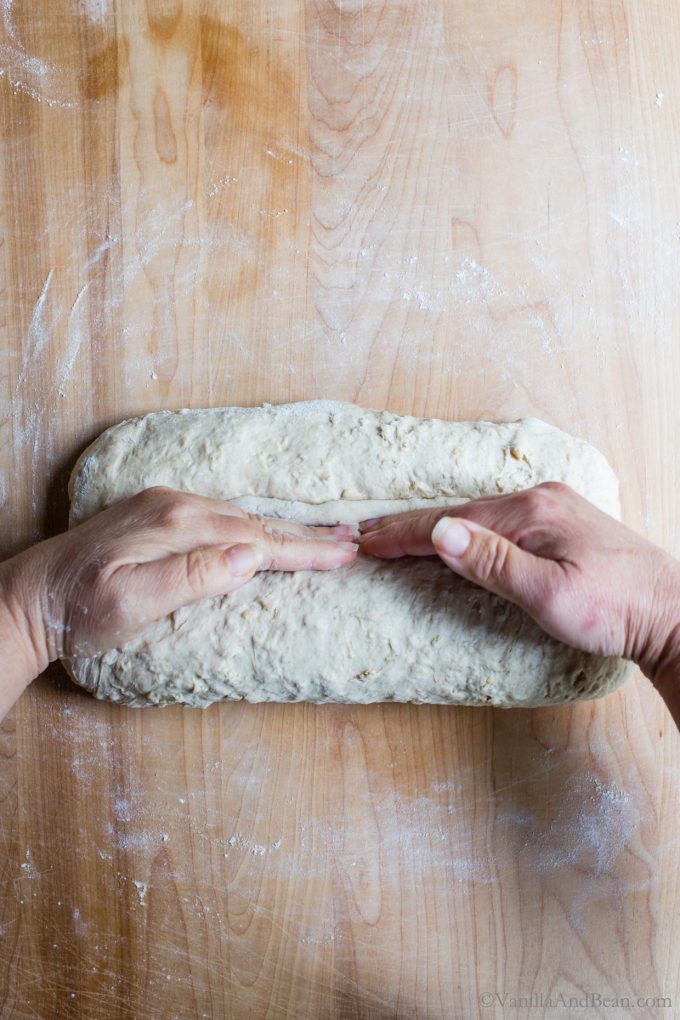
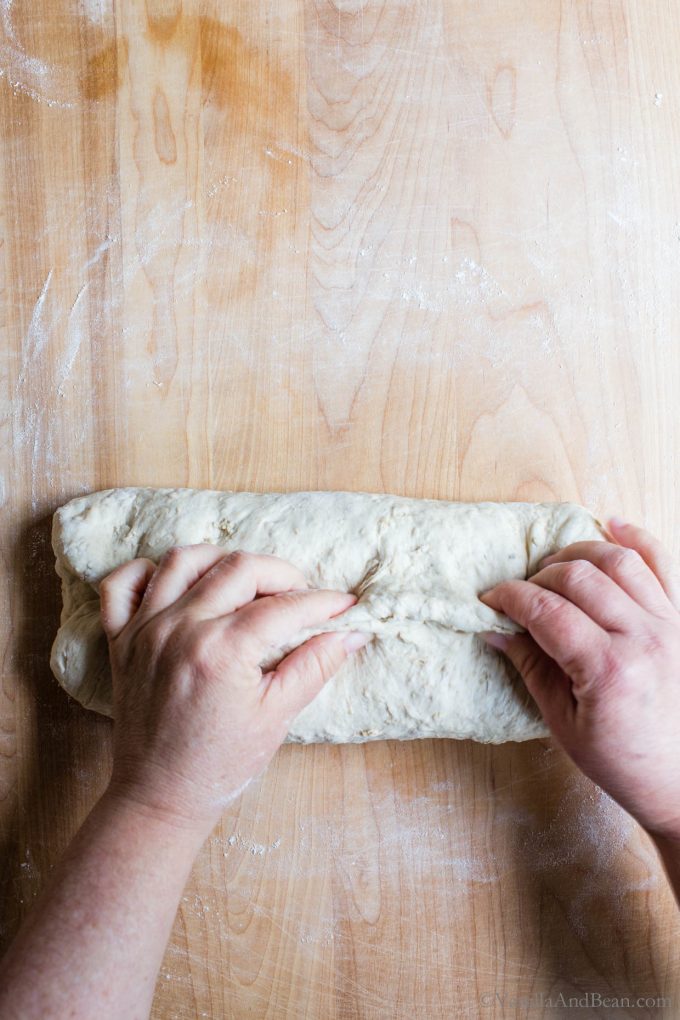
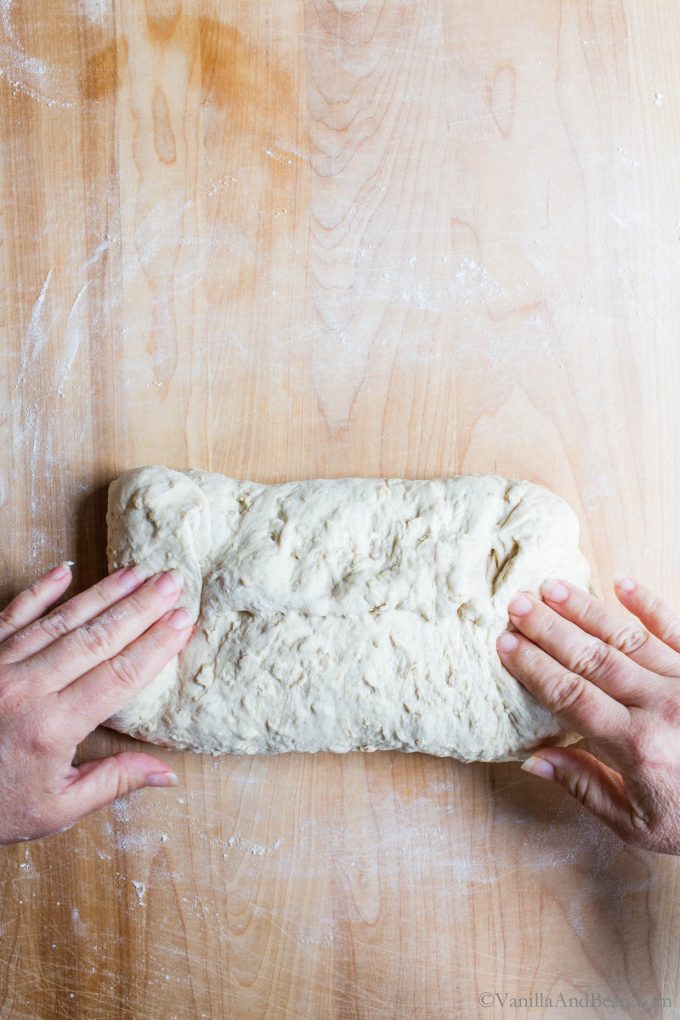
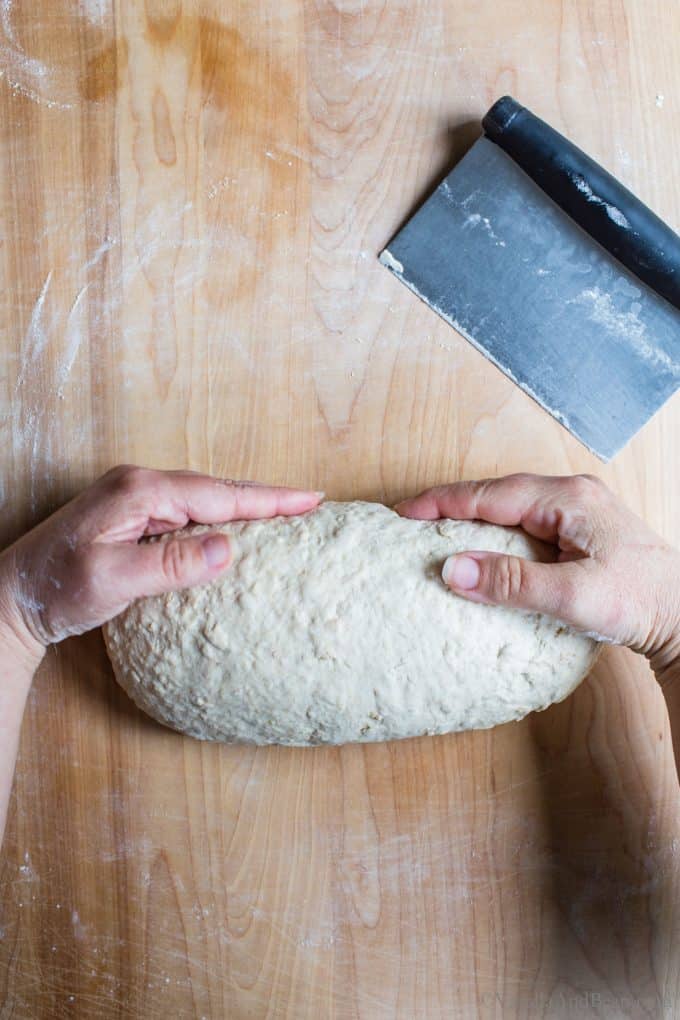
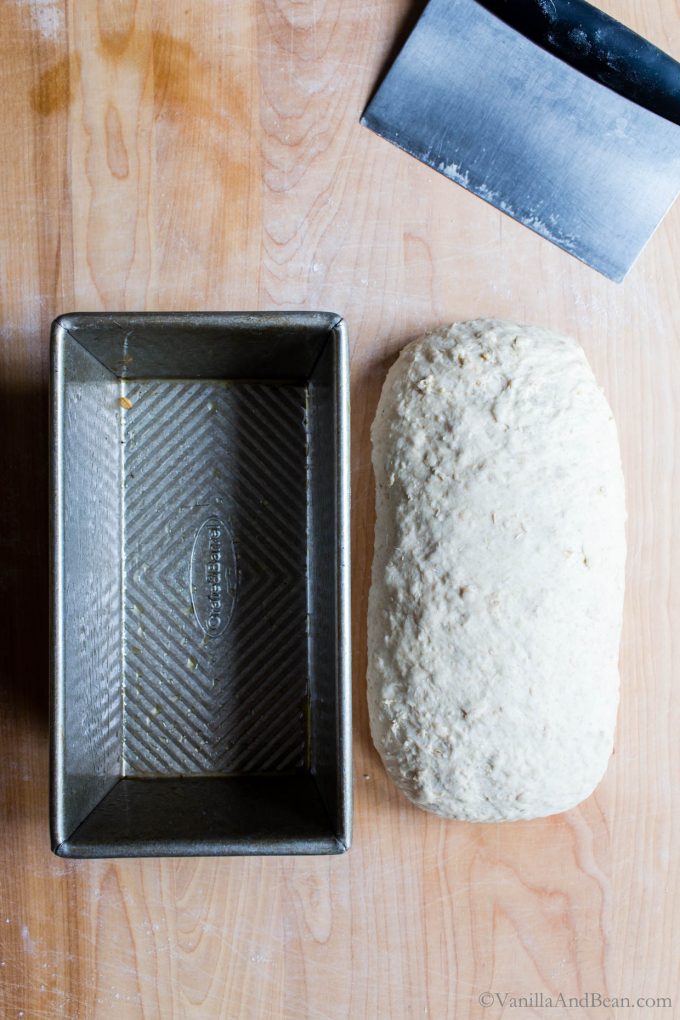
- Shape the Dough: In the morning, and with damp fingertips, coax the dough into a floured work-surface. With moist fingers, take a portion of the dough, gently stretch it towards you and fold it over towards the center, pressing it down gently. Repeat this process until you work the dough all the way around the dough. Using a bench scraper flip the dough over, cover with a tea towel rest the dough for 15-20 minutes. While the dough rests, throughly coat the inside of a 9×5" (23cm X 12cm) loaf pan with olive or coconut oil. Set aside.Flour the work surface and using a bench scraper flip the dough back over. Use the photos in the blog post to help guide shaping. Gently shape the dough into a rough rectangle (sort of a football/oblong shape if you can) by dimpling the dough (think focaccia), to roughly 6" wide and 8-10" long. Fold the dough lengthwise 2/3 over onto itself and crease it firmly using the pinky side of your hand. Fold the 1/3 piece left towards the crease and pinch the seam closed. Fold in the ends, coming in about an 3/4" – 1" and pinch the seam closed. Flip the bread over and rock it back and fourth a bit and gently fluff the ends in. Cover with a tea towel and allow the dough to rest for about 5-10 minutes. Scrape your work surface area of any excess flour and very lightly spritz it with water. Place the dough on the spritz of water (seam side down) and using lightly floured hands, cup the back of the dough and gently pull it towards you until the surface is taught. Gently "fluff" the ends in again if needed to fit into the loaf pan.Once the surface is taut and with one swift move, use the bench scraper to scoop the dough up and, place the dough into the prepared loaf pan. If there's any misshapen edges that need tucking in, use a moist rubber spatula to gently finesse and shape the edges of the dough down into the pan.
- Proof the Dough (second rise): Cover the pan with a damp tea towel and allow the dough to rise until the dough rises to about 3/4" – 1" (2cm – 2.54cm) above the lip of the pan at the center of the dough. The amount of time will vary depending on ambient temperature. At 70F (21C) proofing takes about an hour. In my chilly kitchen, about two hours.Set an oven rack in the center of the oven. Preheat your oven to 450F (232C).
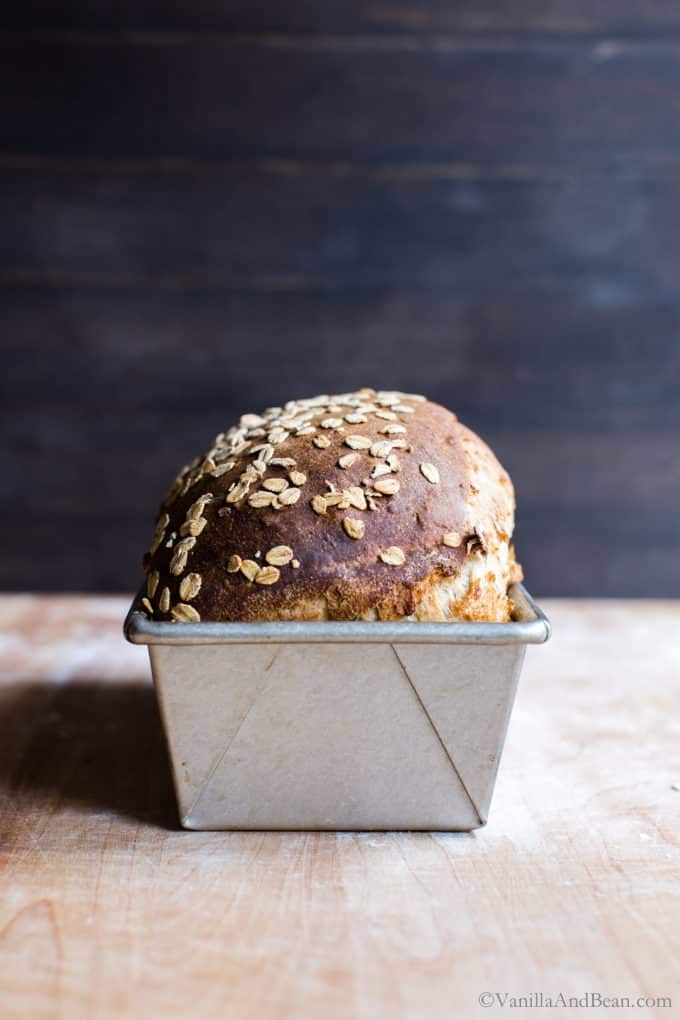
- Bake the Dough: Lightly spritz the top of your loaf with water and sprinkle 1-2 Tbs of Rolled oats over the top. Place the loaf into the oven and then, reduce the oven temperature to 400F (204C). Bake for 45-55 minutes, rotating and tenting the loaf at about 25-30 minutes so it doesn't get too dark. The bread is ready when the internal temperature of the loaf is between 190F – 205F (87C – 96C). When done, transfer to a wire rack. Cool for 10 minutes in the pan, then transfer to a cooling rack. Cool 1 hour before slicing.
- Storage Notes: Sourdough is best consumed on the same day it's baked, but it lasts for 3-4 days stored at room temperature. Store at room temperature cut side down.This bread freezes beautifully. Store baked bread in a freezer bag either whole or sliced for up to two weeks. Thaw at room temperature. This bread can go straight from freezer to toaster to make the most delicious toast!
Notes
Nutrition
Nutrition is provided as a courtesy and is an estimate. If this information is important to you, please have it verified independently.
Made it? Leave a comment below!
The most helpful comment may include recipe rating, feedback, any modifications or helping other commentors.




Just made the oatmeal and maple syrup bread, pure deliciousness. Thank you for making your recipes available.
Love hearing this, Marys. SO glad you’re enjoying the sourdough recipes! I appreciate your note!
I love this recipe but the sides of my loaf always crack. Do you have any advice for this?
Hi Mallory! Thank you for your note. I’m curious about proofing. Are you using a ruler to measure 3/4″ – 1″ above the lip of the pan at the center of the dough? This is an important indicator as to when the dough is ready to bake. Also, you can try scoring the top of the dough down the middle. That will allow the steam to escape while the dough is baking, but in a directed area.
Great recipe even for a beginner in sourdough. Turns out great each time!
Love hearing this, Niki! Thank you for your note!
I will try a longer second proof next time! this time I did make an expansion cut but it still cracked.
This is an excellent recipe. It was my first time using a soaker, which was fun. This bread makes EXCELLENT toast, grilled sandwiches and the crumb is about perfect. I was hoping for a bit more sweetness, but the yeast really eats it up….im going to switch to honey next time and add a touch more. My only word of advice is to use a large loaf pan. The 9×5 is really too small. Next time ill use my 10X5. This is the first sourdough sandwich bread I have LOVED!
Best news ever, Shelley! Thank you for coming back and letting us know!
Awesome bread. I substituted honey for the maple syrup! Lovely dough to work with.
Love hearing this, Lyn! Thank you for your honey sub note.
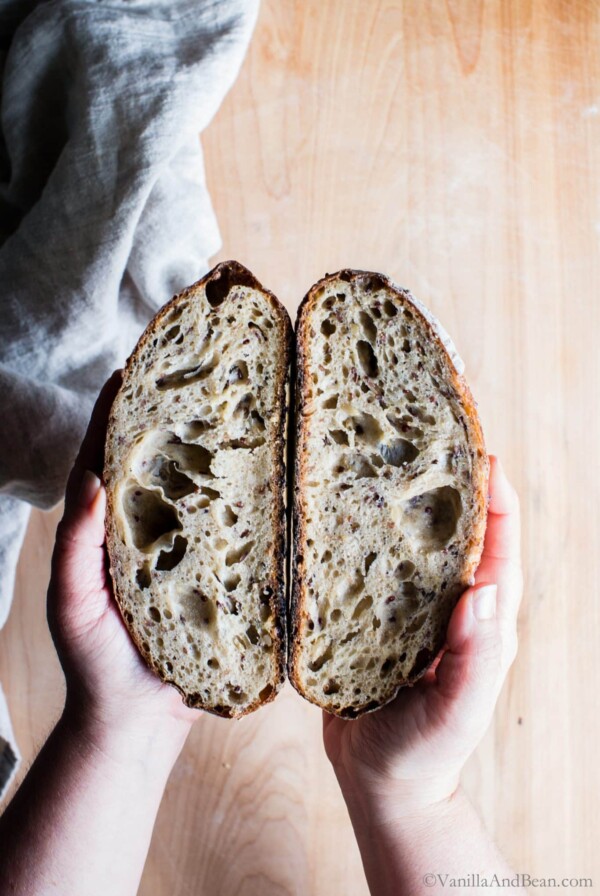
Excellent! The crust is soft yet crisp, the crumb slightly open yet dense enough for sandwiches. The flavor is deliciously homemade, slightly “sour” and the texture is chewy but NOT gummy. (I live at 6000 ft but it rose beautifully.) My husband was pleased I made a loaf for sandwiches because I usually make artisan bread that has a very chewy, crackly crust and free form, and doesn’t always raise reliably. He rated this a five.
Thank you for your note, Dianne! I’m so glad it rose beautifully at 6000 ft – thank you for sharing your tip. Hooray for a rating of five. It’s a win-win!
This was not at all as intimidating as some of the other recipes I found for oat bread, and it came out so good. I appreciate the very detailed instructions which are important to a beginner like me. I used soy milk since we are dairy free and subbed honey for maple syrup because I like it better. The dough wasn’t nearly as hard to work with as I thought it would be. It did take longer to ferment and proof in my cold kitchen which is weird b/c I’m at 6,200′ and usually doughs ferment faster here. But I watched it and did the poke test many times. It took a full three hours to proof this morning and my kitchen is 68 degrees. Thank you for this recipe! I will make it again and again.
Hi Maria! Thank you for your note and feedback. So glad you’re enjoying the sourdough!
Could spelt flour take the place of wheat in this recipe?
Hi Sharon! I think you could, but some hydration adjustment would probably be necessary. But, I just don’t know since I have very little experience with spelt. Keep us posted if you experiment!
Is there any source of info out there you know of that discusses the different characteristics of flours? I like subbing frequently and always wished there was a source for info
There are several gluten free recipe books that are excellent (I have on my shelf), and also provide information on various gluten free flours: Alternative Baker and Flavor Flours. But, I don’t have a comprehensive source for wheat flours. There are a few books that came up through a quick search, but none that I can personally recommend.
Can i use a mixer?
Can I just not use maple syrup as don’t like sweet or is it critical to the rise?
Hi Jane! You can leave it out, however the color will be a bit lighter. I hope you enjoy the sourdough!
Jane, I made this with maple syrup, but there was no discernible sweet taste. I wanted it do eill sub honey. But honestly you cannot taste it.