

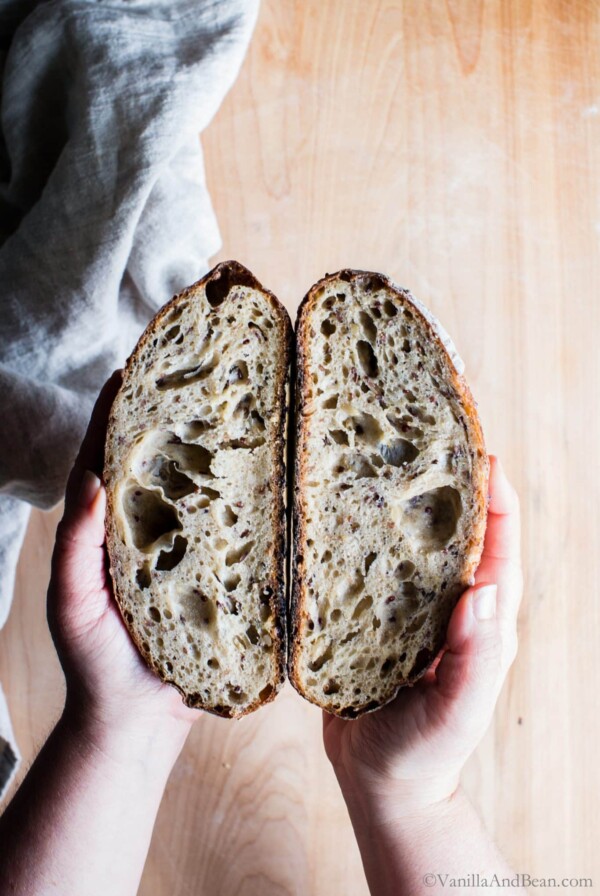
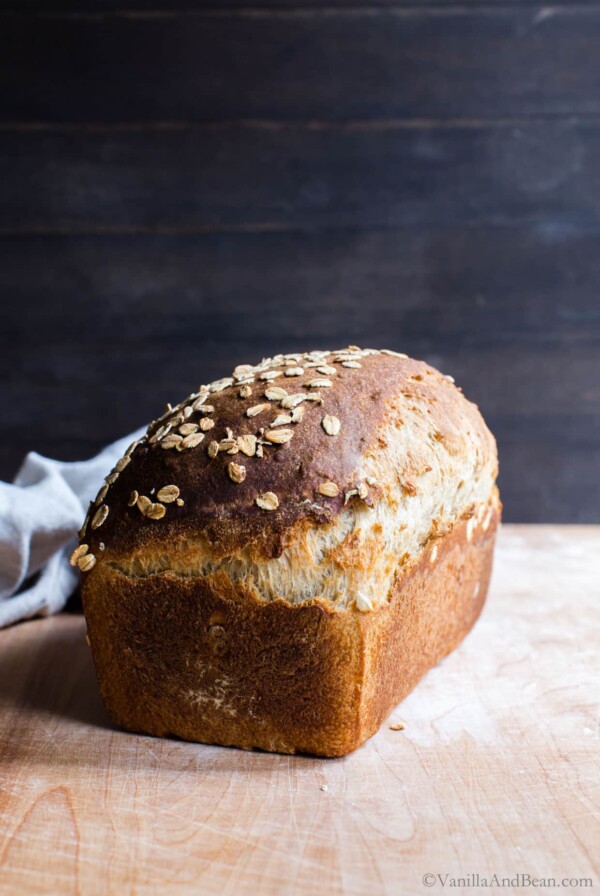
Multigrain Sourdough Sandwich Bread features whole wheat flour and bread flour with 10-grain cereal, rolled oats, sunflower seeds, flax seeds, and quinoa and is lightly sweetened with maple syrup. It has a soft tender crumb and earthy flavor, ideal for sammies and toast!
This loaf has a long overnight rise, with easy next-day shaping and about a one and a half hour proof. Baked in a loaf pan to perfection, use a fluffy, doubled in size Sourdough Bread Starter for the tastiest bread and gorgeous crumb.

You will receive recipes and kitchen tips, along with information about our partners and offerings. For more details, review the Vanilla And Bean privacy policy.
Soft and Earthy Sourdough Sandwich Bread
This loaf has roots in my days at the bakery, where I tasted my first crusty and chewy seedy multigrain sourdough bread. It was one of those moments where I wondered where’d it been all my life! My quest to recreate that flavor and texture started with this Yeasted Multigrain Sandwich Bread I posted back in 2015.
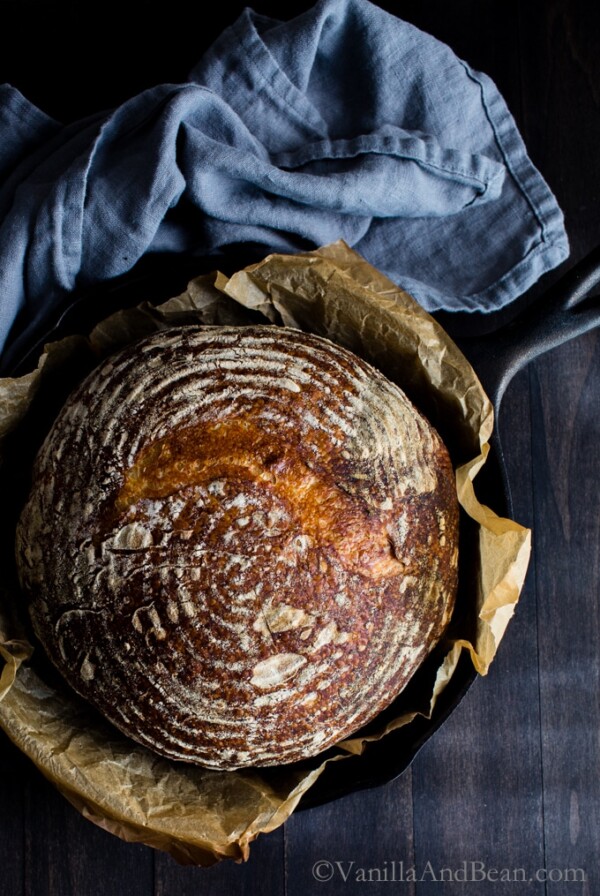
In my journey to perfect a bakery-quality multigrain sourdough loaf, I created this crusty Seeded Multigrain Sourdough Bread recipe after learning the art of sourdough. It’s not only the most frequently baked sourdough in my kitchen, but it has also become a favorite among Vanilla And Bean readers. This sourdough sandwich bread recipe is inspired by readers who wanted a soft, sandwich style loaf—thank you for your requests!
I’ve since added other sourdough sandwich bread recipes to the V&B recipe collection, like this reader favorite Maple Oat Sourdough Sandwich Bread and my newly published, Fresh Sourdough Sandwich Bread (same day recipe or overnight!). You can’t go wrong with homemade sourdough!
This Sourdough Bread Is
- soft yet sturdy
- sweetened with maple syrup
- full of seedy, and whole grain bits
You’ll love this soft sourdough sandwich bread recipe if you enjoy homemade sourdough bread.

Standout Ingredients
for the soaker
The soaker is a mixture of whole grains and seeds soaked in water prior to kneading it into the dough. Soaking softens the mixture makes it easier to incorporate.
- 10 Grain Cereal – this is a mixture of whole grains like wheat, corn rye, oats, millet, brown rice and oat bran among others. It adds flavor, whole grains and texture to this sourdough. You can find it in the cereal isle generally where you’d find oatmeal. This variety of cereal also comes in 7 grain which is a suitable substitute. I recommend Bob’s Red Mill brand.
- Quinoa – has a nutty mild flavor with a toothsome texture. In this recipe, it adds flavor, texture and color. I use red or tricolor quinoa for this recipe because the darker color stands out.
for the dough
- Ripe Sourdough Starter – use a 100% hydration, previously fed, bubbly and doubled in size sourdough bread starter. This is the natural, wild yeast, leavener that will flavor and raise your bread.
- Maple Syrup – I use just a touch for complex flavor with just an edge of sweet. It also aids in giving this bread its rich golden-brown color while also softening the texture.
- Extra Virgin Olive Oil — adds earthy flavor, interest and warmth. It also aids in softening the crumb.

“I’ve been making sourdough for nearly ten years and this is the best sandwich loaf I’ve ever made! It’s wonderful with soup and makes incredible toast!”
Robyn
__________________________
How to Make Multigrain Sourdough Sandwich Bread
step by step


Need a sourdough starter? Follow my 2-ingredient sourdough starter recipe!


How To Tell When Sourdough Has Risen Enough
It takes a bit of practice to tell when sourdough has doubled in size. Since I use a bowl rather than a straight-sided transparent vessel for fermenting sourdough, I look for other cues to tell when the dough is ready for shaping, and use the same bowls so I have a visual sense of when the dough has risen enough.
Bulk fermented (first rise) dough is ready when:
- it no longer looks or feels dense
- is jiggly when the bowl is wiggled – really jiggly!
- has about doubled, or a little more, in size
- the top has a dome shape
- you should see a few or more large bubbles on the surface of the dough
TIP: If you’d like to use a vessel that will clearly show when the dough has doubled in size, I recommend employing 1-gallon straight-sided glass cookie jar. You can treat it the same as when you’re watching your starter double in size, but instead, this is your sourdough baby in bulk ferment.


Proof the Dough (second rise)
Baking in a loaf pan makes it super easy to tell when the dough is done proofing (second rise) and is ready to bake. Allow the dough to rise until its about 1 1/4 inch (3.15cm) above the lip of the pan at the center of the dough.
The amount of time to proof the dough will vary depending on ambient temperature. At 70 Fahrenheit (21 Celsius) proofing takes about an hour. In my chilly kitchen of 68 Fahrenheit (20 Celsius), about one and a half hours.
If you’d like to speed this process along, you can put the loaf in a turned off oven with the light on. Just be sure to remove the loaf before preheating your oven for baking!


Make delicious homemade Rhubarb Freezer Jam to slather on your multigrain sourdough sandwich bread.


Traci’s Tips
- Kitchen Tools: I recommend a digital oven thermometer for monitoring accurate oven temperature and weighing your ingredients using a digital kitchen scale for best outcome.
- This loaf bakes up dark due to the maple syrup and whole grains. If getting too dark, about 30 minutes into the bake, you can tent the bread with foil.

Soft Multigrain Sourdough Sandwich Bread
Ingredients
For the Soaker:
- 1/4 cup (40 grams) 10 Grain Cereal, or 7 grain cereal
- 2 tablespoons (13 grams) Old Fashioned Rolled Oats
- 2 tablespoons (25 grams) Tri-Color Quinoa, or red quinoa
- 2 tablespoons (20 grams) Flax Seed
- 2 tablespoons (20 grams) Hulled Sunflower Seeds,, unsalted, raw
- 2/3 cup + 1 tablespoon (160 grams) Water, about 150F (65C), or soak the grains and seeds overnight in room temperature water
For the Dough
- 3/4 cup (150 grams) Sourdough Starter, 100% hydration, previously fed, bubbly and active
- 3/4 cup (170 grams) Water, about 80F (26C)
- 3 tablespoons (45 grams) Maple Syrup
- 3 tablespoons (30 grams) Extra Virgin Olive Oil
- 1/2 cup + 2 tablespoons (100 grams) Whole Wheat Flour
- 2 1/4 cup (300 grams) Bread Flour
- 1 1/2 teaspoons (10 grams) Fine Sea Salt
Instructions
For the Soaker:
- In a medium mixing bowl add the cereal, rolled oats, quinoa, flax seeds, sunflower seeds and water. Set aside.
For the Dough:
- Mix the Dough: In the evening, whisk the starter, water, maple syrup and olive oil together in a large bowl with a fork. Add the flours and salt. First, mix with a fork, the dough will be shaggy. Then mix by hand, mixing, folding and pushing the dough in the bowl until the flour is fully incorporated and no dry bits are present. It will seem dry at first, but the more you work the dough, the more hydrated it will become. The dough will feel stiff and it will stick to your fingers as you go. Do this for about 3-4 minutes. (note: In the video below, the soaker and dough water is switched from the written recipe, so the initial mixed dough looks a bit dryer. However, the overall hydration for the bread is the same). Use the fork to scrape off the dough on your fingers. Cover bowl with a damp tea towel. Set a timer for 30 minutes and allow the dough to rest. Now is a good time to feed/refresh your starter.
- Incorporate the Soaker: After the dough has rested, mix in the soaker. To do this, take 1/3 of the soaker and smear it over the top of the dough, then take a portion of the dough and fold it over, on top of itself. Repeat until all the soaker has been folded in. Knead the dough for about 1-2 minutes or until the soaker is evenly distributed in the dough. It will seem like a lot of added bits, but as you work the dough and as the dough develops through fermentation, the soaker will incorporate. The dough will be stiff, wet and sticky. If adjusting water or flour, now is the time to assess the dough and adjust as needed. Set a timer and allow the dough to rest for 30-45 minutes.
- Fold the Dough: After the dough has rested, fold the dough. To do this, grab a portion of the dough while it remains in the bowl, stretch it up and fold it over, pressing your fingertips into the center of the dough. You'll notice the dough is less stiff and more workable at this point. Repeat, until you've worked your way around the dough. This is the first fold. Repeat this fold one or two more times as it improves the final dough's structure and crumb. Allow for 30-45 minutes each between folds.
- Bulk Fermentation (first rise): After the last fold, cover the bowl with two damp tea towels and allow to rise overnight at room temperature (see note* on optionally retarding the dough). This will take about 8-10 hours at 70F (21C), but in a cooler kitchen, the dough can take up to 11-14 hours to rise – this is the norm in my chilly kitchen 68F (18C). Use the time as a guide and not a determining factor.The dough is ready when it no longer looks dense, is jiggly when the bowl is shaken, and has about doubled in size.
- Shape the Dough: In the morning, with damp fingertips, coax the dough onto a floured work-surface. With moist fingers, take a portion of the dough, gently stretch it towards you and fold it over towards the center, pressing it down gently. Repeat this process until you work the dough all the way around the dough. Using a bench scraper flip the dough over, cover with a tea towel. Rest the dough for 15-20 minutes. While the dough rests, thoroughly coat the inside of a 9 inch x 5 inch (23cm X 12cm) loaf pan with olive or coconut oil. Set aside. Flour the work surface and using a bench scraper, flip the dough back over. Use the photos in the blog post and video below to help guide shaping. Gently shape the dough into a rough rectangle (sort of a football/oblong shape if you can) by dimpling the dough (think focaccia), to roughly 6 inches wide and 8-10 inches long. Fold the dough lengthwise 2/3 over onto itself and crease it firmly using the pinky side of your hand. Fold the 1/3 piece left towards the crease and pinch the seam closed. Fold in the ends, coming in about a 3/4 inch – 1 inch, and pinch the seams closed. Flip the bread over, rock it back and forth a bit, and gently fluff the ends in. Cover with a tea towel and allow the dough to rest for about 5-10 minutes.Scrape your work surface area of any excess flour and very lightly spritz it with water (this will help increase surface tension as you do the final shaping). Place the dough on the spritz of water (seam side down) and using lightly floured hands, cup the back of the dough and gently pull it towards you until the surface is taught. Gently "fluff" the ends in again if needed to fit into the loaf pan.Once the surface is taut and with one swift move, use the bench scraper to scoop the dough up and, place the dough into the prepared loaf pan seam side down. If there are misshapen edges or a wrinkled top that need tucking in, use a moistened rubber spatula to gently finesse and shape the edges of the dough down into the pan.
- Proof the Dough (second rise): Cover the pan with a damp tea towel and allow the dough to rise until the dough rises to about 1 1/4 inch (3.2 cm) above the lip of the pan at the center of the dough. The amount of time this takes will vary depending on ambient temperature. At 70F (21C) proofing takes about an hour. In my chilly kitchen (68F/20C), about an hour and a half. Set an oven rack in the center of the oven and preheat to 425F (218C).
- Bake the Dough: Place the loaf into the oven and then, reduce the oven temperature to 400F (204C). Bake for 40-50 minutes. The bread is ready when the internal temperature (read on a digital food thermometer) of the loaf is between 190F – 205F (87C – 96C). When done, transfer to a wire rack. Cool for 10 minutes in the pan, then transfer to a cooling rack. Cool 1 hour before slicing.
- Storage Notes: Sourdough is best enjoyed on the same day it's baked, but it lasts for 3-4 days stored at room temperature. Store at room temperature cut side down on a cutting board. This bread freezes beautifully. Store baked bread in a freezer bag either whole or sliced for up to two weeks. Thaw at room temperature. This bread can go straight from freezer to toaster to make the most delicious toast!
Video
Notes
Nutrition
Nutrition is provided as a courtesy and is an estimate. If this information is important to you, please have it verified independently.
Made it? Leave a comment below!
The most helpful comment may include recipe rating, feedback, any modifications or helping other commentors.



Love this recipe! I bake it on a weekly basis! Delicious!
Oh my goodness….my family loves this multi-grain bread. I’m making my 3rd loaf this morning. It is delicious. I use seeds that are in my pantry…granola, sunflower, chia, flax, and oats.
Hi Jackie! Thank you for your note and giving the sourdough a go! Love hearing you’re family’s enjoying it. Granola sounds wonderful!
This bread is a big hit with my family. I’ve made it 3 times now…it always comes out yummy. My elderly parents said it’s their favorite bread of all.
What size loaf pan, please. I have several at different sizes.
Hi Charmayne! For this recipe, you need a 9 inch x 5 inch (23cm X 12cm) loaf pan. Let us know if you give it a go! I hope you love the sourdough!
Your description of this bread is spot on! I followed your instructions having some knowledge of making sour dough for a bit over a year now. My second attempt of multi grain as the first recipe I tried was not palatable at all. I am a big fan of this bread and will make again and again. This is definitely a keeper! Diolch (thank you) for the recipe.
Hi Welshgirl! Diolch for your note and giving a new sourdough recipe a go! SO happy you’re enjoying the bread!
Hi Traci, Could a whole wheat sourdough starter work for this recipe? If so, how much or is it the same as a non-whole wheat starter?
Hi Jeanette! Although I’ve not tried it, I wouldn’t hesitate giving it a go, using the same amount of starter. Keep us posted, okay?
Hi Traci,
I’m new to sourdough but have been watching many videos. I typically make multigrain bread in juice cans, 17 loaves at a time! I’d like to get into the sourdough though. I’m just wondering, all the videos I’ve watched show it covered for part of the cooking time. Do you cover yours? I didn’t notice this.
Thanks,
Heather
Hi Heather! How excited to be venturing into sourdough! I don’t cover my sandwich bread in this recipe since I want the crust to be soft. Let us know if you give the bread a go!
Tried this recipe and it’s amazing! Thank you. Have you ever tried to make sub rolls with this recipe? Does anything need to change?
Hi Jessica! Thank you for your note! I’ve not tried making sub rolls with this recipe, but that sounds delicious. If you experiment, please keep us posted!
If I’m Retarding during bulk fermentation (about 8 -10 hours) in the refrigerator. About how long does it take to double at room temperature?
Hi Jessica! The time to take to double at room temperature after bulk retardation will depend on the temperature of the ambient environment and how active your starter is. I have done this before in my chilly 68F kitchen, and it took quite a while (I’m thinking 8-10 hours).
This is the best multigrain bread I have ever had. I’ve been making so many breads, especially fermented breads for over 5 years but was always nervous to make multigrain because I worried it would be dry. This bread is so soft and delicious. My whole family is raving about it! Thank you!