

Making a homemade sourdough bread starter couldn’t be easier. My step by step guide walks you through the process with just two ingredients, minutes a day for about 7-10 days, and a little patience, you’ll be making delicious homemade naturally leavened artisan Multigrain Sourdough Bread, Homemade Sourdough Pizza, Sourdough Oatmeal Pancakes, and so much more in no time!
An Essential Start to Your Sourdough Journey
It’s true. Sourdough is a journey, but it starts with a strong and resilient sourdough bread starter. If you’re here, you may be just starting or perhaps you received a starter from a friend and aren’t sure what to do with it. I hope by sharing my experience, you’ll be able to create your own sourdough starter from scratch, maintain it and soon be making flavorful homemade sourdough bread and all the other good things that can be made with a sourdough starter.
When you create a sourdough starter, you gain an intimate look at the inter-workings of wild yeast and friendly bacteria and their interaction with water and flour. Too you’ll get to know how your starter changes over time and appreciate how a vibrant starter will help you produce the most delicious sourdough bread.
It’s not hard to do. Just a little attention and a few minutes a day for about seven to eight days (sometimes it takes longer) is all you need to get a starter going. A little flour, water and time are the ingredients to start your journey. Are you in?
What is a Sourdough Starter?
Sourdough starter is a cultured mixture of friendly yeast and bacteria, water and flour. We make it with just two ingredients: water and flour. These are the essential ingredients for cultivating a community of microbes into a form we can use to bake with. This fermented mixture of microbes, flour and water becomes the yeast needed to raise bread and gives baked goods their signature sourdough flavor.
The wild yeast needed for a sourdough bread starter is all around, but more specifically, it is found on the flour you’re making the starter with. So, there’s no need to add yeast to your starter. It’s naturally occurring.
_________________________
How to Make Sourdough Starter
step by step
You will receive recipes and kitchen tips, along with information about our partners and offerings. For more details, review the Vanilla And Bean privacy policy.
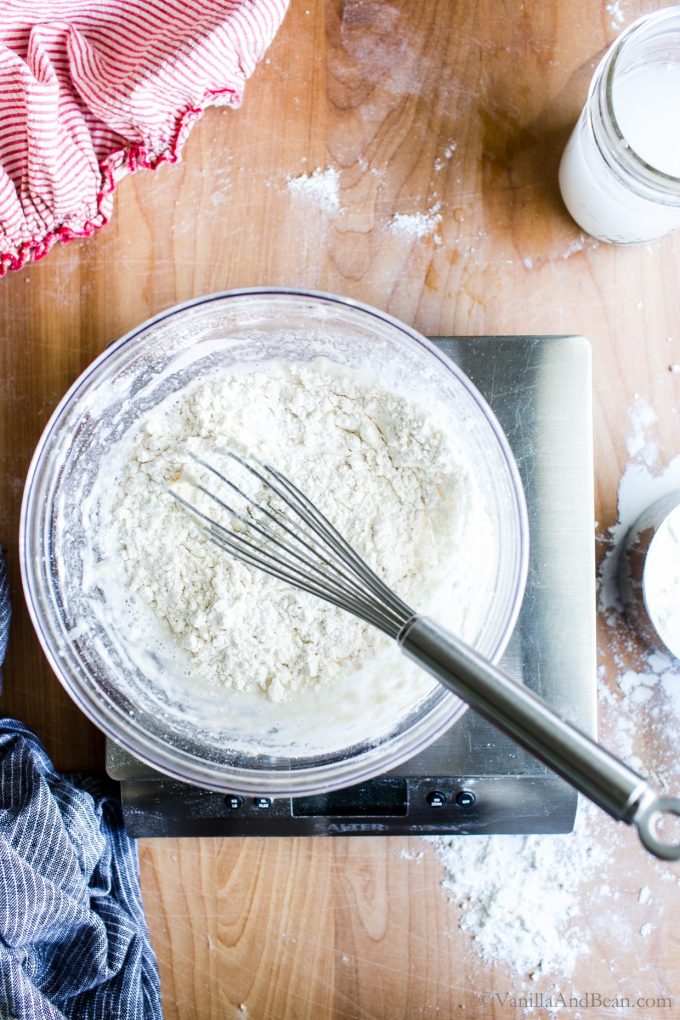
How Long Does it Take?
Building a sourdough bread starter generally takes about seven to eight days to complete. It could take longer depending on available yeast and bacteria present in your flour, and environment. Ambient temperature will also be a determining factor in the progression of your starter. A cooler kitchen means a slower starter.
If you’re like me, you’ll probably think about it more than the time it takes to make it: checking on it periodically, looking for bubbles, taking a whiff for a bit of that sweet and sour aroma we’re after. The key is patience and consistency.
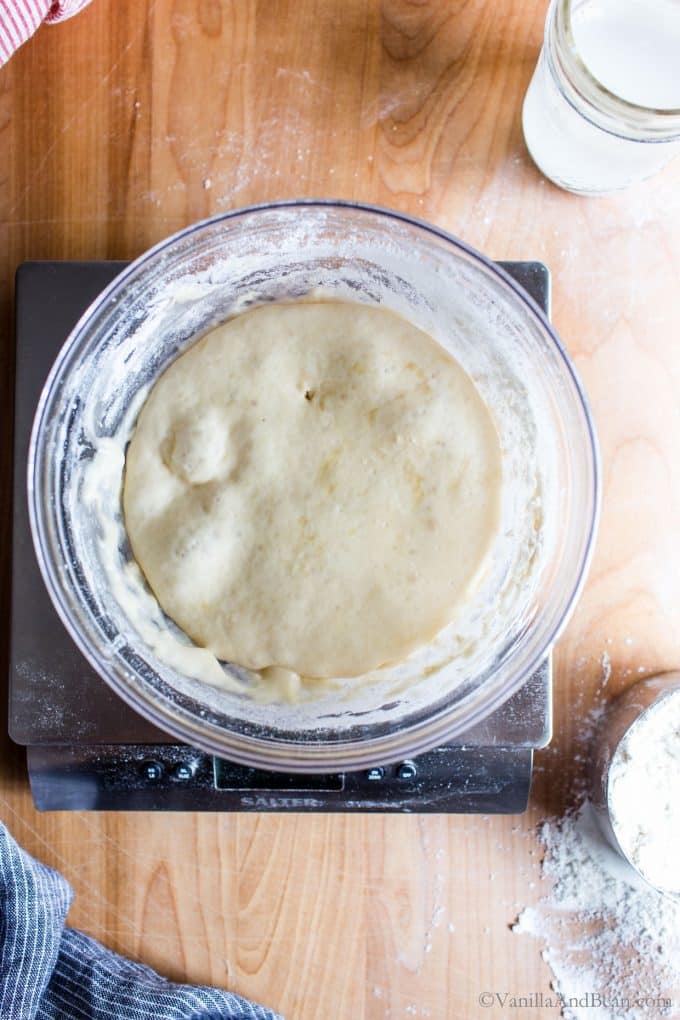
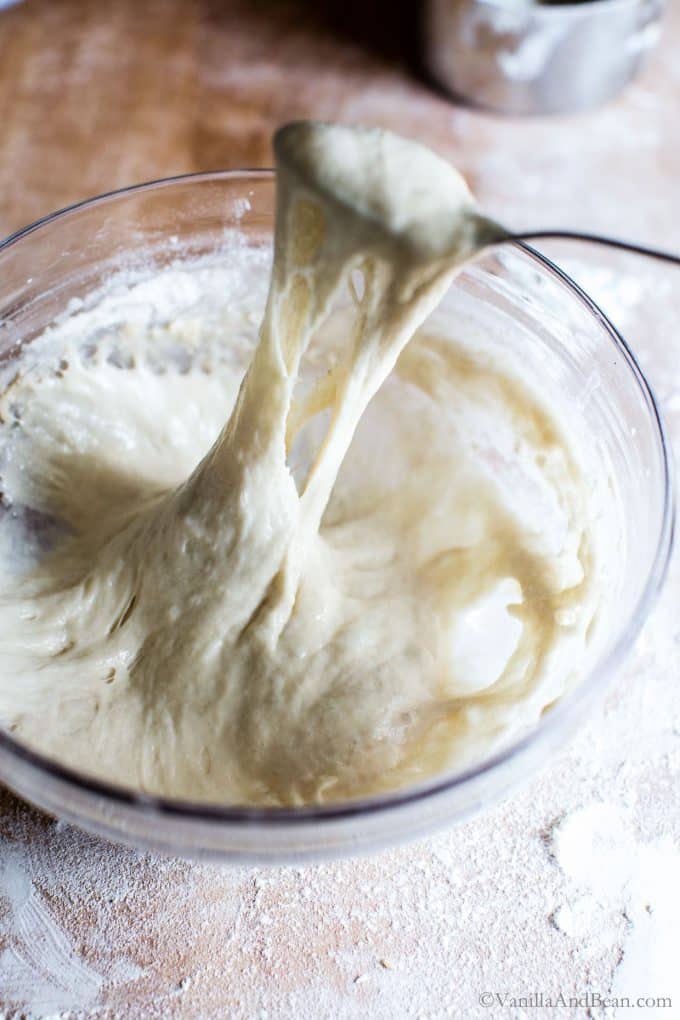
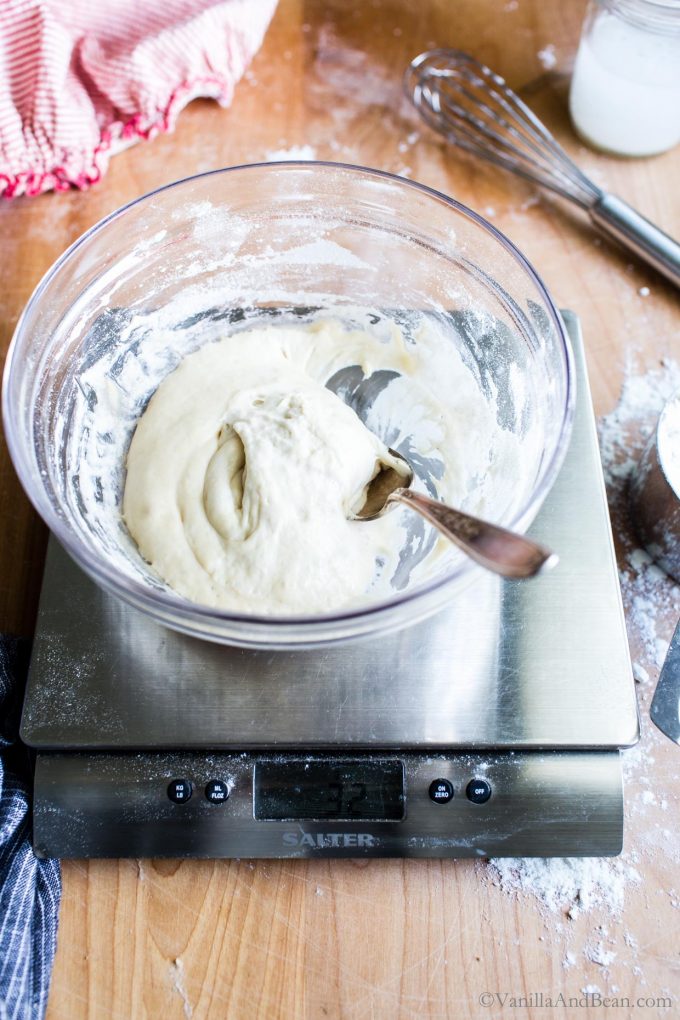
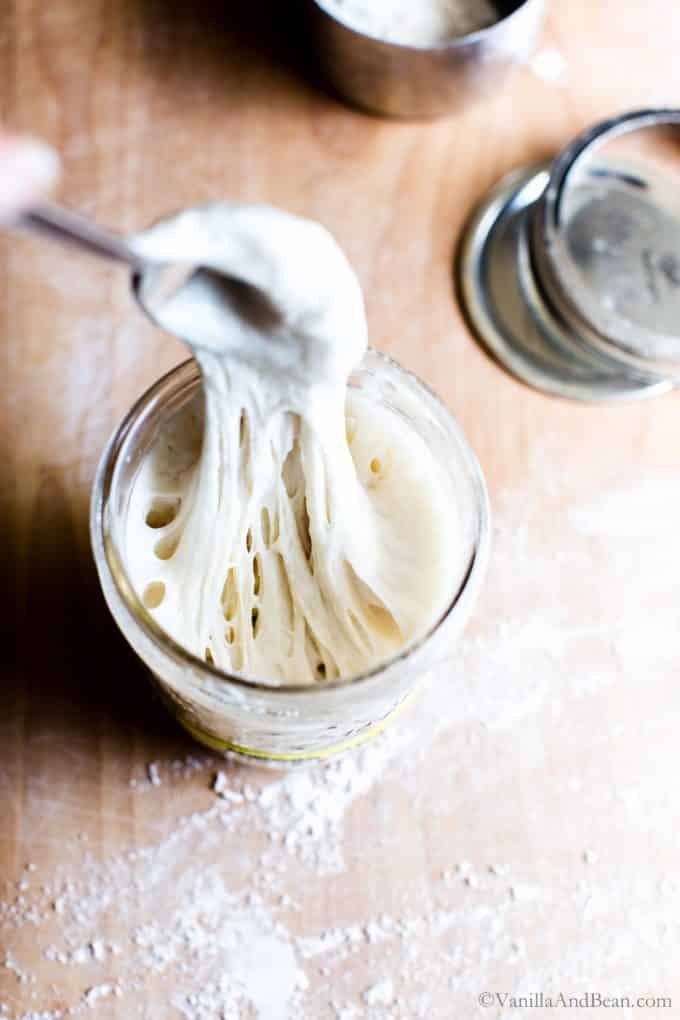
DAY 7 and Beyond: Seven to eight days has been my experience for an established starter to emerge. But it can take longer. Keep repeating day two until you notice the signs of a ripe starter: the starter is elastic (not pasty) has a sweet-sour aroma, is light and fluffy, large and small bubbles are present under the surface and just breaking the surface (see pictures below).
Note: time mentioned here is a guide rather than a determing factor for when your starter is ready. Use the cues and your senses to determine when it’s ready. It may take longer than eight days.
It’s ready when it’s ready.
How to Feed Sourdough Starter
Now that you have established a starter, you’ll need to feed it to maintain it and to use it in sourdough bread. Refreshing a sourdough starter keeps it balanced and strong.
Feeding your starter is very similar to how you built your starter. The main difference is you don’t have to feed it every day and for this recipe, I use just a bit more flour and water to feed it so that I’ll have enough to use in a recipe and enough discard to collect for making pancakes, biscuits and/or waffles. I feed my refrigerator stored starter every week, usually 8-10 hours before I’m ready to mix sourdough – but this is in my cool kitchen of about 68F.
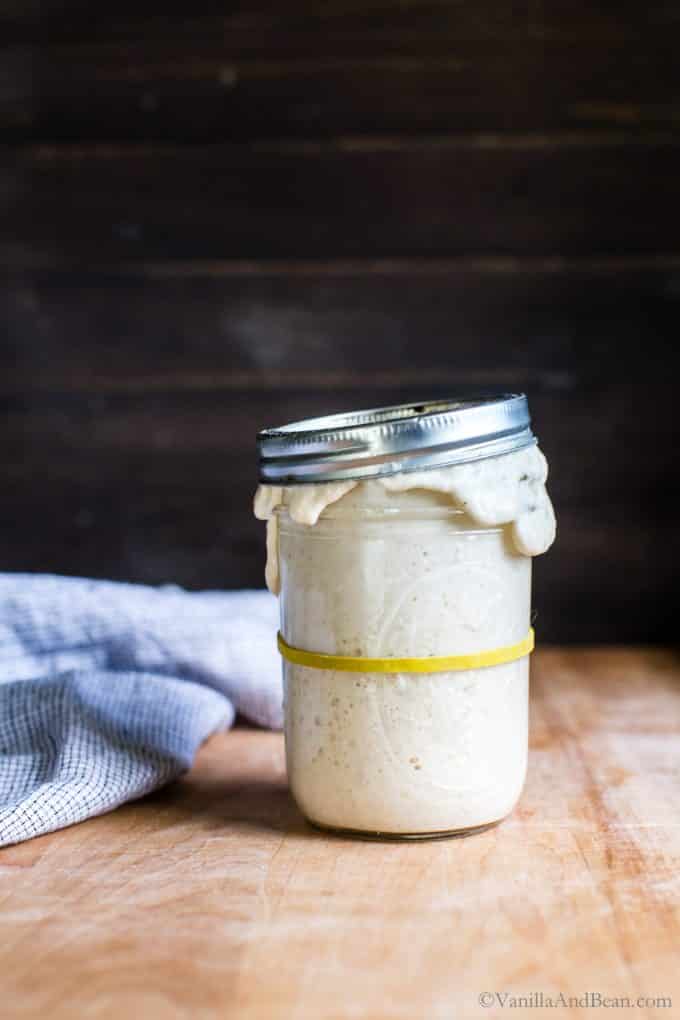
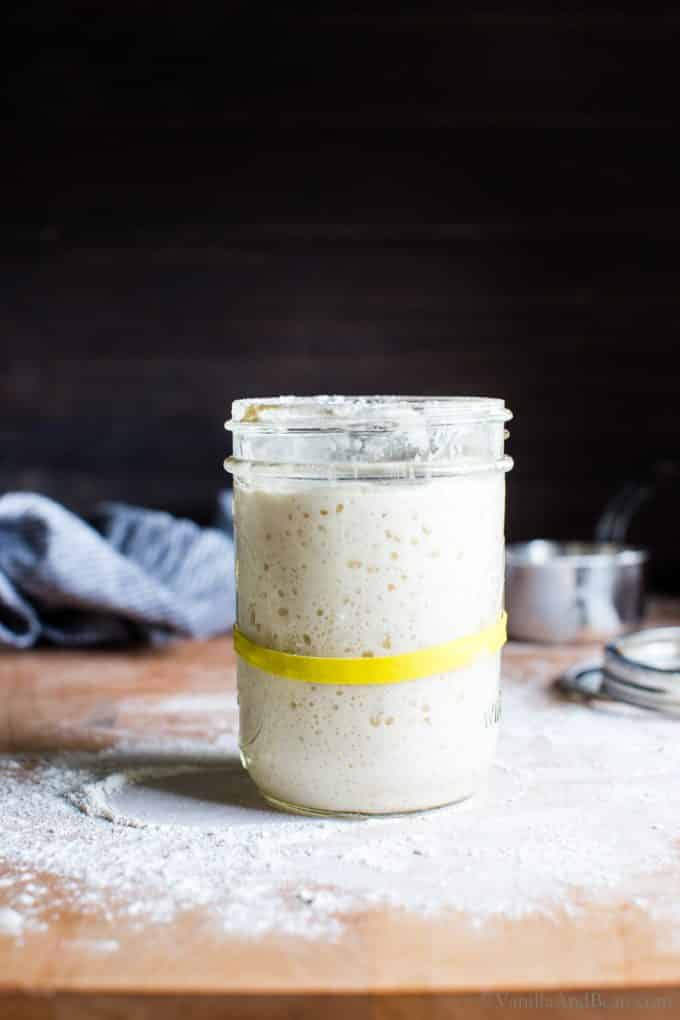
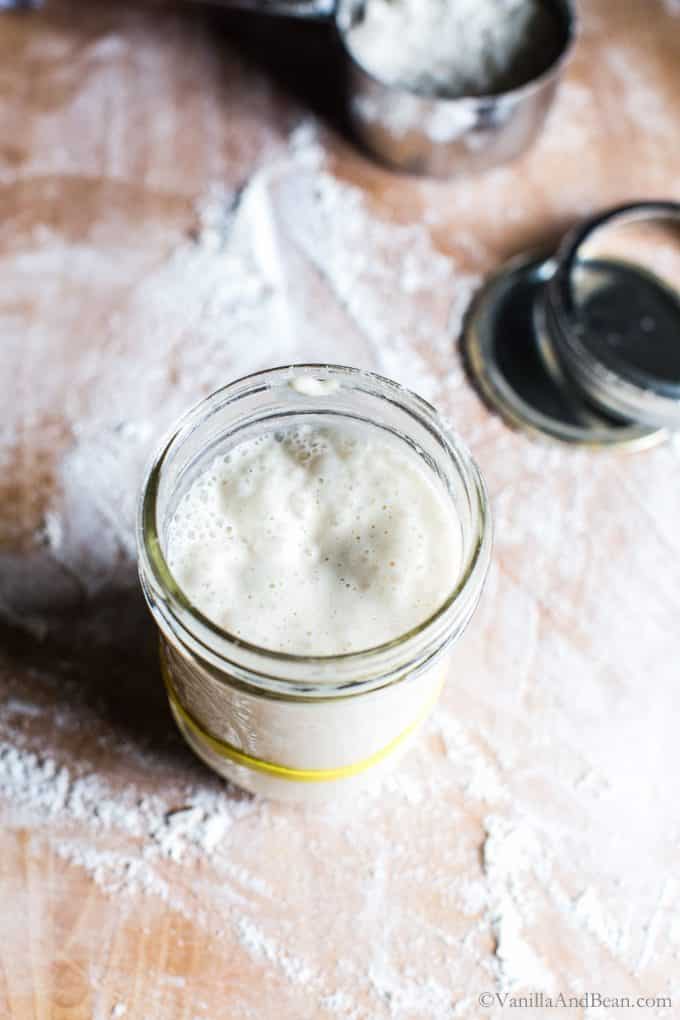
Keep the starter in a glass jar with a rubber band around the starting level. Doing this shows a visual indication of how much the starter has grown as it grows to double in size.
Also, I use a ratio of 1:1:1 (by weight) when refreshing the starter for a 100% hydrated starter. You may have read about using other ratios like 1:2:2 or 1:4:4, and those do have a place in maintaining a starter. However, for the purposes of establishing a starter, I begin with a 1:1:1 ratio.
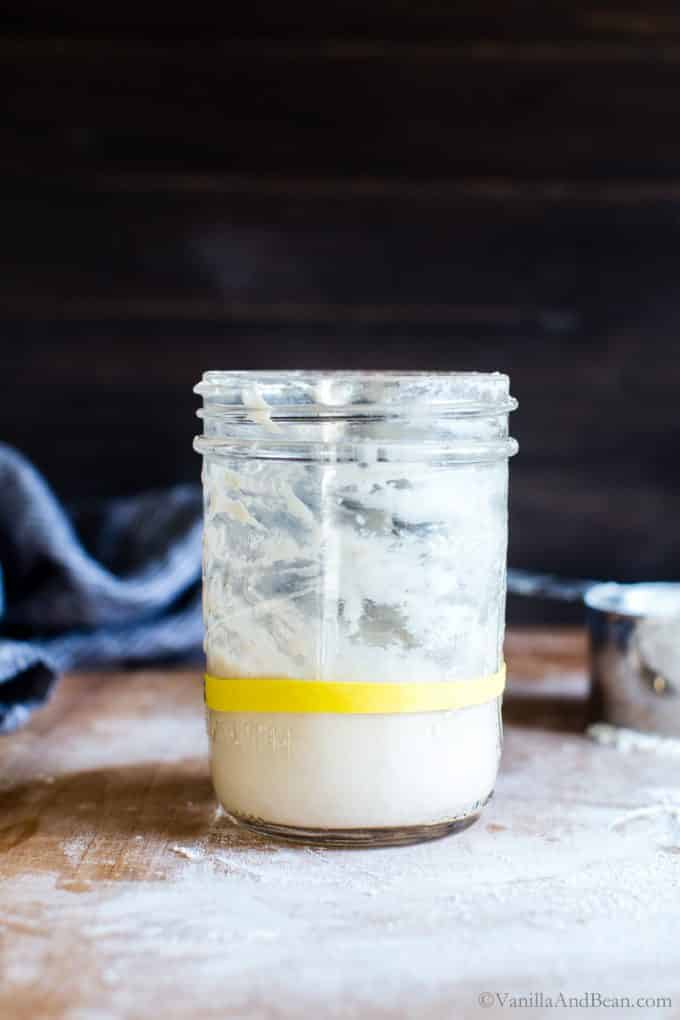
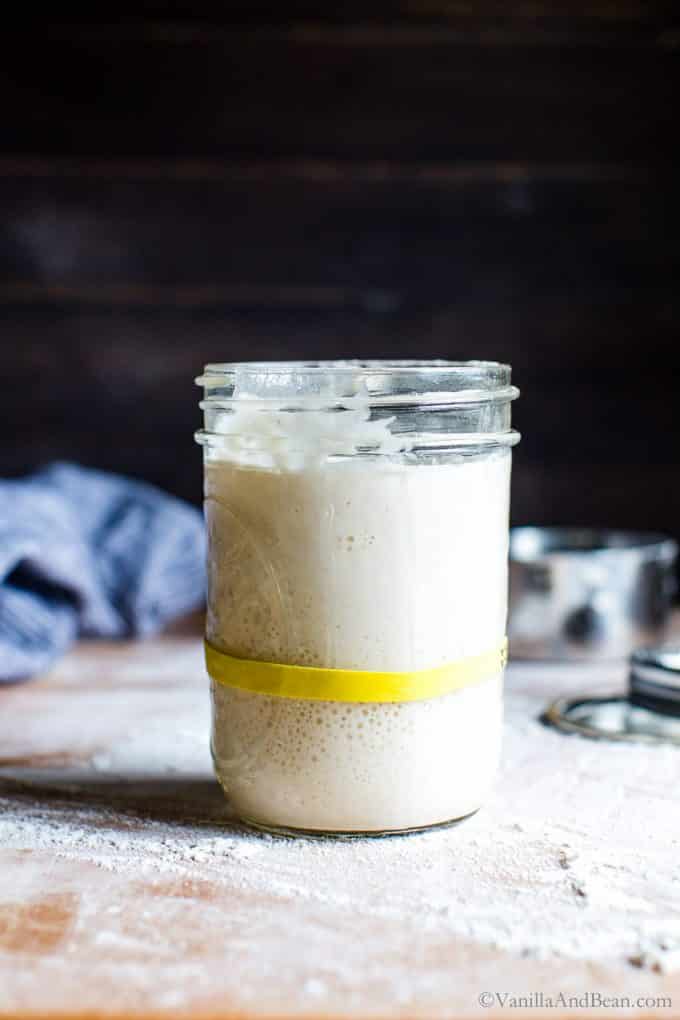
your starter is ready when it doubles in size, but you’ll find, it may triple in size!
How do I Know When My Starter is Ready?
Once the starter has at least doubled in size (it may triple), is bubbly throughout, elastic when stretched, has a pleasant sweet-sour aroma, and passes the float test, it’s ready to use in your sourdough recipe.
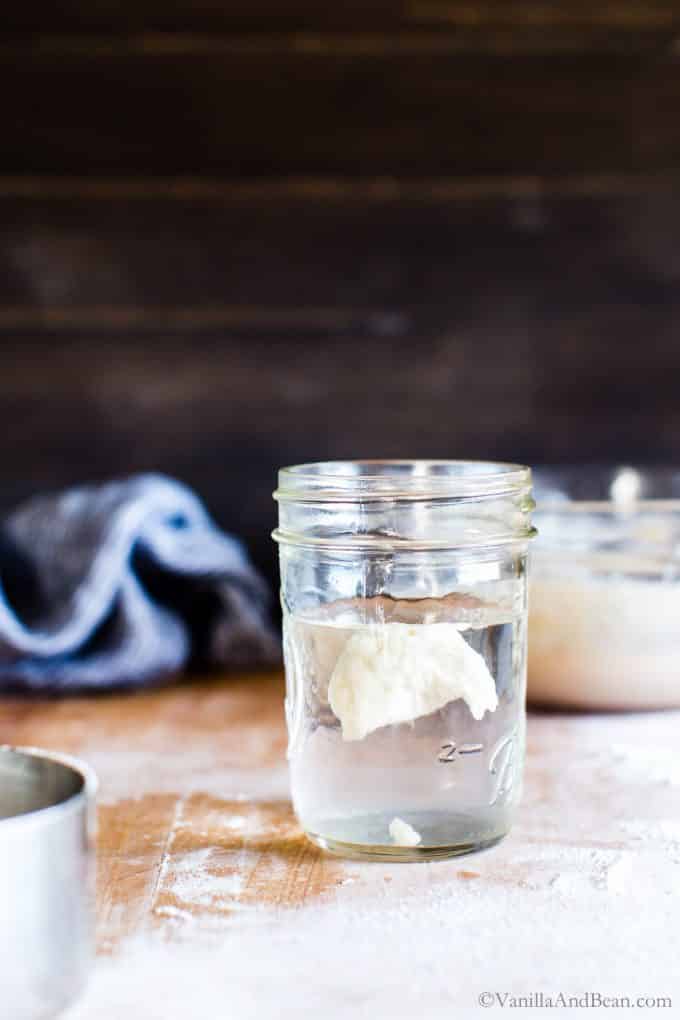
How to do a Float Test: Test to see if your starter is ripe by giving it a float test. Simply fill a glass with water and drop a small portion of sourdough starter into the glass. If it floats, its ready! If it sinks, it needs more time to double in size or develop.
How Long will the Starter Stay Doubled in Size?
At some point after doubling in size, your starter will begin to lose its strength and fall. The exact amount of time will vary from starter to starter but I’ve typically observed a few hours window, at room temperature, where the starter will remain doubled in size. On warm days, it’s shorter.
But in the refrigerator, it’ll hold for quite a while. I’ve observed at least three days! Once it starts falling back down after doubling in size, you’ll need to refresh (or feed) it and allow it to double in size again before using it in a sourdough bread recipe.
If your starter is struggling to double in size, you’ll need to go through a few cycles of refreshment to build strength in the starter. You can even refresh twice within a 12 hour period if needed. Doing this builds strength and will help later in the development of your sourdough bread. I do a series of refreshments after a longer period in the refrigerator before using it in a recipe.
How to Maintain a Sourdough Starter
Think of your homemade sourdough starter as a pet that needs regular attention. There’s a community of yeast and friendly bacteria that make up the starter so it needs to be fed (refreshed) on a regular basis, else it can run out of food and weaken. The good news is, a sourdough starter is pretty resilient. So, if neglected for a bit, you can usually revive it through a series of refreshments.
Your starter can be stored at room temperature if you’re baking daily or in the refrigerator if baking at least once a week.
How to Store Sourdough Starter
Room Temperature Storage: If you plan on baking daily or every few days, leaving your starter on the kitchen counter is fine. Keep an eye on it because the warmer the kitchen, the more active your starter will be. It can double in size quickly, in as little as 5 1/2 hours at 70F! You’ll need to feed it more frequently, once or twice a day to keep it active and strong.
Refrigerator Storage: I bake with my starter about once or twice a week, so I store my starter in the refrigerator until I’m ready to prepare for mixing dough. If your starter is sluggish after refrigerating it for a while, you can feed it up to twice a day until it’s bubbly, elastic, and has a pleasant sweet/sour smell.

My Starter is Ready, But I Don’t Have Time to Mix the Dough
I get it! Something comes up, but you want to maintain that doubled in size state. To do this, put your starter in the refrigerator. This will slow it down dramatically and allow it to stay in that doubled state for at least a few days. Then you can get back to it later.
What’s That Layer of Liquid?
Occasionally you may notice a layer of liquid that forms on the surface after your starter has gone unfed for a period of time. This liquid is called hooch, a naturally occurring alcohol which indicates that it’s a little past time to feed your starter.
Hooch should have a pleasant sweet-sour aroma. You can pour it off or stir it into your starter then, carry on with refreshment. I typically pour it off because it makes my starter more slack.
Traci’s Tips
- Name Your Starter: some sourdough bakers name their homemade sourdough starter. My starter is Claire, named after my late feline friend.
- Time is a guide rather than a determining factor for when the starter is ready. Use the cues and your senses to determine when it’s ready. It may take longer than eight days. It’s ready when it’s ready.
- When to Make a New Starter: for your starter or saved discard from your established starter, if you see any mold, a layer of pinkish/orange color or it smells off, throw it out and make a new starter. This can be avoided simply keeping your starter well fed and strong, refreshing it weekly in the fridge or daily at room temperature.
- Through testing this recipe, I chose to use organic unbleached all purpose flour. It’s a flour I always have on hand, it’s easy to find, and it works. If you use something different, please share in the comments!
- Sourdough Discard: for leftover sourdough starter (discard) that is discard from an established, fully developed, doubled in size starter and able to rise sourdough bread, you can keep this discard in a jar for use in sourdough discard recipes. It gives baked goods that sourdough flavor without the long slow rise. I keep a jar in my refrigerator and refill it as I discard the leftover starter at refreshment time. I like to use it up within about two weeks.
Recipes for Your Sourdough Bread Starter
- Rustic Sourdough Bread
- Everyday Sourdough Bread (for beginners)
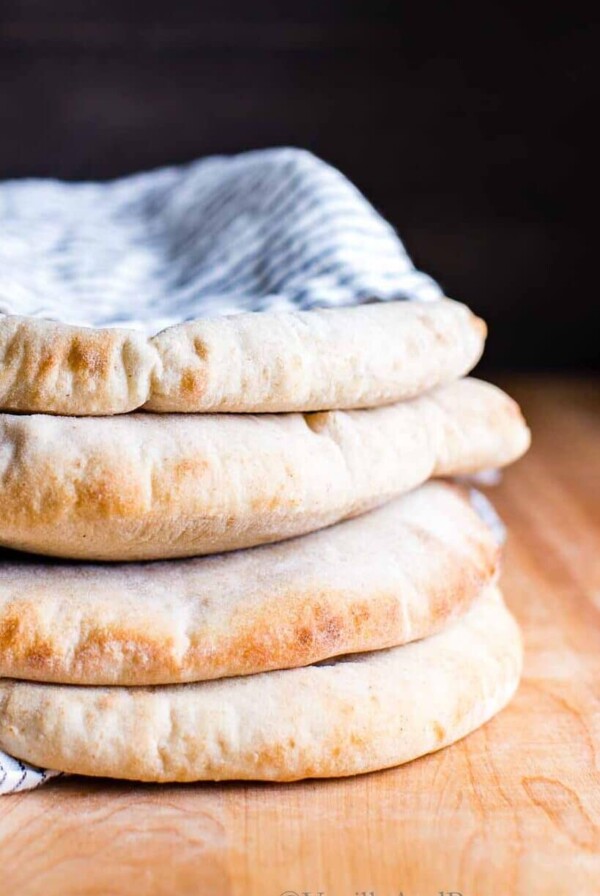
- Sourdough Pita Bread
- Soft Sourdough Dinner Rolls
remember… your starter is ready after refreshment when it at least doubles in size, is bubbly throughout the culture, elastic when pulled and has a pleasant sweet-sour aroma. It should also pass the float test!
How to Make Sourdough Bread Starter From Scratch
Ingredients
- Unbleached All Purpose Flour, organic *see note on flours
- Water, **see notes
Instructions
To Build Your Starter:
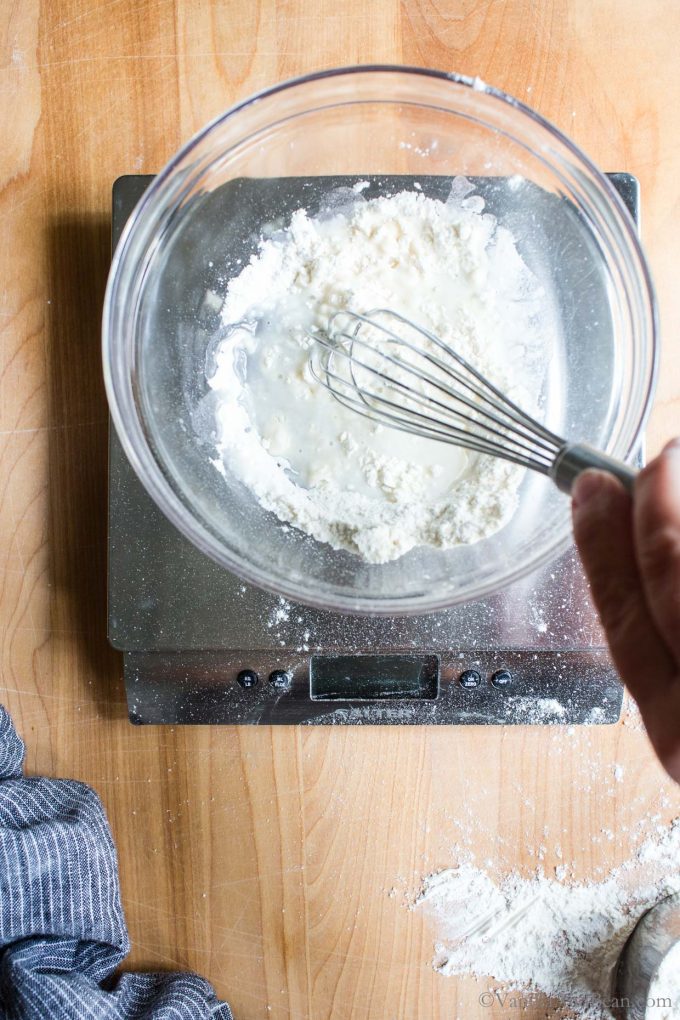
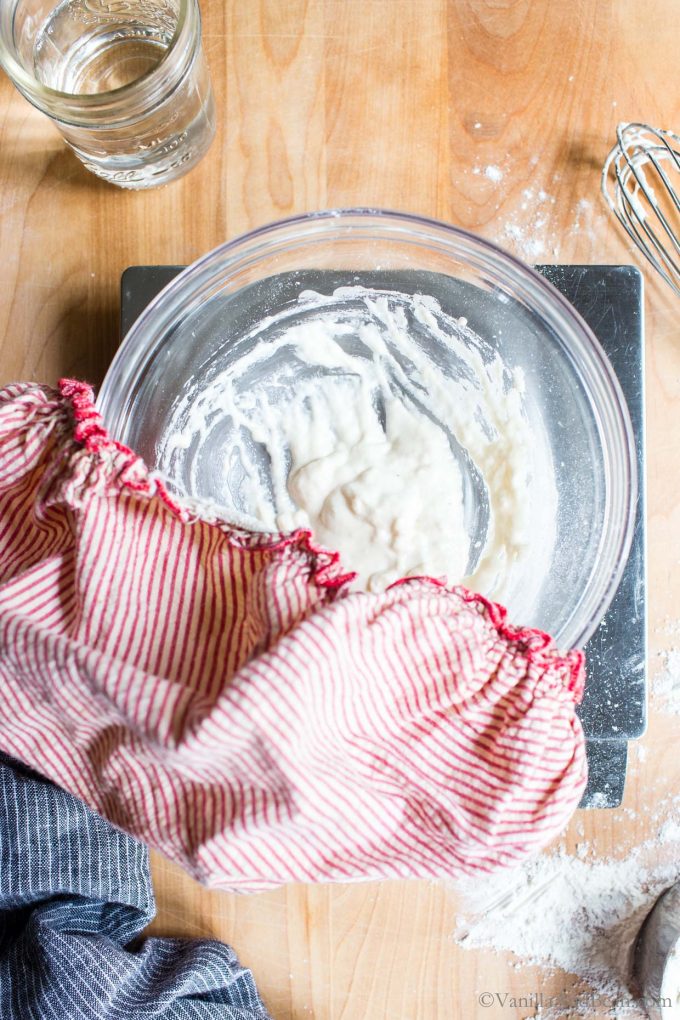
- Day One: In a medium glass bowl or jar, whisk together 2 Tbs (20g) flour, 1 Tbs + 1 tsp (20g) of water. Cover with a damp tea towel or loose fitting lid and rest at room temperature for 24 hours. *When covering with a damp tea towel, be sure to double up else a skin may form. If it does form, and if it's thin, I simply stir it back in to my starter and carry on.
- Day Two: In a medium glass bowl or jar, whisk 2 Tbs (40g) of mixture you made yesterday (throw out the leftovers), 1/4 C (40g) flour, 2 Tbs + 2 tsp (40g) water. Cover with a damp towel or loose fitting lid and rest at room temperature for 24 hours.
- Day Three Through Day Seven or Eight (or beyond): Repeat step two using the previous days starter, continuing to throw out the discard, until the mixture becomes puffy, fluffy, has a pleasant sweet-sour aroma (not sweaty socks) and small and large bubbles begin to appear just under the surface and throughout the culture. Notice on day three you may begin to notice a sour aroma, with a few bubbles and puffy appearance. On day four, a doubling in size in not uncommon – but it maintains it's stinky odor. On day five-six, it'll probably pass the float test but it's still stinky! Keep going!This process takes about seven to eight days (as this has been my experience) – but it may take longer. Time is not a determining factor for when the starter is ready, it's simply a guide. It's ready when it's ready. Use the cues and your senses to determine when your starter is ready. This is the nature of sourdough.*update* If your starter is struggling to show signs of development, and your flour is old, try using fresh, just purchased flour. Before using your new starter in a recipe, you'll need to refresh (feed) it.
To Refresh or Feed Your Starter:
- If not using a Mason jar or other 16 ounce jar at this point, now is the time to transfer your starter to one. I use a 2 C (16 ounce) wide mouth Mason jar. In a glass jar whisk 3 Tbs (60g) of sourdough starter with 1/4 C (60g) water. Add 1/3 C (60g) unbleached all purpose flour to the water mixture. Mix well until the flour is hydrated.
- Lid the jar and wrap a rubber band around it at the height of the starter.
- Allow the starter to develop at room temperature for about 8-10 hours (65F/18C). This time can vary due to ambient temperature and how active your starter is. If it's rising too fast, you can pop in in the refrigerator where it will continue to rise at a slower rate. Or, if you want to speed it up, refresh it with 80F (27C) water. That'll get it moving a little more quickly.Once the starter has doubled (or even tripled) in size, is bubbly and puffy, has a pleasant sweet-sour aroma, and passes the float test, it’s ready to use in your sourdough recipe. After measuring out the portion needed for your recipe, feed the starter and store it until your next refreshment. If there’s and starter left, you can save the discard for use in other recipes like pancakes and waffles (or toss it or give it away).Float Test! Test to see if your starter is ripe or ready to be used in a recipe by giving it a float test. Simply fill a glass with water and drop a small portion of sourdough starter into the glass. If it floats, its ready! If it sinks, it needs more time to double in size or develop.
How to Store Your Established Starter:
- If you see any orange or pink film or mold, or it has an unusual oder, toss it.
- Room Temperature Storage: If you plan on baking daily or every few days, leaving your starter on the kitchen counter is fine. Keep an eye on it because the warmer the kitchen, the more active your starter will be. It can double in size quickly, in as little as 5 1/2 hours at 70F! You'll need to feed it more frequently, once or twice a day to keep it active and strong.
- Refrigerator Storage: I bake with my starter about once or twice a week, so I store my starter in the refrigerator until I'm ready to prepare for mixing dough. If your starter is sluggish after refrigerating it for a while, you can feed it up to twice a day until it's bubbly, elastic, doubles in size and has a pleasant sweet/sour smell.
How to Store Your Discard if Saving:
- After you have an established starter, you can use your sourdough discard in pancakes, biscuits, muffins and other recipes to add a tangy sourdough flavor. Store it in the fridge, in a lidded glass jar, for up to two weeks. You may see a layer of hooch, and this is not unusual. You can pour it off or stir it in. If you see any orange or pink film or mold, or it has an unusual oder, toss it.
Video
Notes
Made it? Leave a comment below!
The most helpful comment may include recipe rating, feedback, any modifications or helping other commentors.




When you initially make the starter, do you leave on the counter or can you put it in a cabinet for 24 hours. I wasn’t sure if putting it in a dark cabinet might cause the mold to grow.
Hi Susan! Leave the starter on the counter, at room temperature. I’ve not put mine in a dark cabinet, so I’m not sure what the results would be. If you experiment, keep us posted!
Question for you, Tracy. My bread is more flat than rounded the last few times I’ve made it and wondering if it’s that my starter has become more liquid than it used to be. I’ve poured off the hooch when I take from refrigerator. Is that what I should be doing?
I’ve been making this bread for 4 years and we love it!! Even flat. 😆
Hey There Lucky! Hooray for tasty sourdough bread! A flatter bread, could be your starter (but also fermentation). If your starter more liquidy, it may be the hooch you’re stirring back into the starter. Try this for a few feedings: add 1 tablespoon of your starter to a pint Mason jar. Feed it with 70 grams of water and 70 grams of all purpose flour. Allow it to double in size, then feed it again. Do this two to three times to strengthen your starter. This is a 100% hydration starter. If you’re seeing hooch regularly, try storing your starter in the fridge or feed it more frequently. Hooch indicates a hungry starter. As far as fermentation – allow your first rise to fully double in size. Just when you think it’s ready, give it more time. Play with this and you’ll probably see a difference. This was a game changer in my bread baking. I hope this helps. Happy baking!
Traci, I am at Day 18 (I think). My starter smells right and has lots of bubbles, but will NOT double. It also passes the float test. I’ve tried feeding every 12 hours, then every 6 hours. I bought a new bag of flour after about Day 7. I’ve put it inside a cold oven with the light on where it now lives. It’s risen as far as maybe 1/3 above the rubber band. I thought my home was just to cool to get it going. What do I do? Should I just go ahead and try and make bread?
Hi Lori… you’ve all the signs and you’re doing it right! I say, go ahead and make bread, but keep feeding your starter regularly to continue building the microbiome diversity. Keep us posted!
Hi
I am trying to find a gluten free sour dough bread that has an easy starter. I read your gluten free sourdough starter and it seems complicated to me. Any easier way to get started??
Thanks so much!
Paula
Traci, my discard is a thick doughy consistency, your discard (from the pictures) looks like you pour it. Your cookie recipe says to whisk the egg and discard together. I would never be able to whisk mine. Should I be adding more water to make mine pourable? Not sure if I’ve done something wrong or not but would love to make your cookie recipe.
Hi Leah! Thank you for your note. Okay on thick, doughy consistency. The discard I use is 100% hydration, meaning it’s made with equal parts flour and water by weight. If you have a lower hydration starter, you can make some discard that’s 100% hydration. Since you need 65g of starter, add a tablespoon of your existing starter with 35 grams water and 35 grams all purpose flour to a Mason jar. Allow the starter to rise and fall. The starter should be slack and easily whisked into the wet ingredients of the cookie recipe. Using it at room temperature will be helpful too. I hope this helps and you enjoy the cookies!
I see that your starter has a different hydration ratio from the one Emilie Rafa uses in her book. Is there a reason for that? Will her recipes work using your starter?
Hi Cathy! Thank you for your question. The hydration of this starter is 100%. The hydration for the recipe in Emilie’s book is 100%, meaning you can use this starter or her starter in any of my or her recipes in her book (unless otherwise noted). Maybe you’re referring to the amount of flour and water used is this starter recipe vs Emilie’s book? You’ll notice in this recipe, I use less flour and water to build the starter, but it is still at 100% hydration (1:1 ratio – equal parts flour and water by weight). I hope this helps!
I have been given and bought several sourdough starters which enjoy for a awhile then I get tired of using and tossing so much starter, then after awhile I am ready I am missing it and am ready to go again. Think I need to learn how to make it myself. I have always made our whole wheat bread (white w/w flour, oats, corn, hulless barley, red wheat, rye) It is mainly white w/w with small portions of the remaining. I also bake a dilley bread for a choice change. My vegetarian mom always baked bread so I continued. I have never eaten anything with a face:) Thank you for many lovely recipes!
Thank you for your note and sharing about your journey, Maggie! I understand about tossing starter. You can however create a no waste starter by making only a little more than what you need for a loaf of bread. Say you need 50g of starter… feed your existing starter with 30g water + 30g flour. That way you you only have a little leftover to keep your starter going. I love the addition of whole grains like oat, rye etc.. they make such tasty additions to bread. Your “vegetarian mom..” how wonderful she passed that on to you… Keep in touch about your new starter, Maggie!
Thank you, Traci, for your personalzed troubleshooting and cheering!
It started really great for the first 3 days and then all the sudden the activity seemed to come to a stop. It had dramatically reduced bubbles and it’s activity. i live in Az, so I knew it would take a lot shorter time for the fermentation to start. That being said, I waited for 12 to 18 hrs betweern the feedings. After 14 days, I finally realized it gets doubled and goes flat within 5 to 6 hrs!!! I didn’t pay attention that much earlier. I went through what kind of water is the best.(reverse osmosis is not suitable for making sourdough starter, filter or mineral water is good), the flour, and the way I stir, etc.
In the end it serms like 5-6 hrs is the good between timing for my starter to be fed since it is still pretty warm during the day here. I m sure I may encounter other issues sometime in the future, but I am happy to note that I was able to make a beautifil sourdough sandwich loaf yesterday morning after 18 days from the beginning. If there is anyone struggling with the starter. I know there is an answer somewhere out there. I know if I can do it, you can. Keep going even if it doesn’t look like it’s doing anything. If you think it’s dead or close to, take 20g of the starter and add 40g of each bread flour and water. This may get activated more with the new feed.
Best wishes to all the sourdough lovers.
Thank you for your great support, Traci. You are the best
So happy to help, Mayumi. I loved learning about your sourdough starter journey, then seeing the wonderful bread you made! Way to go YOU for your diligence!
Thank you for all the detailed information! It was sooooo helpful! I started off being incredibly overwhelmed, but when I saw that my starter had finally doubled in size (it took 10 days), I squealed with excitement. Thank you for helping me start my starter!!
Hiii Monique! Celebrating a big win for you and your starter! It can be overwhelming, for sure. I often say when I first started it took more brain space thinking about creating a starter / first loaf than it actually took / takes to create it! HA! SO excited for you and your new adventure. I appreciate your note and star rating!
Hi!
Great post! Lots of very helpful information. Wondering what you do when you leave the house for extended periods… like vacation?
Hi Lynn… Thank you! Yes, Vacation or travel in general. The fridge will preserve your starter! I left my starter for three weeks last year and after giving it a few feeds it bounced right back. I hope this helps! Keep us posted if you give it a go 🙌🏻