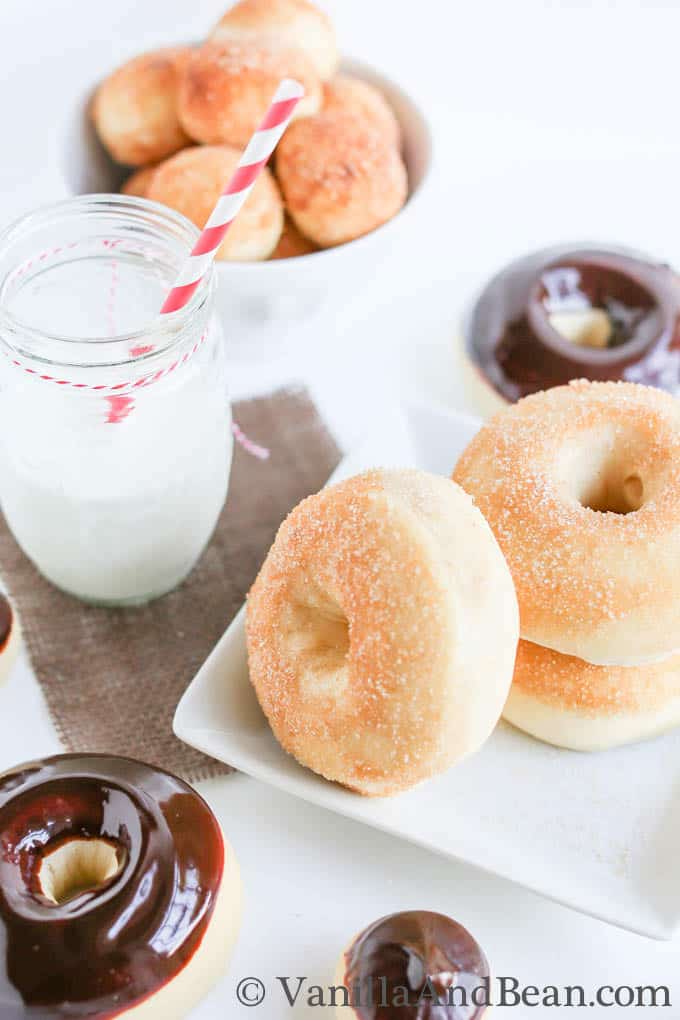
These yeasted Vanilla Bean and Buttermilk Baked Doughnuts will delight even the most discriminating doughnut connoisseur. Served fresh and warm, these doughnuts are sure to please.
Buttermilk Baked Doughnuts
Did you know that National Doughnut Day is June 5? It gave me a good excuse to bake some pillow soft, melt in your mouth doughnuts and share the recipe with you! Any excuse for doughnuts, right? I love doughnuts, but hardly ever indulge… you know why. Doughnuts are the proverbial junk food. Don’t get me wrong. If I could get away with a daily doughnut, you bet I would! They are soooooo delightful!
I don’t typically fry and no, I am not a fry snob. I do indulge in the occasional fried food. There’s just something about all the oil, the smell of frying, then having to do something with the oil after it’s been used (any good ideas?). I also tend to make a terrible mess, and one I don’t like to clean up. So I just avoid it. Maybe I’ll come around, but I haven’t yet. But these doughnuts, they don’t need to be fried. Right out of the oven, they are light, soft, and full of flavor.
Why Baked Yeast Doughnuts?
Because doughnuts can take on so many different flavors, I thought I would incorporate two of my favorite baking ingredients, vanilla bean and buttermilk. Vanilla beans are pretty in any baked food that is light enough to showcase the beautiful bean specs that impart such a delicate, yet rich flavor. Buttermilk, an acid, adds a slight tanginess to the dough, but better yet, it tenderizes the gluten yielding a finer crumb. I also used some whole wheat white flour, to try and get some nutrition in there! HA! Don’t ask me why I bothered….

Oven Baked Doughnuts
The doughnuts can be made and baked the same day, or you can retard them overnight in the fridge, give em’ a proof the next morning and bake. You’ll want to have any toppings, or glazes ready for quick service as these doughnuts are best fresh from the oven. I do find, however, if they must sit for several hours or a day, they refresh quite well in an oven at 300F for about 10 minutes. I’ll take it!
Baked Yeast Doughnut Recipe
When working with yeast dough, it is typically slow for me because I live in the Pacific Northwest and it is a bit cool in my kitchen for yeast to do their thing without a little help. In order to get yeast movin, I warm my oven for a few minutes minutes on 200F, turn it off and then pop my dough in for the proof. Works like a charm. Setting a cup of boiling water in the bottom of the oven helps too because it keeps the environment nice and moist. This makes the yeast extra happy!
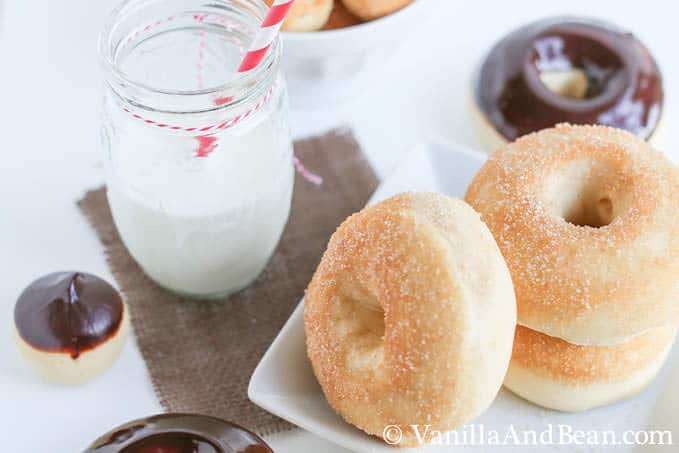
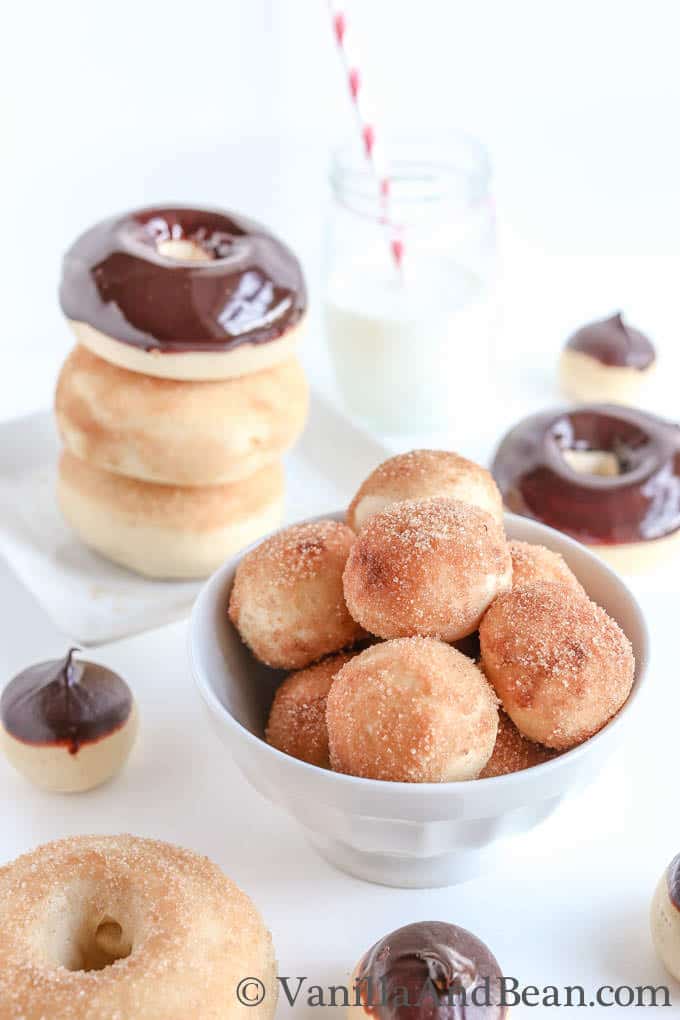
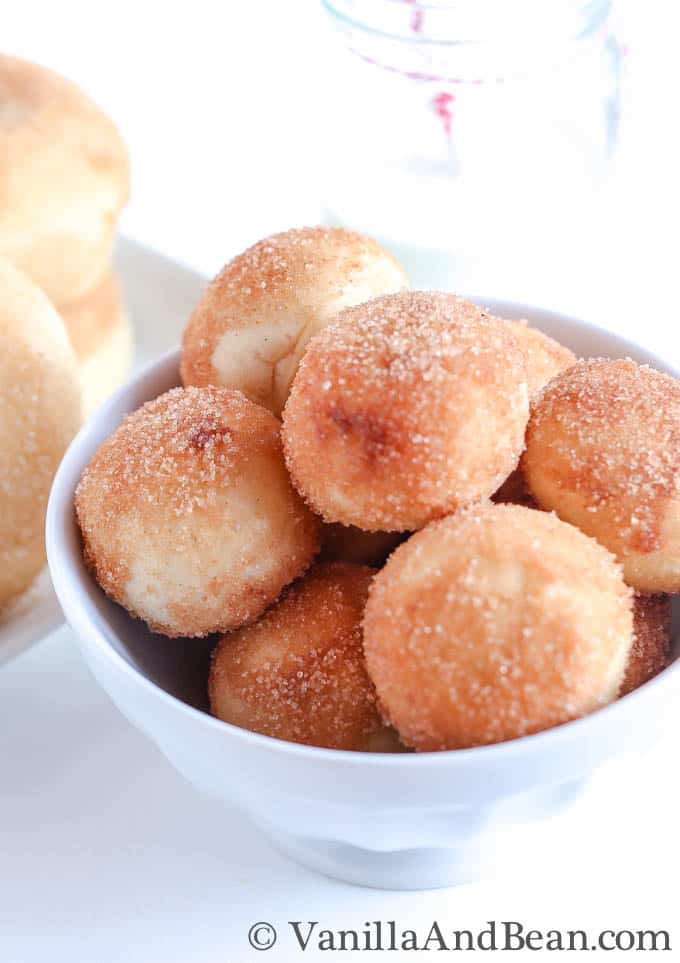
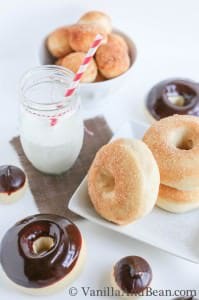
The Toppings
The toppings for Oven Baked Doughnuts are endless. I went with a butter-cinnamon-sugar topping and ganache glaze. I liked both, but the cinnamon sugar won my tasters over. For the ganache I used bittersweet chocolate (78%) with a bit of corn syrup to sweeten it for a rich, chocolately finish. For a sweeter ganache, you can use semisweet chocolate (58%) . So many toppings can be added to the ganache glaze like jimmies, chopped nuts, sprinkles, coconut… the possibilities are endless!
I would love to hear what you think about this baked yeast doughnut recipe and what your favorite toppings are!
More Breakfast Recipes to Love
- Zucchini Bread with Oat and Almond Flour
- Gluten Free Sourdough Pancakes
- Breakfast Banana Nut Muffins – gluten free + vegan
Vanilla Bean and Buttermilk Baked Doughnuts
Ingredients
Doughnuts:
- 1/2 C + 2 Tbs Milk
- 2 tsp Apple Cider Vinegar
- 1 tsp Quick Rise or Instant Yeast
- 1 Tbs Unsalted Butter 1/2 oz
- 1/3 C Granulated Sugar 2 1/2 oz
- 1 Large Egg slightly beaten
- 1/2 tsp Vanilla Bean Paste or Seeds of 1/2 a Vanilla Bean
- 1 1/4 C All Purpose Flour 6 oz
- 1 1/4 C White Whole Wheat Flour 7 1/8 oz
- 1 tsp Salt
Ganache Glaze:
- 1/4 C Finely Chopped Chocolate I use E Guittard (65% bittersweet or 58% semisweet) (1 oz)
- 1 Tbs Heavy Cream
- 2 tsp Light Corn Syrup
- 1/2 tsp Vanilla Bean Paste or vanilla extract
Instructions
For the Doughnuts:
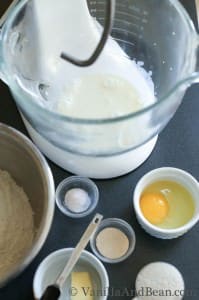
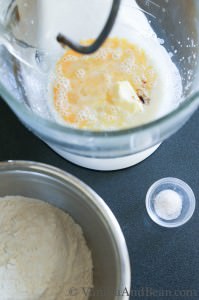
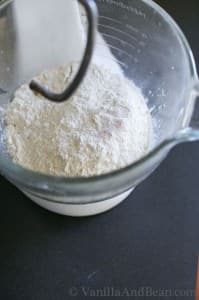
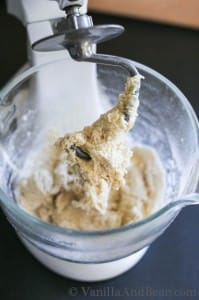
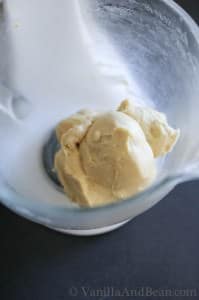
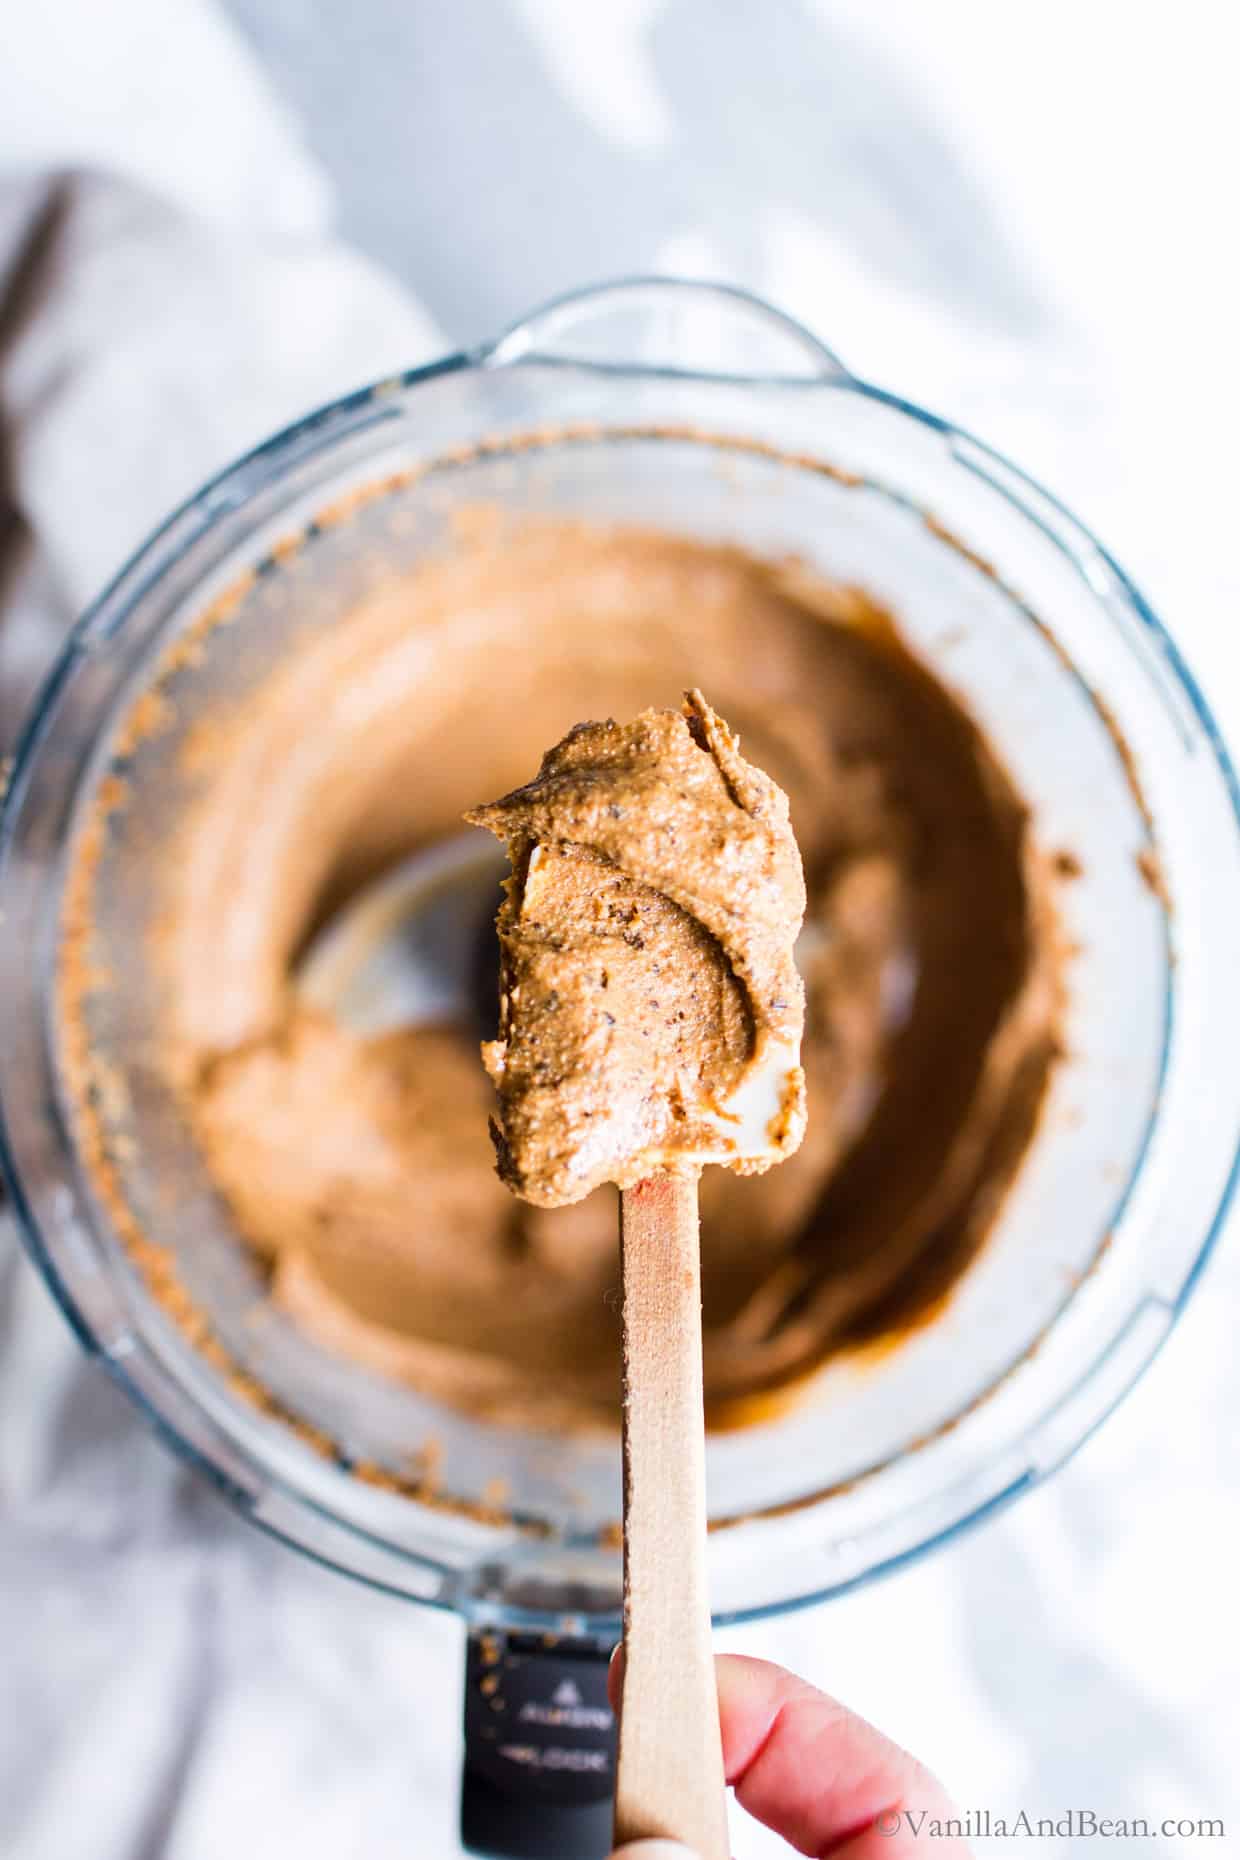
- In a small bowl, mix the milk and apple cider vinegar. This will create soured milk (buttermilk!). Let stand for at least 5 minutes. Warm buttermilk to between . In a stand mixer with the dough hook attachment, pour in the soured milk, yeast, vanilla bean paste and sugar. Mix with a hand whisk until incorporated. Add the butter, egg, flours, and salt. Turn on mixer and mix with dough hook for about 3 minutes on speed 2. The dough will have a shaggy appearance and will be sticky. Continue to knead with dough hook for an additional 2-3 minutes on speed 2 or 3. The dough should start pulling away from the sides of the bowl and become tacky, not sticky. If the dough is too wet, add a sprinkle or two of AP flour. If too dry, a tsp at a time of milk will hydrate it. You're looking for a tacky, not sticky, feel to the dough.
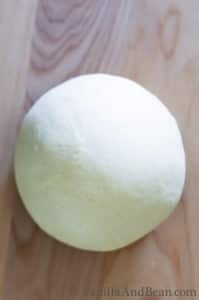
- Remove the dough from the bowl and shape into a ball. Place dough in a buttered bowl, cover with plastic wrap and let it rise for about an hour, or until it doubles in size. It may take longer than an hour, depending on the temperature of your kitchen. (This is ok as it is during this time that flavor development occurs! We don't want to rush this part!)
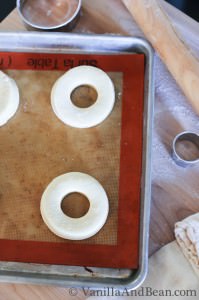
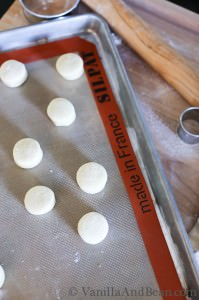
- Punch down the dough by folding the dough three to four times over onto its self (I know, not really a punch, but that is the term used). Cover again and let rest for 5 minutes. Remove the dough from the bowl and place on a lightly flowered surface. Lightly dust the top of the ball with flour. Roll out to about 1/2" thickness. Use a 2 1/2" cookie cutter to cut out doughnut rounds. Transfer doughnuts to a parchment or silpat lined baking sheet. Use a 1 1/2" cookie cutter to cut holes in the center of each doughnut. Transfer the holes to another parchment or silpat lined sheet. Cover with plastic wrap or plastic bag to prevent crusting.
- *Next Day Bake: At this point, the doughnuts can be retarded in the fridge overnight. Remove the doughnuts and holes from the fridge the next day, keep them covered and give them their final rise (proof). Proof for 1-2 hours or until they double in size.
- *Same day Bake: Allow doughnuts and holes to proof for about 1-2 hours or until they double in size. Preheat oven to 375F and bake doughnuts and holes for 8-9 minutes. They will not turn golden in color, rather almost a pasty color. The bottoms should just be a slight golden brown. Remove from oven, let cool just until doughnuts are able to be handled. Top as desired. Serve immediately.
For Cinnamon Sugar Topping:
- Mix the sugar and cinnamon together and place on a plate. Melt the butter on a separate plate. Dip the holes and/or doughnuts in the butter, then roll or sprinkle on the cinnamon sugar.
Ganache Glaze:
- Chop the chocolate into fine bits. Place in a bowl. Heat the cream just to scalding, but not boiling (you'll see little bubbles form around the edges of the cream - where the cream meets the pan). Pour the heavy cream over the chocolate. Let sit for about 1 minute, then stir to incorporate and melt all the chocolate. Add the corn syrup and vanilla and stir.
- If the consistency needs adjusting, you can add more corn syrup, or cream. Place ganache on a plate and dip doughnuts and/or holes into ganache. If the ganache stiffens a bit, pop it into the microwave for about 5 seconds at a time. Stir.
Notes
Nutrition is provided as a courtesy and is an estimate. If this information is important to you, please have it verified independently.
Any way to make these gluten-free? I LOVE your gf pizza dough. I try to make husband something special every Saturday night, a gf “cheat” meal. He asks for pizza using your crust recipe at least twice a month. I’d like to try gf donuts, wondering if you had suggestions.
Hi Julie! I wish I could say it would be an easy 1 to 1 swap with these, but having not tested or attempted any GF subs with these, I’m unable to say. So happy to hear y’all are enjoying the pizza! Hooray!
Hi Traci! These look so delicious- I’m literally making them right now! I just had a question- how do you keep your buttermilk from curdling when you warm it up? I first tried the microwave, dumped it, started over on the stove and stirred and heated very slowly and gently and it still curdled. Hopefully it works with plain milk, I don’t know what else to do! I was reading that buttermilk doesn’t like to be heated over 90 degrees. Any tips? Thank you!!! I’ll let you know how they turn out with regular milk!
Hey Stephanie! Oh good… I use milk + apple cider vinegar to make soured milk (buttermilk) and it curdles, so I don’t know about store bought buttermilk and heating it. The milk should be curdled somewhat since it’s soured. If you haven’t already try milk + acv and heat it to 90F (I’m wondering about thermometer calibration now… : /). We’re basically warming the milk to help activate the yeast. I hope this helps.
Hey i might be blind but i cant see anywhere when you added the vanilla paste!
Oops, sorry about that Hannah. Add it with the soured milk.