


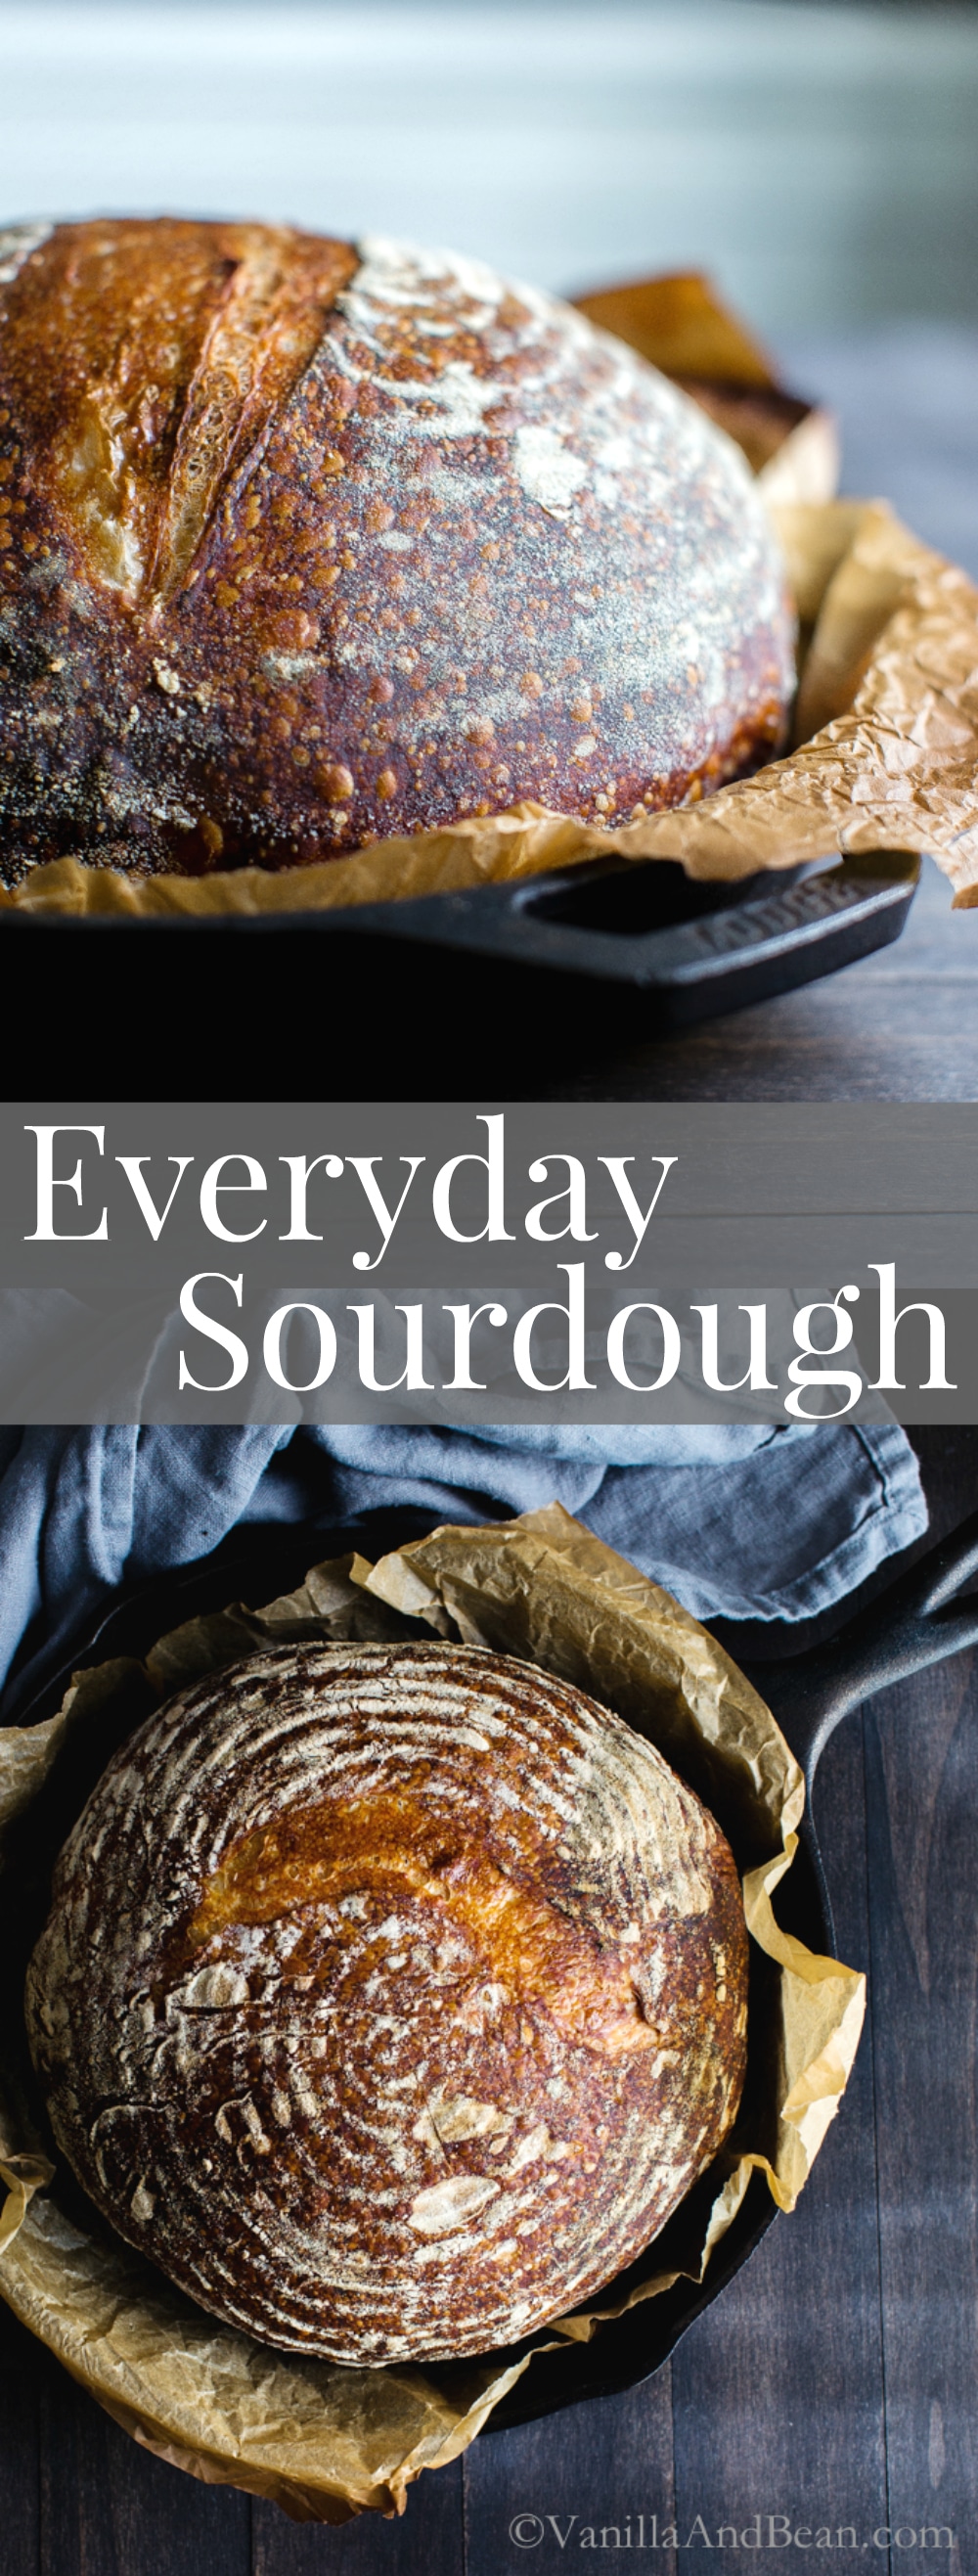
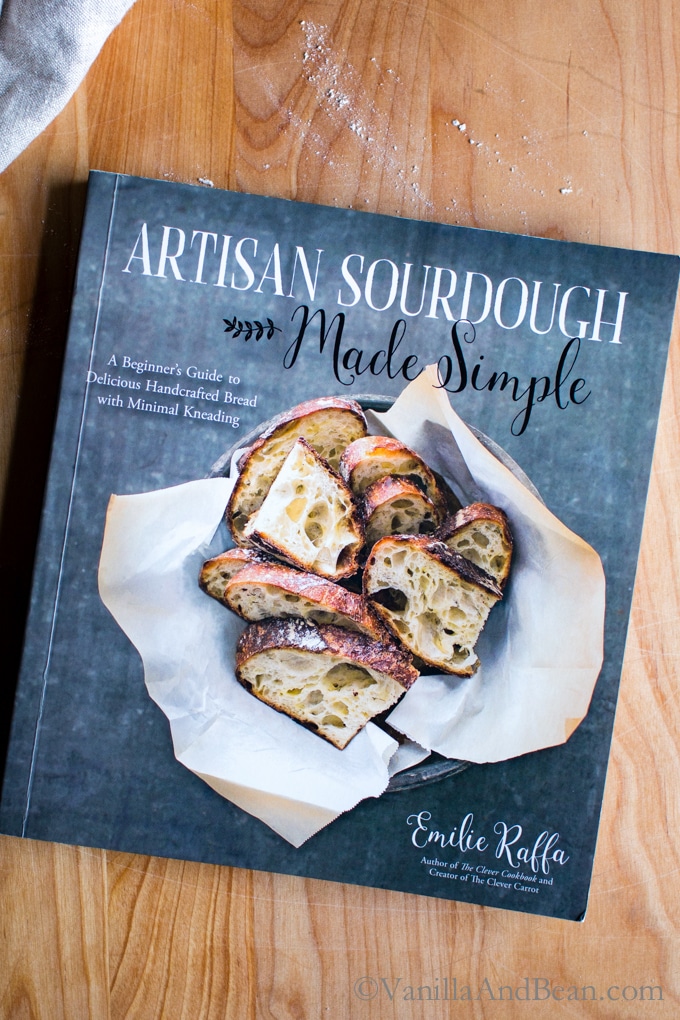
New to homemade sourdough bread or simply improving your craft? Everyday Sourdough from Emilie Raffa’s book Artisan Sourdough Made Simple is a fabulous starting point for new sourdough bakers or simply to hone your sourdough skills. DIY a Sourdough Bread Starter to create a beautiful wild yeast sourdough loaf!
Disclosure: I received a copy of Emilie’s new book and am thrilled to be able to share her book in this space (with permission). All opinions are my own.
A Sourdough Journey
Prior to going to pastry school, I’d never tried making homemade sourdough bread, although I had read books about it. Intimidated by the terminology, flours, feeding schedules, shaping techniques and knowing, I never took the time or had the courage to dive in.
During pastry school I worked with yeasted bread until I could make it in my sleep. But it was naturally leavened sourdough that mystified me. Only having a few opportunities in school to work with it, I never really gained the hands on knowledge I’d anticipated. So, I continued to read about it, gleaning little nuggets that would some day make me the bread baker I wanted to be.
related: make an Easy Homemade Sourdough Starter.
A friend of a friend offered some sourdough starter, knowing my interest. I promptly killed it after attempting sourdough again. Then, I carried some of my mom’s starter back to Whidbey with me after a visit to Texas.
I persisted, yet…
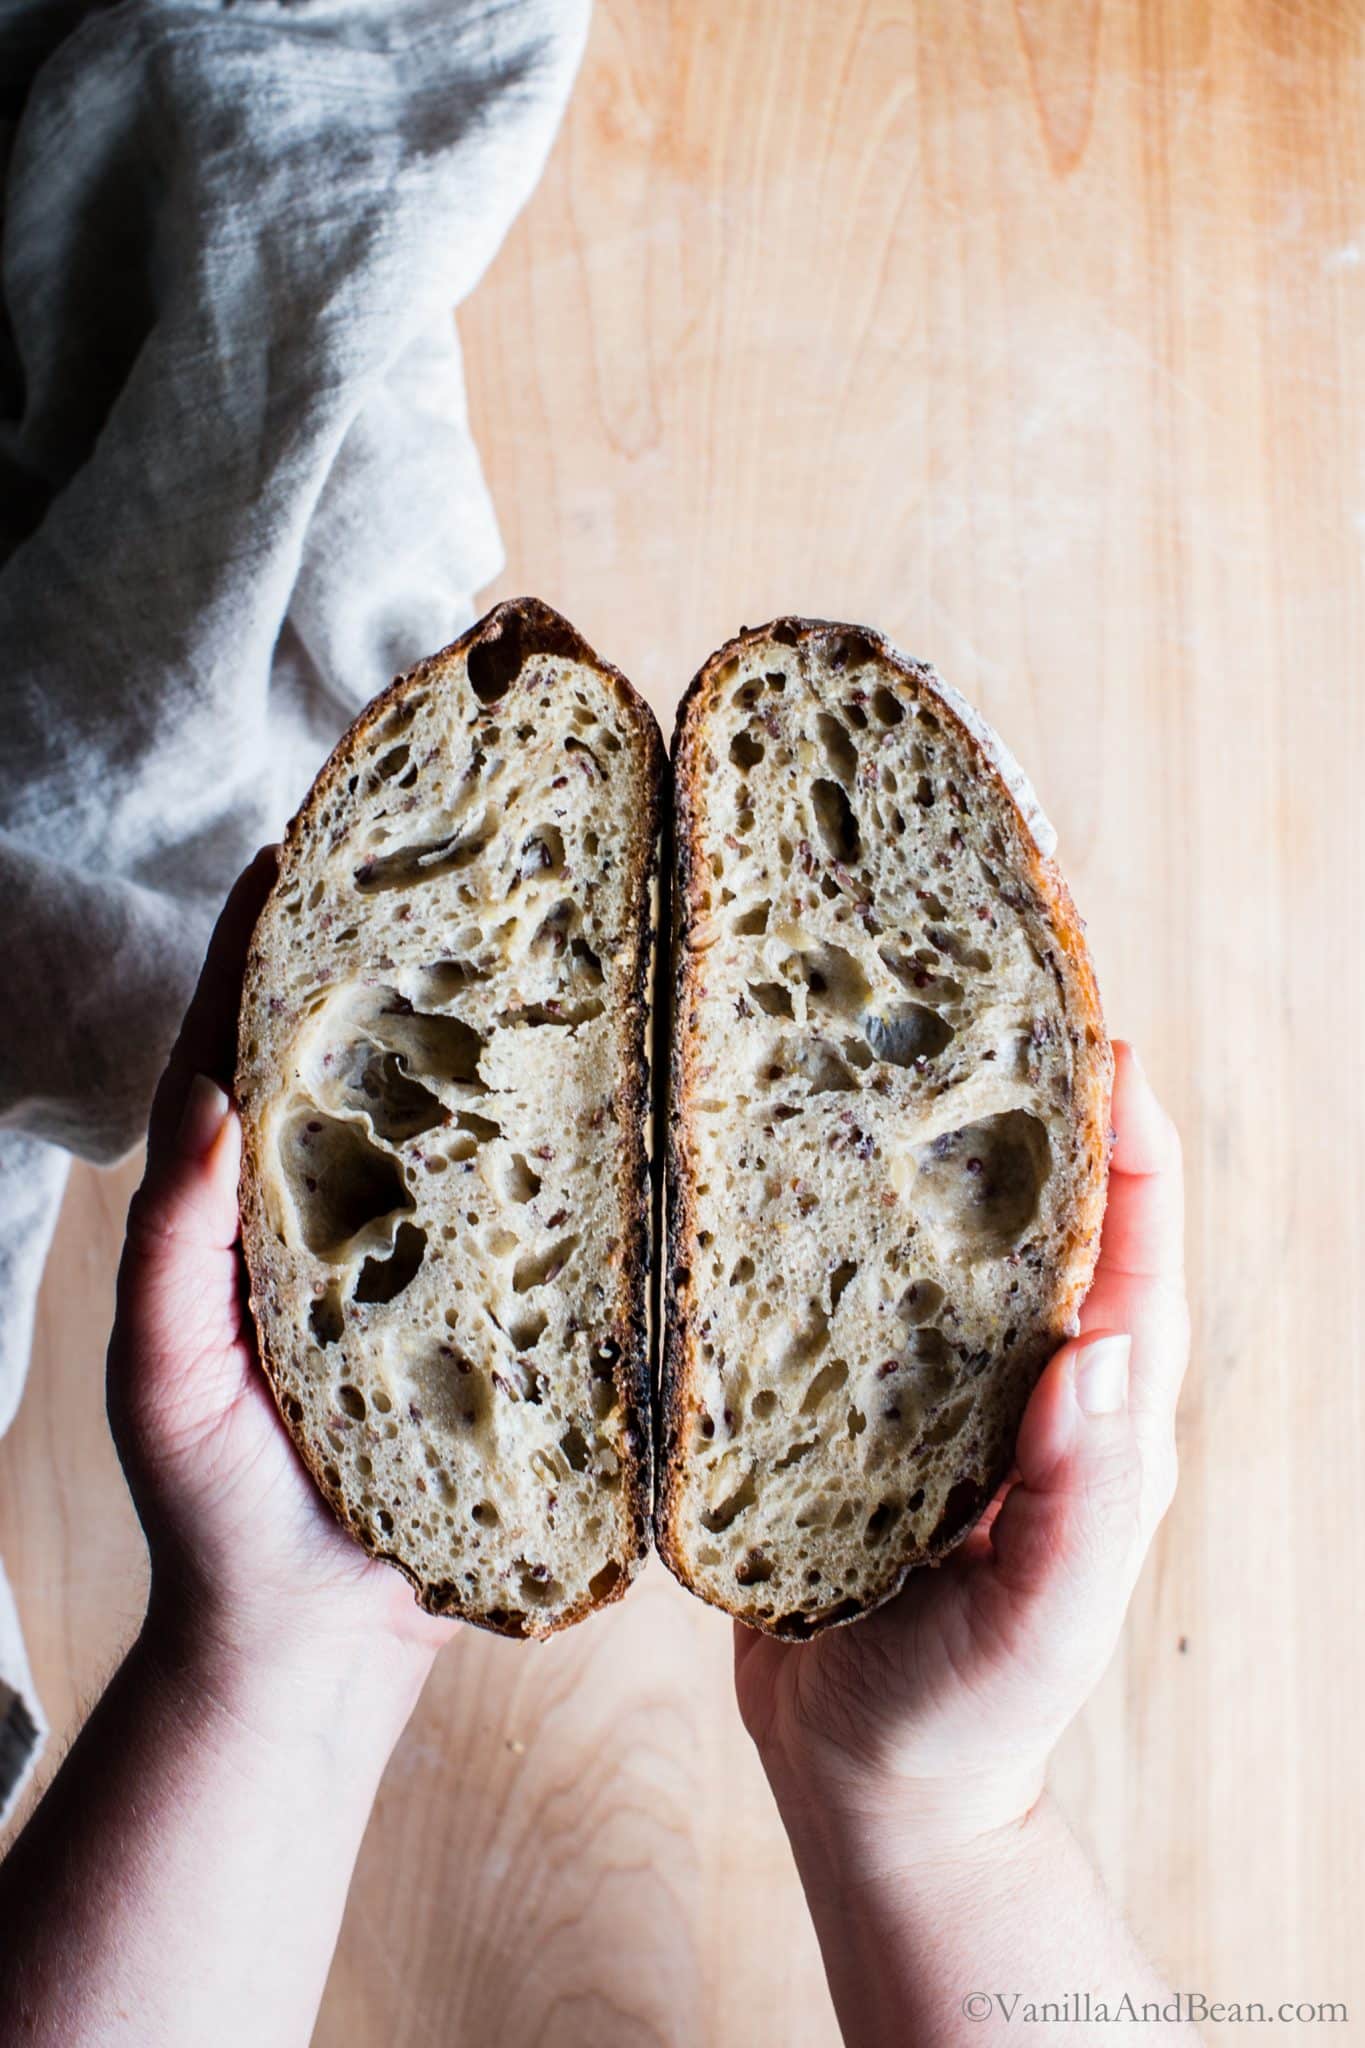
I couldn’t quite get the dough to its fluffy pillowy softness, the crumb to its tender-chewy texture, or the crust to its crusty bliss as I had tasted, seen in books, bakeries.
I tried again, still not producing the loaf of my dreams. Why is this SO hard?
I gave up sourdough baking early last winter with the hopes of starting again this fall.
Sourdough Success!
Enter Emilie Raffa’s new book Artisan Sourdough Made Simple. When I heard she was publishing a book on her sourdough method, I knew it would be my best chance yet to finally learn how to make the perfect loaf. I’ve been following Emilie’s blog, The Clever Carrot, for a while now.
After diving into sourdough again using Emilie’s thorough and approachable new book and in a short period of time, I can confidently say,
I am a sourdough baker.
Making everything from Sourdough Sandwich Bread, Sourdough Pie Crust and Homemade Sourdough French Toast to this simple Buttery Sourdough Discard Cornbread recipe.
And, you can do it too!
Artisan Sourdough Made Simple Includes
- Photography of every recipe
- Illustrations and photography for basic tools, handling, shaping, and scoring patterns
- FAQ section – so helpful
- Sourdough terminology – explained simply
- Good to Know tips in each section
- Sweet and savory loaves
I’ve baked three everyday sourdough loaves, and a cheddar-jalapeño chive loaf (omgeeee!), and made gruyere-chive crackers and waffles with leftover sourdough starter. I love them all and can’t wait to try her basic no-knead focaccia, mighty multigrain, and cinnamon raisin swirl among so many others. I’m just getting started!
An Essential Resource
Emilie’s book is for the beginner or more advanced sourdough baker. So if you’re just starting sourdough, intrigued or have been baking for a while, this book is for you. Her recipes are approachable, creative, completely mouthwatering and clearly written for success. Her photography and gentle nudges will inform and inspire you.
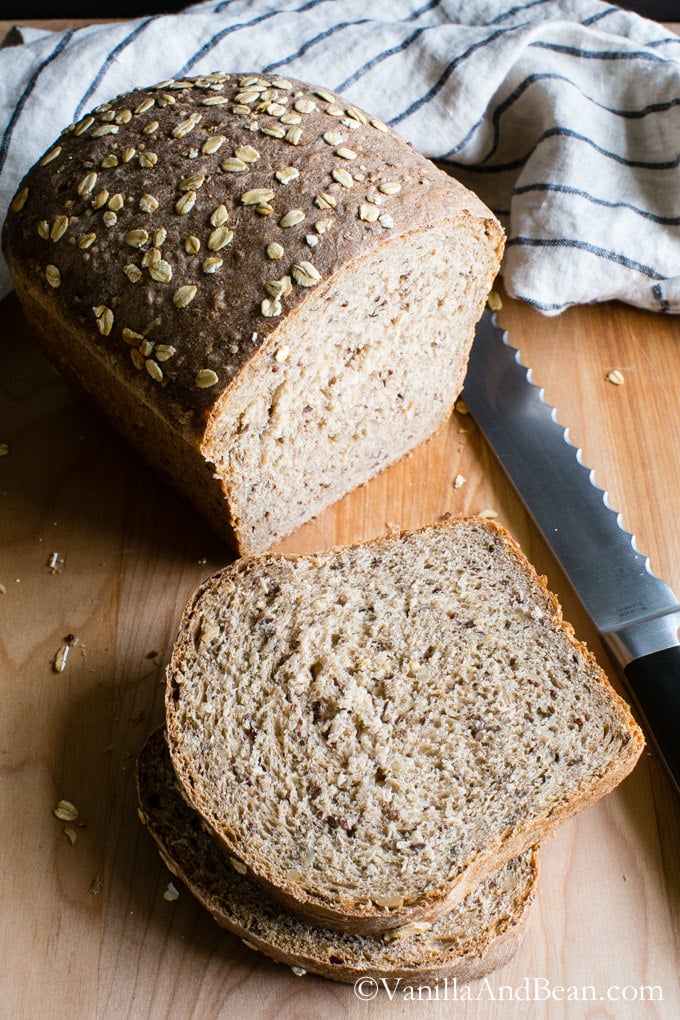
Looking for a delicious Multigrain Sourdough Bread recipe to challenge your bread baking prowess? Check out this reader favorite Seeded Multigrain Sourdough Bread.
My Sourdough Toolkit (affiliate links):
-
-
- 7 Quart Dutch Oven
- 10″ Cast Iron Skillet with Deep Dish Skillet for a lid
- Bench Scraper
- Parchment Paper
- Digital Food Thermometer
- Lame – for scoring the dough
- Banneton(s)
- Digital Scale
-

Emilie's Everyday Sourdough Recipe
Ingredients
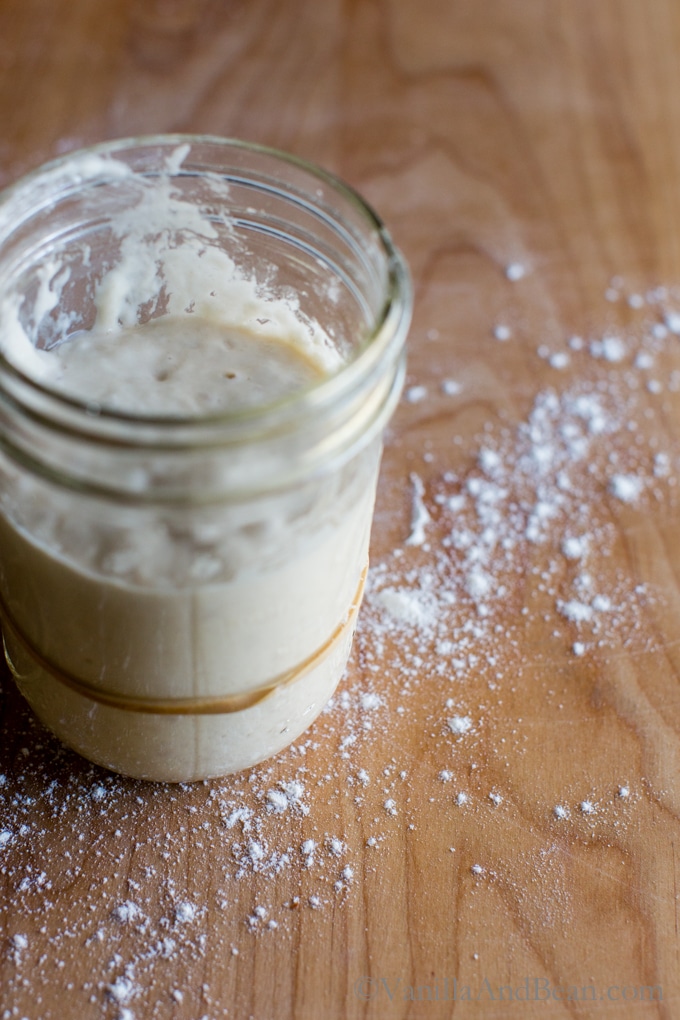
- 1/4 cup (50g) Sourdough Starter previously fed, active and bubbly
- 1 1/3 cup + 2 tablespoons (350g) Warm Water about 80f (26c)
- 4 cups (500g) Bread Flour
- 1 1/2 teaspoons Fine Sea Salt
Instructions
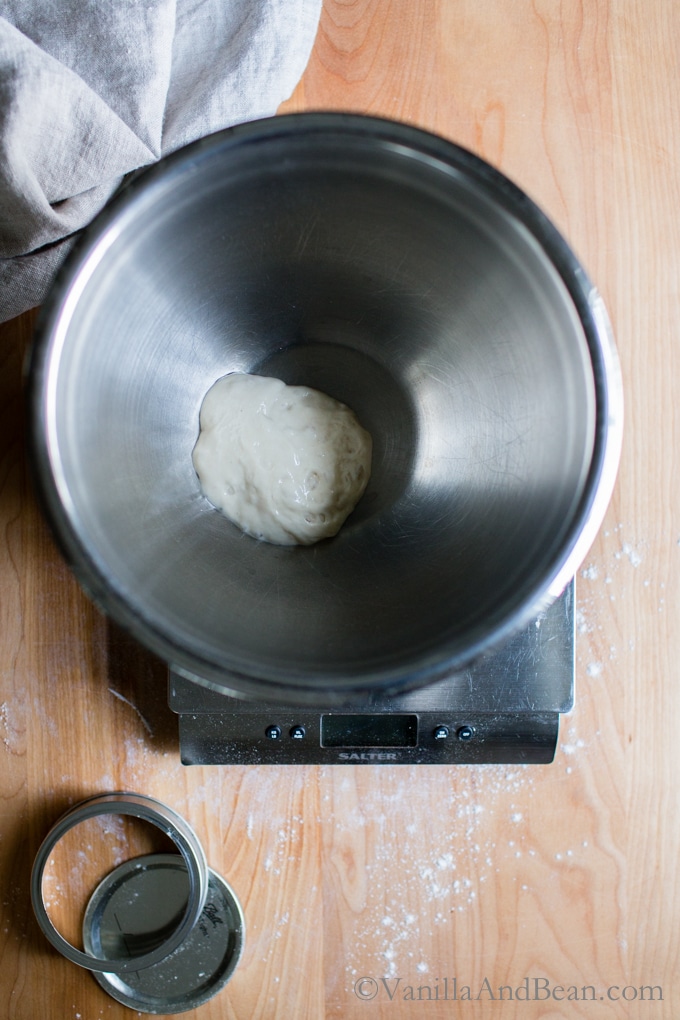
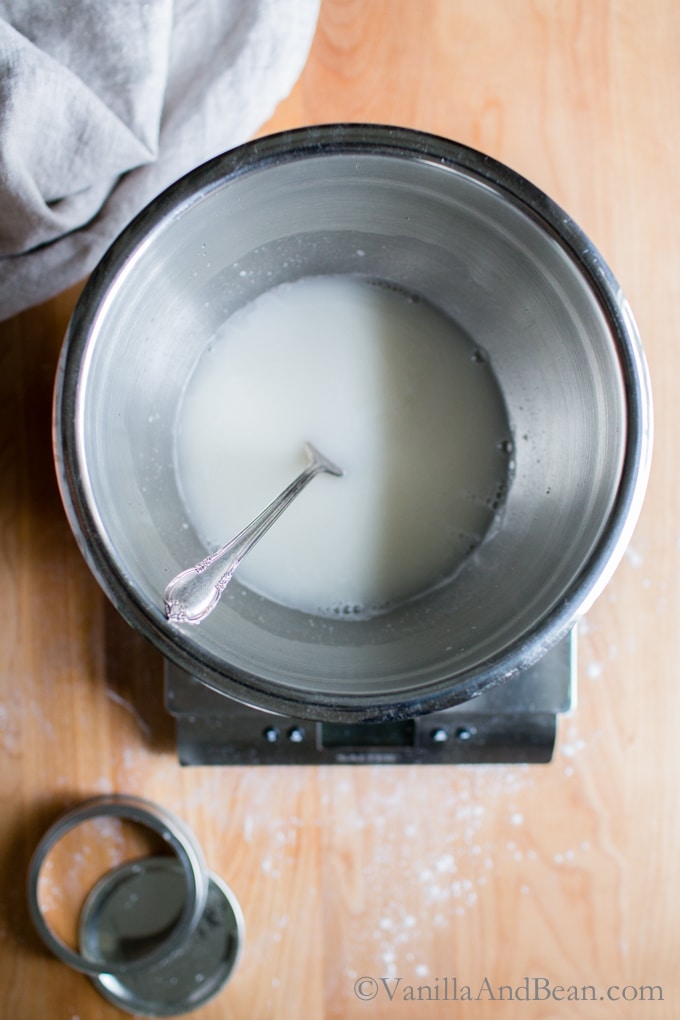
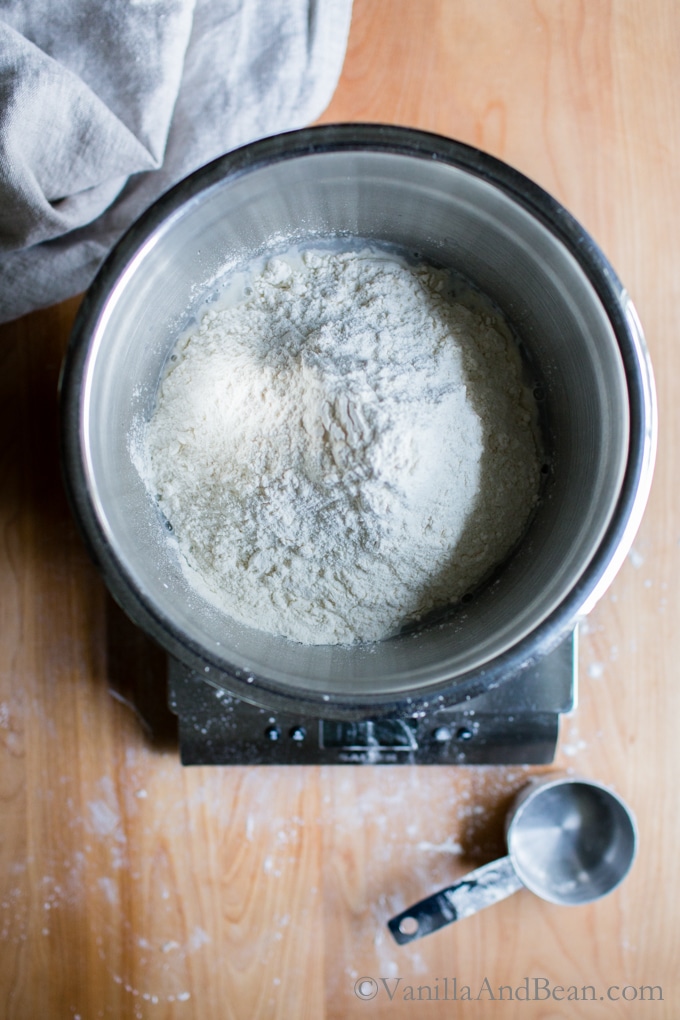
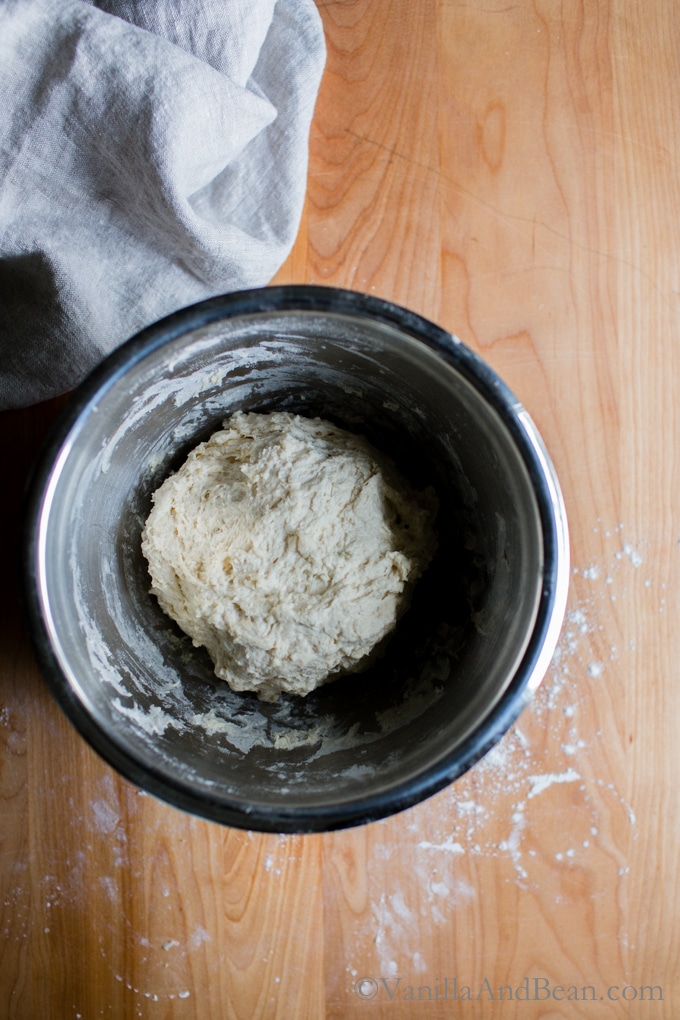
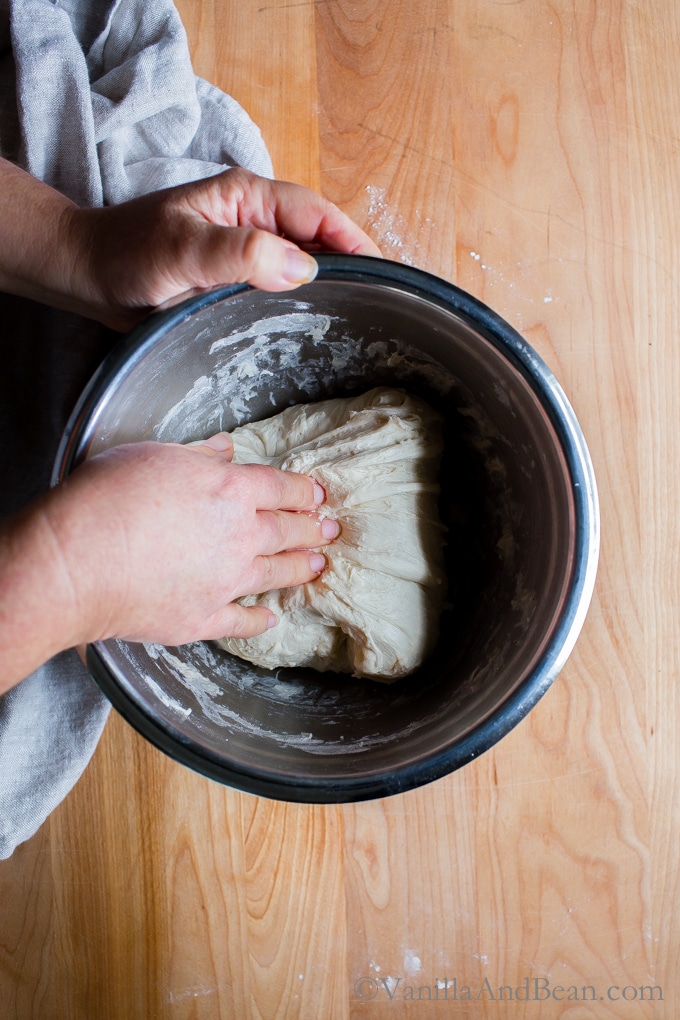
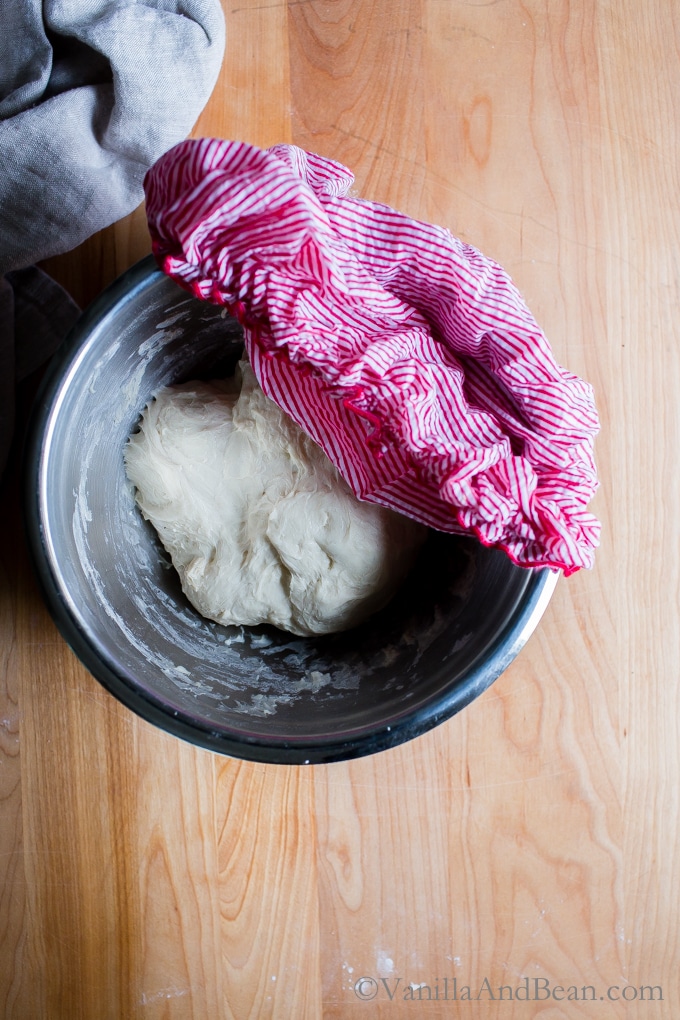
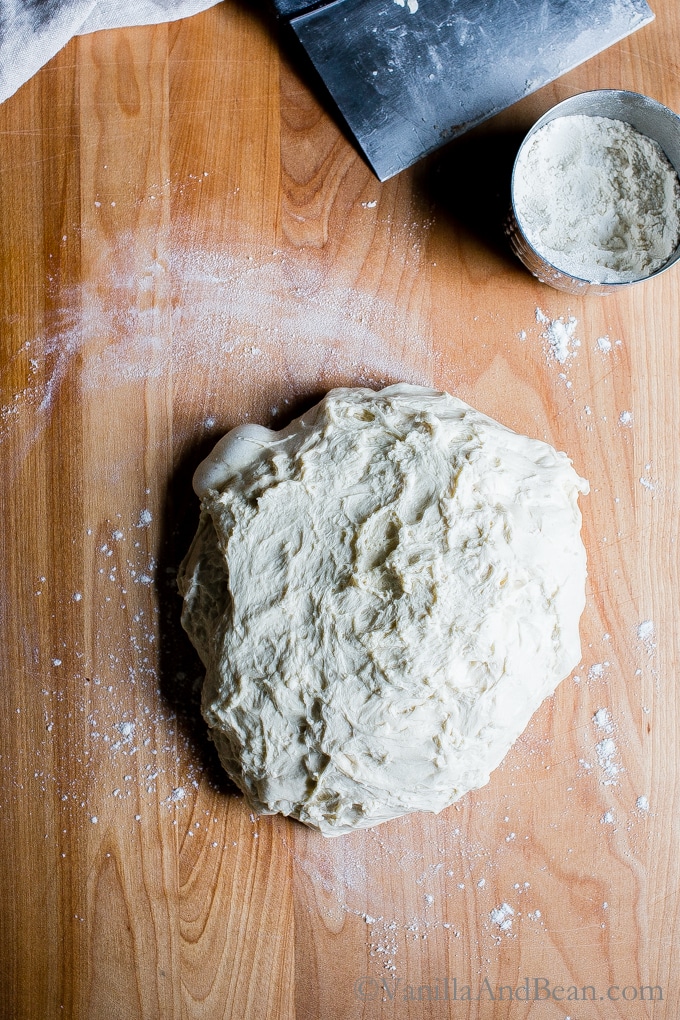
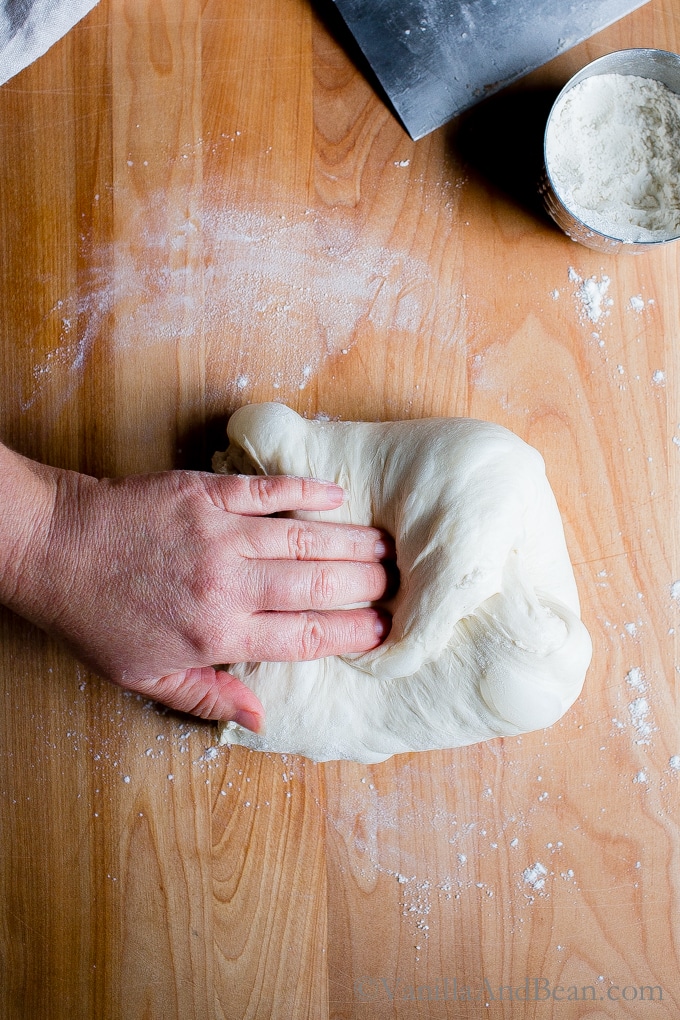
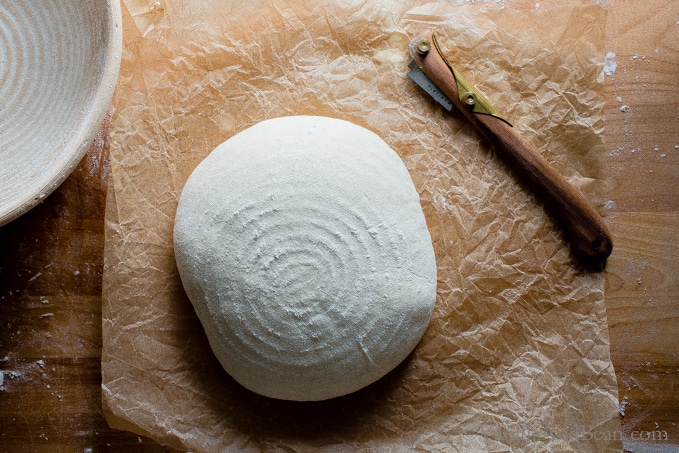
- Make the Dough: In the evening, whisk the starter and water together in a large bowl with a fork. Add the flour and salt. Combine until a still dough forms, then finish mixing by hand to fully incorporate the flour. The dough will feel dense and shaggy, and it will stick to your fingers as you go. Scrape off as much as you can. Cover with a damp towel and let rest for 30 minutes. Replenish your starter with fresh flour and water, and store according to preference. After the dough has rested, work the mass into a fairly smooth ball. To do this, grab a portion of the dough and fold it over, pressing your fingertips into the center. Repeat, working your way around the dough until it begins to tighten, about 15 seconds.
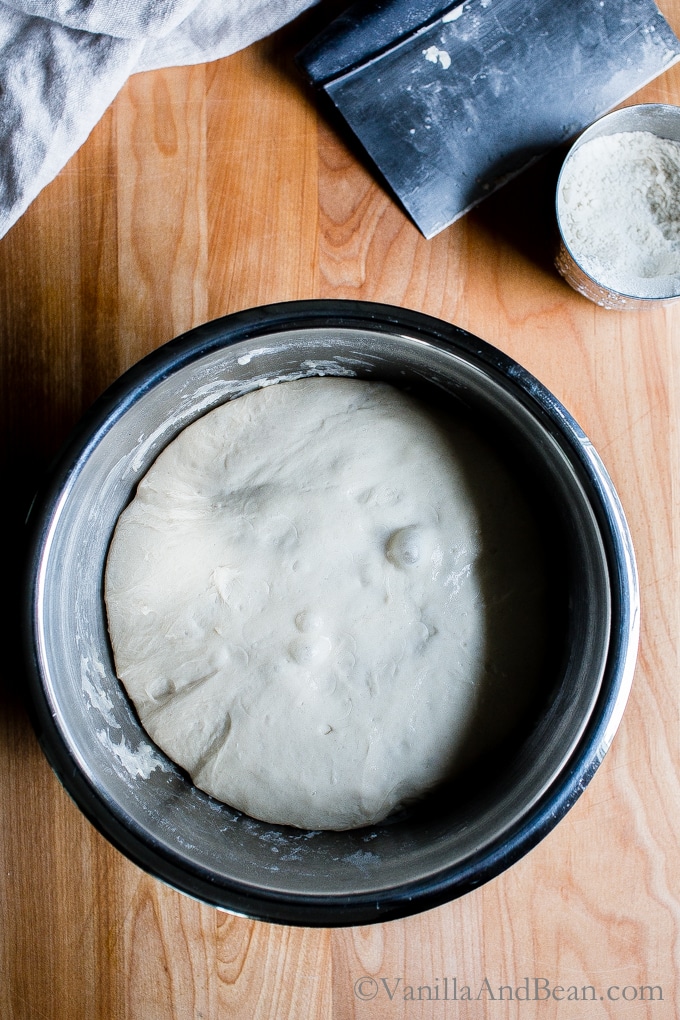
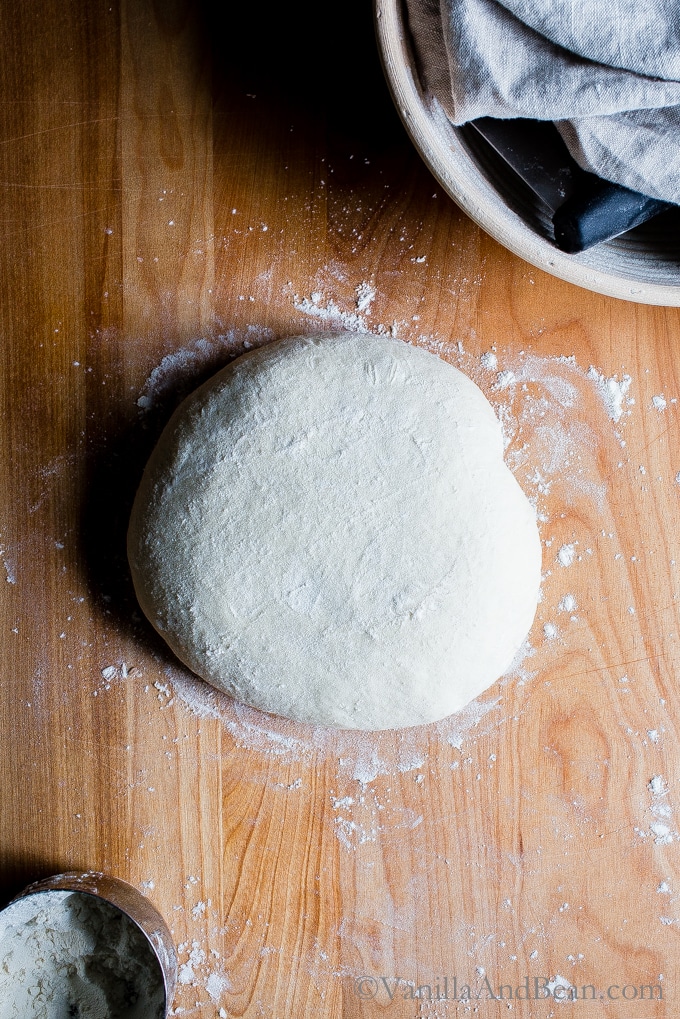
- Bulk Rise: Cover the bowl with a damp towel and let rise overnight at room temperature. This will take about 8-10 hours at 70F (21C). The dough is ready when it no longer looks dense and has doubled in size. (Traci's Note: Mine generally takes 12-13 hours to rise, but I have a chilly kitchen!).
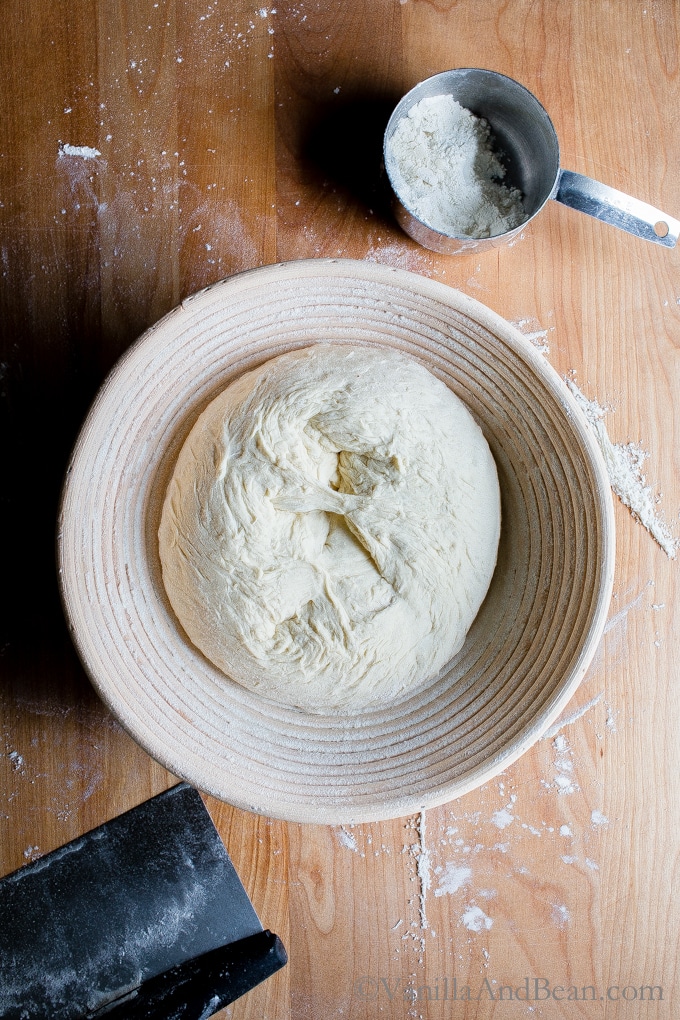
- Shape: In the morning, coax the dough into a lightly floured work surface. To shape it into a round, start at the top and fold the dough over towards the center. Turn the dough slightly and fold over the next section of dough. Repeat until you have come full circle. Flip the dough over and let rest for 5 to 10 minutes. Meanwhile, line an 8-inch (20cm) bowl with a towel (or use a banneton) and dust with flour. With floured hands, gently cup the dough and pull it toward you in a circular motion to tighten its shape. Using a bench scraper, place the dough into the bowl, seam side up.
- Second Rise: Cover the bowl and let rest for 30 minutes to 1 hour. The dough is ready when it looks puffy and has risen slightly but has not yet doubled in size. Preheat the oven to 450F (230C). Cut a sheet of parchment paper to fit the size of your baking pot leaving enough excess around the sides to remove the bread. **UPDATE (5.20)** Place a sheet pan on an oven rack directly under the oven rack you'll be baking the bread on. This protects the baking vessel from the intense heat of the oven and helps prevent a too-dark or burnt bottom. (See notes for more information).
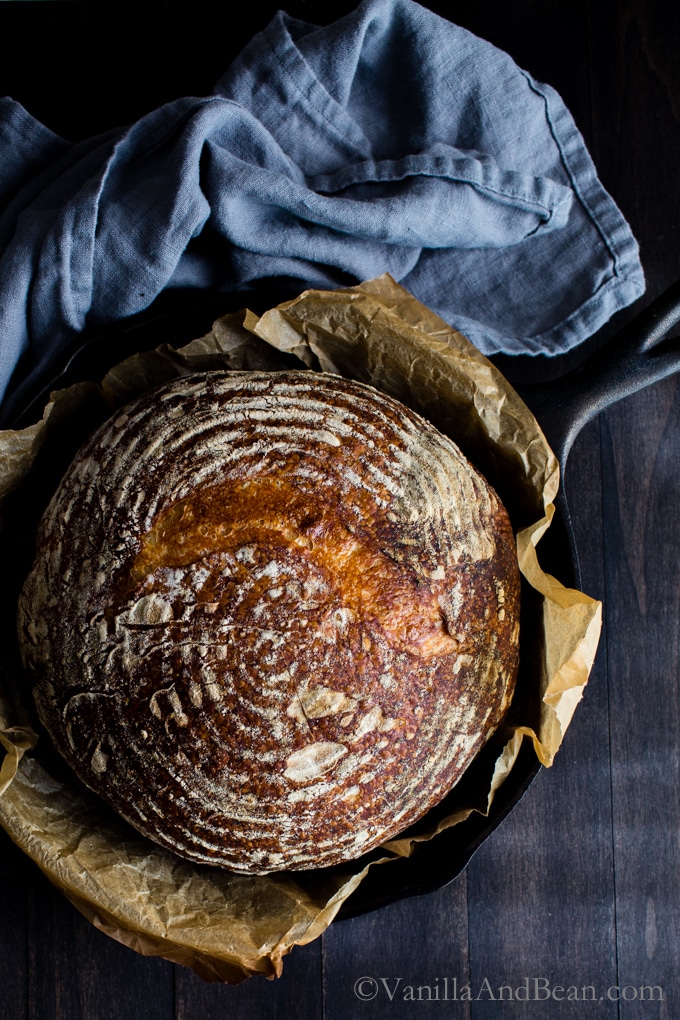
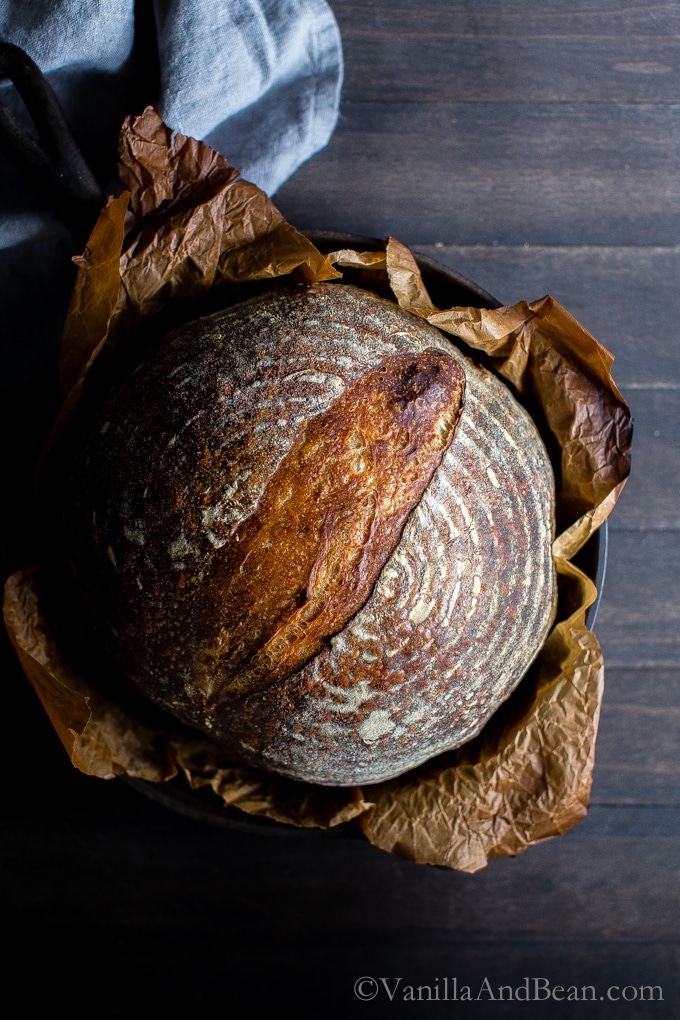
- Score: Place the parchment over the dough and invert the bowl to release. Sprinkle the dough with flour and gently run the surface with your hands. Using the tip of a small, serrated knife or a razor blade, score the dough with a cross-cut pattern about 1/3" (8mm) deep and about 2-3" (5-7cm) on the top or any way you like. Use the parchment to transfer the dough to the baking pot.
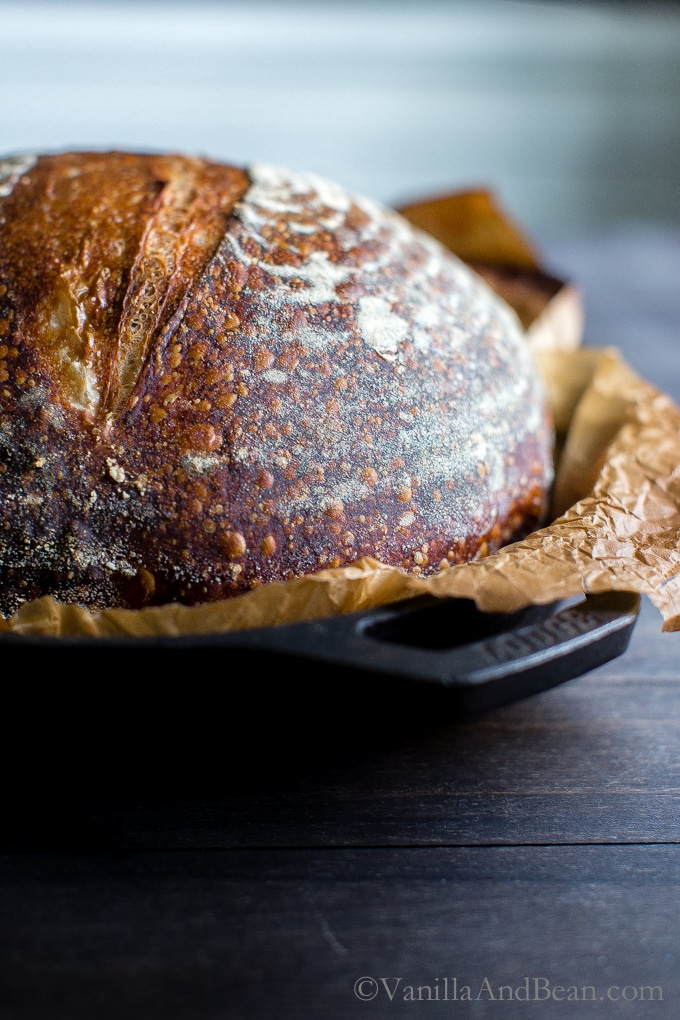
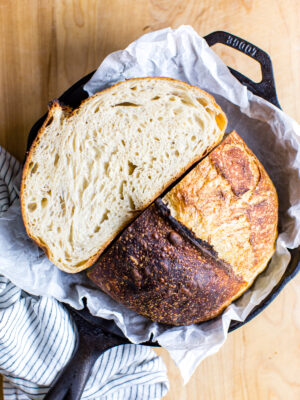
- Bake: Bake the dough on the center rack for 20 minutes, covered. Remove the lid and continue to bake for 30 minutes. Then, carefully remove the loaf from the pot and bake directly on the oven rack for the last 10 minutes to crisp the crust. (To check if the bread is ready, check the internal temperature of the loaf. It should read between 190F-205F when done.) When finished, transfer to a wire rack. Cool for 1 hour before slicing. Sourdough is best consumed on the same day it's baked. To maximize freshness, cool completely and store at room temperature in a plastic bag for up to one day (My sourdough is generally storing for between 3-4 days.)


I am a soudough bakes in the making and i need help!! I am doing my starter, so I have nursed “nani” for almost 3 weeks now and she is very stuborn and doesn’t want to show too much activity. I decided its my cold kitchen, so I tried in the oven with light on and nani grew! She did not even double its size and came back down again!! Other days I think this has happen because I can see the marks showing it was at higher level and came back down!!
Any ideas what is wrong with nani? And most important how can I fix her? I am dying to make my bread.
Oh I am doing 113 gr of starter, flour and water same amount. Mix whole wheat and white flour.
Thank you
Hi Lucia! Nani needs some support! Here’s what I’m thinking, and this has been my experience. When I first started making sourdough, I attempted a mix of whole wheat and white flour for my starter. I experienced the SAME thing you did. My starter, Claire, never doubled in size. So, I started feeding my starter all purpose flour with the same hydration you use. I mix 60g starter, 60g water and 60g AP flour. Claire started doubling in size over time as the percent of whole wheat dropped in my starter. Using all AP flour is the most reliable way, I’ve found, to manage and maintain a strong starter. Save the whole wheat to use when you mix the dough. A strong sourdough starter (and high quality flour) is your biggest asset in making the bread of your dreams! I hope this helps.
Interesting about the AP Flour. I find that my pure rye starter is much more active than my AP starter! I’m a sourdough returnee, having made all our bread back in the 70s and then become a vagabond for 20 years :) Things have changed a lot and I really enjoy your blog. Thanks!
Thank you Traci! Nani has been fed AP flour and hopefully in few days she will be growing again.
I will let you know my results.
Hi fellow bakers,
This recipe was my best attempt so far at sour dough bread. My husband loved it. I’m trying to improve my bread baking in general. My breads have a tendency to be dense with little or no air bubbles. This recipe I did get some small 1/4″ bubbles but feel they should be larger. Any advice welcome. Will try this recipe again soon. Maybe tomorrow.
Terry
Hi Terry! Thank you for your note and five star review! So happy to hear you’re enjoying the bread. For a more open crumb, you’ll need a higher hydration dough – it’s the water that really opens up the bread! The higher hydration though, the more challenging the dough is to shape – it’s like shaping a blob – but it’s totally doable. Thank you again Terry!
Hello, I let my starter rise overnight for 13 hours at 70 degrees. It doubled in size and it was bubbly at the top so I thought I was good to go. When I dumped it on the flat surface it was veeeeery runny. I couldn’t even shape it into a ball it would just go flat again. My starter floated, I thought I followed the instructions correctly. What did I do wrong/how can I fix it? Thank you!
This is my new go-to sourdough recipe! I had been trying (and failing) with a different one for a few months. My first loaf with this recipe was great! And they’re only getting better :) Thanks so much!
Hey Chelsea! SO happy to hear of your success! Emily’s technique is a game changer for sure! Hoooray for a fabulous first loaf and that they’re getting better! Wooooo!!!
Hi Anna! I’m sorry to hear your dough was runny after bulk fermentation. Since it’s difficult for me to say what went wrong.. can you share a bit more information? A few things come to mind…. what kind of flour did you use? Did you weigh your ingredients? Can you tell me a little bit about your starter – what is the ratio of starter:water:flour ? Did you bake the bread? How’d it taste? How old is your starter?
Hi Traci! Thank you for your reply. I ended up remaking the dough and it turned out perfectly the next day! I do have a question, because the dough has risen overnight it is ready to bake early in the day. After bulk fermentaiton could I put it in the fridge and bake it later on the in the day so we have warm bread for dinner?
Hi Anna! Hooray! So happy to hear! After bulk, you can proof it in the fridge. Simply shape the dough and place it in the proofing vessel as you normally would. Spray the bottom of the bread with a spritz of water, wet two towels and lay it over your proofing vessel (this so the dough doesn’t dry out). Pop it in the fridge for a long proof – six to eight hours, I’ve read some proof up to 12 hours, but I’ve not tried it. When you’re ready to bake, preheat the oven and pull the bread from the fridge to allow the dough to warm up a bit – it should get puffy as Emilie indicates. Score and bake. I hear some bakers bake from fridge right to oven, after scoring – but I’ve not tried that either. This may take a bit of experimentation! Let us know how it goes!
Awesome! Thank you Traci!
Hi there.
I bulk ferment, right after kneading by hand. Into my fridge for 24 hours. Then I take it out, allow to rest on my granite counter not in fermentation vessel but on its own for 20 minutes(bench rest) Then shape and place in well floured bannaton. Allow to rise 45 minutes covered with a clean towel on my preheating oven.
I will have to try baking straight from the fridge at some point.
Thank you for sharing Charlie! There seems to be so many techniques to making a good sourdough. Looks like we’ve more to try!
Hi, my loaf is very flat. What did I do wrong?/
Hi Katy! I’m sorry to hear your loaf is flat. I’ve totally been there. In order to figure out what may have gone wrong, I need more information. How long did you bulk ferment for and at what approximate temperature? Did the dough double in size? What is light and puffy? Was your starter ready (did you do the float test?). Can you tell me about your proof as well?
The starter that I originally purchased from a major flour producer recommended 1 part water to 1 part starter to 2 parts flour. If using these proportions, what are the outcomes?
Hi Linda! Having not tried a 1:1:2 starter, I can only predict that the dough may be a bit stiffer. A lower hydrated dough yields a tighter crumb – but perfectly delicious!
When ready for use in this recipe, what consistency should the starter be? My newly-made starter is about the consistecy of cold buttermilk. Should it be thicker??. Thanks (I’m a first time baker)
Hi Carroll! It sounds like the starter will be okay. I use a 1:1:1 ratio when I feed my starter (60g starter, 60g water, 60g flour). Please let us know how your bread turns out!
Thanks
Hello Traci-
Seven days later and my starter is a go! :-)
Would love to bake a loaf of bread in the AM, but I only have a 3.5 quart dutch oven, do you think this will be too small? Thoughts on cutting the dough in half and baking two?
Thank you!
Hey Christina! Yes! Cut it in half and proof one at room temp, and the other in the refrigerator! The one in the fridge may need a few minutes to warm up / puff up before you bake it. I have guidance on baking in my Seeded Multigrain Sourdough: https://vanillaandbean.com/multigrain-sourdough-bread/ I hope this helps and you bake the bread of your dreams!
Hi Traci! I actually don’t have a dutch oven — the closest thing I have is a slow cooker piece. Any tips or tricks or alternatives to that part?
Thanks!
Hi Megan! If baking without a lidded vessel or Dutch oven, Peter Reinheart, in his book The Bread Bakers Apprentice, suggests baking the loaf on a pan or pizza stone and placing a heat proof pan in the bottom of the oven. Once the loaf goes into the oven, half fill the bottom pan with boiling water. This creates a nice steamy environment. Be careful though. I’ve busted my glass oven window when I was spraying the inside of the oven (with cold water) to create steam. I was really new to sourdough at the time. A Dutch oven or lidded cast iron skillet (one shallow and one deep) is a great investment if you’re baking on a regular basis. I hope this helps and you bake the loaf of your dreams!
Thanks so much! Maybe you’re right and I should just invest in a proper dutch oven — if nothing else, for baked beans! I have a stone, butvthat must have been scary when your oven burst. Oh my goodness. I’ve got a good starter I’ve been incubating all week — super excited to try out your recipe <3 Thanks for all of your help!
I use my DO for SO many things, Megan. In fact, it’s one of my most used pots! It cleans up easily too. It’s so versatile! And then there’s bread. LMK if you give the recipe a go, Megan!
Hi! I’d love to incorporate some seeds or nuts (pumpkin seeds, chia seeds, flaxseed, etc) into this bread. But i want to make sure they’re soaked in water overnight before I incorporate them into dough. Any concerns with the added water from the seeds messing with the dough? Any recommendations on which stage to add the seeds in?
Hi Joyce.. I have a Seeded Multigrain Sourdough If you’d like to use that recipe… it’s linked with a picture just above the recipe card on this recipe. I hope this helps.
Hello, I just tried my bulk rise but the dough did t have any bubbles at all. I used bubbly starter and it floated beforehand. I don’t have time to bake it now, but I was just curious if that means this batch was a dud.
Hi April… how long have you been in bulk? What is the temperatureish of your kitchen (cold, cool, warm?). I wouldn’t call it a dud yet… give it more time. Did it rise at all, even a little? If it did, it just needs more time to ferment. I hope this helps!
Hi there, I followed the recipe exact so far (I’m in the bulk rise portion) but my dough is far from shaggy and wet. I feel like there was too much flour to water, but I know the measurements were the same as yours. Is this going to make my bread too tough or too tight of a crumb/ no yummy bubbly holes?
Same
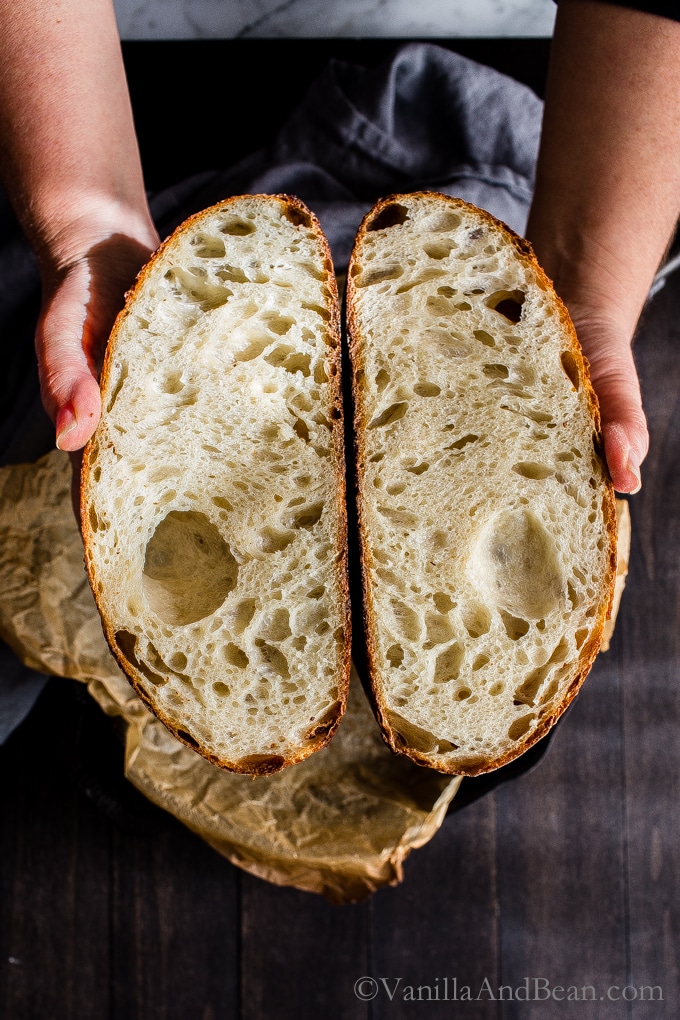
Hi Louis! I’m copying my reply to Laura in case you didn’t receive it. “…..In bulk the bread shouldn’t be ‘wet’ necessarily, but the dough should be hydrated with no flour clumps or dry patches. During the beginning stage of bulk, the dough should be dense and shaggy as indicated in the recipe. What’s important to understand is that this recipe is not a high hydration recipe. The crumb in the images above is this recipe. If you’d like a more open crumb, you’d need a higher hydration recipe. I hope this helps. “
Hi Laura! By now you’ve probably baked your bread. How did it turn out for you? In bulk the bread shouldn’t be ‘wet’ necessarily, but the dough should be hydrated with no flour clumps or dry patches. During the beginning stage of bulk, the dough should be dense and shaggy as indicated in the recipe. What’s important to understand is that this recipe is not a high hydration recipe. The crumb in the images above is this recipe. If you’d like a more open crumb, you’d need a higher hydration recipe. I hope this helps.
Hi! Could I double check that your recipe states 50g starter and 500g bread flour? I recall reading 150g on Emilie’s blog. Thanks!
Hi Aparna! Yes 50g is correct. There are many different recipes for sourdough. Take a look at the success comments below using this recipe! I hope this helps.
Starting this recipe and my starter didn’t pass the float test. Big deal, or no? I’d heard it helps but never tested my previously attempted so-so loaves!
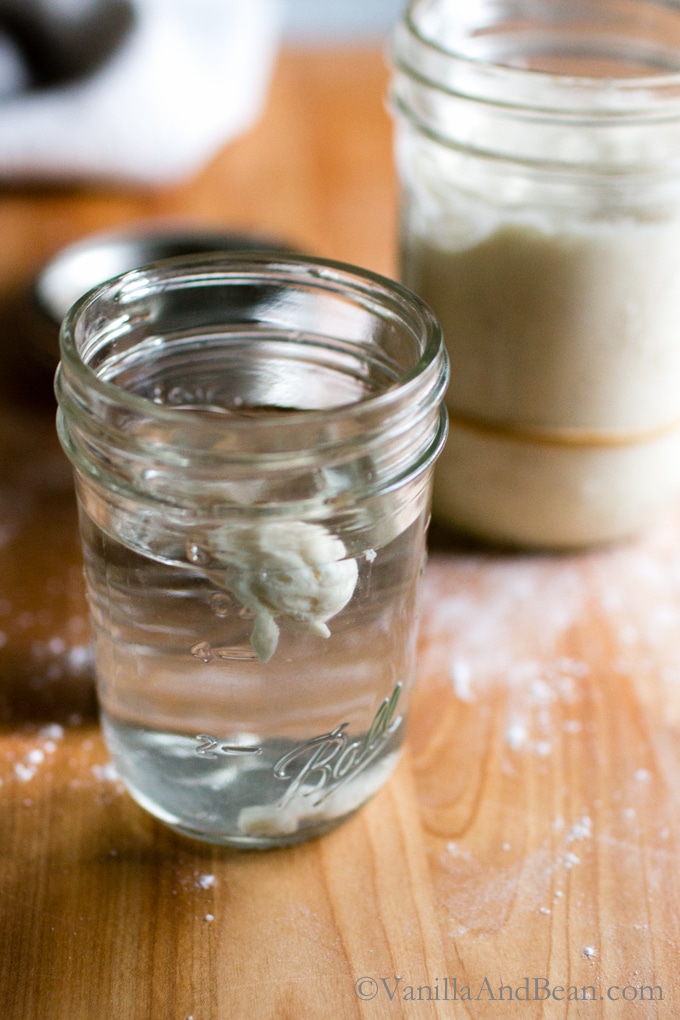
Hi Patricia! Thank you for your note. When first starting my sourdough journey, I found that the float test helped me understand when my starter was ready to bake with and when it was not. This was a game changer in the quality of my bread, because the starter needs to be at it’s best, bubbly, doubled in size, and strong prior to baking. I’ve baked loaves where the starter isn’t quite there and found it did make a difference. Now after baking so much bread, I know what the starter looks like when it’s ready, so I don’t float test anymore. I hope this helps and you bake the bread of your dreams!
This recipe is by far the best I’ve tried! I made two loaves and both came out very dense. I felt like one loaf was on the wet side and one on the dry. Any recommendations?
I also didnt have a dutch oven so I cooked on a pizza stone with a stainless bowl over the top. I ended up with a very crunch outside that is great!
SO happy to hear, Madison! Sounds like you got a really nice crust! There are a variety of reasons why your dough turned out dense, so I’m afraid the answer isn’t cut and dry. How long (and at what temperature) did the dough ferment? Was your starter bubbly and doubled in size? Do you have a young starter or more mature? Was the oven at temperature when you baked? Are you weighing ingredients? Don’t give up! And keep practicing! I can’t tell you how many dense loaves I had before I finally got an airy texture!
Where do you get and where do you keep sourdough starter?
Hi Linda! You can make your own starter or purchase it online. King Arthur Flour has a recipe you can use. The starter can be stored in the refrigerator or at room temperature, if baking daily. I hope this helps!
Yes!! Great recipe. Second recipe I’ve tried and worked out well. Mine is still a little wet but could it be because of a “wetter”, more liquid starter?
Hi Joyce! Thank you for coming back and leaving a note! So happy to hear! Did you temp the internal of the bread before pulling it from the oven? You’re looking for a temp of between 190F-205Fish.
Found this site and wanted to try your recipe out, your start looks thicker than mine, mine is like a pancake mixture. I usually feed equal parts start, flour water.
It was nice and bubbly when I added it but did not get much growth over night, a quarter cup seems low, I usually use a cup with abt 7 cups of flour in other recipe
Hi Greg! I’m sorry this recipe didn’t work out for you. My starter is also equal parts flour and water. Sometimes due to ambient temperature, the dough is slow. I’ve had to bulk up to 15 hours before! I’ve never tried a cup of starter in sourdough bread… I’ve always made mine with just 50g (1/4C). If your dough is still in bulk, give it more time to rise. That’s all it probably needs.
Emily…I just found this on a Google search and am going to try it. I have been a self-taught baker of sourdough off and on since the early 1990s and love the satisfaction it brings. I will post my results…yes, including professional images!
Hi Charlie! Thank you for your note. Emilie is the Author of the book I’m (Traci) highlighting in this blog post. Her recipe has helped so many, including me, create homemade sourdough bread! I’m looking forward to seeing/hearing about your experience using her technique! Agreed, making sourdough IS so satisfying!
Emilie’s methos is much like mine with only slight differences. I add salt after 20 minutes of autolyse time and I do a 20 minute bench rest prior to shaping for the second rise.😁
-Charlie
Hi!
I’ve just started sourdough baking and your book has been an invaluable tool for me! One thing I’m struggling with is the timing around the dough prep and the baking and wanted to see you could help.. If I want to make bread to serve at dinner, how do I handle the dough for those recipes that require an overnight bulk rise? Should I refrigerate the dough during the day before baking them day? Or should they be stored at room temperature until time to bake?
Thank you!
Deb
Hi Deb! Emilie’s book is just fabulous and has been a valuable resource for me too! If you want to share the bread fresh from the oven at dinner, consider starting your bulk rise in the morning for a day bulk rather than an overnight bulk. Another option would be to proof the dough in the refrigerator after the overnight bulk. I hope this helps and you enjoy the recipe!
Traci – Thank you so much! Deb
I’ve been making sourdough for about a year now and I love this recipe! I’ve been playing around with a few of the steps and each time it comes out great. I halved this recipe for a graduation gift to someone and it turned out absolutely perfect! Thank you and that book looks great!
Hi Shanice! It’s such a solid recipe! Thank you for coming back and leaving a note. Sourdough bread is such a special gift for anyone who receives it and it was so generous of you to gift it.
I’ve never checked the temp of my oven but cook/bake a lot and never had an issue. After the 1/2 hour I took it out of my Dutch oven and the bottom was burned. Any idea?
Hi Tonja! This has been a topic of discussion before on this post. It’s not uncommon for this to occur when using a DO – and it has happened when I use my DO but not my cast iron double cooker. Apparently it has to do with the materials used in the DO (but I’ve read not all DO result in a burnt bottom too). You can try using double parchment, as this has worked for me and others. Or use a different vessel. I’m sorry to hear your bread burnt though. I’ve salvaged mine before by skimming it off with a serrated knife. I hope this helps!
Thank you so much for this! I’ve been trying the Tartine method and coming up short but the first time using your recipe and it worked. It was a really warm day so the bulk rise was quicker and not as much sour taste. When doing a bulk rise in the fridge, are you waiting for the dough to double in size like when rising at room temperature? I always use that as a gauge to know when it’s ready but not sure if that’s how it will look in the fridge or not. Hope that makes sense.
Hi Sabrina! Thank you for coming back and leaving a note. Warm days can really speed up the bulk. When bulking in the fridge, I do wait for it to double in size. However, most of the time, I don’t have the patience, so I bulk overnight in the fridge, then pull it in the morning where it warms up and doubles a little quicker. Doing it this way too, makes it easier to shape. I hope this helps Sabrina! Here’s to good bread!
I live really really far from civilization. My options for a baking vessel are an 8 in iron skillet or a 12 in iron skillet. What would be the best option?
Hi Jessica! Either one will work! If a deep dish/iron lid is unavailable, then leave the skillet uncovered. Use the other skillet to place on the rack below the baking vessel to pour boiling water in. This will create a steam environment in the oven, much like a lidded vessel would do. Just don’t spill any water on the glass of the oven else it could shatter (lesson learned the hard way here). I hope this helps and you bake the bread of your dreams!
Hey Jessica… thinking more about this, I would use the 12in for the bread. I’m thinking the 8″ would be too small for proper oven spring to occur and the bread shape would be off. Go with the 12″ for baking!
Thank you! Thank you! Thank you! Finally, a sourdough recipe that is simple and works. First attempt was perfect. Made another to see if it was a fluke and the 2nd loaf was also perfect. I’m going to try a longer rise in the fridge next time to develop more sourness. Thanks again!
Hooray John! Way to go YOU! Thank you for giving the recipe a go and coming back and leaving a note. I’m working on the sourness thing too in the exact same way. An extra loooong bulk ferment in the fridge! Please let us know how it goes for you!
I’ve been trying to make sourdough from a recipe that is way too complicated, so I’m glad to find this one! I’m looking forward to giving it a try. For the starter, do you have a particular recipe or will any starter recipe work with this?
Hi Rachel! This recipe took my sourdough skills to a whole new level. Emilie’s method is so simple and approachable! For the starter, I use a mixture of 60g discard + 60g water + 60g All Purpose Flour. I can’t say if any starter will work because I’ve only used my own, but it should. If you’re looking for a new sourdough starter recipe, I recommend King Arthur Flour or The Perfect Loaf I hope this helps, Rachel! Please let us know how your sourdough turns out!
I’m sorry I don’t know how to leave a comment without it being on another thread. Can this proof in the fridge over night and until five pm the next day? I started it not realizing the time frames. I’m clearly a newbie. Thank you!
Hi Kara! The comment box is at the very bottom of the comments… I know, that’s a long way to scroll (I need to change its location – thank you for reminding me!). For proofing, I’m afraid that would be an extra long proof. If you said bulk ferment, I’d say go for it. But I’ve never proofed in the fridge for that long. It’ll be an experiment! Let us know how it goes!
Hi,
I’ve tried this recipe twice and each time the shaping has gone awry. The initial mixing of the dough goes well, I get the shaggy, sticky consistency that the recipes states. Then when making the initial smooth-ish ball I can see the dough tightening after a little while, I think it’s longer than 15 seconds though. After the rest overnight, the dough looks similar to the picture in your blog post. So I think everything up until the shape and second rise is going well.
Do I need to put down more flour on the surface when folding my dough into a ball and then turning it over?
Hi Brent, I’m sorry your struggling with shaping. Don’t over think that initial shaping. Just take a portion of the dough, working all the way around, and press each portion down and into the center. The surface doesn’t need to tighten at this point. Really, you’re just ‘mixing’ the dough by gently folding it. 15 seconds is all you need. It’s after the overnight bulk rise that the shaping is super important. This is where the surface of the dough should become taught. Putting more flour down prior to turning the dough out onto your work surface (after the bulk fermentation) will help you flip the dough without it sticking. When ready to do the final shaping, scrape the flour away and lightly sprits the work surface with water. This will help the dough grip your work surface and help you create a taught ‘skin’ and your round/shape the dough. Otherwise, the dough just slides around on the work surface and it’s harder to get that taught skin. I hope this helps and you create the loaf of your dreams!
I’m having the exact same issue as Brent. After mixing the starter, water, flour, and salt, the dough is very wet, sticky, and shaggy. It looks like the photos (thank you by the way!!). Instead of staying in a more solid, ball shape, it spreads out over the bottom of bowl and sticks to the bottom and sides. After the initial rest, I’m basically prying the dough off the sides of the bowl and my hands. After it’s folded over, it returns to the sides of the bowl and flattens back out. I’ve never been able to get it to that nice rounded shape or smooth look. Even after the bulk rise. :( Glad to know I’m not alone and will keep on trying!
Okay I’ve made three loaves and each time my dough is sticking to the banneton! One loaf completely ruined! What am I doing wrong? Why is my dough so Sticky? Thanks!
Oh nooo Sara! I’m so sorry to hear this. It sounds like you need more flour. Just before putting the shaped dough into the banneton, take flour in both hands and cover the entire surface of the dough in flour making sure to get the areas at the base at the dough too (that area always used to stick for me too). Don’t worry about using too much – just make sure the entire surface is covered. I’ve read some people use a 50:50 mix of rice flour and AP flour and cover the dough before putting it in the banneton; they do this because of the bread sticking. I’ve not tried it because I’ve not had an issue, but it’s something that may work for you. I hope this helps! Please let us know if this works for you.
I drank a little wine and tipsy me thought it’d be fun to try and bake a loaf with the newly acquired starter I had sitting around. Your recipe was easy enough that I didn’t mess anything up, and this morning the loaf came out pretty well! Can’t wait to try again under more sober conditions. Thanks for posting!
Hehe! Sounds like you had a little fun baking! :D So happy you’re enjoying the recipe Trisha!
Re: my previous comment, taking into account that I used only organic sprouted wheat flour in this loaf (no white or bread flour/rice flour) and it came out much lighter than I expected, I’m extremely pleased.
Oooh, I’m encouraged! I’ll have to look for sprouted wheat… thank you for your tip, Donna!
Traci, I am SO glad I found your website. While I’ve made bread for years, I’ve recently begun the trial/error adventure of sourdough starters and trying to achieve a decent loaf. After going through numerous recipes that were entitled “simple” (except for the fact that they had 15 steps, a list of utensils, I guess you had to cook under a full moon, I don’t know….lol) your Emilie’s sourdough turned out absolutely lovely last night. I don’t have all of the fancy proofing baskets, etc. but I used my husband’s suribachi as the proofing bowl and baked the bread in our donabe ceramic covered bowl. (He got these from a macrobiotic institute years ago). They worked perfectly–I heated the donabe before adding the dough on parchment. Much lighter than the others and I almost cried when I saw the gorgeous cracked/scored/darkened top crust that looked almost like a pod opening up. Thank you for posting such an easy recipe with succinct instructions. I wish I could send you a pic. :) Since this one won’t last long, I’m getting ready to start on another one. :)
Hi Donna! Thank you so much for coming back and leaving a note. Emilie would be proud… and I am thrilled for your success (I would love to see a pic – please email me!)! What a journey, right? I can relate to your feeling of joy pulling that bread baby from the oven and it’s perfectly cracked/scored/darkened top crust. Hooray! Here’s to many more perfect loaves, Donna!
I’ve been having trouble with my sourdough, but I tried your recipe this weekend and had great success! Thank you! I wish I could include an image here to show how beautifully the loaf came out. It’s bakery quality =) Just bought the book you recommended and can’t wait to make more!
I loooved reading your note, Sam! And I’m thrilled to hear of your success. You’re going to love Emilie’s book! Here’s to good bread!
I’m so glad I found your recipe! I just made this and it turned out perfect! Thanks for this perfect recipe and easy to follow instructions.
So happy to hear Jocelyn! Thank you for coming back and leaving a note. Here’s to good bread!
Thank you for the recipe. I’m so thrilled to see I’m getting some nice rise and ears!!! ❤️❤️
Do you recommend preheating the Dutch Ovens?
Hi Cindy! So happy to hear! Hooray! I’ve tried preheating and not… and find it’s not necessary. Emilie doesn’t feel it’s necessary either. I hope this helps! Here’s to good bread!
I believe different Dutch ovens have different qualities, so you might want to check manufacturer’s specs. My Emile Henry potato/bread pot is perfectly safe being preheated, & I always do. Pyrex, though, is, I think, one that can crack if it’s preheated without anything in it.
Hi Judy! Thank you for your tip!
This is my first foray into baking bread. baked twice over the past 2 weekends.
i got my starter from a local bakery, and i have a couple or three questions about that and the recipe:
the starter i got is quite gooey, and when fed an kept, it looks quite active. my question hoever is based on the vaious videos and recipes out in the wild, – is te starter supposed to flow, like sat thick goop, or is it suppose to be scoopable with a spoon? (i add equal measures of flour and water when feeding the beast)
the recipe says 350gms of water, i have had to add slightly more water to make the dough not as dense/tough while mixing/kneading. are the measurements more guidlines or are they more strict than the 4 way stop sign?
thanks for the recipe and your response to my questions
cheers
ramdev
So I attempted this recipe with both white and whole wheat. During mixing the whole wheat was WAY thicker and denser( seemed like it was more thirsty) than the white and didn’t turn out the same. Why is that? Thanks.
Whole wheat needs more liquid than white does.
Hi Brandon! Sheila is right. Working with whole grain/wheat flour is a different beast than working with white flour. In a nutshell, whole wheat is not refined. It still has its bran and germ attached so it will need more water in any given recipe. There’s so much to explain, but I found an informative article that helps explain the reasons behind why whole wheat can be more challenging to work with if new or unfamiliar territory. I hope this helps Brandon and you continue to explore whole wheat sourdough!
I am on my second loaf now, so easy, and so delcious!
Thanks for posting this!
You got it Rachael! Bravo YOU!
After doing a recipe that took literally all day, this recipe is awesome! My loaf turned out perfect and it has passed the husband test! Thank you.
Haha! When I was learning sourdough I thought about it more than I made it and even during the process so it felt like it took me weeks to make one loaf, lol! I’m so happy to hear you did it and it’s hubs approved! Hooray, Melissa!
Hello,
I love this recipe! I made a beautiful round loaf with it and am very happy with the look and crust and inside. But, when I tasted it, it tasted like plain white bread. It’s cold right now where I live, about 50 degrees 24/7, and let it rise for almost 12 hours. I’m not sure what happened, and why I didn’t get that wonderful sour taste or even a hint of it. I got the starter from a friend who had gotten it in LA. I’m hoping you can help answer my dilemna and I can create the sourest bread around! Thank you!
Hi Sarah! So happy your loaf turned out beautiful! The sourness of the bread is a multifaceted question and goes a little beyond my expertise. However, I do know flavor can vary depending on the wild yeast that inhabit your sourdough starter. This is why sourdough can taste vastly different with the same basic ingredients from one baker to another. The Fresh Loaf has a lot of information regarding this topic and is worth a read. Also, a longer ferment helps develop flavor as well… perhaps give bulk fermentation a go in the fridge. I’ve bulk fermented mine up to 24 hours with tasty results. Just be sure to cover the dough with two moist tea towels and spray the top of the dough with water so it doesn’t dry out. I hope this helps!
Hi Traci,
I have a question–I’ve been using this recipe to bake sourdough bread and it gets rave reviews except for one thing. For some reason, the bottom is always burned! I’ve been baking it at 450 for the same times as indicated in your recipe, the top always comes out fine, what am I doing wrong? 8(
Thanks,
Shepard
Hi Shepard! Thank you for your note! So happy to hear you’re enjoying the bread, but the bottom being burned is no good. I find the bottom crust gets darker for me when I use my Staub DO vs my Lodge double cast iron set up. I imagine different materials can yield different results. Give this a go… Preheat to 450, then once the bread goes in, decrease the temperature to 400. You may need to bake the bread a bit longer, but the bottom shouldn’t get quite as dark (the internal temp should be between 190-205F). You can also try putting a layer of cornmeal down on the parchment paper. The Perfect Loaf has an article about this problem (it’s not uncommon – scroll about 1/2 way down). I hope this helps and you’re enjoying good bread!
i used to get burnt bottoms as well. i started putting a tin pan like you would make lasagna in under my dutch oven. Sit the dutch oven right on the tin pan. This allows more air flow under the dutch oven and it also takes the direct heat off the bottom of the dutch oven
Hi Kelly! Thank you for sharing your tip! I’ll give it a go! 🙌🏻
Wow! This is a great recipe and I’m finally proud of my sourdough bread. Instructions are clear and simple.
I was very happy with how my crust turned out. The bread rose beautiful, had a nice oven spring and also the crumb had big air pockets. However I found the bread to be kinda chewy and doughy. The crumb itself wasn’t dense but rather chewy (if that makes sense!). Any ideas why that would be? I thought perhaps it could use a longer bake time? Any advice would be greatly appreciated! Thank you!
Hi Sarah! So happy to hear you’ve baked a fabulous loaf. Hooray! Regarding the texture of the interior, my sourdough is always chewy (and this is something I look for in a good sourdough bread), but I wouldn’t call it doughy. Since your sourdough was doughy, I’m curious if you took the internal temperature of the bread before removing it from the oven? Looking back over the recipe, I didn’t make a note that the interior of the loaf should be between 190F-205F when done (now added). Additionally, an oven thermometer is helpful in knowing the exact temperature of your oven. New, old and in-between ovens vary widely in their temperature variations. This isn’t SO important when baking bread, but for new bread bakers, I find it helpful. Perhaps give it a little more time in the oven next time and see how it turns out. I hope this helps!
Hi there, I just tried this recipe and am looking for some advice. My starter was nice and active, passed the float test, but after mixing and letting it rise over night I did not find that it doubled in size. I then put it in the oven with the oven light on, thinking it was too cold in my kitchen, but that didn’t seem to help. I went through with the rest of the process because I wanted a finished product, even if it is a dense, small rock of a bread loaf haha. I’m thinking that covering it with a damp dish towel as opposed to plastic wrap may have had something to do with it because after the 12+ hour bulk rise the dough seemed dry and hard and did not look “sticky” like in your photos. Thoughts? The fact that my starter was made and fed with AP flour and I used bread flour in this recipe would not affect it correct? I weighed everything out with my digital scale so I know all the amounts are alright…just trying to troubleshoot and get your opinion. Thank you!
Hi Samantha… oh I know, that is so disappointing. A damp towels makes a difference. In fact, I sometimes spray the top of the dough with a few squirts of water just to make sure it stays moist on top. Also, if I ferment overnight in the fridge, I double towel it… both moistened with water. The fridge can do a number on drying dough out. I’m thinking if the top was hard and dry, the dough probably couldn’t become the light and fluffy, doubled in size dough you need it to be. The starter sounds like it was ready, so that isn’t an issue. I use AP and Bread flour, just like you…. work on keeping that dough nice and moist. Check the towels for dampness throughout rise time if you can. It really does make a difference. And most importantly, don’t give up! You will bake the light and fluffy sourdough of your dreams!
Thanks for your reply! Do you think the top of the dough could have gotten hard and dry because my towel didn’t stay damp throughout the night? Now I’m thinking I may have not dampened it enough before the bulk rise… I will continue to troubleshoot and try again!
Hi Samantha! Exactly! That towel needs to stay moist, AND I would suggest misting the top of the dough with water before you put it in the fridge, just to ensure the top part of the dough stays nice and moist.
I’m having an issue with the dough being too sticky. Like, even after my final rise it’s so sticky that it’s impossible to touch and not ruin the shape?? I think I may be over proving as well since my crumb structure has been REALLY tight. The taste however, is out of this world! I’m going to keep at it and try some more this week… 6th times the charm? LOL
Hi Melissa! Oh my! Yes! Keep at it… it’s such a journey. After the final rise, it’s okay to sprinkle it with more flour so that you can better handle it. Use your bench knife to move the dough around, too… that helps with less touching. Are you proofing at room temperature or refrigerator? Hooray for taste that is out of this world! You’ve got this!
My Dad always put about a Tablespoon of Olive Oil on the bench when kneading , so it didn’t stick to anything then shaped it then set it to rise then again on second raise , then he’d put a small amount of flour gently ribbed into the dough
I am totally new to this. Got a starter from a friend last week.
The 50 gr of starter, is that after it’s fed? I took 1/4 cup out of the fridge and started to feed it to make it ready to make sourdough bread. Do I have to take 50 gr from that 1/4 cup?
This is all so new for me and confusing, but I want to learn how to make it :-)
Hello Gudrun! Totally new, but you’re doing it! Way to go! The 50g of starter is a fed, active and bubbly starter. This is what you use to mix the dough. After mixing the dough, feed the leftover starter, then refrigerate it or keep it at room temperature. It should eventually double in size, then you’ll repeat the process to keep the starter active. I hope you bake the bread of your dreams!
Darn. Sorry! Will post update if bread soon anyway. Can’t wait to try 😊
I am in the process getting my dough ready as I type. I am wondering about proofing temp of 70 degrees. I have made a proofing box in a top cupboard and it keeps things at around 80-84 degrees usually a pretty consistent 83. Is this too warm for my sour dough starter? I have not used dough out of this proofer for anything other than pizza crust and traditional white bread with normal dry yeast and it has worked great. Will this temp in my proofer be alright or should I just rise at room temp in my kitchen? Also thanks for the tip about not cracking your oven glass, I never thought of that when I am spraying water during the early bake.
Hi John! There are no hard fast rules for proofing/fermentation. You can ferment in your refrigerator, if you like! When it comes to proofing/fermentation, I prefer a long and slow fermentation to tease out more flavor. 80 degrees would be too warm IMHO. If your kitchen is notably cooler, I’d proof at room temp in the kitchen. Oh yeah, watch that sprayer! :D I hope your bread comes out beautiful! :D
My loaf is beautiful and crusty and tastes delish…if it wasn’t sourdough! I get hardly any sourdough flavor from it. Where could I have gone wrong? My starter smells fairly potent.
Thanks in advance for your advice!
Hi Ariel! So happy to hear your loaf is beautiful, crusty and tastes delish! As far as sourness goes, the first thing that comes to mind is fermentation. How long did the dough ferment? I don’t know too much about sourness manipulation, but Cultures For Health may have a few pointers. I hope this helps!
I wanted to know if you don’t have the bowl or Dutch oven w lid , how would you suggest to me on how to bake it ? I’ve always loved Sourdough bread , and I have my dads starter from9 years ago.
I tried a different loaf and it was so heavy n squishy . I didn’t want to try it again until I saw your recipe
Ty in advance
Hi Sharon… How fabulous you have your dad’s starter from nine years ago! That is fantastic! Boo to heavy, squishy sourdough.. I’ve been there. It’s such a journey. Way to go YOU on your perseverance! The purpose of a lidded vessel is to capture steam. Steam at the start of the bake is essential to create a really nice sourdough crust. If baking without a lidded vessel or Dutch oven, Peter Reinheart, in his book The Bread Bakers Apprentice, suggests baking the loaf on a pan or pizza stone and placing a heat proof pan in the bottom of the oven. Once the loaf goes into the oven, half fill the pan with boiling water. This creates a nice steamy environment. Be careful though. I’ve busted my glass oven window when I was spraying the inside of the oven (with cold water) to create steam. I was really new to sourdough at the time. A Dutch oven or lidded cast iron skillet (one shallow and one deep) is a great investment if you’re baking on a regular basis. I hope this helps and you bake the loaf of your dreams!
Thank You so much for your reply and quickly at that .
I wish I had the money to get everything that I need to make the perfect loaf , I decided to get back into baking bread again . On October 17 th , My son and I found my “common law husband” passed away in his bed. The state of Pa don’t accept people saying they’re common law marriages , even though we had 24 beautiful years , so since he wasn’t married the state took all of his assets , pension , ect evt.
Fast fwd , your knowledge and your kind words to your replies , has sparked me to make the perfect loaf for Terry ( my husband) he loved sourdough !
Thanks again .
Sharon
I have used a ceramic baking dish and it works great too!
Hi Brandy! Thank you for your note and tip!
I have been trying my hand at sourdough for some time. My loaves are usually dense and stiff. I’m trying this recipe today! I was always taught to feed starter and prep dough within 1 hour of feeding but my dough rises really fast! Usually doubled within 3-5 hours. I would prefer a longer fermentation. Should I wait longer after feeding before prepping dough?
Hi Heather! Thank you for your note. I hope you’re enjoying a nice crusty loaf by now!. For the starter, it’s not about the clock, rather, the starter should simply double in size. To check if your starter is ready, spoon out about a teaspoon and drop it in a small jar of water. If the starter floats, its time to make bread! If it sinks, it needs more time to develop. If you want a longer fermentation, simply place the dough, covered, in the refrigerator. Pull it out of the fridge and let it warm a bit while the oven preheats. Then transfer to the baking vessel and bake as you normally would. I hope this helps and thank you for stopping by!
Made this bread this weekend and it was delicious!! It didn’t come out of the brotform and I was unable to score it until it cooked a bit, but the taste was delicious. Might have been too wet? Thank you for a great starting point for my sourdough adventures.
Try using rice flour in your brotform or banneton.
Hi Brandy! So happy to be a part of your journey! I agree with Rob… try more flour or use an ample amount of rice flour. I’ve used both for my sourdough and found that the banneton has to be covered well in order for the dough to easily fall from the basket. So happy you’re on this journey! :D
I realize this post is over a year old, but I wanted to leave a comment to say that I’ve been trying to make sourdough bread for a few months now. I’ve never had as much success as I have after following the directions here. Breadmaking truly has been a bit of a humbling experience for me, that’s for sure. Anyway, thanks! Gorgeous photos, too. :)
Hi Tiffany! Thank you for coming back and leaving a note and your kind words, despite the post being over a year old. I read and try to respond to every note, nevertheless. I’m thrilled to hear of your success with this recipe! I’m telling you, Emilie’s book was a total game changer for my sourdough success. SO happy to hear about your’s! I’ve not made this bread in over 9 months since I had to go gluten free. But, I’m now applying what I learned from Emilie in my attempt to make gluten free sourdough… it’s coming along, but it’s certainly a different beast. I may reintroduce gluten sourdough bread soon… to see if I can handle it. Here’s to good homemade bread!
Hey Tracy! I had to go gluten free as well 2.5 years ago. After about a year I was able to reintroduce sourdough, but mostly from bakers with old starter. That’s the only time I can consume gluten without GI distress. I hope you can add sourdough in as well! I am just now making your recipe, it’s rising as we speak!
If you ever master that GF recipe, I’d love to give it a try!
As I type this comment I have in the oven my sourdough bread, inspired by Emilie’s book. It’a pure bliss. I become so in love with the process thanks to her book, that I feel like baking everyday 🤩
I began by grow my own starter and that was the moment I knew I won’t see the bread making process the same as I did before. Such a humble and fulfilling experience!
Hooray, Hooray Cori! Way to go you! Indeed, a humbling and fulfilling experience. Thank you for your note :D
Hey, Could you tell me what exact baking pot/dish you used? I see its a cast iron by Lodge but I cant find what exact shape or size, what kind. Amazon link might help! Thanks so much!
Hey Melina! There’s a link above under the heading: Tools I use to make sourdough (these are affiliate links). I hope this helps.
Hello,
I have an enamel coated dutch oven. I was wondering, about whether or not you were preheating the cooking pot before placing the dough in it. I have seen others advise this, and was not sure from above if this is what you do.
Thank you.
John
Hi John! You know, I’ve tried (have read this too) preheating the DO then baking and the results are the same as not preheating. Emilie also advises preheating isn’t necessary.
Thank you!