Whip this dairy free and vegan pie crust up in no time! The dough is super simple to work with and it’s make ahead ready! This crust is light, and flaky and perfect for all your pie crust needs.
Why Homemade Pastry?
I realize there’s some uneasiness about making homemade pie pastry. I get it, I was there too. But once I started making my own, I never went back to store bought. I found the more I made it, the easier it became to handle and my favorite part, I could control the ingredients. Pie dough is freezer friendly, able to be made weeks ahead and frozen, then thawed in the fridge the night before you need it. It also holds well in the refrigerator for at least two days prior to use.
I use homemade plant buttermilk to hydrate pie crust because it’s something I can make at home with just two ingredients: milk and an acid, like apple cider vinegar or lemon juice. Rarely do I have real buttermilk on hand, anyway. The acidity of buttermilk helps tenderize gluten, yields a more pliable dough and tastier crust.
Matters of the Pan
The type of pie pan you use can make a difference in your crust. I use stoneware and glass, both of which seem to bake more evenly than metal. With stoneware, with its slick surface, the dough tends to slide down, which makes it look like the pastry shrunk a bit.
With glass, the edges tend to keep their shape better, and you can keep an eye on the bottom of your crust while baking; an advantage if you’re uneasy about pie-baking. Martha Stewart has a dish debate that may be helpful.
The Easiest Crust
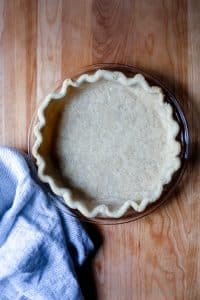
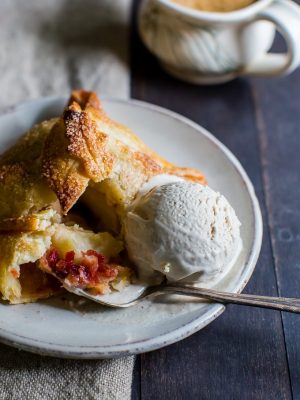
Below, I share my process, tips, and recipe for a vegan blind-baked single crust (pictured) and double crust dough. Use a blind-baked crust when the filling will take longer to bake than the crust. It also helps to prevent a soggy bottom. Who wants a soggy bottom anyway? And….
There’s a video below!!
Helpful Tools (these are affiliate links):
Recipe Development
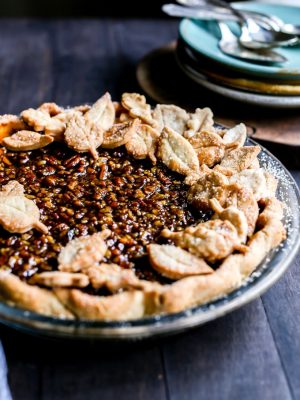
I was skeptical until a Vanilla And Bean reader asked me to create a Vegan Bourbon Pecan Pie. Then I got to work testing a vegan pie crust using coconut oil, preparing for the pecan pie.
It didn’t happen the first time or the second time. I tried using melted coconut oil and made a complete mess. Then I tried cutting solid coconut oil in just as I would for an All-Butter Buttermilk Pie Dough, hoping to make an extra flaky dough. What I got were melted pits of nothing in my crust.
Determined to make a vegan pie crust, I got out the food processor and processed in solid coconut oil, until I got an extra mealy consistency. After baking this dough it came out the way I envisioned and exceeded my expectations. It’s easy to work with, the dough is silky, the baked crust is flaky and it tastes delicious.
Without extra folding or handling, I was quite impressed not only with the flavor but with the texture of the crust. And I could work the dough at room temperature without worrying about getting the dough too warm. A win-win in my book!

Practice, Practice, Practice…
With regards to crimping and fluting, this is a skill that takes time to master. I’m still learning and am inconsistent in my work. Some days it looks good, others, not so much. When that’s the case, I cut out leaves or other shapes and and decorate over the crust edge. I just keep practicing!
Rob said this crust was “buttery” (!!). Y’all, he detects any and everything that’s not regular (his words), so for him to say this crust tastes buttery without knowing it’s coconut oil kinda knocked my socks off. Me? I don’t think it tastes buttery, but it certainly gives butter a run for its money!
This vegan pie crust is quick, easy, flaky, and tastes light, and crunchy.
Watch A Video To See How to Make It!
How to Make a Coconut Oil Pie Crust
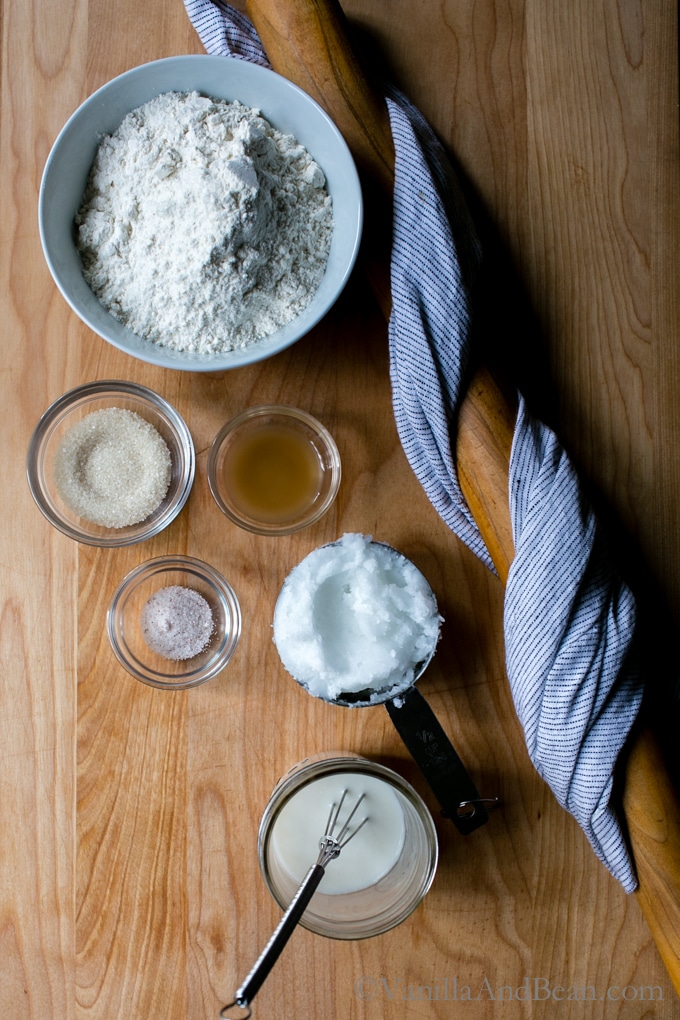
Ingredients
Single Crust Pastry to Make 1, 9 1/2" (24cm) Pie Crust (you'll have leftovers for decorating!)
- 1/3 C Nut Milk I use Homemade Cashew Milk, 74g
- 1 1/2 tsp Apple Cider Vinegar
- 1 1/4 C All Purpose Flour + more for dusting 210g
- 1 Tbs Organic Cane Sugar
- 1 tsp Sea Salt
- 1/2 C Unrefined Virgin Coconut Oil - solid at room temperature, 113g
- Pan Spray
Double Crust Pastry to make 2, 9 1/2" (24cm) Pie Crust (you'll have leftovers for decorating!)
- 2/3 C Nut Milk I use Homemade Cashew Milk, 148g
- 3 tsp Apple Cider Vinegar
- 2 1/2 C All Purpose Flour + more for dusting 420g
- 2 Tbs Organic Cane Sugar
- 2 tsp Sea Salt
- 1 C Unrefined Virgin, Coconut Oil - solid at room temperature, 226g
- Pan Spray
Instructions
- Whisk together nut milk and apple cider vinegar. Set aside to rest for 5 minutes.
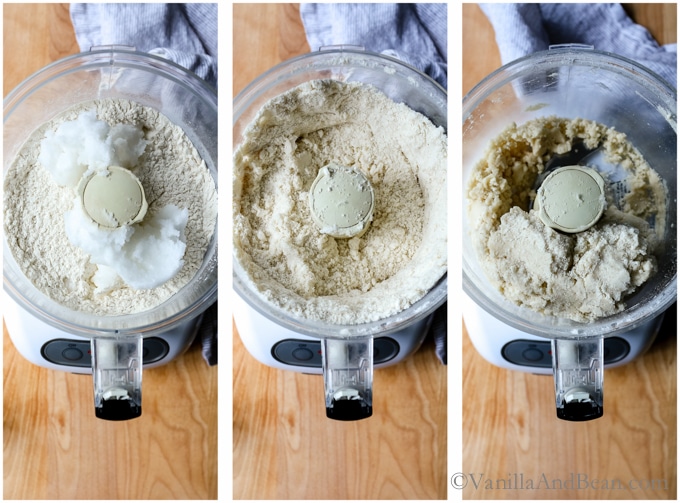
- Meanwhile in the bowl of a food processor, add the flour, sugar, and salt. Pulse to combine. Add the solid coconut oil and process until mealy, about 18 seconds. With the processor running, add the nut milk and process about 20 seconds or until the mixture forms a loose ball (there will be some loose bits of dough). To test the dough, grab a fist-full and squeeze. It should hold together. If not add no more than a tsp of water until it clumps in your fist.
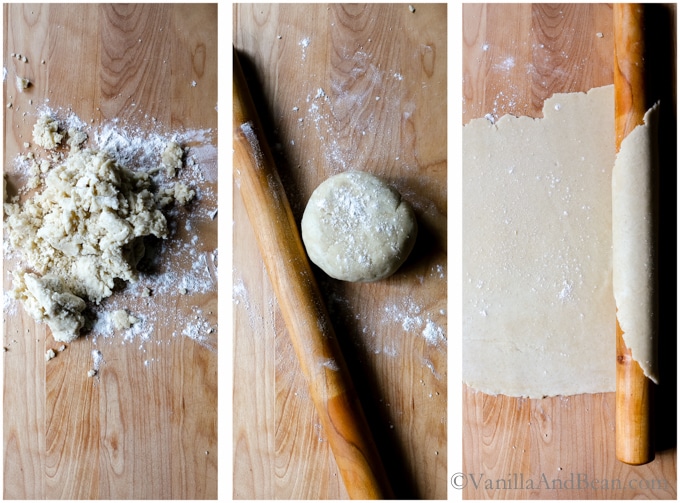
- Dump the dough out onto a floured work surface. Use a bench scraper to gather the bits together. Use the bench scraper to press and fold, press and fold - folding the dough over and on top of its self several times. The dough will begin to come together. Shape into a smooth thick disk and cover the dough with a bowl. Rest for 20 minutes to relax the gluten. Or, if you're like me, press on. It will be a bit more difficult to roll out, but if you're comfortable working with pastry or in a hurry, then just go for it!
- FOR GALETTES: At this point the dough can be used for one or two galettes (one for a single crust, two for a double crust). Proceed with the directions in whatever recipe you're followingTO FREEZE: Now is a good time to freeze the dough if you're planning ahead for a future event or wont be using the dough within a two days. Double wrap the dough in plastic wrap and place it on a flat surface in the freezer for up to one month. When ready to use, thaw overnight in the refrigerator. Before rolling out the dough, leave it at room temperature for at least an hour - this will make it easier to roll.
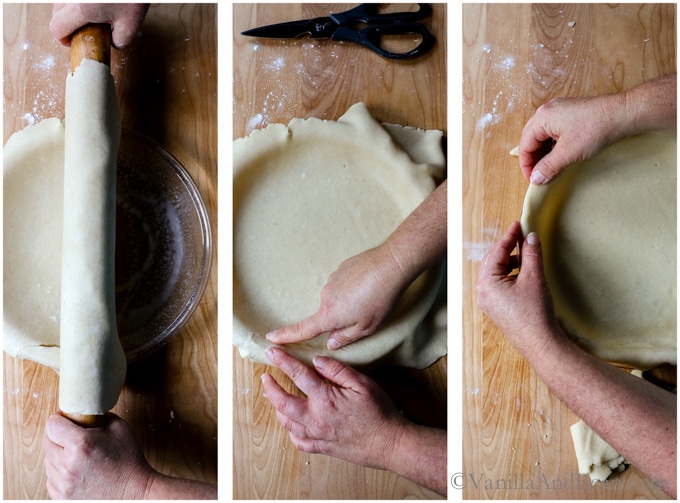
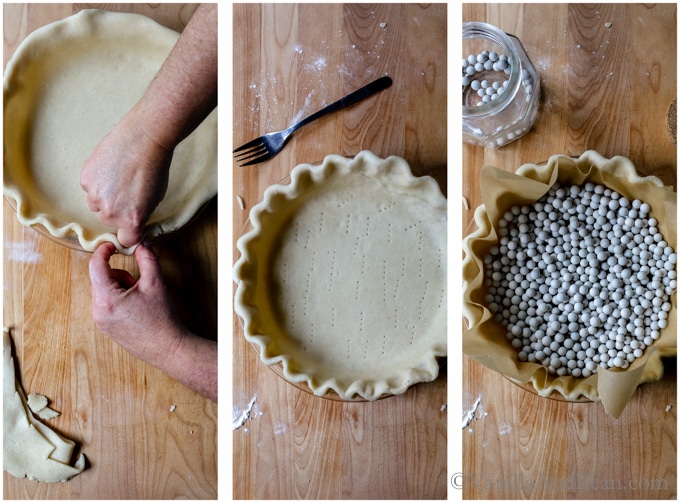
- FOR PIE: Spray a 9 1/2" pie plate with pan spray, set aside. Flour your work surface and rolling pin generously and beat the dough with your pin about 5-6 times, keeping it in the shape of circle as much as possible, turning it as needed. Roll out the dough to 1/8" (3mm) making sure to reflour the work surface under the dough as you work or it will stick. (You may find at this point you'd rather just ball it up and start again. If so, give the dough some time to rest. Ball it up, knead it, beat it, let it rest for 10-20 minutes, then roll it out again - believe me, I've done it!) Roll the dough over the rolling pin, then center it in your pie plate, unrolling the dough. If you find a crack, simply dab your finger in cold water and press the crack together. Press the dough gently into the pan. Trim the edges to about 1" and tuck pressing the dough as you tuck onto the edge of the pie plate. Crimp edges and throughly dock the dough using the tines of a fork. Line the pastry with parchment then fill it with pie weights, beans or pennies and place it in the refrigerator for 30 minutes or over night (wrapping if leaving overnight). Fill as directed by the pie recipe or continue for a or par or blind baked crust.
- Par Bake (partially baked): While the dough is resting, preheat oven to 350F (180C). Bake the pastry for 25 minutes for a par baked crust. A par baked crust is for pies that will be filled and baked again, like pecan or pumpkin pie. Then proceed with the directions of the recipe you're using. Par baking a crust can be done up to one day prior to when the pastry is needed. Store covered at room temperature.
- Blind Bake (fully baked): Use a blind baked crust If the pie will not be baked again as with some custard pies like banana cream or coconut cream. While the dough is resting, preheat oven to 350F (180C). Bake the pastry for 25 minutes for a par baked crust, then remove the pie weights and parchment and return the crust to the oven to finish baking for another 10-15 minutes or until the bottom crust is golden and baked through. You can also brush the edges with nutmilk and sprinkle with sugar after removing the pie weights for an extra tasty and dark crust.
Hello, can you recommend a GF flour to use?
Could not find a link to the video.
Hi Gloria! The video sits just above the recipe card. I hope this helps!
Did you ever hear from Giselle who -in 2016- made the crust with a gluten-free flour? I’m also wondering if we need the vinegar since you were using it to tenderize (?) the gluten with the regular all purpose flour.
Hi Tonya… I didn’t hear from her, but I just posted this Apple Pie recipe – it’s gf! https://vanillaandbean.com/apple-pie-gluten-free-vegan/ Absolutely use the Apple cider vinegar. It too tenderizes even gf flours! I hope this helps.
Would storebought nut milk work rather than homemade, and what would you recommend?
Hi Erin… store-bought is fine. You can choose whatever nutmilk prefer. I hope this helps.
Hi Traci,
Thank you so much for such a great recipe! I decided to give coconut pie crust another go after two almost failed attempts, I made this last night and it was so easy…no struggles at all with the crust breaking down as I rolled it, the almond milk and vinegar I think make such a difference as opposed to just adding cold water. The dough was soft and so easy to handle, and it tastes deliciously flaky and light. I rolled it out to cover an 11″ pie pan, and refrigerated for 15 min, then filled it with my apple mix for an open faced pie. It turned out fantastic! Thanks again!!
Thank you so much for your note, Sirine! Vinegar is said to tenderize gluten and there’s no other recipe I find that more to be the case than with pie pastry. It makes it SO much easier to roll out and shape. Your apple open face pie sounds just fabulous (I need to make one!). Thank you for sharing your thoughts and success! I’m so happy you decided to give coconut oil pastry a go… again! Hooray!
I make homemade kefir and would like to try substituting it for the nut milk/vinegar. Do you think it will work well?
Hi Heidi! Although I’ve never worked with kefir (I know, right?!), I think it may work. The water content is probably different, so just keep an eye on that and adjust as needed. Please let us know if it works for you!