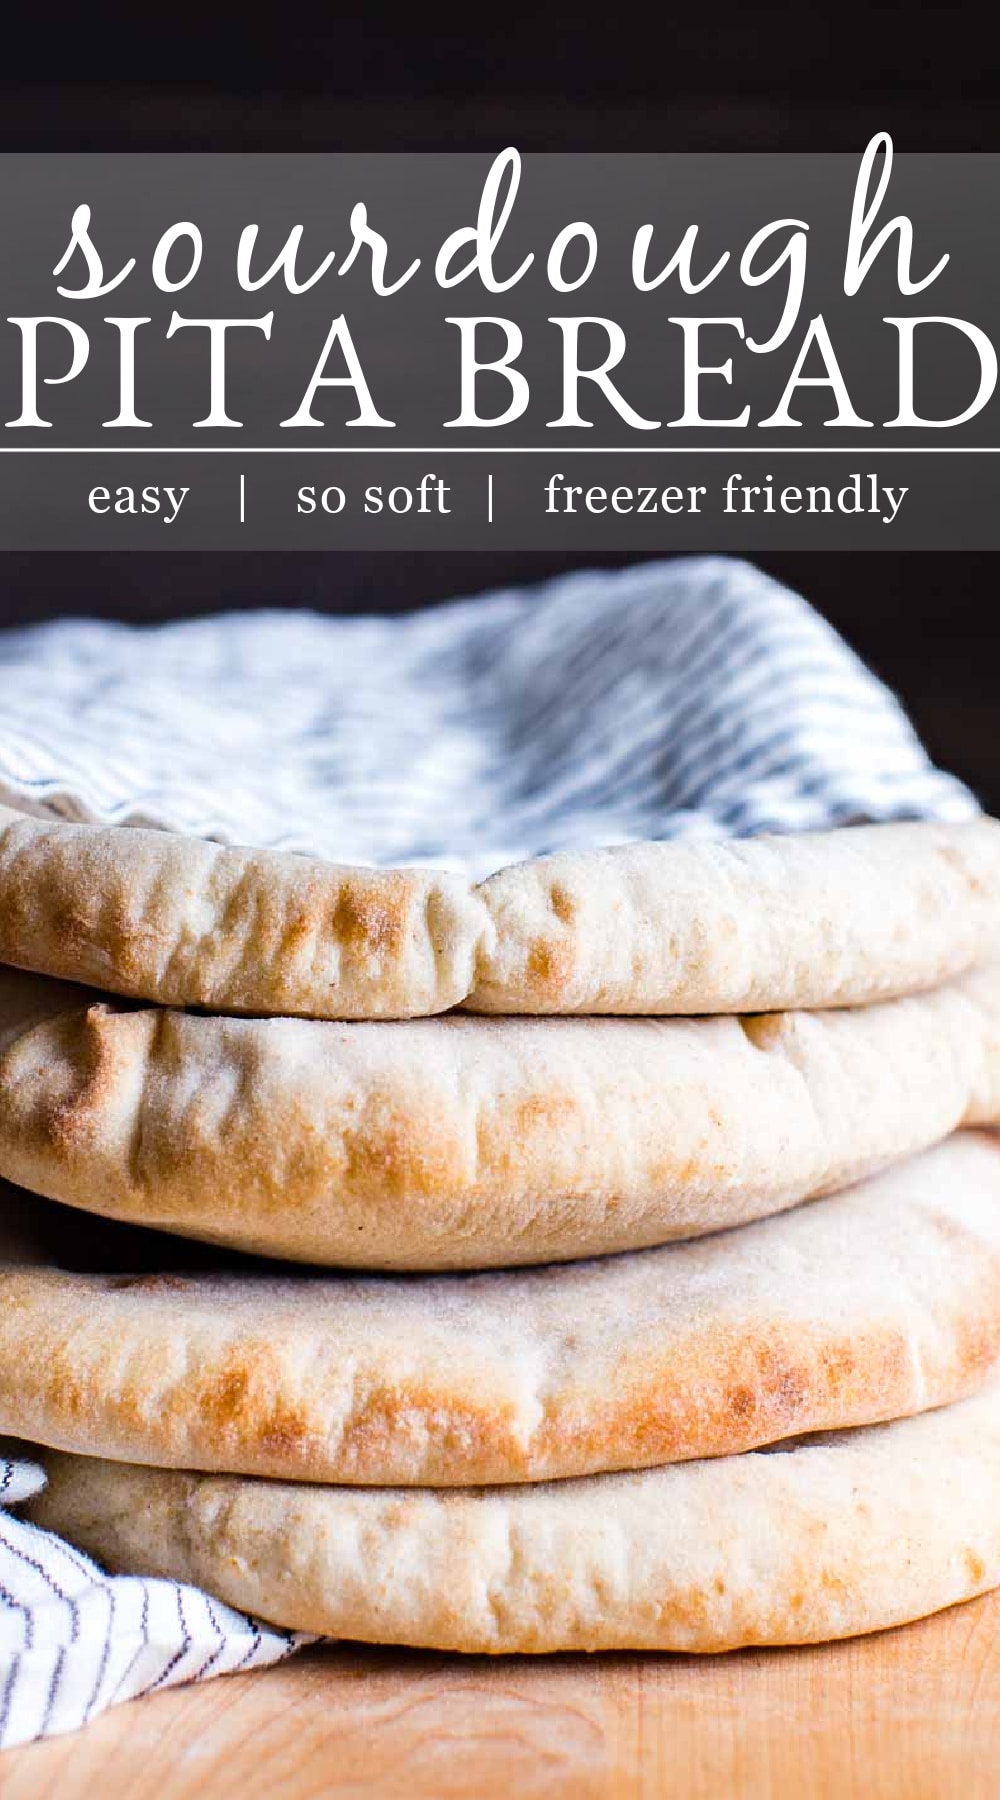
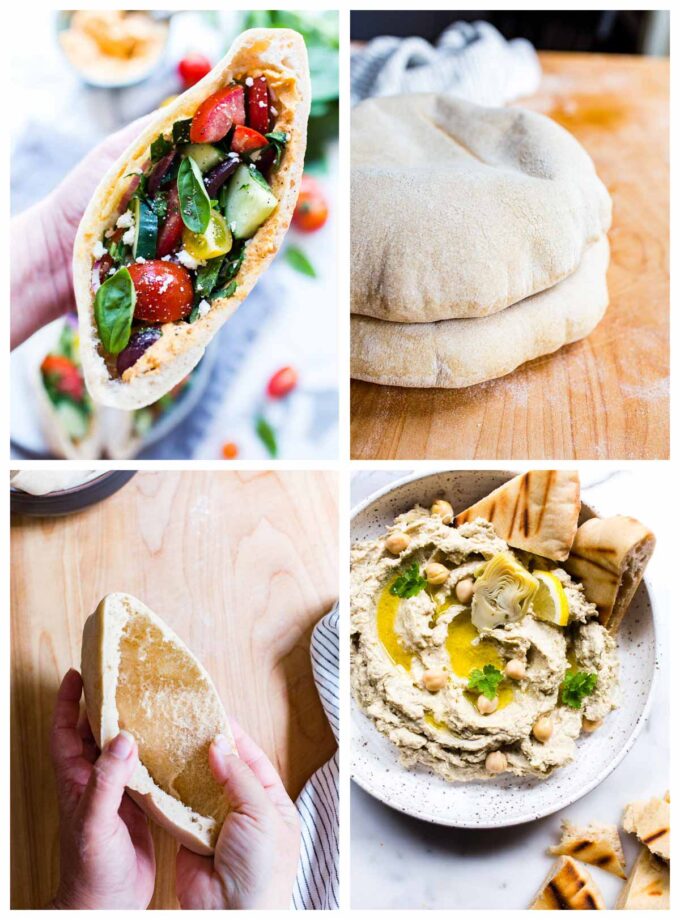
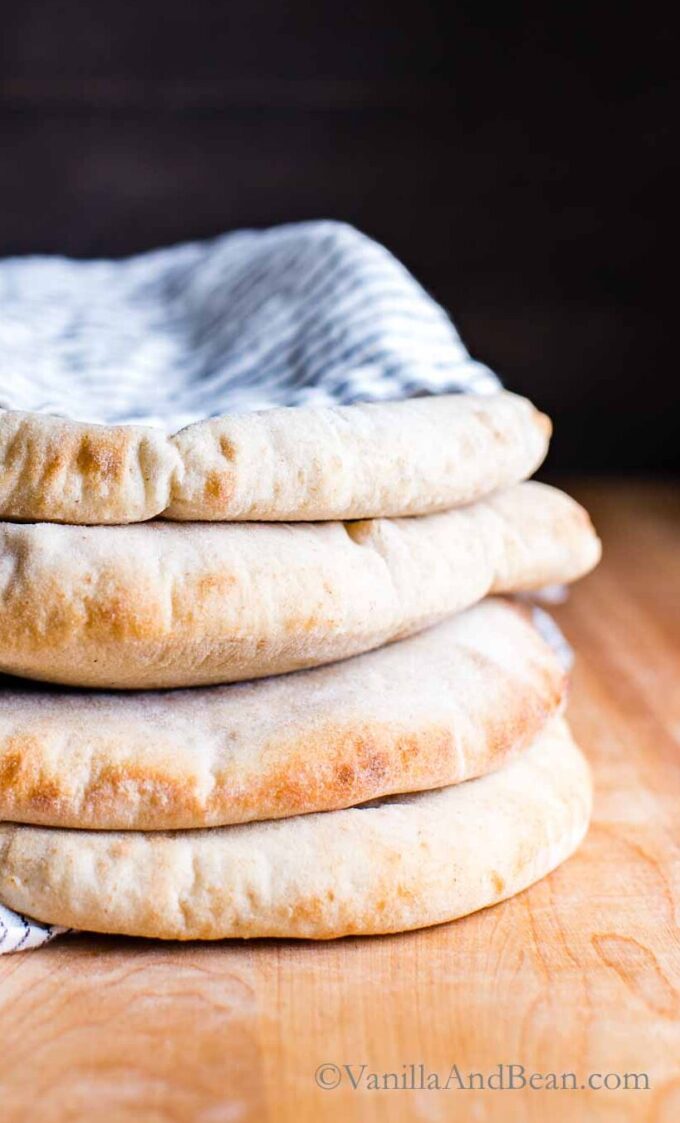
Soft, tender and fluffy Sourdough Pita Bread for all the sandwich stuffings like these Greek Pita Sandwiches, and a vehicle for scooping up flavorful dips and spreads like Artichoke Hummus. Use your doubled in size Sourdough Starter to whip up this sourdough pita recipe. This recipe is vegetarian and vegan friendly.
⭐️⭐️⭐️⭐️⭐️ Review: “I’ve tried making sourdough pita bread about 3 times using a variety of recipes. None of them could compare to the texture and flavor of your recipe.” ~ Marisa
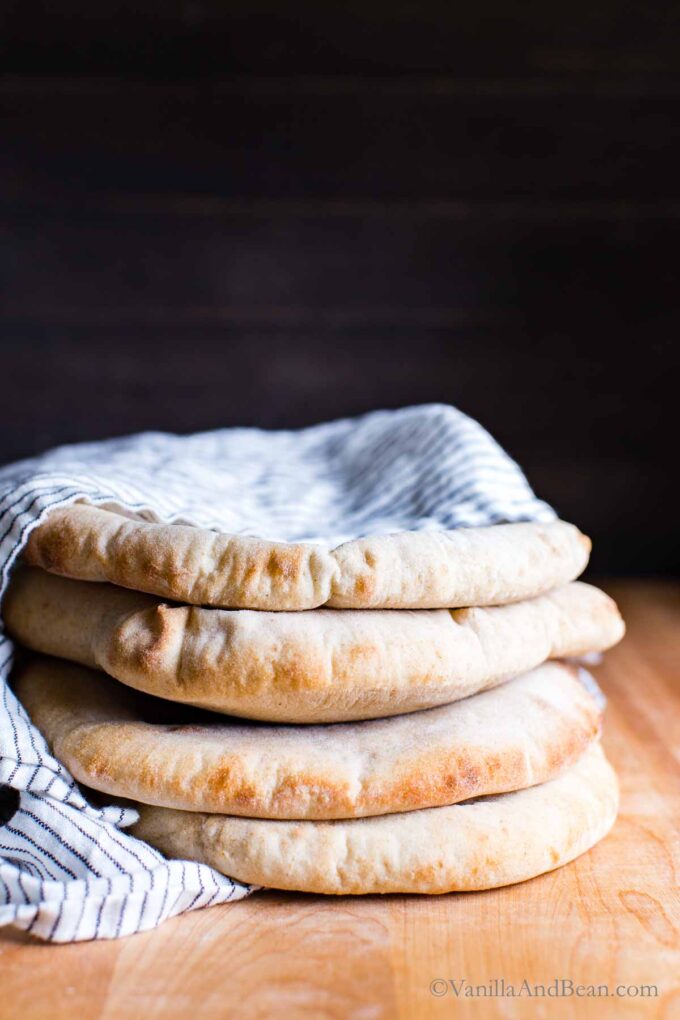
Homemade Sourdough Pita Bread
If you make homemade Sourdough Recipes, you’re going to love this Sourdough Pita Bread recipe. Homemade pita bread is flavorful, tender, soft and fun to make; It’s my best sourdough pita recipe! Watching it puff up in the oven means homemade pita isn’t too far away (and it’s so satisfying!).
This Recipe Is
- easy to make
- freezer friendly
- versatile enough for sandwiches, rich soups, pita pizza or slicing into wedges for dipping
There are many ways to enjoy homemade pita bread, and it tastes amazing! Read on to learn more.
About the Key Ingredients
- Sourdough Bread Starter – previously feed, doubled in size and bubbly. This is the natural leaving agent for sourdough pita!
- Bread Flour – for a chewy, sturdy yet tender crumb, I use unbleached, organic if possible, bread flour. It creates a stretchy tender dough that’s a dream to work with!
- Whole Wheat Flour – you can use whole wheat bread flour or regular whole wheat. Look for stone ground, I like Bob’s Red Mill. It adds an earthy flavor and contributes to pita’s chewy texture.
If you have leftover sourdough starter, use it in my Olive Oil Sourdough Discard Crackers.
At a Glance: How to Make Sourdough Pita Bread
You’ll start with a 100% hydration, doubled in size Sourdough Starter. Just like making sourdough bread, plan ahead so the dough has plenty of time to rise.
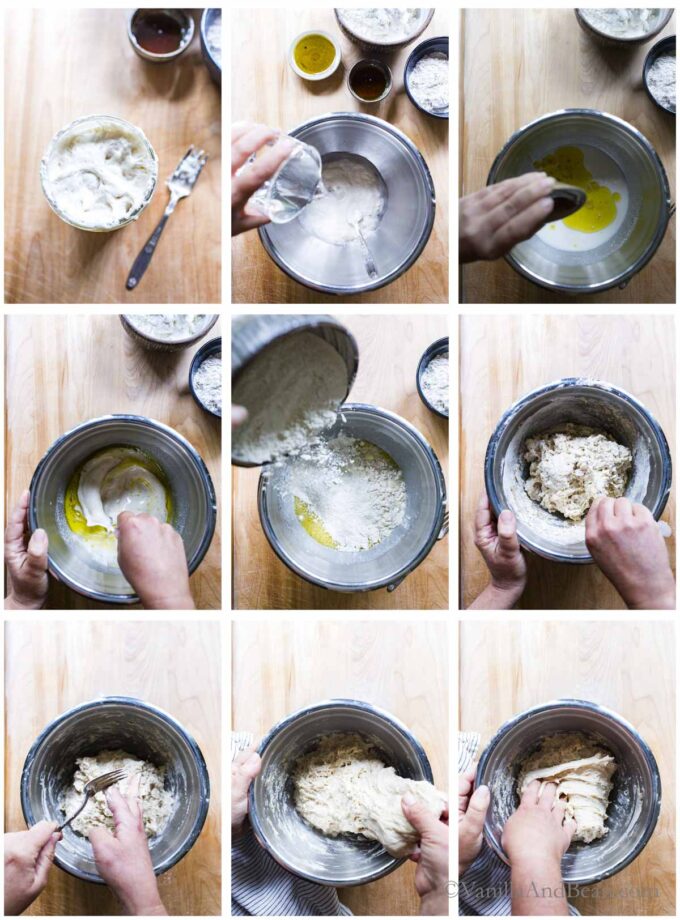
- First, in a medium mixing bowl, add your fluffy and active sourdough starter.
- Second, stir in warm water, maple syrup and oil.
- Third, add the bread flour, whole wheat and salt.
- Fourth, mix the dough by hand until no dry patches remain.
- Next, bulk ferment at room temperature overnight for about 12-16 hours.
- Last, shape the dough, proof for just 15 minutes, then use a rolling pin to roll out each individual pita and bake!
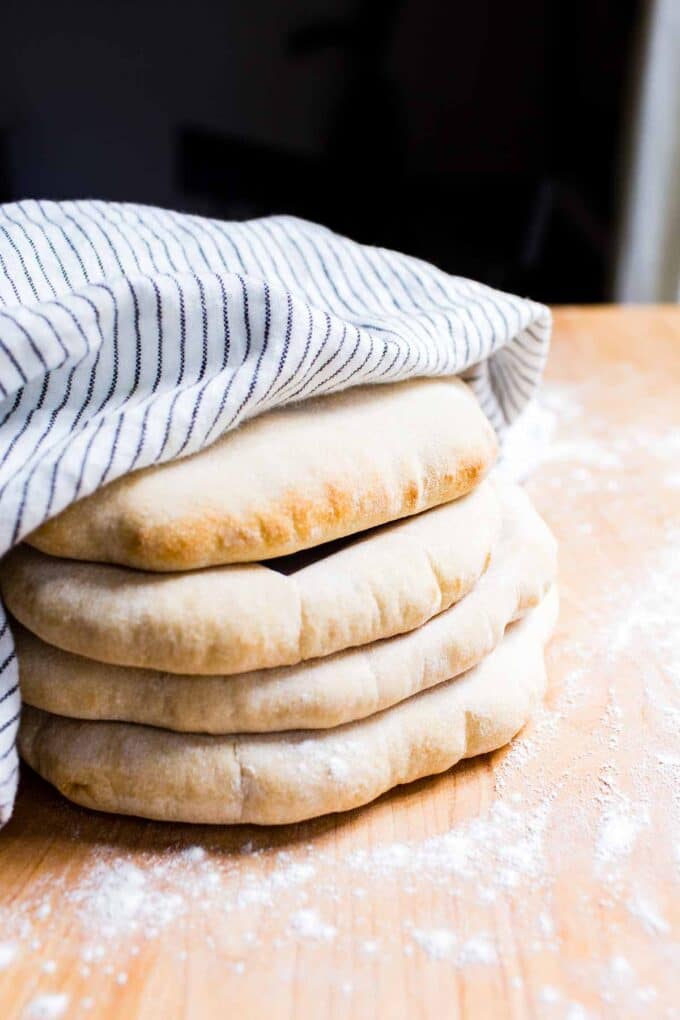
To bake the sourdough pita, you’ll use the back of a baking sheet or pizza stone / baking stone. Use parchment paper cut to fit individual pita dough to make transferring the pita rounds to the baking surface easier. You’ll bake for just 5-6 minutes, then wrap the hot pita in a kitchen towel.
Things to Stuff, Slather, Dip or Serve with Sourdough Pita Bread
Sourdough Pita Bread Good to Know
How it Puffs
Pita is baked at a high temperature, in this case, in the oven at 500 degrees Fahrenheit. When the dough hits the hot baking surface, the water quickly becomes steam, causing the pita to puff up. When removed from the oven, the void or “pocket” remains.
Country of Origination
Pita has its roots in the Middle East, dating back 14,500 years! According to Wikipedia, Pita originates from the Natufian people in Jordan.
Pita Bread as a Pizza Base
Preheat your oven and a pizza stone or upside-down baking pan to 500 – 550 degrees Fahrenheit. Top your pita with your favorite pizza toppings. Slide it onto a piece of parchment paper, then use the parchment as a handle to slide it onto the preheated baking pan/stone. Bake for about five to six minutes, then it’s ready!
Sourdough Pita Making Schedule
- In the Morning: Feed your starter and allow it to double in size.
- In the Evening: Mix the dough and bulk ferment at room temp.
- The Next Morning: shape, rest and bake.
Pita Making Tools
You’ll need a few basic bread baking tools. Here are some of my favorite tools (these are affiliate links):
- Digital Scale – accurately weighs your ingredients for optimal outcome.
- Baking Stone – evenly transfers heat to your pita dough in the oven and also, it’s an ideal base for making sourdough pizza crust too!
- Rolling Pin – used to roll the pita dough evenly and thin.
- Aluminum Sheet Pan – an ideal baking medium if you don’t have a baking stone on hand. I find it works just as effectively as a baking stone! Turn it upside down for easy pita dough transfer.
- Parchment Paper – a perfect vehicle for transferring the rolled out pita dough into the oven and onto your baking surface.
- Bench Scraper – scrapes all the bits of flour and dough off your work surface to keep it clean and tidy.
- I recommend a digital oven thermometer. Knowing the accurate temperature of your oven allows you to make temperature adjustments when needed.
Traci’s Tips
- I include whole wheat flour in this recipe because it offers an earthy, rustic flavor and added nutrition. It can be replaced with bread flour if desired. I use stone ground whole wheat flour for best flavor.
- Weigh your ingredients for best outcome.
- Make sure your oven is fully preheated so that the pita will puff up as it should. An external oven thermometer is helpful in knowing the proper oven temperature and so, you can adjust when needed. I recommend a digital or dial oven thermometer to know the true temperature of your oven.
Soft and Puffy Sourdough Pita Bread
Ingredients
- 1 cup (200 grams) Sourdough Starter 100% hydration, active and doubled in size
- 3/4 cup + 2 tablespoons (200 grams) Warm Water 80 degrees Fahrenheit (27 Celsius)
- 2 tablespoons Maple Syrup or honey
- 2 tablespoons Extra Virgin Olive Oil
- 2 cups (300 grams) Bread Flour unbleached
- 1/2 cup (85 grams) Whole Wheat Flour stone ground
- 1 teaspoon (6 grams) Fine Sea Salt
Instructions
- Mix the Dough: In a large mixing bowl, add the sourdough starter, water, maple syrup, and olive oil. Whisk until there are no chunks of starter floating around. To the wet ingredients, add the bread flour, whole wheat flour and salt.
- First, mix with a fork, the dough will become shaggy. Then mix by hand, mixing, folding and pushing the dough until the flour is fully incorporated and no dry bits are present. It will seem dry at first, but the more you work the dough, the more hydrated it will become. Do this for about 3-4 minutes. The dough will stick to your fingers as you go.
- Use the fork to scrape off the dough on your fingers as much as you can. Cover bowl with a damp tea towel. Set a timer for for 30 minutes and allow the dough to rest for 30 minutes. Now is a good time to feed/refresh your starter.
- Fold the Dough: After the dough has rested, fold the dough. To do this, grab a portion of the dough while it remains in the bowl, stretch it up and fold it over, pressing your fingertips into the center of the dough. You'll notice the dough is less stiff and more workable at this point. Repeat, until you've worked your way around the dough. This is the first fold, and you can stop here and begin bulk fermentation, but If time permits, and optimally, you'll want to repeat this fold at least one more time, two if you can, as it improves the final dough's structure. Allow for about 30-45 minutes each between folds.
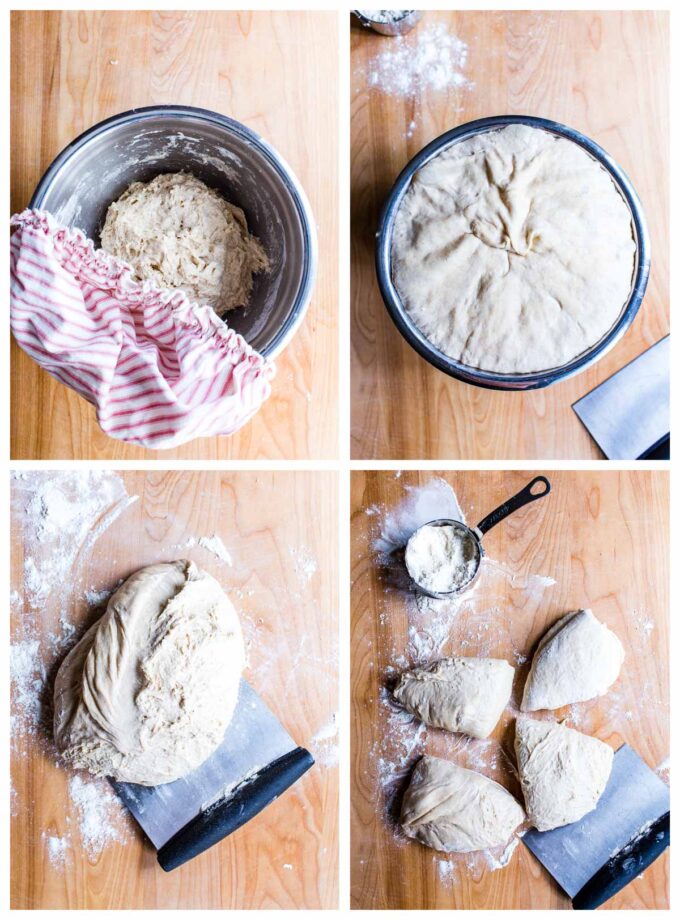
- Bulk (fermentation) Rise: After the last fold, cover the bowl with two damp towels and allow to rise overnight at room temperature. This will take about 10-12 hours at 70 degrees Fahrenheit (21 Celsius), but in a cooler kitchen the dough can take up to 12-16 hours to rise – this is the norm in my chilly kitchen. The dough is ready when it no longer looks dense, is jiggly when the bowl is shaken, and has about doubled in size.
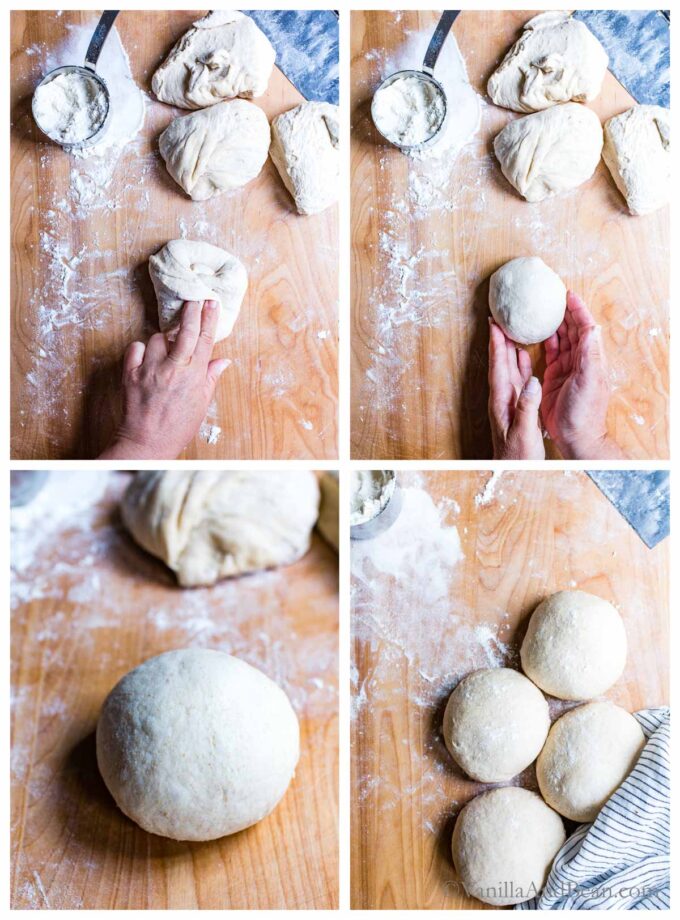
- Shape the Dough: In the morning, and with damp fingertips, coax the dough into a floured work-surface. Divide the dough into 4 pieces (210 grams each). Working quickly, with a piece of dough on the work surface, pull the edges of each piece to the center to shape the dough, and pinch making a rough dough ball. Place the dough ball on the floured work surface pinched side down. Rest the dough for five minutes. Scrape the flour away from your work surface and sprits a touch of water. This will increase friction between the dough and surface if needed (otherwise the dough will slide around rather than grip the surface to form a tight ball). Gently cup your hand behind the dough ball and pull it towards you to increase surface tension. Once a ball is formed, proof the dough.
- Proof the Dough (second rise): Transfer the balls to a lightly floured surface, and cover with a damp tea towel. Allow the dough to rise at room temperature for 15 minutes (a quick proof). They'll become just slightly puffy.Meanwhile, preheat the oven to 500 degrees Fahrenheit (260 Celsius). Arrange the oven racks in the upper and bottom third of the oven. Place an upside down sheet pan(s) and/or pizza stone on each rack for preheating.
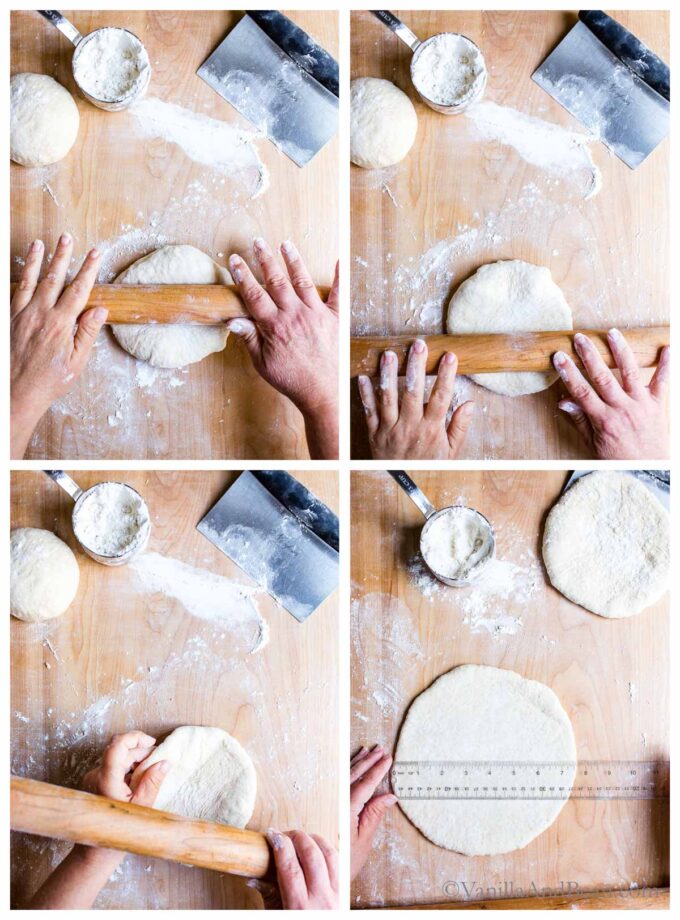
- Roll Out the Dough Balls: On a lightly floured work surface, use a rolling pin to roll the dough balls into a uniform disk to between 1/8 – 1/4 inch (.3 – .6 centimeters) thick and 7 – 7 1/2 inches (17 – 19 centimeters) wide, turning the dough like pie dough to keep a circular shape, sprinkling with more flour as needed to prevent sticking. If the dough becomes difficult to roll, set it aside to rest for about five minutes, and roll another ball. Transfer the pita dough to a small piece of parchment paper. Cover with a damp tea towel unless transferring directly to the oven. Finish rolling out the remaining dough balls.
- Bake the Pita Bread: *Note*: You can bake two pita at a time (two is easier to manage without cooling the oven down too much). I bake two at a time on one sheet pan (preferably), one at a time on a stone. Once the oven is preheated, transfer the pita to a peel or upside down sheet pan. Open the oven door, and using the parchment as a handle, slide the pita onto the preheated pan or stone.Bake for 5 minutes and 20 seconds or until the pita is puffed up and only lightly golden on the bottom around the edges. It won't brown on top. No need to flip the pitas while they're baking.
- Remove from the oven and loosely wrap the pitas in a tea towel(s). Do not deflate the pitas while still hot as the steam coming out of the pita will burn skin. Rest 10 minutes, then gently deflate once cooled.Slice the pitas in half and enjoy stuffed, or slice into wedges for dipping in all the things (see blog post for ideas!).
- To Store: Sourdough is best consumed on the same day it's baked, but pita will last for 2-3 days stored at room temperature in a sealed plastic bag.Baked pita freezes beautifully. First, allow the pita to cool completely, then place in a freezer bag. Freeze for up to two weeks. Thaw at room temperature, and rewarm in a 350F oven, wrapped in foil (to keep their softness) for about 10 minutes.


I made this today and it was great! Pita was soo fluffy
Best news ever, Brittany! Thank you for your note and giving the pita a go!
This is an extremely amazing recipe! The dough was so beautiful I gave this out to many friends and everyone raved about it. I will be using your recipe for many years to come, THANK YOU FOR SHARING!
Best news ever, Tambra! Thank you for your note and sending a smile!
These turned out awesome for me. I was amazed to see them puff up so perfectly in the oven! My bulk fermentation was much shorter. I can’t leave any dough overnight in the summer, lol. My second proof and oven time were both longer. Simply amazing with Greek chicken, salad, and tzaziki.
Hii Rebecca! Thank you for your note and giving the pita a go!
Love these, I use my dutch oven overtruned bottom and cast iron griddle to bake these fun to watch them puff up oven magoc
YUMMMMMMMY!
I’ve tried a few but this one is tops. Follow it precisely. For the final roll out phase I did most of it using gravity and fingers like a pizza dough. BUT I found that rolling it for most of this phase made for a quicker POP and puff. Don’t be affords to let it rest a few minutes in between final roll/shape as noted.
Best news ever, Ellen! Thank you for sending a smile, and trying a new pita recipe! Day made!
Turns out so good every time. 🤩 🤩
I normally make 8 instead of 4.
Love, love, LOVE this, Emma! Thank you for your note!
Delicious, All puffed up beautifully. My dough was rising fast, so I put it in the refrigerator (covered w plastic) overnight, This week I’m going to make slightly smaller ones (140g), 6, instead of 4.
Hi Linda! Thank you for your note and overnight tip. Six small pitas sounds perfect!
I did the same thing cover and popped it in the fridge over night took out in the AM to room temp for about an hour and was ready to go :)
Quite literally amazing! 😍
Love hearing your results, CSH! Thank you for your note and giving the pita a go!
This pita bread is amazing! I’ve made it twice and both times it turns out fantastic, very soft and almost always puffing up perfectly in the oven. The last time I made it I even added a bit more whole wheat than the recipe called for and it still turned out just as good. I also love your seeded multigrain sourdough, I make about four loaves every couple of months and freeze them for the best toast! What I would really love to see in this blog is a good sourdough naan recipe. When I realized you don’t have one, I tried a few recipes from other websites, even the one from Maurizio Leo’s book, The Perfect Loaf, but none of them really wowed me, although they turned out good. I love naan and I used to make it using yeast, but I would like to step away from yeast now that I bake sourdough. This pita is just as good as naan, but when I make it in the summertime my whole house ends up at 85 degrees due to the constant opening of a very hot oven.
Best news ever, Emily! Thank you for your note and sharing with us. You can’t go wrong with more whole wheat! I had been working on a naan recipe… but shelved it due to multiple lackluster results. Thank you for nudging me back to it! I love naan too, so a sourdough version needs to happen!
I made this recipe with a few adjustments and it turned out perfect! Notes:
1. I only ever feed my starter enough for 100g, so to compensate, I added 50g to the bread flour (350g total) and 50g to the water (250g total).
2. I started in the morning, and had some errands to run, so I only mixed the dough and hand-kneaded it for ~5 minutes before covering and leaving on the counter without any extra folds.
3. It’s summer here in Atlanta and I keep my kitchen at 75°F, so even though I used less starter, when I came back just 7 hours after the original mix/knead, the dough was proofed and jiggly.
4. I had dinner plans when the dough was proofed, so I opted to put the dough in the fridge without shaping to retard, and it was there for 17 hours until I baked the next morning.
5. Shaped and quick-proofed for 15 minutes as directed.
6. Used a baking stone for baking at 500°F, and found parchment paper made it easy to transfer to the stone. Put the rolled out round on the paper, placed on the stone, and slid out the paper. 5 minutes was about the right baking time. Pitas poofed up beautifully.
Hi Samuel! Hooray for poofy pita! Thank you for coming back and sharing your process with us and that retard timing! I bet the flavor was incredible!
I added fresh, minced rosemary this time. 8 pillows of goodness!
Loove hearing this, Clay! Thank you for your note, star rating and rosemary tip – so delicious!
Fantastic recipe and wonderful tangy taste
Made the recipe and turned out great. baked the pita in my Ooni.
I cut back on the honey a bit. Do you think I can cut the honey out or add a minimal amount and the recipe will still hold up?
I like to do so for to watch my sugar intake. But, also I can taste the sweetness in the finished product and prefer it to be less sweet. Thank you in advance!
Hi Michael! Thank you for your note. SO glad you’re enjoying the pita! You can leave the honey out, although the dough will handle a bit different and softness will decrease a bit.
So on a whim, I decided to try cooking these on an electric griddle with a dome instead of heating my oven up and it worked perfect !! The max temp is 400, but cooked great and it worked just fine. I cooked 5 min each side. They were puffy and brown and so delicious !!
I love hearing this, Hilary! Thank you for your tip and sharing details about cooking on an electric griddle. Here’s to homemade pita all summer long!
My pita were delicious and puffed nicely. I did not turn over (as instructed) so they were browned on one side and not on the other. They tasted quite ‘sour’, any reason for this strong sourdough taste?
Hi Beverly! SO glad you enjoyed the pita. The sourness of sourdough can vary, and it’s a complex topic. A strong sour taste could come from: fermenting at a warmer temperature for a shorter period of time, if the starter is used after its peak, if you use a whole grain flour in the starter, and by not feeding the starter regularly, hooch can form in the starter. There are other variables but this is where I’d start. For more information, King Arthur Baking is an excellent resource.
I didn’t have whole wheat flour, but, I did have dark rye and buckwheat, I chose buckwheat. Wish me luck. Also added 1/2 tsp yeast just in case. I’m on my third fold now and will let it set overnight.
Keep us posted, Walter!
Failed again. Only puffed up in random bubbles. Never a full bubble in the oven. Second try. About to hang it up and find a market.
Hi Gail! How can I help? I’m curious if you’re able to check the internal temperature of the oven with an external oven thermometer? If the oven isn’t hot enough, the pita won’t puff properly, if at all.
I’ll grab a thermometer for next bake.
Woke up to check the dough and it has not doubled in size!! Just placed it in the oven with the light on
Good call. Keep us posted Gail!
I followed the recipe exactly, using honey, and it turned out perfect!! Thank you
Thank you for your note, Angela and giving the pita a go! Day made!
Mine puffed up nicely but the bottom, inside was thick and dense. Any idea what the issue was and what I can try next time??
Hi Kell! When you shape the pita into balls, pinch the bottom of the ball to create as smooth of a surface as you can. If there’s uneven dough on the bottom of the shaped pita, it won’t roll out as smooth, resulting in a denser bottom when baked. When you roll the dough out, try rolling the pita a bit thinner. Keep us posted, okay?
This recipe is wonderful! It’s straightforward and easy, with a hands-off approach perfect for any skill level. The result is the most airy, puffy, and beautiful pitas I’ve ever made. Using a pizza stone preheated for an hour and baking them one at a time resulted in perfect puff every time. Highly recommend!
Hi Nicola! Thank you for letting us know your results and recommendation. Your description of the pita is spot on!
I never comment on recipes. I’m from Palestine, and this recipe rules. It produces such nice, fluffy, sour pita bread, with a perfect pocket. I’ve made it three times so far. It’s GREAT!
I appreciate your note, D! SO happy you’re enjoying the pita!
I had similar problem as below. Followed the recipe to a T. Oven at 500 degrees with preheated sheet pans that were in the oven for atleast 30 min before actually baking. My sheet pans are big so I baked all pitas at once and only one puffed up while the rest stayed flat or only puffed slightly…hmmmm. I like the overall recipe I just don’t know what went wrong
Hi Stephanie! I’m sorry to hear all the pitas didn’t puff. Thank you for your note. First thing that comes to mind is oven temperature. If the oven isn’t hot enough, the pitas won’t puff. Are you employing an external oven thermometer? Since all the pitas were loaded at once, I’m thinking the oven may not have been able to recover/maintain a hot enough temperature initially for the pitas to puff; the oven door may have been open too long.
I followed everything to a T (I used the grams) and it flopped like nothing else. It doubled overnight, but was so incredibly sticky you could not handle or shape it, so I had to toss it. Very disappointing
Hi Danyelle. Oh no! Can you tell me a little more and maybe I can help troubleshoot, like how the dough felt as you mixed and then folded the dough? What was the ambient temperature during bulk and what was the timeframe of the bulk ferment after the stretch and folds? It sounds like the dough could have over-fermented and didn’t have enough strength or structure to hold up to shaping.
When I mixed it is was fairly wet, but stiffened slightly after 3 folds. I let it bulk ferment overnight 12 hours in my kitchen (19 degrees Celsius) on the stove that was slightly warmed from the oven light being on.
Would it make a difference if I use a 1:3 or 1:4 ratio when feeding my sourdough?
As long as you’re using a strong (doubling in size in about 5-7 hours) 100% hydration starter, at its peak when mixed the ratio 1:3:3 or 1:4:4 should be fine. Kitchen temperature sounds good. A few other variables is flour moisture and humidity – as these vary by flour brand. Humidity varies from regions and seasons and plays a role in water absorption in flour. I know this isn’t helpful now, but if you try making this again, I would hold out some water (50-60g) when initially mixing the dough and assess as you go.
Hmm. Okay. I’ll definitely try less water. I do live in the canadian side of PNW and we get a lot of rain usually and we get very wet cold climate.
Best pita i ever made. Love that they are a little fluffy. Made 8 smaller rather than 4.
Love hearing this, Donna! Thank you for your note!
What an incredible recipe!! For those that don’t have high temp baking sheets/stones, you can use a cast iron skillet. I have a cast iron combo cooker, so I just used the bottom and the lid, and the pitas came out absolutely gorgeous.
Thank you for your tip, Charity and sharing your results! Thrilled to receive your note!
thank you for including the metric numbers along side of the US. . . . .also, thank you for including whole grains. Nutritious and delicious!
Hi Marcy! Thank you for your note and giving the sourdough pita a go! SO happy you’re enjoying it.
This pita bread turned out so fluffy and pillowy! I heated up a couple cast iron skillets in my oven to cook them on and it turned out perfectly.
Best news ever, Ec! Thank you for note and sharing your iron skillet tip!
For cold ferment, do I mix and out straight in the fridge for up to 12 hours, then take out and leave at room temperature to come to room temp to double in size and the shape, OR do I leave at room to grow some, then put in the refrigerator to finish till next day. And can shaping happen with cold dough?
Hi Amanda! After mixing and doing your folds, put it in the fridge up to 12 hours, then take it out and leave at room temp to double in size. Once doubled, you can shape, proof and bake. Cold dough is difficult to shape (it’s too stiff), so I don’t recommend it. I hope you enjoy the pita!
Recipe was excellent and easy to follow! My bread puffed up nicely! I replaced the maple syrup with one and a half spoons of sugar instead and it works really well. Thank you for sharing this recipe
Hi Marlolo! So glad to hear your success with the pita. Thank you for your note and sugar tip!
I hardly ever comment on recipes but this one is phenomenal!!
Hi Kristi! Yay! I appreciate your note. SO excited you’re enjoying pita. Thank you for sending a smile ☺️
Pitas taste great. Maybe I did something wrong but only one of my pitas puffed up. The rest were flat. What did I do wrong?
Hi Gianna! So glad you’re enjoying the taste of the pita bread! Thank you for your note. First thing that comes to mind is oven temperature. If it’s not hot enough, the pitas won’t puff. Are you employing an external oven thermometer? Be sure the oven has time to recover to 500F before baking another pita.
I can’t say enough about this recipe. It’s perfect! This is the best pita I’ve ever had. So fulfilling to make at home. I made Diane Kochilas’ tzatziki with it. I’m in heaven. Thank you so much for sharing this. ♥️
Worked out perfectly! So soft and perfect puffy pillow.
Hi Wendy! Thank you for coming back and sharing your five star review! SO excited!
The weights are off. Dough was super wet with 400g of liquid and only 385g dry. I upped high gluten flour to 500g.
Are the calories per whole or half pita?
Hi Sarah! One pita pocket, so half a pita.
Awesome thank you!
This pita is seriously SO GOOD! I was a little worried about it not being cooked thoroughly, but it turned our PERFECT!
100/10
Fabulous recipe – these came out fluffy and delicious.
I love that you use weights rather than cups. I specifically look for bread recipes that use weights as they are more reliable. Thanks for sharing!
Buenos días, ref a su receta solo podría. comentar que por los ingredientes debe salir un pan buenísimo, voy a intentarlo. Tengo una pregunta yo uso masa madre de harina integral o de harina de centeno, como son 150 gr en la receta debo considerarla en la receta, solo tengo un poco de experiencia en hacer hogazas y normalmente llevan un porcentaje de harina de trigo integral o harina de centeno, entonces no soy muy cuidadoso en estos porcentajes. pero en este caso quisiera ser muy estricto en la receta con los ingredientes pretendo que me salga un pan muy bueno o bueno en general. gracias y saludos cordiales/Jdelao
Hola Jdelao… como no he usado ningún iniciador de masa madre que no sea uno con harina para todo uso, no sé cómo quedaría esta receta de otra manera. Dicho esto, debido a que el iniciador es un pequeño porcentaje de la masa total, siempre y cuando el iniciador esté 100% hidratado, no dudaría en intentarlo. Gracias por detenerte. Espero que esto ayude. ¡Háganos saber si lo intenta!
To accommodate my baking schedule so you think it’ll work if I shape balls then fridge them overnight to bake the following day? What if I let them cold retard two or three days?
Hi Elaine! I’ve not tried this approach with this particular recipe. But at the same time, this is one way I make my sourdough pizza dough (cold retard/proof). So, while I think it could work, I’m hesitant to give a 100% yes since I’ve not tested it. If you experiment, please keep us posted!
It worked great! I formed the balls, covered and rested about 30 minutes then put them in the fridge. I took them out today a couple hours ahead then proceeded per your instructions. They came out just as lovely as they have without the cold retard. I love stowing multiple doughs in a fridge then binge baking all in one day. Your pita bread will be in that kind of batch regularly!
That’s terrific Elaine! Thank you for letting us know. Hooray for tasty regular pita!
I’ve tried making sourdough pita bread about 3 times using a variety of recipes. None of them could compare to the texture and flavor of your recipe. They reminded me of the pitas I get from my local falafel restaurant. This was super simple to make and very flexible timing wise. I ended up having my pita balls sitting on the counter covered for over 8 hours after the 2nd proof due to a minor emergency that had me away from the house. I baked them when I got home and they were still perfect. I will definitely try this again without having them sit out for so long. Thanks for the recipe!
Hi Marisa! Thank you for your note, five star rating and giving the pita recipe a go! Hooray for a looong proof (so glad it worked and thank you for letting us know!) and a tasty, perfect pita!
Fantastic recipe, thank you! First time making pita bread and they were perfect! I threw the dough in the fridge after it had nearly doubled because I wasn’t ready to bake. Pulled it out a few hours later and worked with cold dough. They puffed up beautifully and tasted delicious! Definitely adding this recipe to my regulars. Thank you!
Hi Holli! Thank you for your note, review and sharing your cold ferment tip! So excited you’re enjoying the SD pita!
I’ve made this before and it is awesome. I need to take the dough after bulk ferment traveling & do the balls later. Timing is a problem. Can any of the long rise be done in the fridge or a cooler? I love this bread but don’t want to screw it up. Thank you!
Hi Bonnie! Thank you for your note and giving the pita a go… The long rise can be done in the fridge or a cooler. You’ll just want to make sure the dough doubles in size before you shape the pita balls. So, after you mix the dough, pop it in the fridge or cooler. I’ve done this before for up to 12 hours. Then, the dough will just need to double in size. I hope this helps and you enjoy the long fermentation (hello flavor!).
Thank you so much Traci. I will let you know how I do. Have a great day.
Excellent recipe! I made these tonight and my 5 year old triplets loved them AND helped roll them out. Seems to be forgiving enough;)
I made the dough this am and let it sit on my counter until this evening…probably a 7 hour ferment. Still turned out beautifully! Can’t wait to try them either the recommended bulk ferment.
Hi Chelsey! Super happy to read your note and that your littles helped. What fun! SO happy y’all are enjoying the pitas!
Until making this recipe, pita always = meh. Excellent! Another favorite.
Hooray for tasty Pita, Sheryl! Thank you for your note and giving the pita a go!!
Fantastic recipe. I’ve made it a few times now, best pita I’ve ever had. I prefer to make 8 instead of 4 out of the same dough, but that’s just my size preference.
Thank you for your note, Kelly and giving the pita a go! SO happy to receive your note and FIVE star rating!
So easy and so delicious. Made some hummus to go with it and blew my wife away. This is a keeper!
Day made, Jon! Super happy to receive your note and star rating!
Excellent pita recipe! Rose beautifully overnight, shaped well, and puffed like a whoopee cushion in the oven! I’m glad I doubled the recipe! Will be adding this to our recipe book. Thank you!
Hi Maggie! Super happy to receive your note :D Thank you for giving the pita a go and coming back to share your experience. I lol “like a whoopee cushion”! That is SUPER exciting when it comes to pita bread.
Hi Traci,
I’m just wondering if we need to degas before shaping? Thanks.
Hi Jennie! No need… when you divide and shape the dough, you’ll lose some of that gas! Keep us posted!
Thanks for replying so promptly. I’ll give it a try. Thank you so much.
This recipe was spot on Perfect.
Thank you!
Hi RJ!Thank you for coming back and leaving a note and rating. Super happy to hear!
well worth making these from scratch, it’s been so long since I’ve had a good pita, so thank you!
Hiii Sabrina! Thank youu for making and sharing! Day made 👏🏻❤️