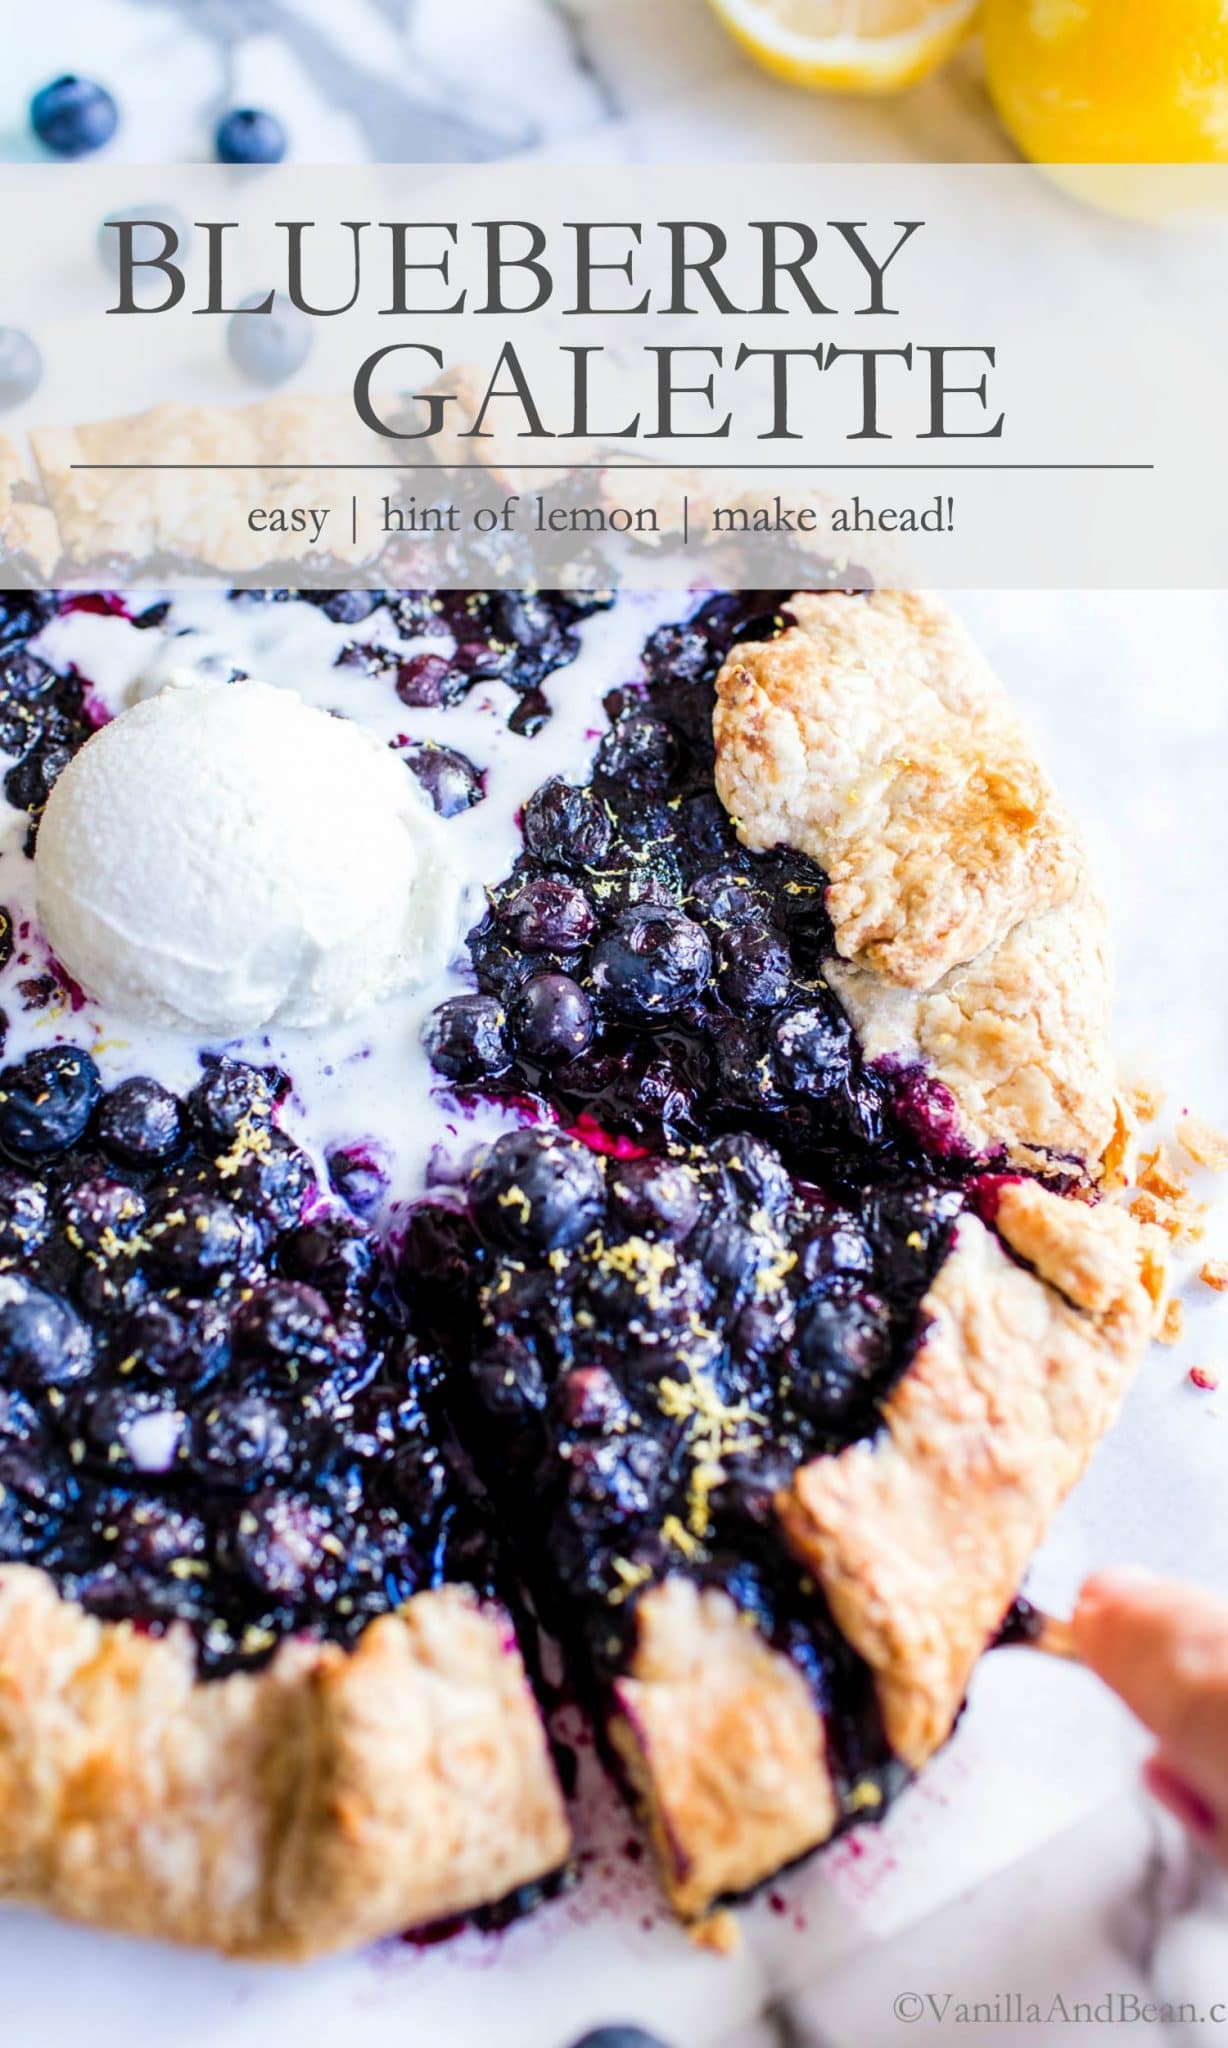
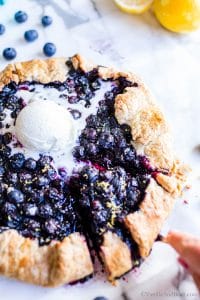
An easy rustic Blueberry Galette made with a buttery pastry filled with plump blueberries, a hint of lemon, and vanilla. This recipe is make-ahead ready and goes from freezer to oven with ease! Top with your favorite vanilla bean ice cream. This galette is vegetarian, easily egg free.
Highlights of this Rustic Pie
When I was in pastry school, we made a lot of galettes for the restaurant. They’re easy to make, and you can make em’ ahead and have them at the ready, stored in the freezer.
Sweet and plump summer berries make for the easiest of desserts, like this Sweet Cherry Galette, Blueberry Lemon Curd Hand Pies or this savory Zucchini Caramelized Onion Galette. Whippin’ up a pastry crust and having it ready in the freezer means summer pie can happen if my fruit buying gets a little out of hand at the market.
This Blueberry Galette Is
- crispy
- juicy with a hint of lemon
- so fresh
Make with homemade buttery or store-bought pastry. Homemade pastry is easily made days or weeks in advance, but even better, the assembled galette can be frozen and baked later for ultimate convenience!
See more tips and techniques on these pastry recipes: Homemade Buttermilk Pie Dough, Buttery Sourdough Pie Crust or for a dairy free pastry, Coconut Oil Pie Crust recipe.
At a Glance: How to Make a Blueberry Galette
Easy and on your schedule, this blueberry galette is simple to make. With a hint of lemon and vanilla, this galette is a fabulous addition to your summer dessert repertoire.
- First, make the pastry. Rest in the fridge for at least 2 hours.
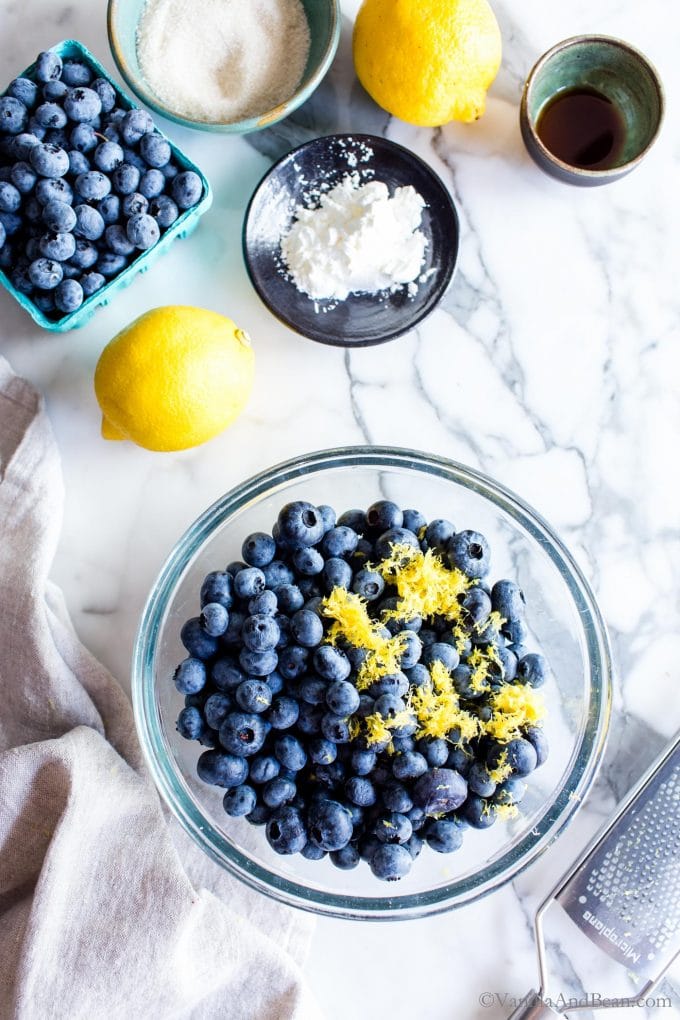
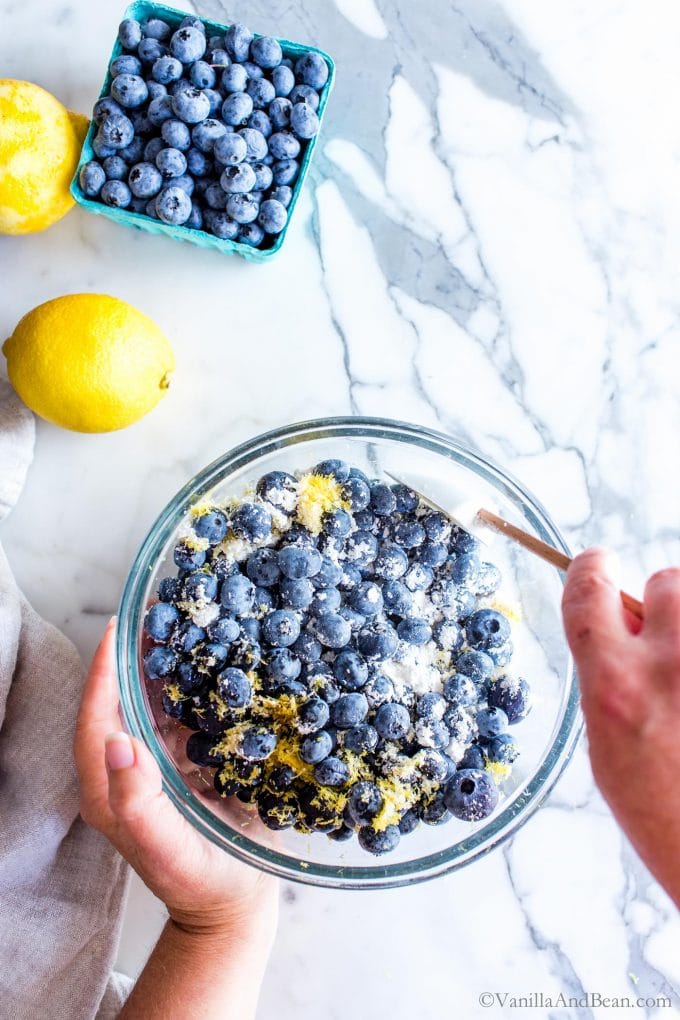
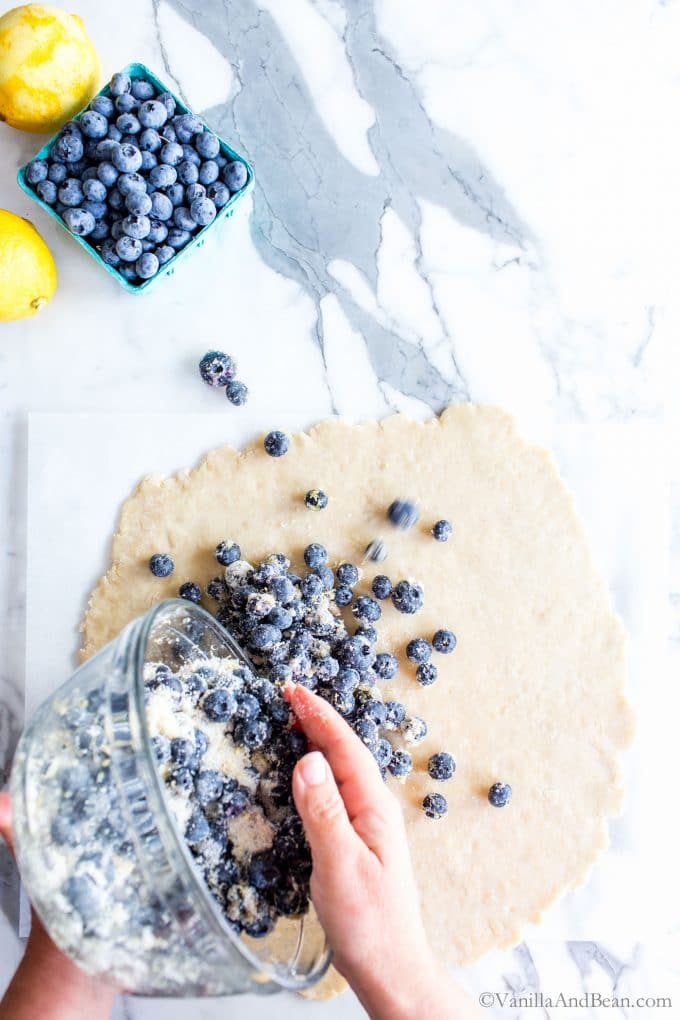
- Second, mix the berries with sugar, cornstarch, lemon zest and juice, and vanilla. Toss.
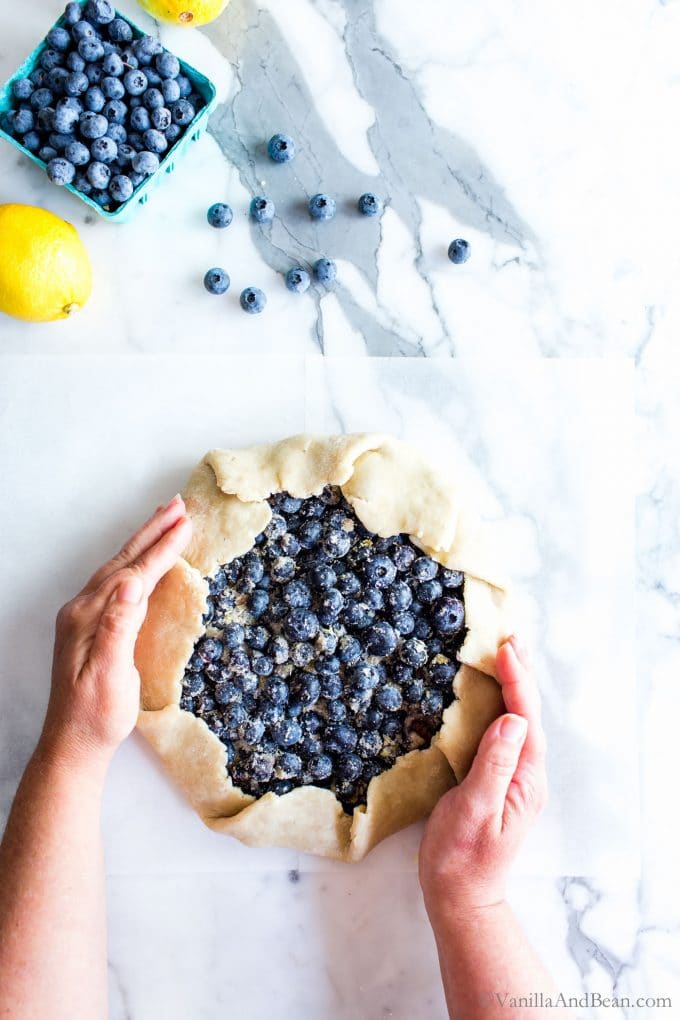
- Third, roll out the pastry and transfer the berries to the center of the pastry. Fold the pastry over the edges of the blueberries.
- Next, freeze for 20 minutes.
- Last, egg or milk wash the pastry and bake!
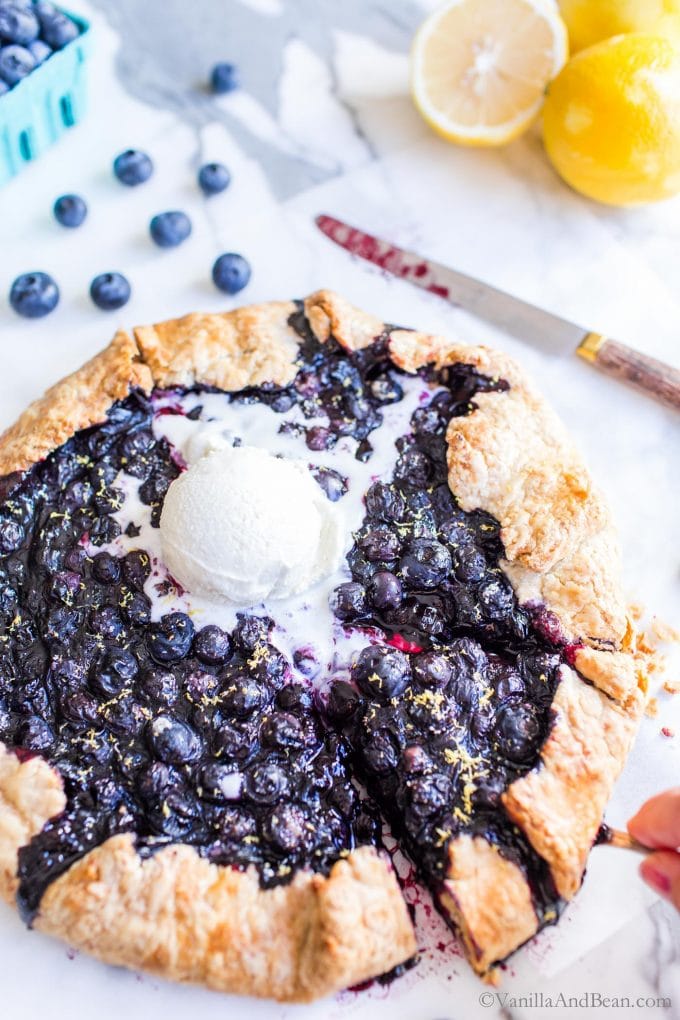
Allow the blueberry galette to rest at room temperature for about 20 minutes before slicing and serving with vanilla bean ice cream.
Traci’s Tips
- Plan Ahead! the pastry requires rest in the fridge for at least two hours, but preferably make a day ahead for easy handling. The pastry, can be made up to two days in advance for refrigerator storage or weeks in advance if stored in the freezer.
- I love the brightness lemon adds to this galette and I always add two tablespoons of zest. But for a more mellow lemony flavor, add only one tablespoon. The brightness will still be there, just less of it.
Blueberry Galette Recipe
Ingredients
For the Pastry (11-12 oz / 311g -340g):
- 1/2 C (114g) Unsalted Butter straight from the fridge
- 3 Tbs Milk plant or dairy
- 1 1/2 tsp Apple Cider Vinegar
- 1 1/4 C (190g) All Purpose Flour
- 1 Tbs Organic Cane Sugar
- 1/2 tsp Fine Sea Salt
For the Galette:
- 1/2 C (110g) Organic Cane Sugar
- 2 Tbs Corn Starch
- 1/4 tsp Fine Sea Salt
- 3 C (455g) Fresh Blueberries about 1 1/2 - 2 pints of blueberries
- 1-2 Tbs Lemon Zest Use 2 Tbs for an extra lemony boost, about 2 lemons
- 1 1/2 Tbs Fresh Lemon Juice from about 1 lemon
- 1 tsp Vanilla Extract
- 1 Egg for egg wash or use milk or nut milk for egg free
Instructions
To Make The Pastry:
- Cut the cold butter into 1/4" (6mm) square pieces. Place the butter in the freezer for at least five minutes.
- Whisk the milk and apple cider vinegar together until it bubbles. It will thicken as it sets for five minutes. This is your buttermilk.
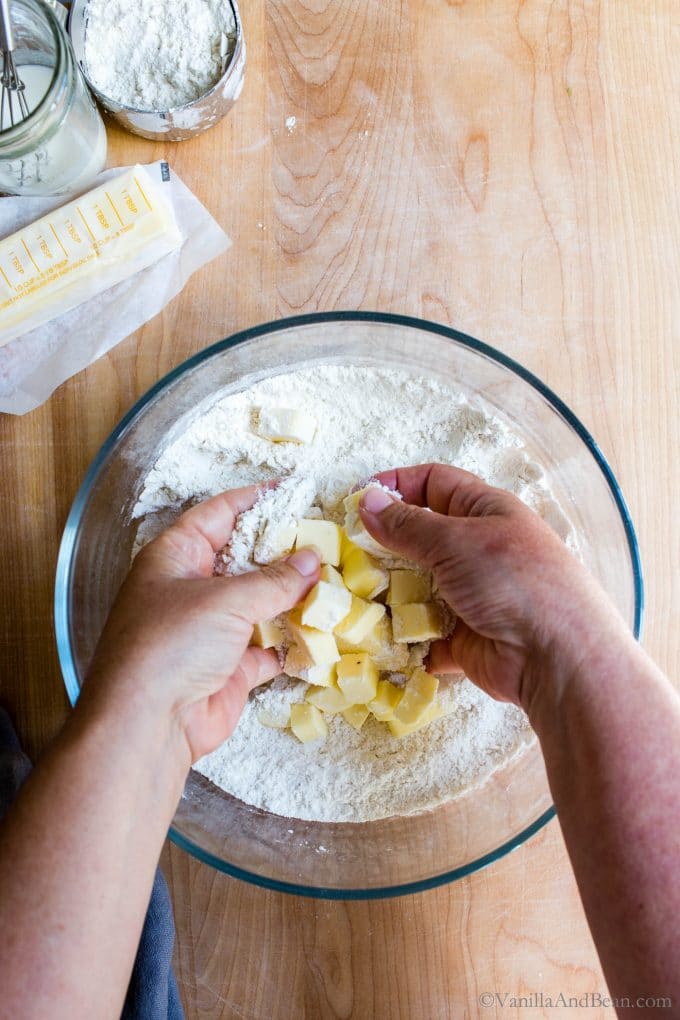
- In a large bowl, mix the flour, sugar and salt. Using your hands (or a pastry cutter), cut in the butter by pinching/flattening the butter as you toss it with the flour. The butter should remain in larger chunks, such as almond size. Work quickly to keep the butter cold.
- Pour in the milk mixture. Use your hands to incorporate the buttermilk, folding and pressing the mixture. Flattening out the butter is okay. To test hydration, grab a hand full of dough and squeeze it. If it holds together, it's ready for further shaping without adding more liquid. If it's still crumbly or falls apart, add a splash of milk or cold water and continue folding and pressing to a shaggy consistency. If the butter is starting to get a bit warm at this point, put the mixture in the freezer for about 5 minutes. We want the dough to stay as cold as possible.
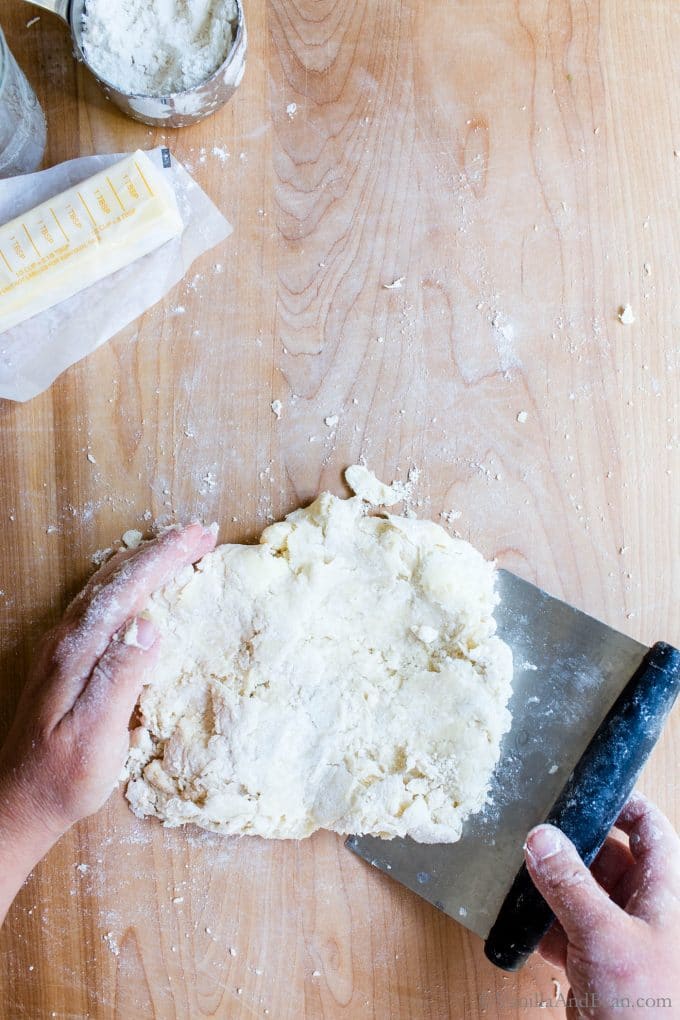
- On a lightly floured work surface, dump out the shaggy dough. Using a bench scraper, fold and press the dough at least 6-8 times, eventually shaping the mixture into a rough rectangle. Use the heel of your hand to press and schmear the dough onto the work surface. Gather the dough once again using the bench scraper and shape into a rectangle. Fold and press the dough over and on top of its self 7-8 more times. This helps to hydrate the dough and build flaky layers.
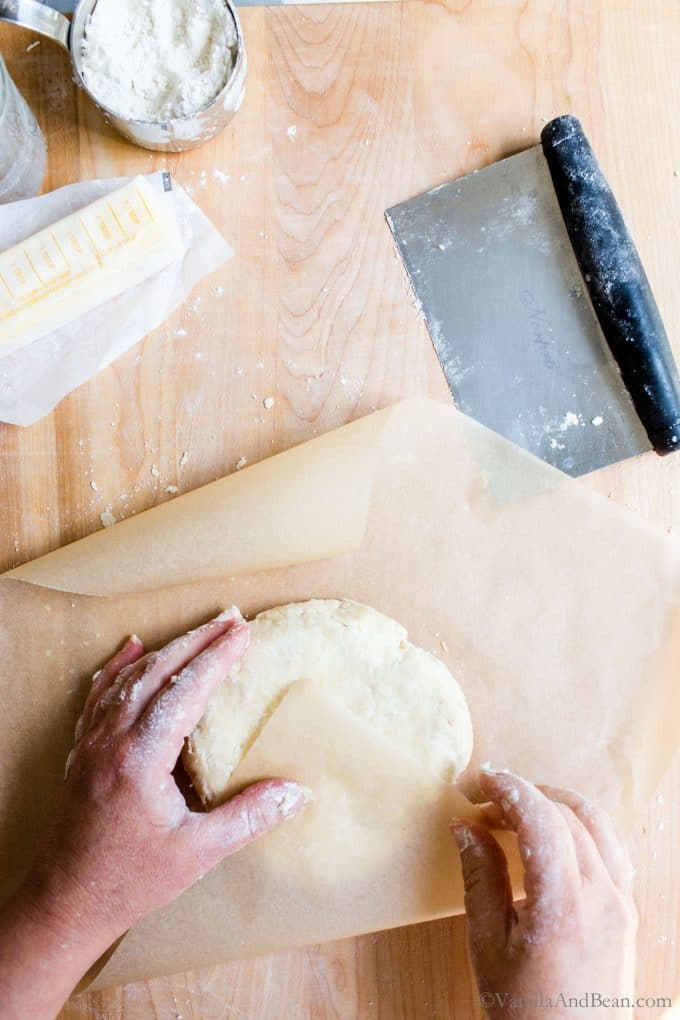
- Gather all the bits together and shape into a rough disk approximately 1/2" (12mm) thick. Double wrap in parchment paper and rest in refrigerator for at least two hours. If you can, make one day ahead as this renders the dough easier to work with. MAKE AHEAD TIP: at this point the dough may be rested in the fridge for up to two days or frozen for up to two weeks. Wrap snugly in parchment, then refrigerate or freeze in a lidded container or freezer bag.
For the Blueberry Filling:
- Remove the dough from the refrigerator and allow it to rest at room temperature for at least an hour. This allows it to soften as to make it more pliable to roll out.
- While the dough is resting, in a small mixing bowl, mix the sugar, salt and corn starch. Set aside. In a large mixing bowl, add the blueberries, sugar mixture, lemon zest and juice and vanilla. Toss to coat the blueberries (you can use a spatula here, but be gentle as to not squash the blueberries ). Set aside.
Roll Out The Pastry and Assemble:
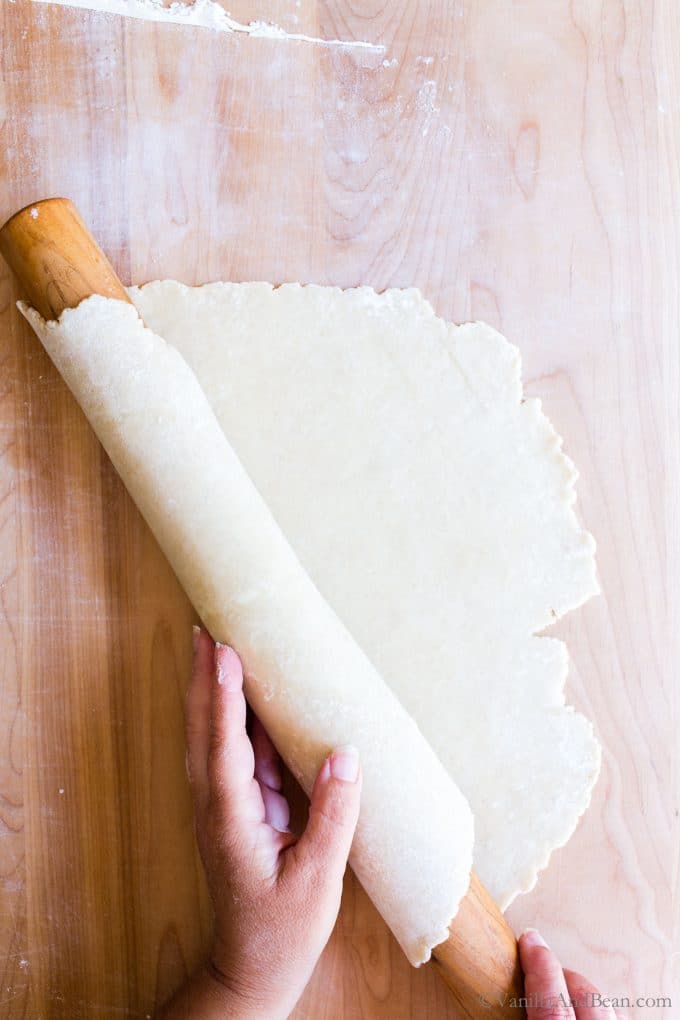
- Dust the top of the pastry with flour and dust your rolling pin. Roll the dough to 1/8" (3mm) thick to about 13 - 14 inches round, flouring the work surface and rolling pin as needed to prevent sticking. Transfer the dough to a parchment lined sheet pan.Mound the blueberry mixture evenly in the center of the pastry leaving about 2 inch (5cm) boarder. Fold edges over the blueberries, overlapping and pleating the edges all the way around 7-8 times, leaving the center open.
- Freeze the galette for at least 20 minutes while the oven preheats to 375F (190C). MAKE AHEAD TIP: The assembled galette can be frozen solid at this point. Simply allow it to freeze then wrap snugly in parchment and foil. Freeze for up to two weeks. When ready to bake, bake on a parchment lined sheet pan as indicated below.
To Bake:
- Arrange a baking rack in the center of the oven and preheat the oven to 375F (190C).
- Just before baking, whisk the egg with 1 Tbs water and egg wash the crust. Alternatively, use milk or nut milk here (with no additional water) for egg free. Optionally sprinkle the pastry with turbinado or raw sugar to finish the crust.
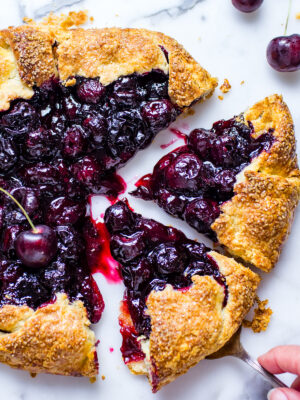
- Bake the galette for 45-50 minutes until the center is bubbly and the pastry is golden (same for a frozen galette). Rest the galette at room temperature for at least 20 minutes before slicing. Serve with vanilla bean ice cream.
To Store:
- The baked galette can be stored at room temperature for up to two days. For longer storage, wrap snugly in parchment and foil, then into a freezer bag for a few weeks. Reheat at 350F for about 15 minutes


Forgot to add my rating!
I made this blueberry galette yesterday using about 1/4 cup real buttermilk in the pastry. It turned out very well. I chilled the pastry only about 30 minutes and baked it immediately after assembling the galette as I did not have the luxury of a long chill and resting time. The blueberry filling was a bit runny so next time I will add extra cornstarch. I used the smaller amount of lemon and it was just right for our taste. I will make this again! Thanks, Traci.
Can I sub vegan butter?
Hi Mary! While I’ve not tried vegan butter in this recipe, I don’t hesitate recommending Earth Balance. You could try my coconut oil pie crust too, although I’ve not tried freezer to oven as this recipe indicates (you can opt for resting in the fridge for 20 minutes instead). If you give it a go, please let us know how it goes!